Tutorials
Build your AI Agent
Teach your AI Agent about your business, write its instructions, test it in the Playground and set its basic settings.
This is the core tutorial for setting up your AI Agent. You add your business content to the Knowledge Base (قاعدة المعرفة) and fill its gaps, write the rules it follows in the Instruction Builder (بناء التعليمات), test it in the Playground (ساحة التجربة), then set its name, avatar, staff and basic behavior in Settings (الإعدادات). It is meant for account owners and admins.
Before you start:
- Sign in and select the right project and AI Agent in the project switcher (see the Dashboard tour).
- Have your business content ready: files, web page URLs, your sitemap URL, text, or a product spreadsheet in Excel or CSV.
A. Knowledge Base
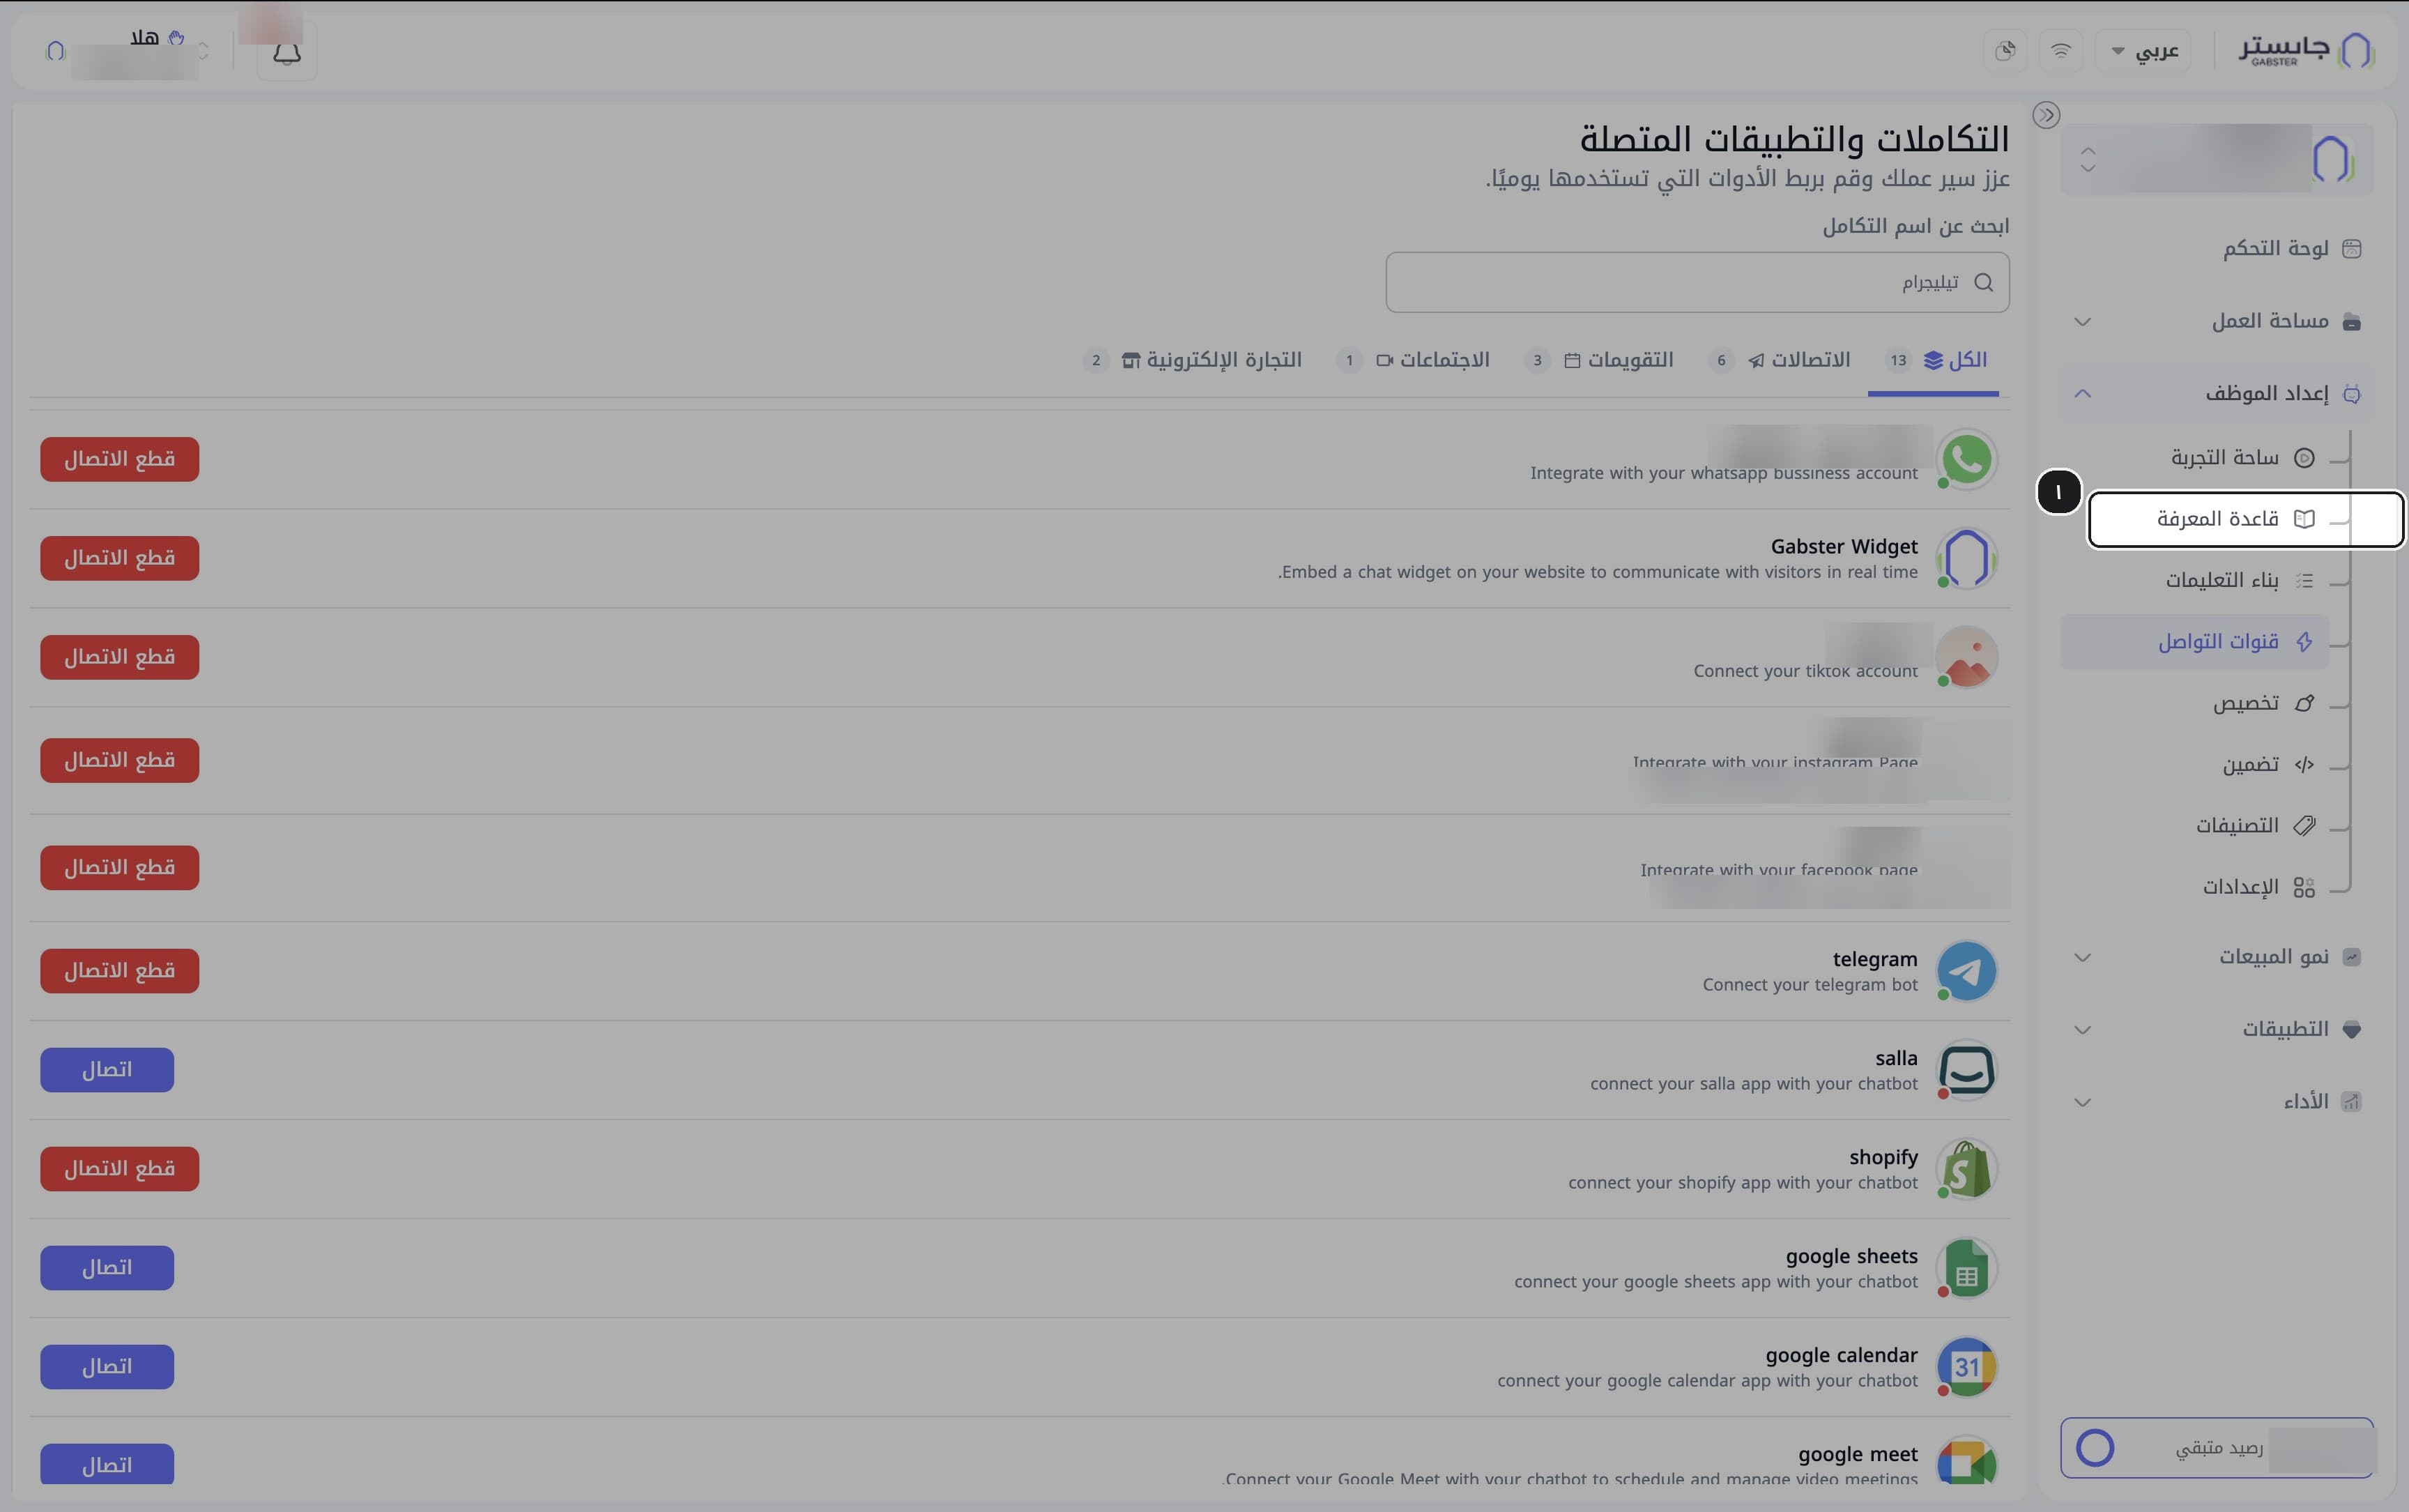
Open the Knowledge Base
In the sidebar, open the AI Agent Setup (إعداد الموظف) group and choose Knowledge Base (قاعدة المعرفة).
Result: the Knowledge Base opens on the Custom Data (بيانات مخصصة) tab; there are seven tabs in all.
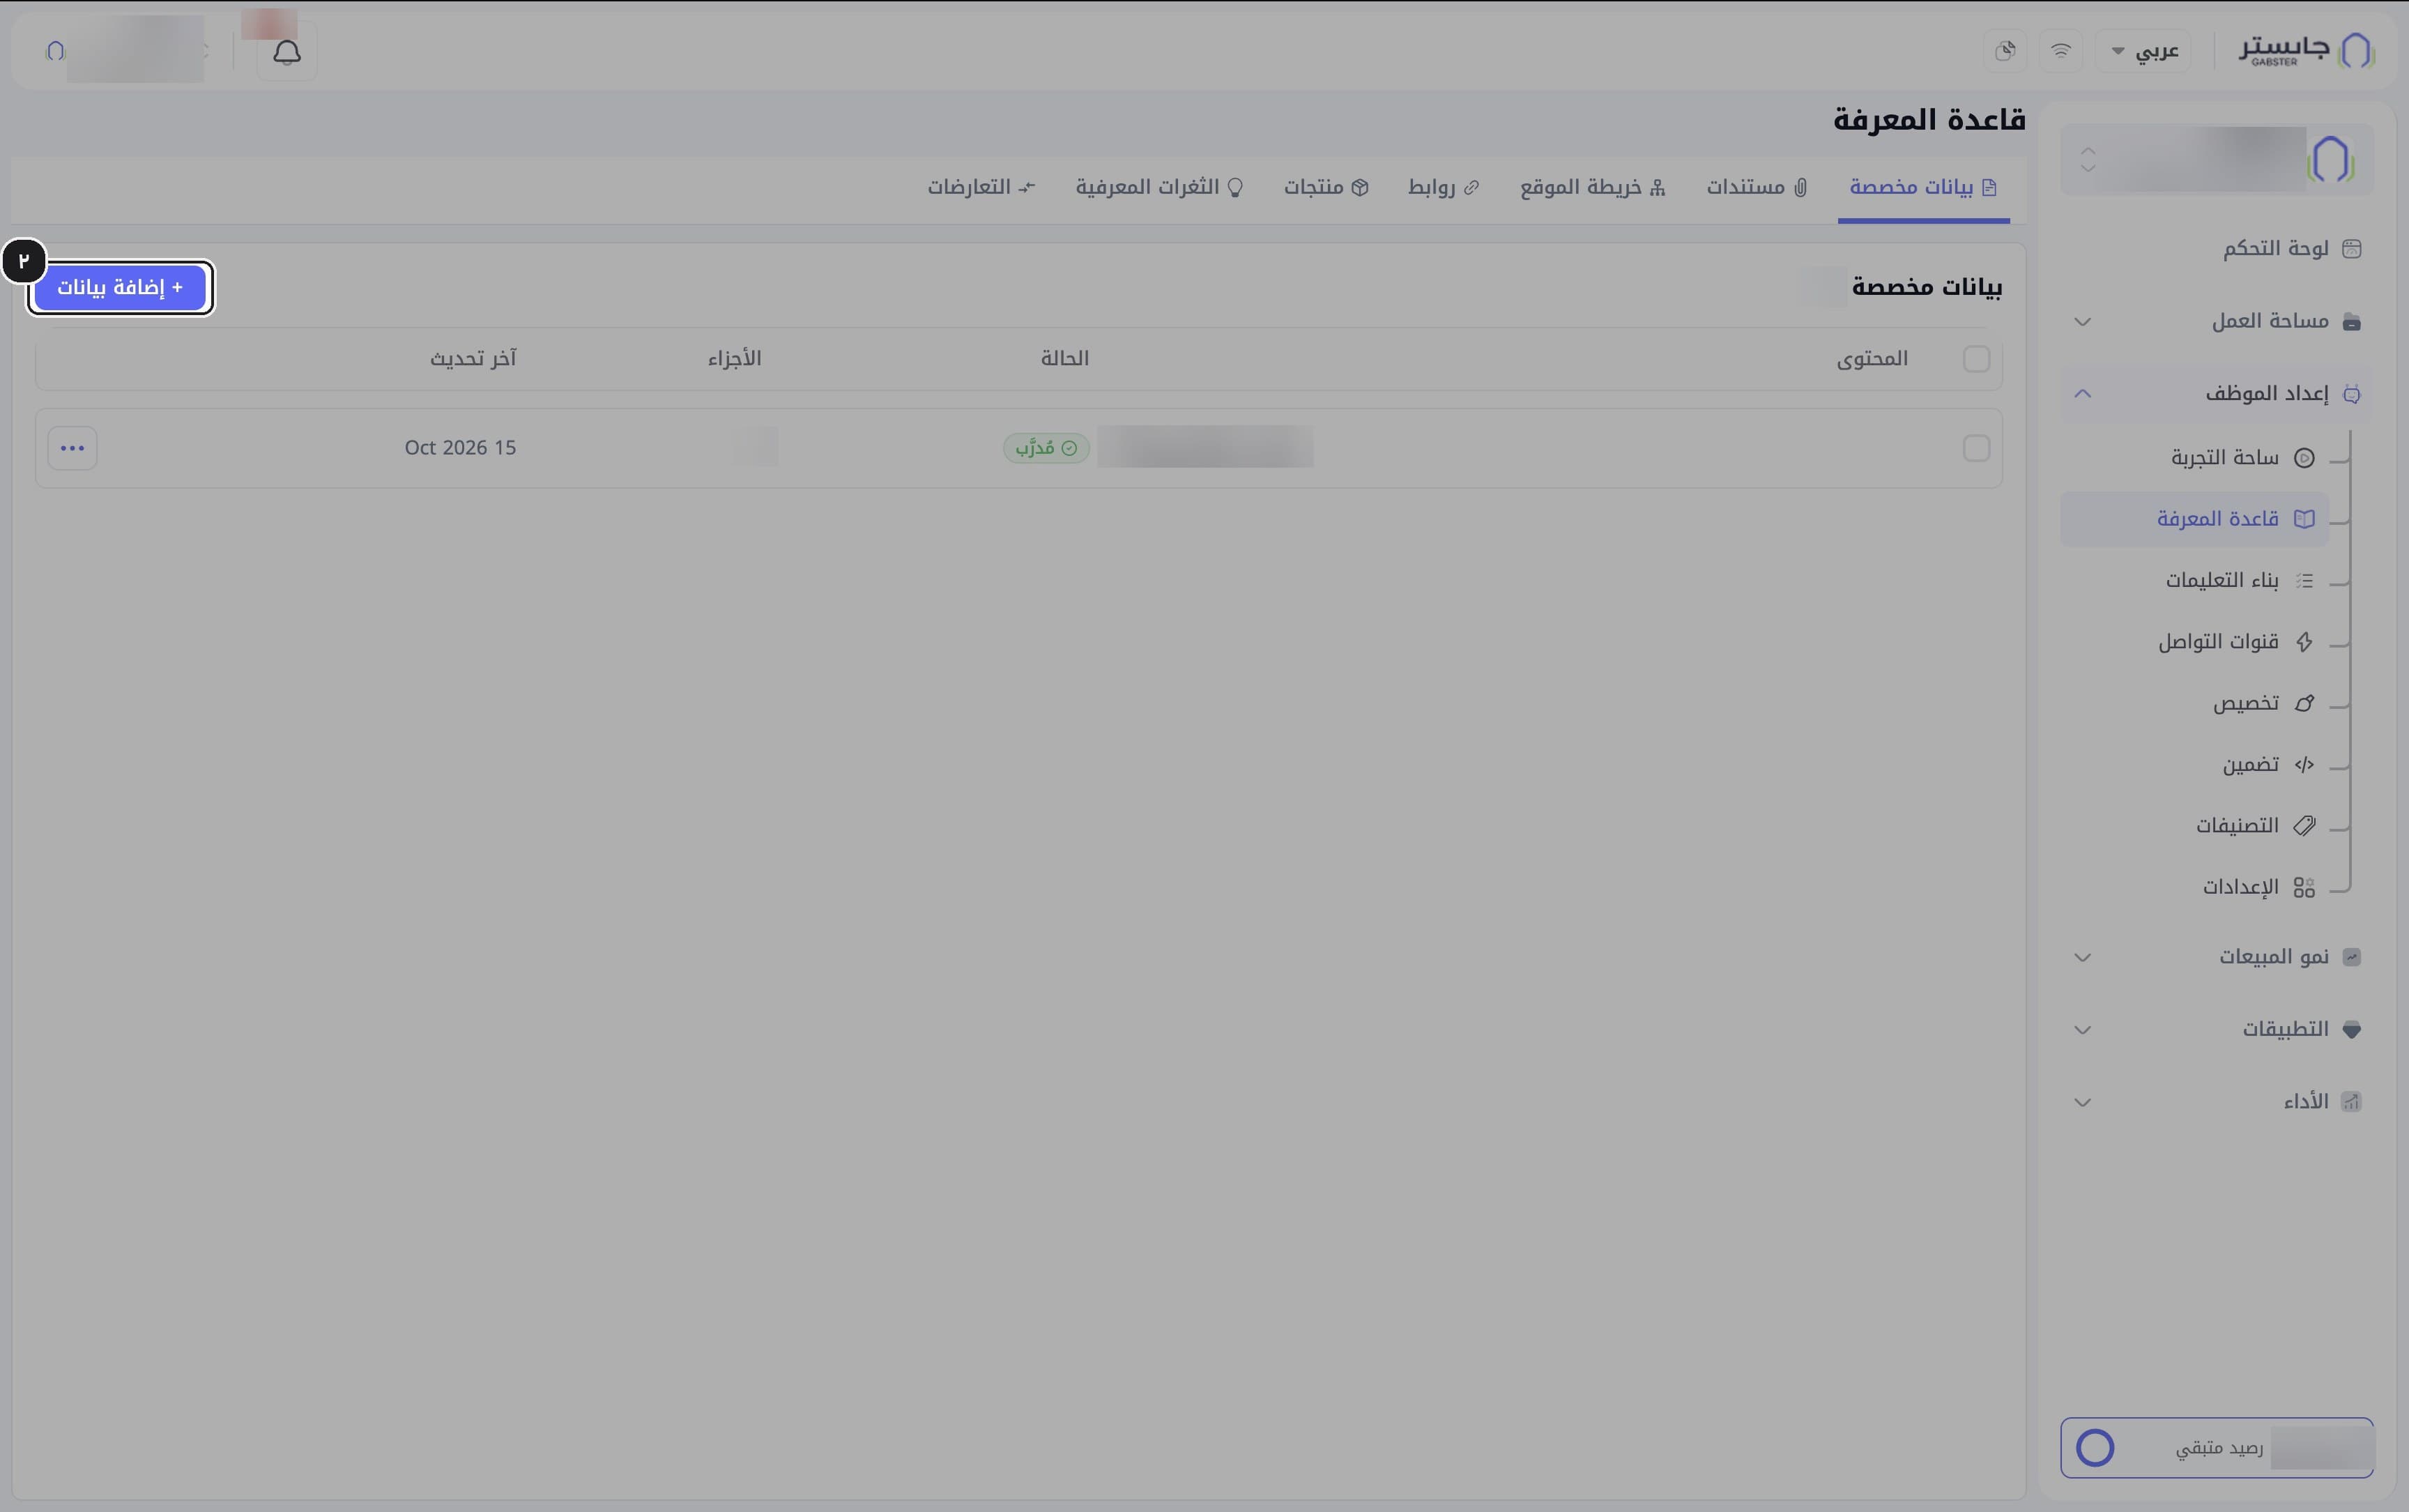
Add custom data
Click + Add data (إضافة بيانات).
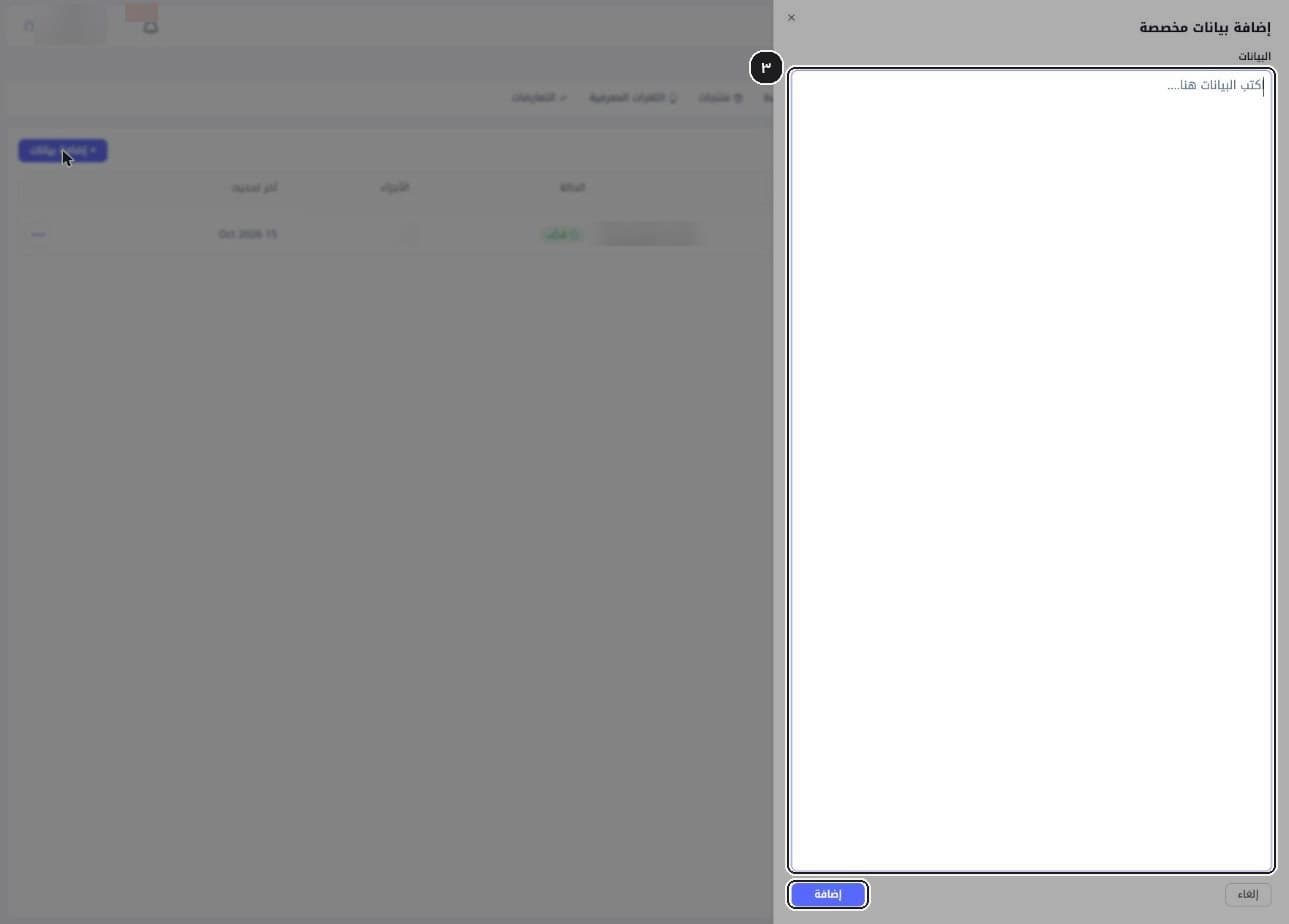
Result: the Add custom data (إضافة بيانات مخصصة) panel opens with a single text box.
Write the entry and add it
Type the information in the box, then click Add (إضافة).
Result: the entry is listed straight away and trained in the background.
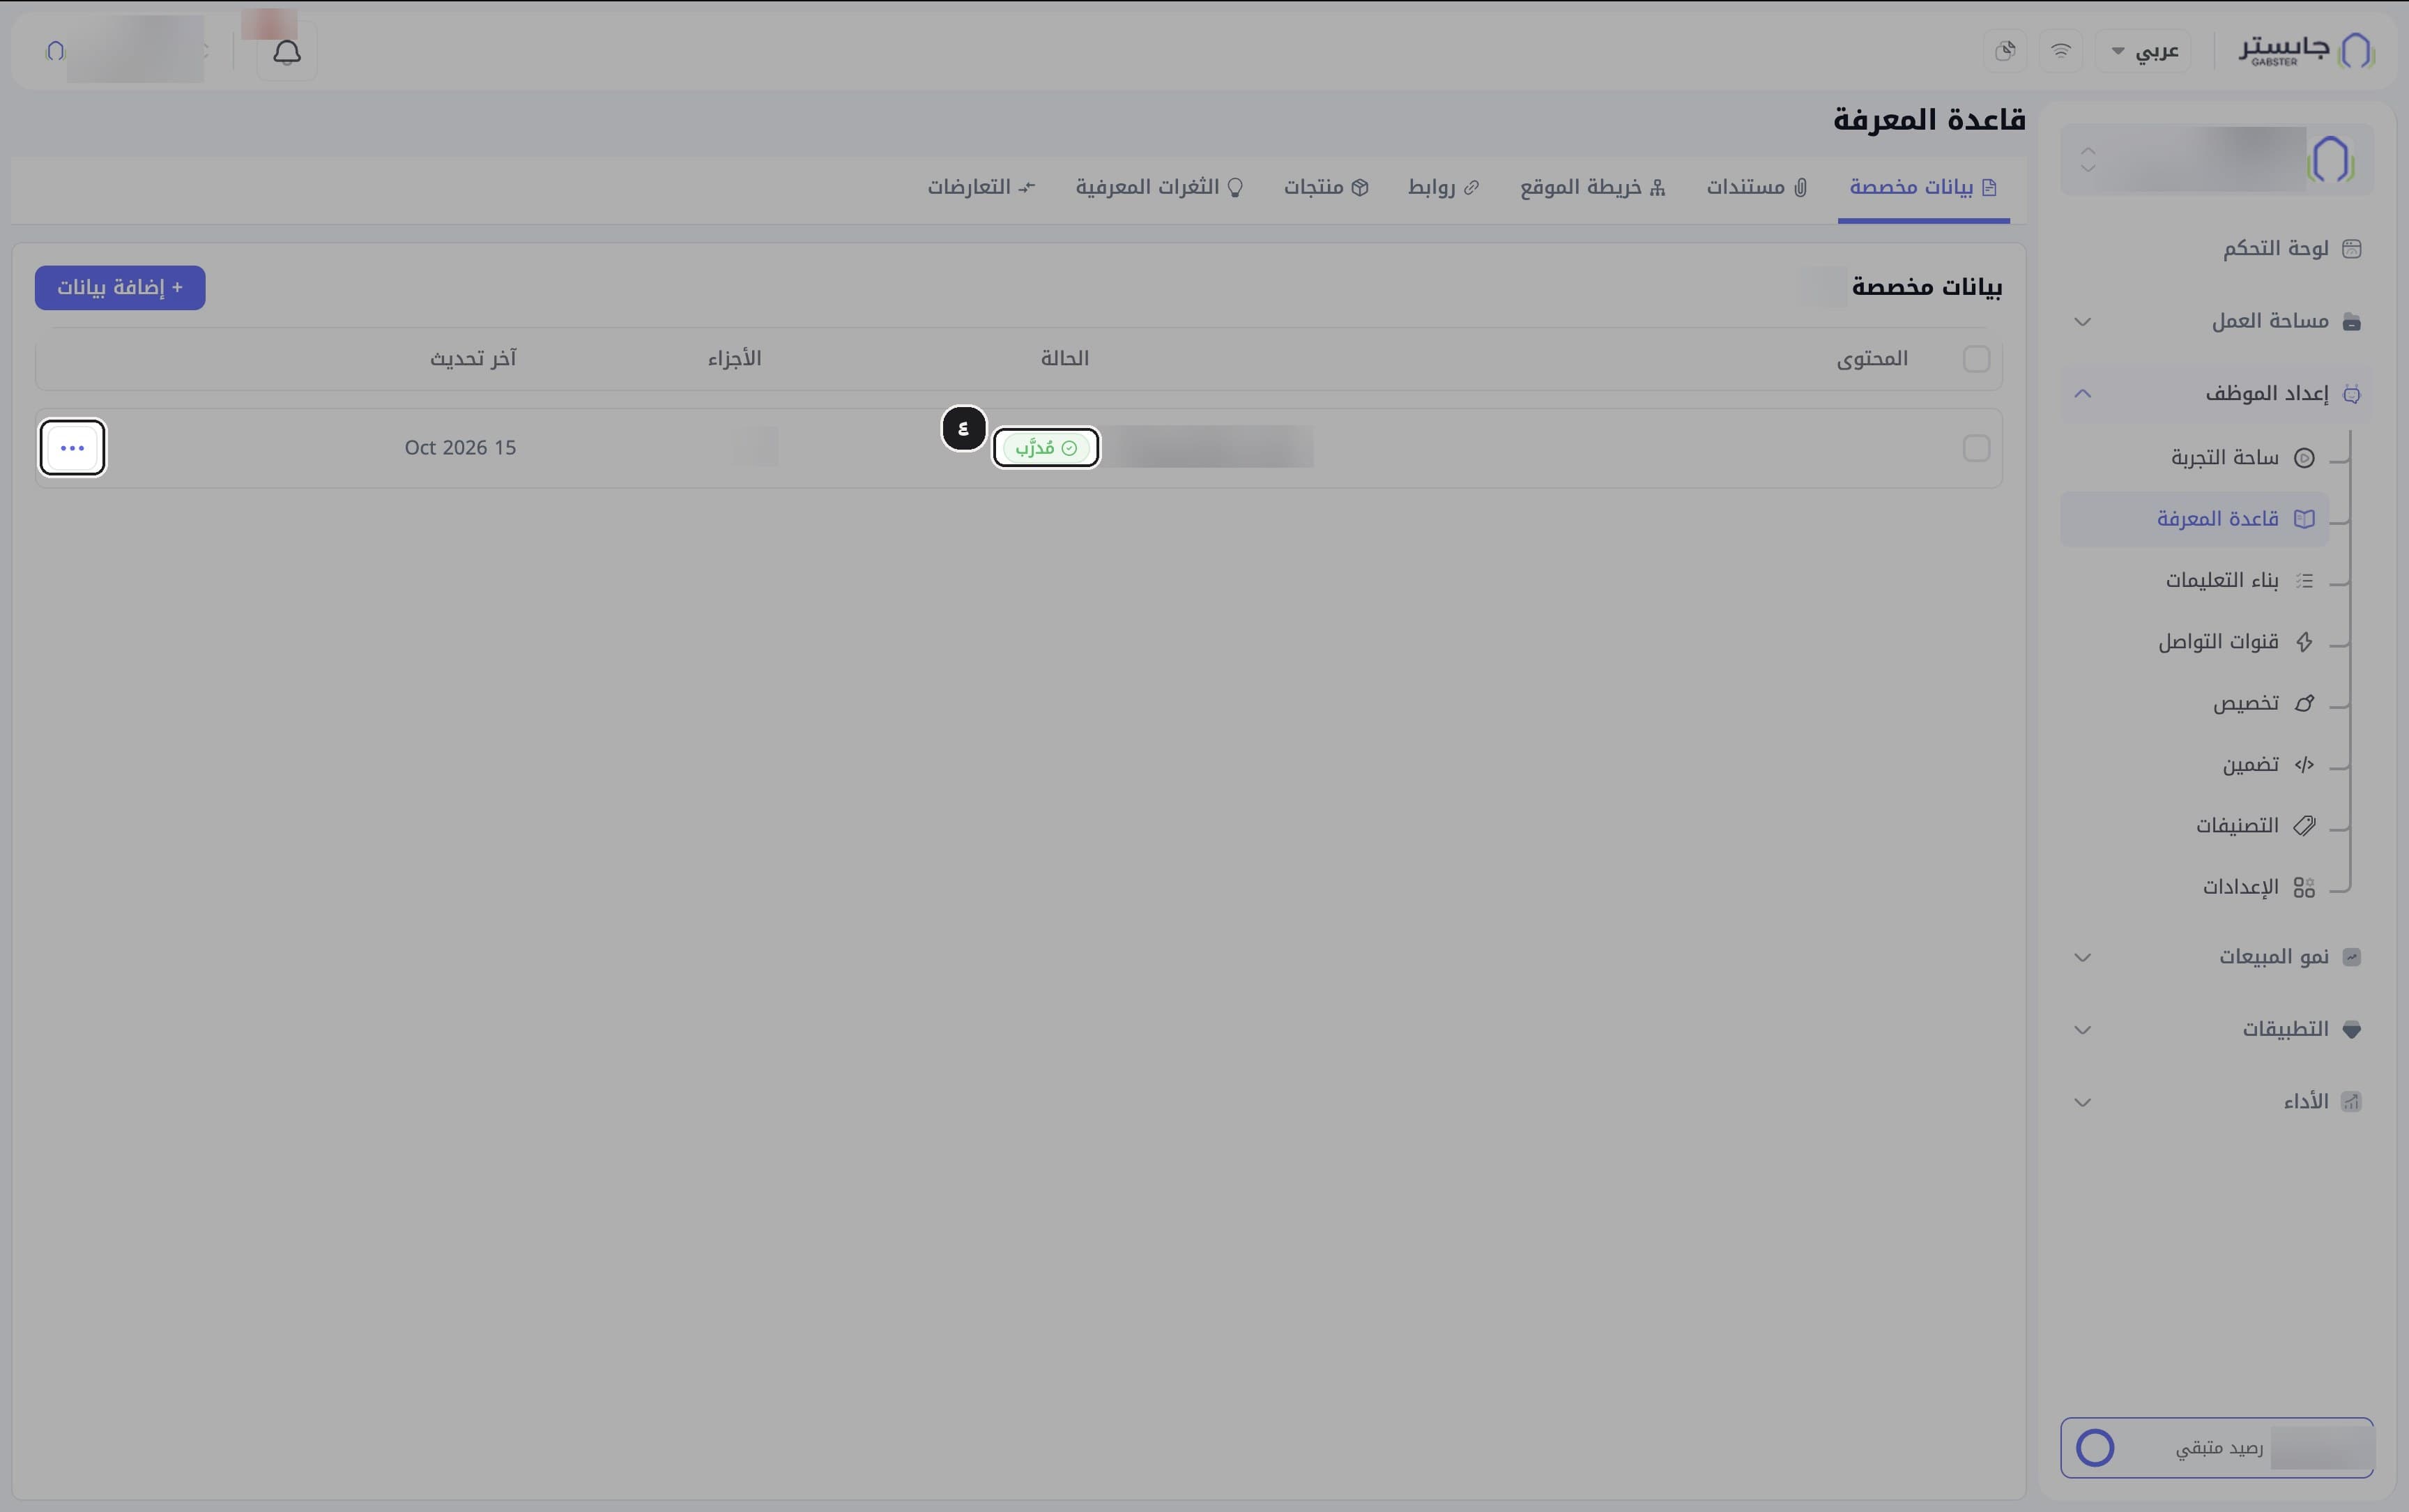
Check the status and manage the entry
Check the entry's status in the table, and use the row menu (⋯) to manage it: View chunks (عرض الأجزاء), Edit (تعديل) or Delete (حذف).
Result: a green Trained (مُدرَّب) badge shows once the entry is part of your AI Agent's knowledge.
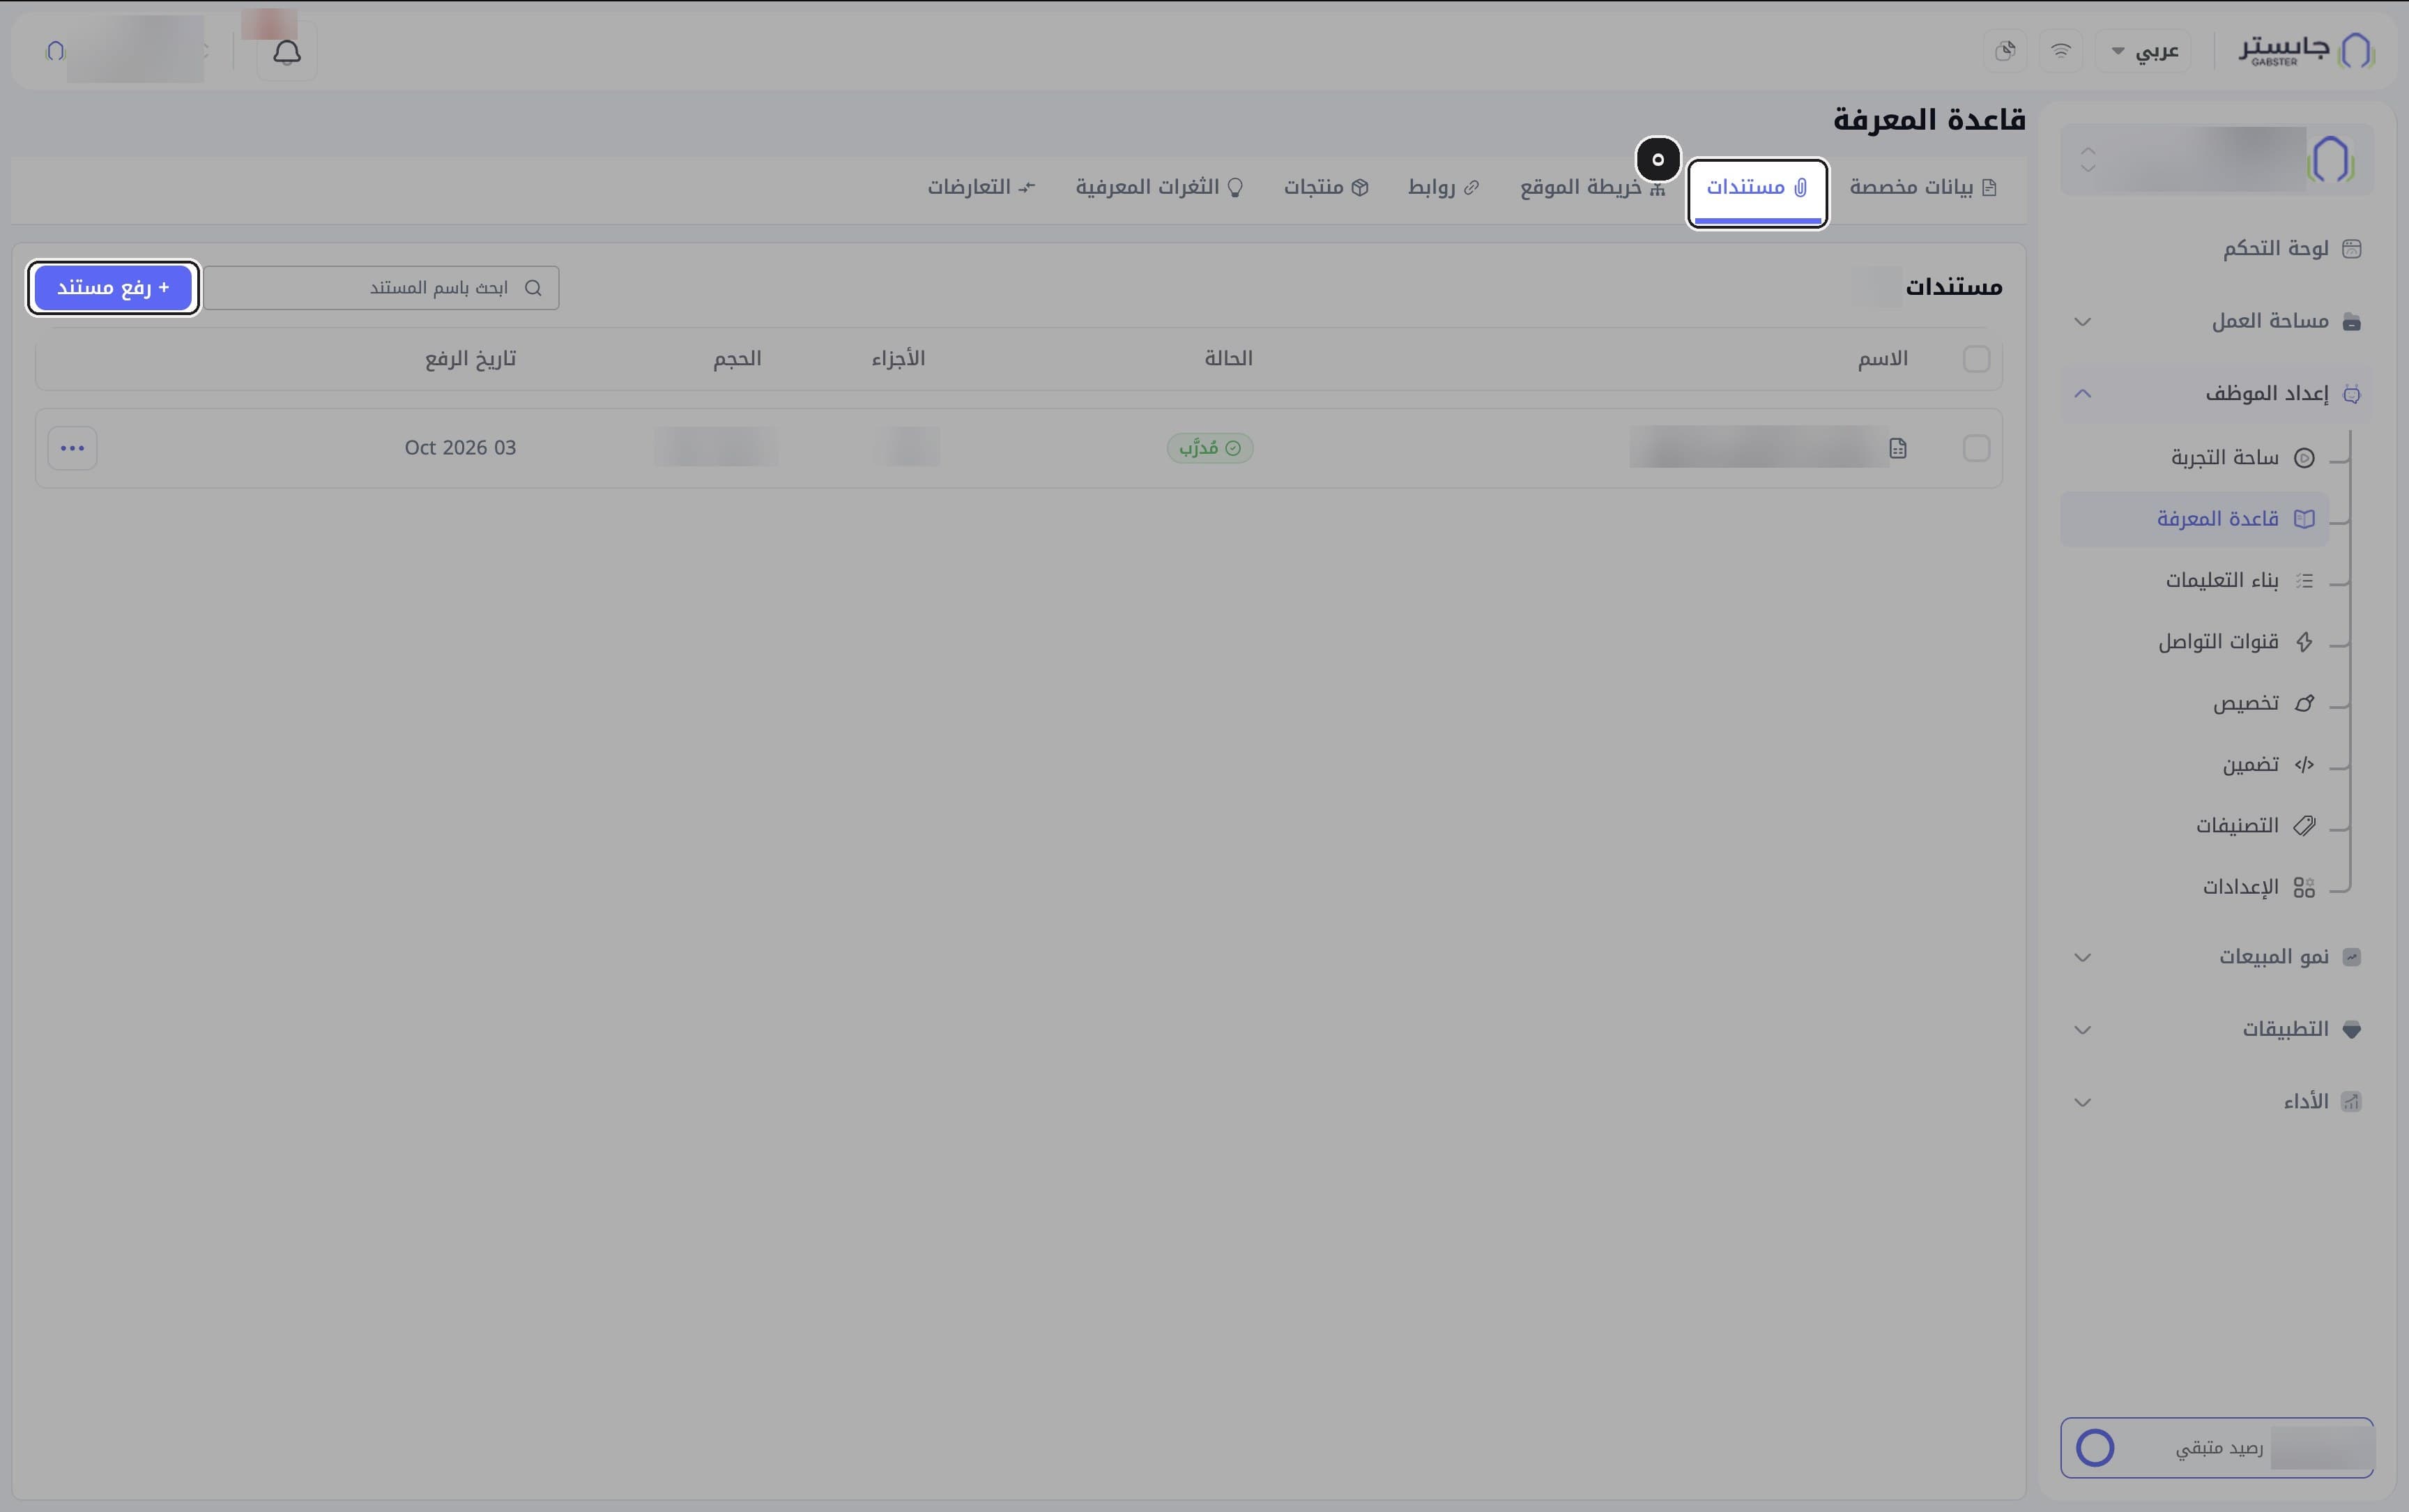
Upload a document
Switch to the Documents (مستندات) tab and click + Upload document (رفع مستند).
Result: the Upload document dialog opens.
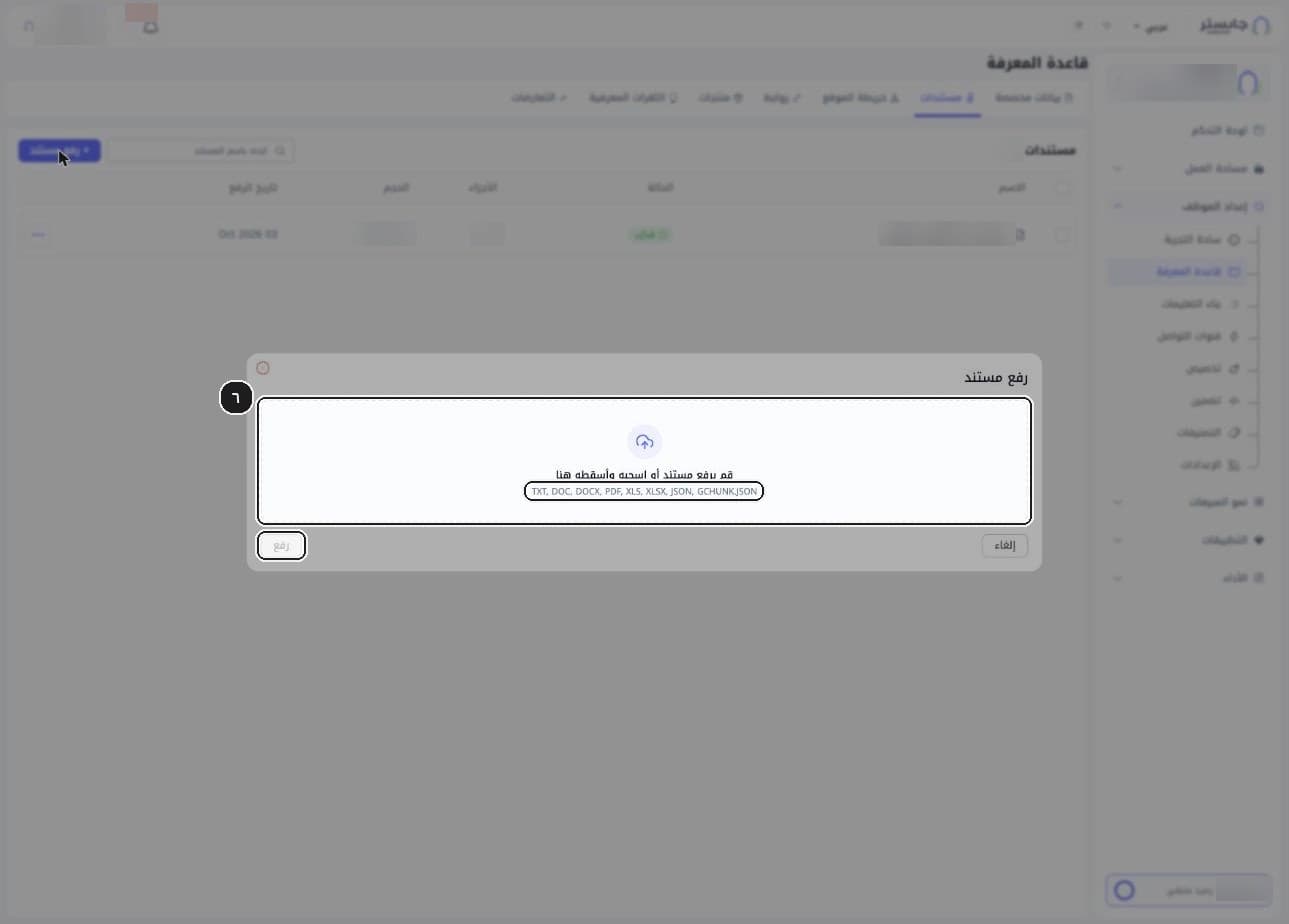
Choose the file and upload it
Drag and drop your file onto the upload area, or click the area to choose it, then click Upload (رفع).
Result: Upload is disabled while no file is chosen. Accepted formats: TXT, DOC, DOCX, PDF, XLS, XLSX, JSON and GCHUNK.JSON.
After upload, each file appears in the table and starts training automatically. You can upload up to 10 files at a time, each up to 10 MB.
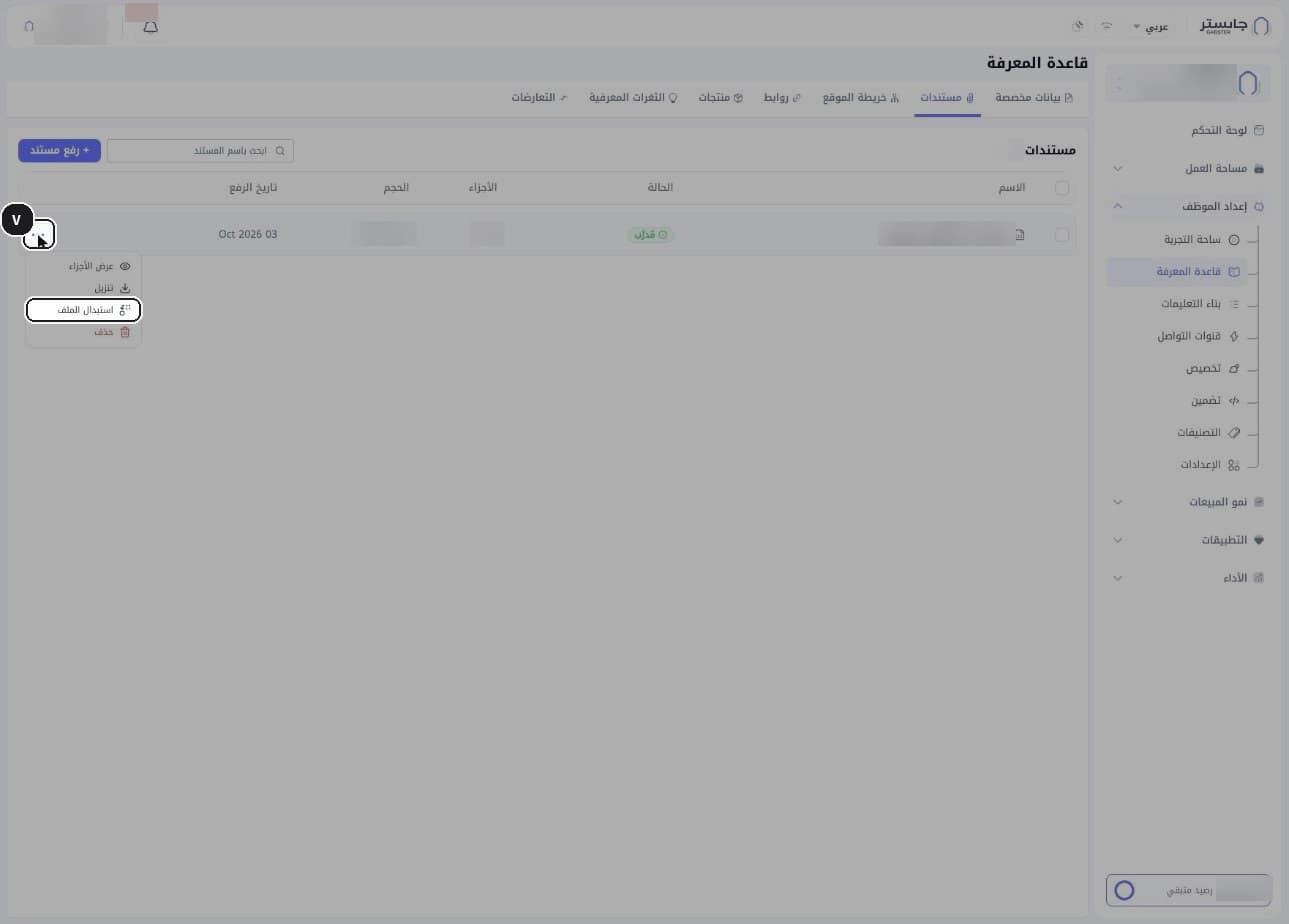
Manage the document
Use the row menu (⋯) to manage the document: View chunks (عرض الأجزاء), Download (تنزيل), Replace file (استبدال الملف) or Delete (حذف).
Documents are not edited in place; to update the content, use Replace file.
Add your sitemap
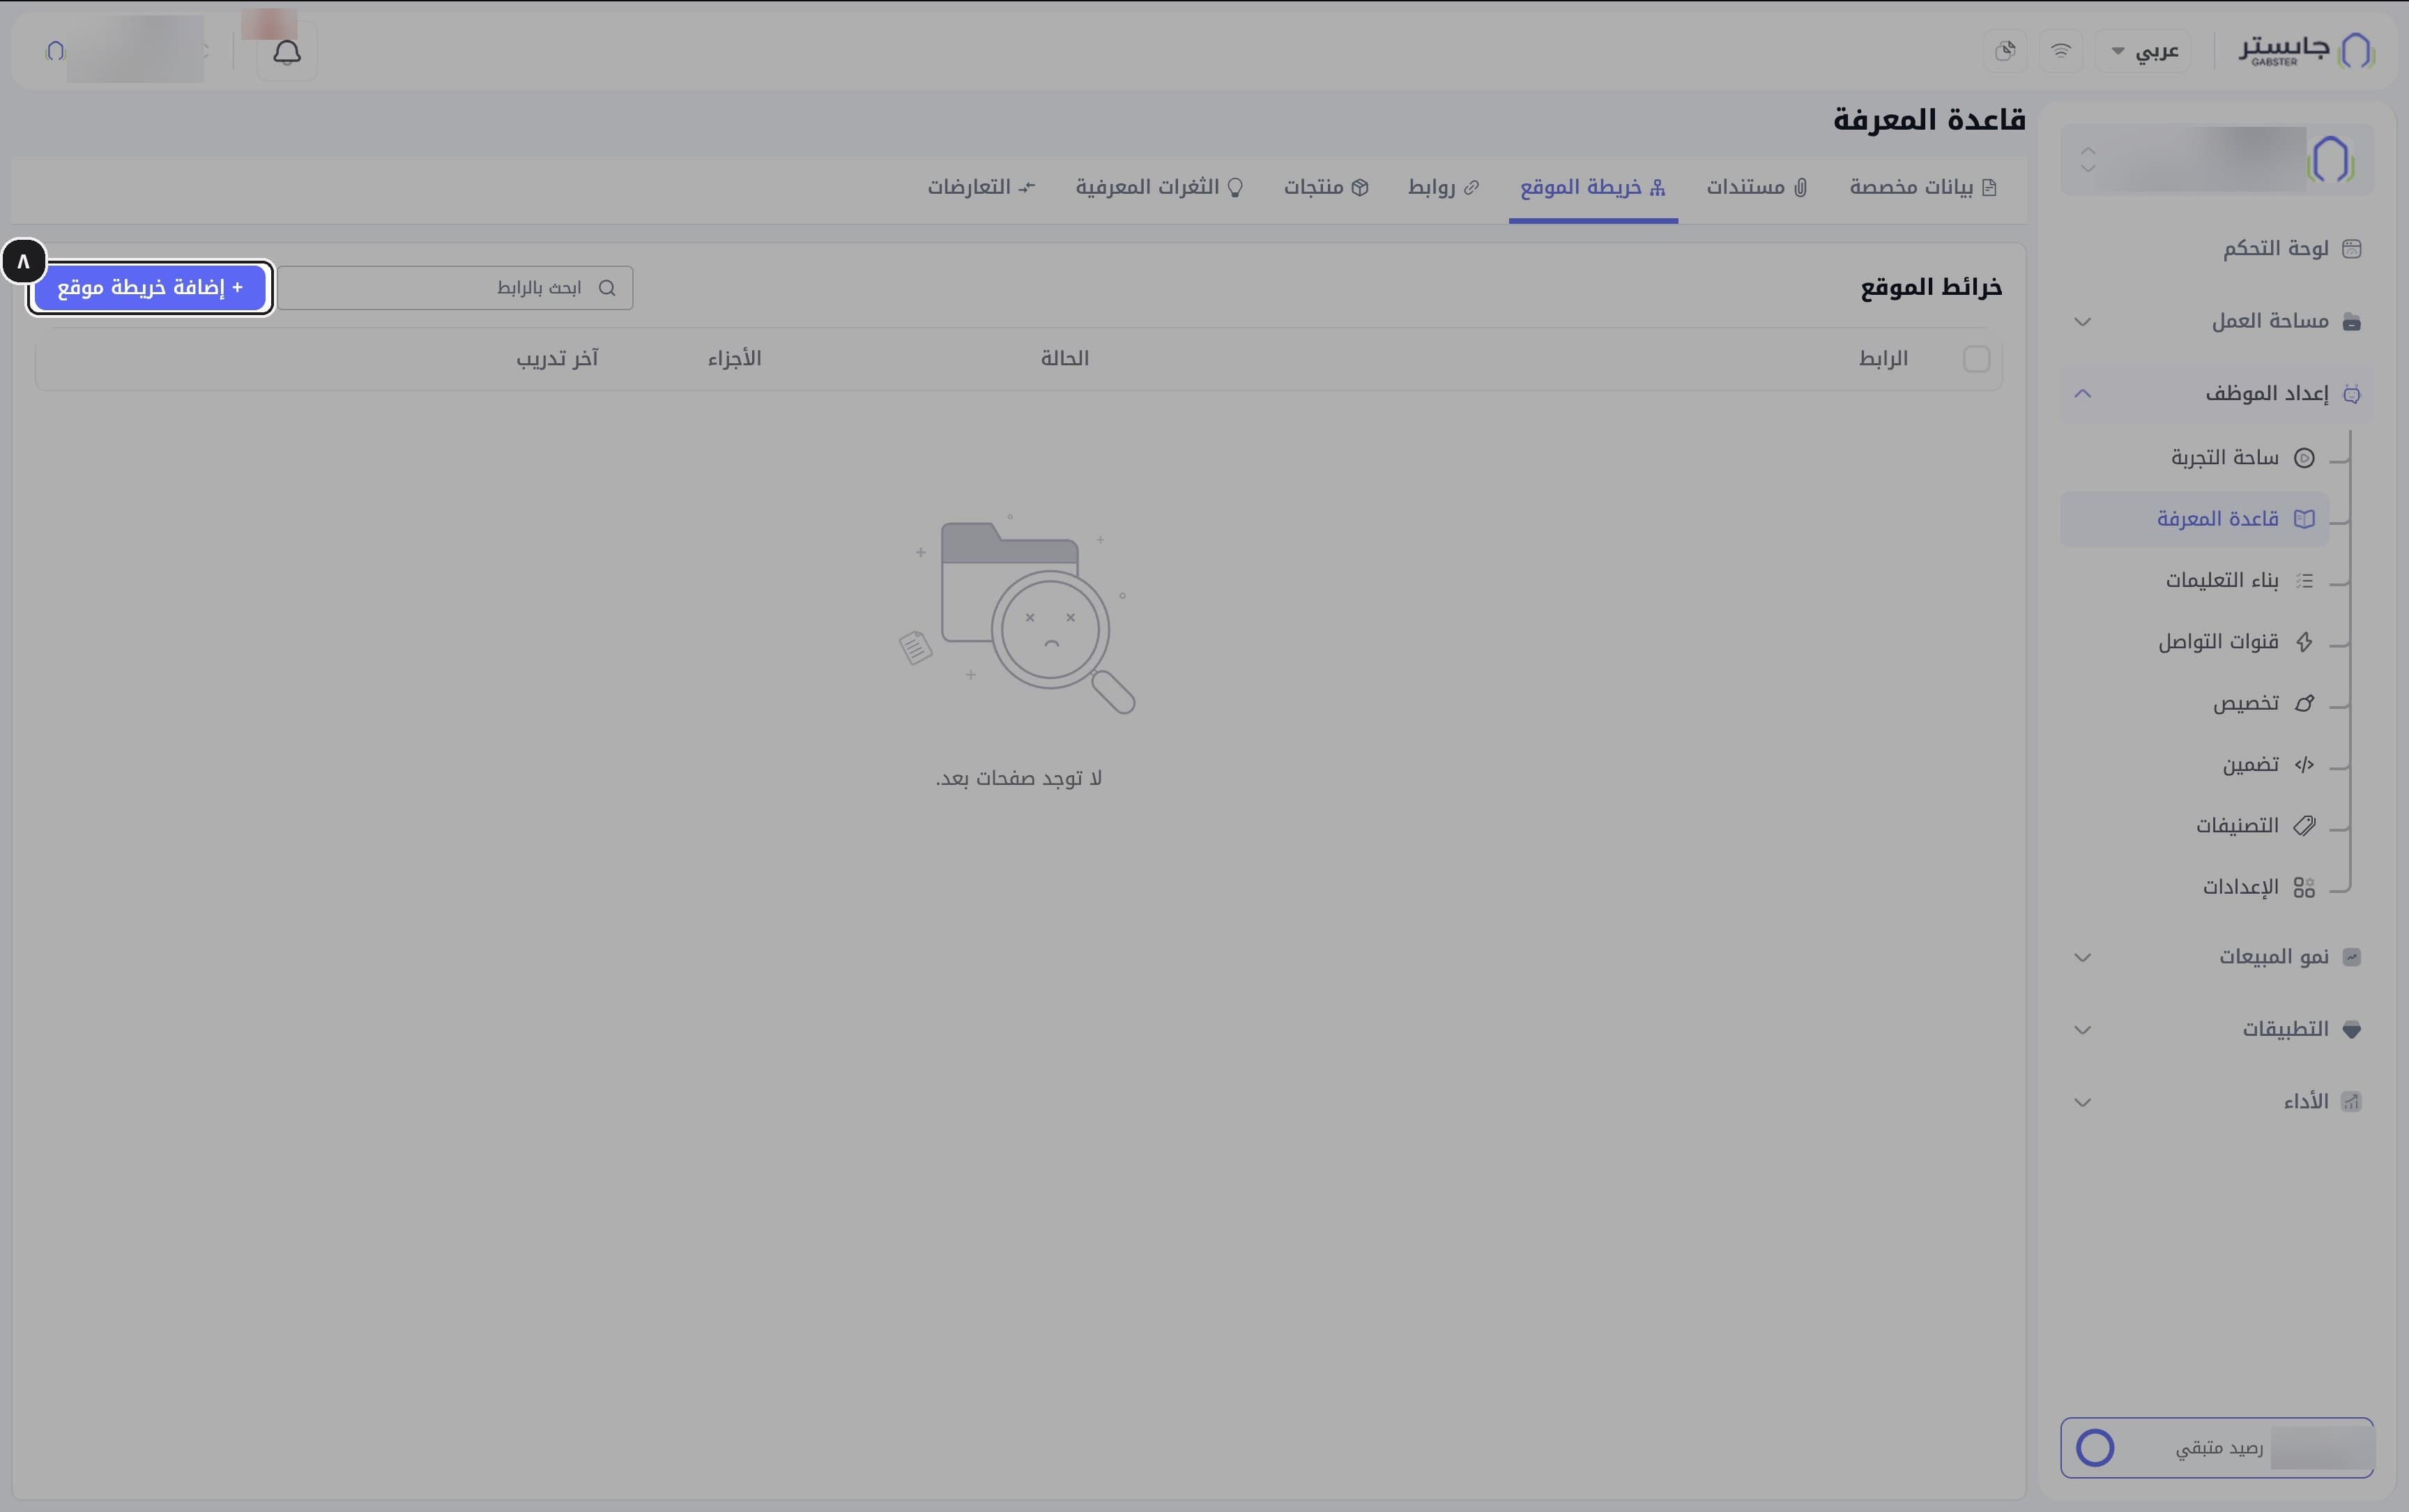
Switch to the Sitemap (خريطة الموقع) tab and click + Add sitemap (إضافة خريطة موقع).
Result: the Add sitemap dialog opens.
Fetch your site's pages
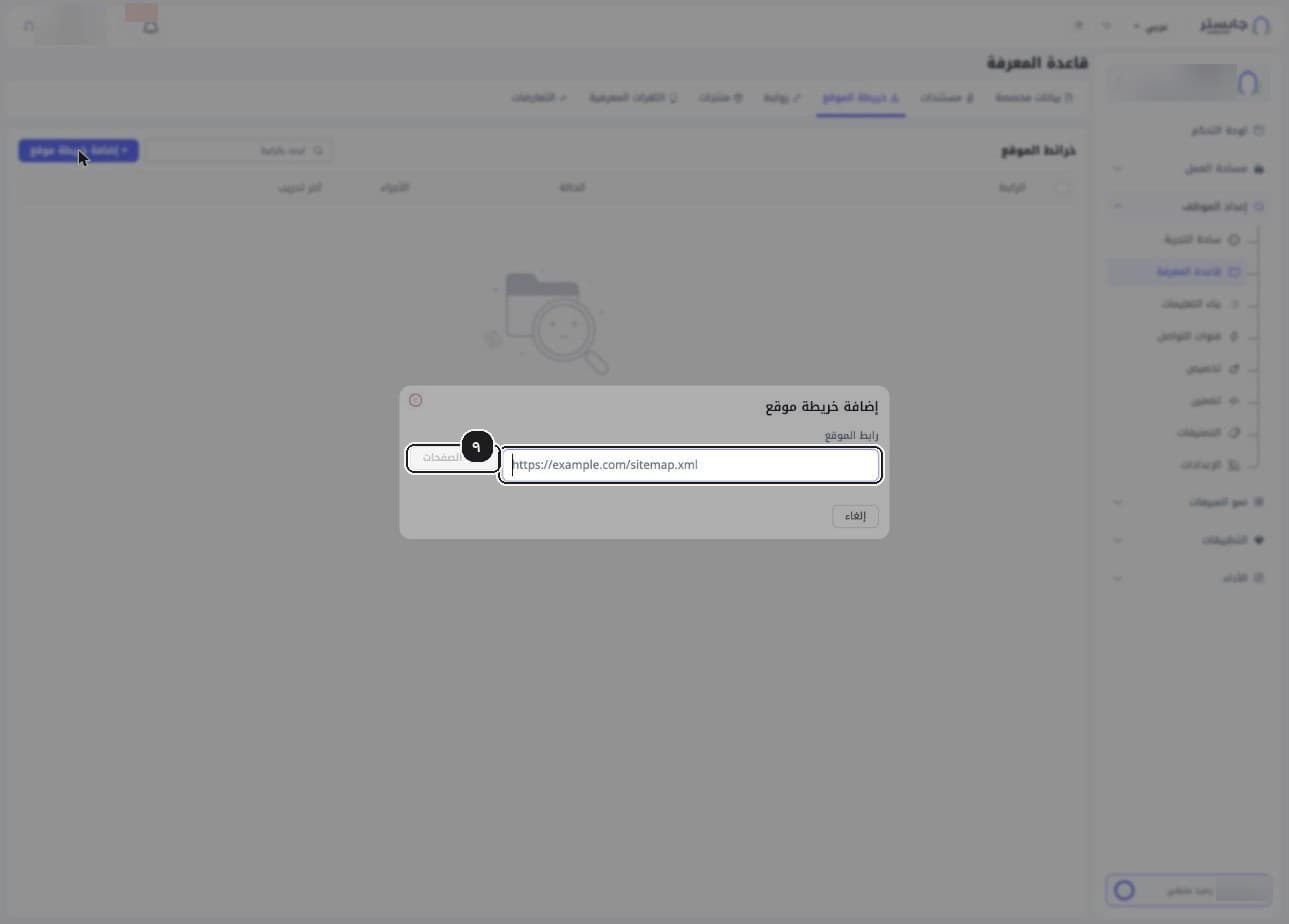
Paste your sitemap address, for example https://example.com/sitemap.xml, and click Fetch pages (جلب الصفحات).
Result: Fetch pages stays disabled while the field is empty.
Fetch pages lists the pages in your sitemap; each page you add is trained as its own item.
Paste the address of your sitemap file (it usually ends in sitemap.xml), not your home page URL.
Add a page link
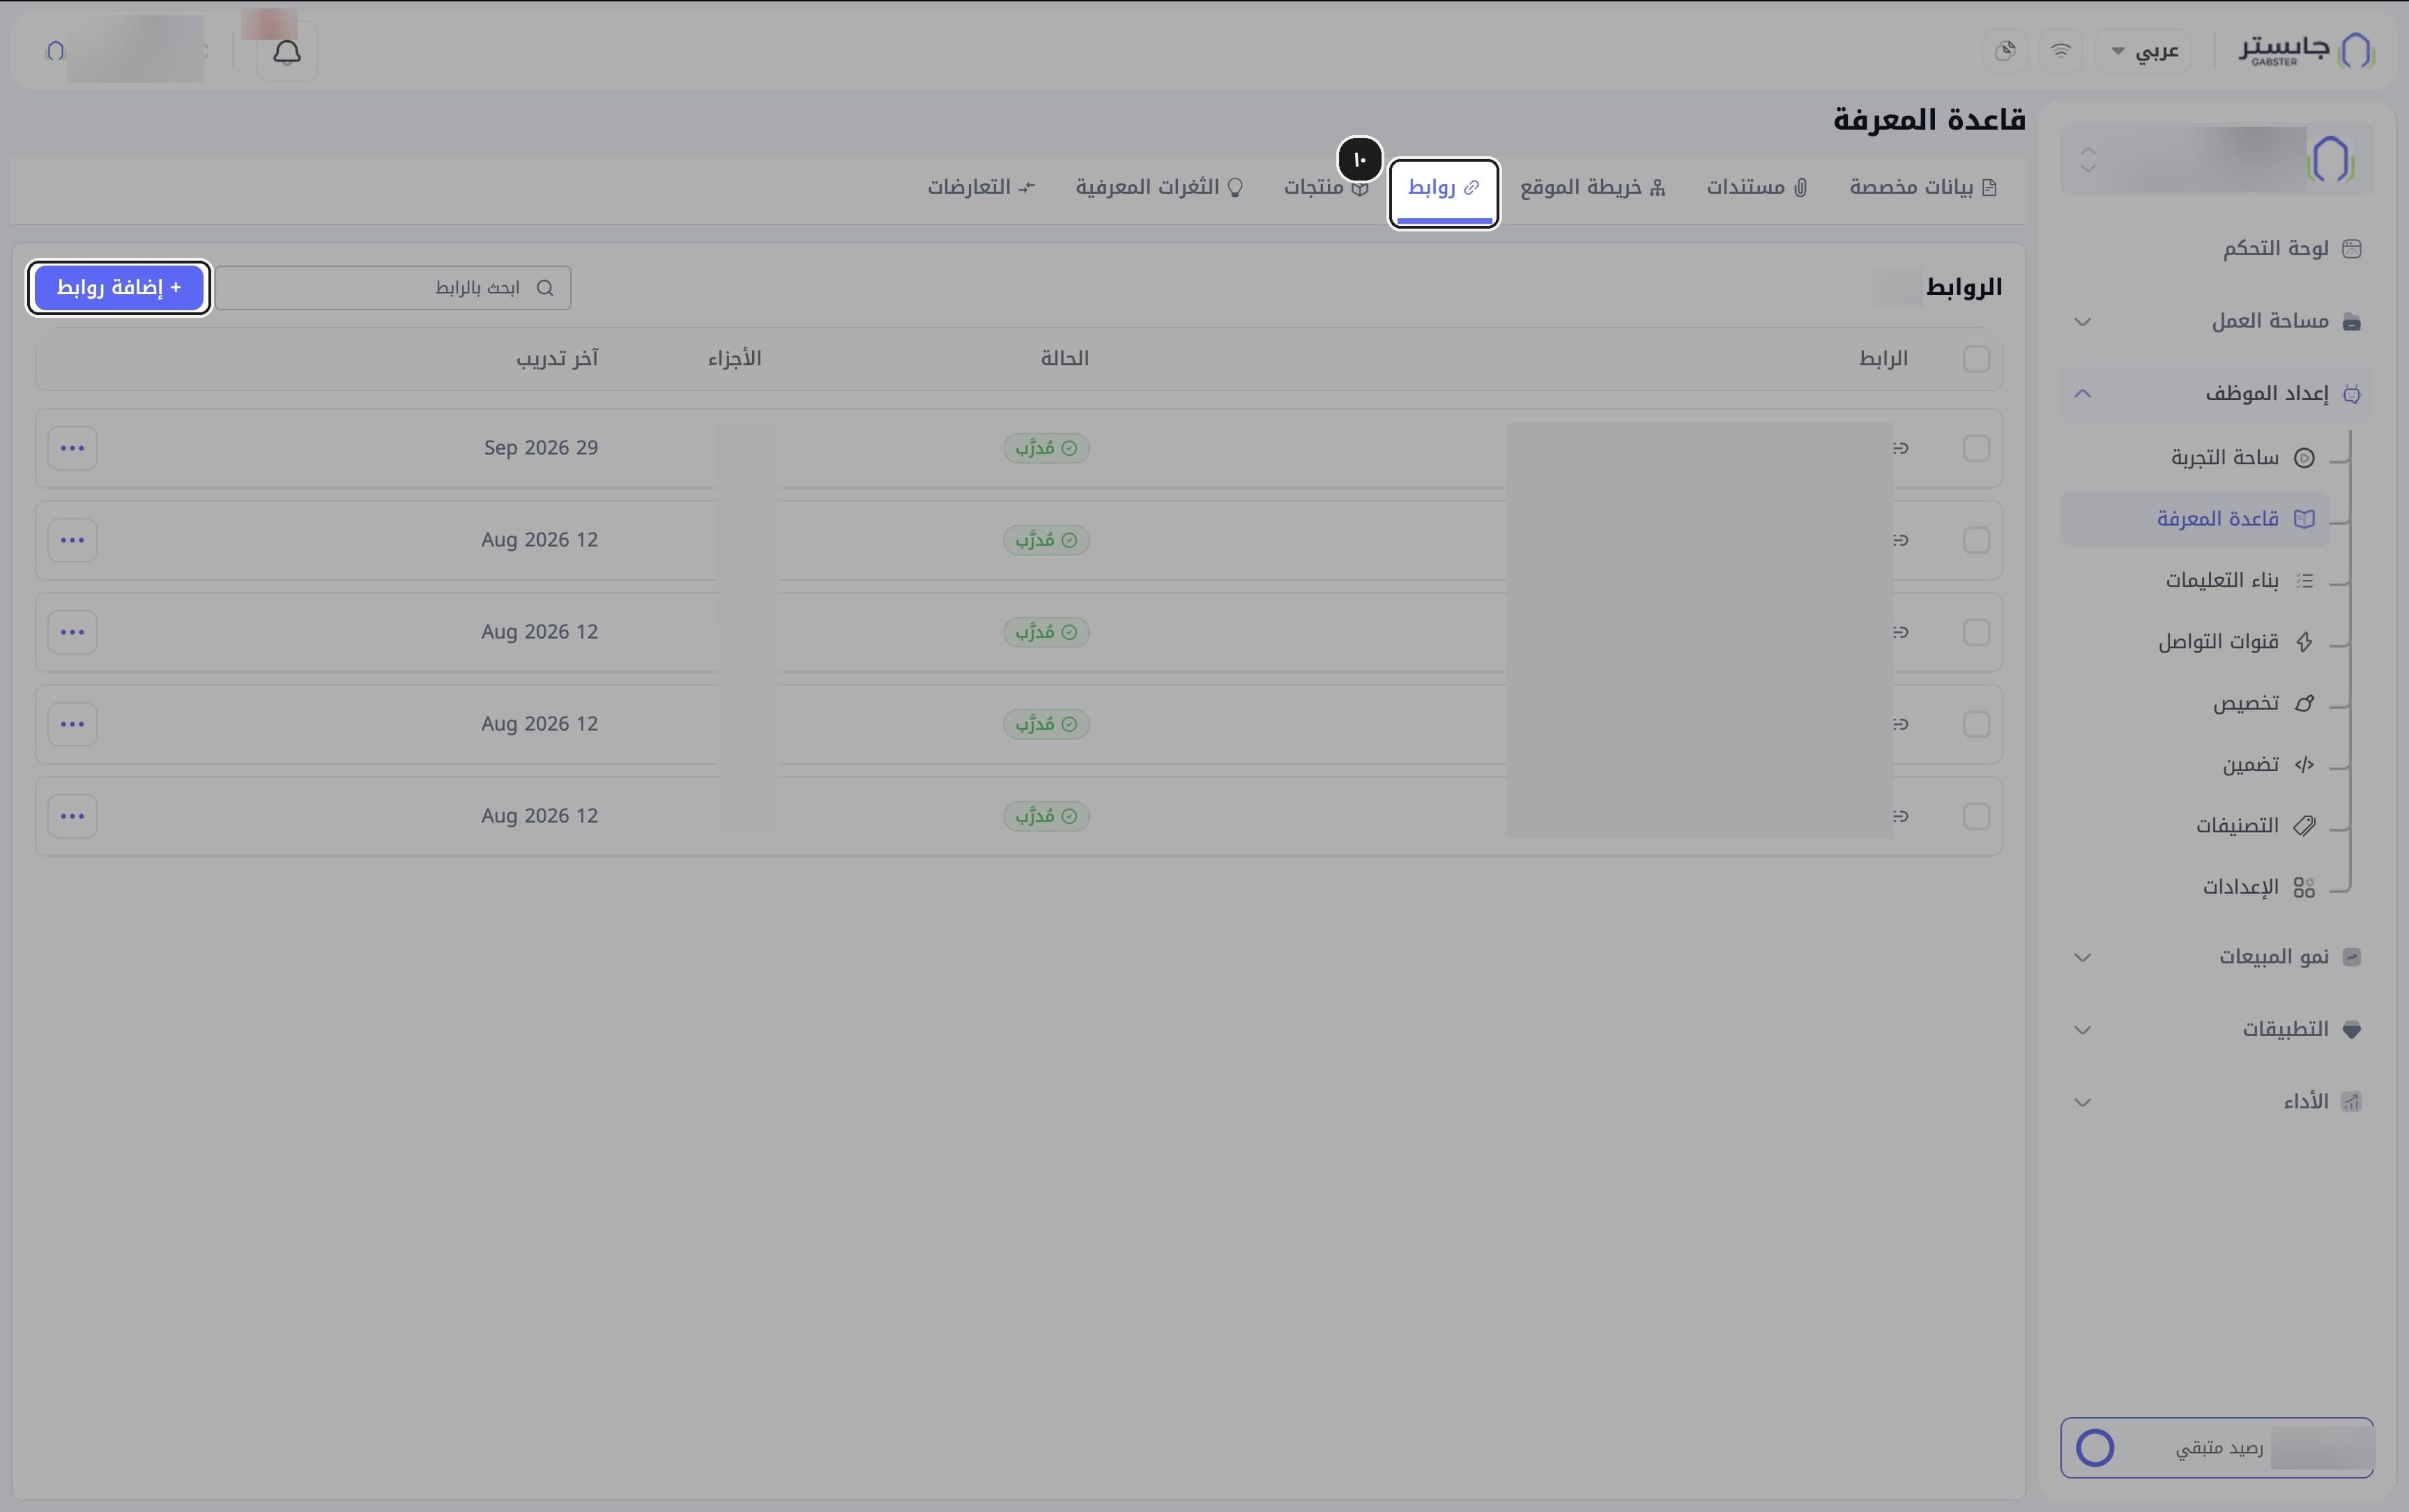
Switch to the Links (روابط) tab and click + Add links (إضافة روابط).
Result: the Add web page (إضافة صفحة ويب) dialog opens with one URL field.
Start training on the page
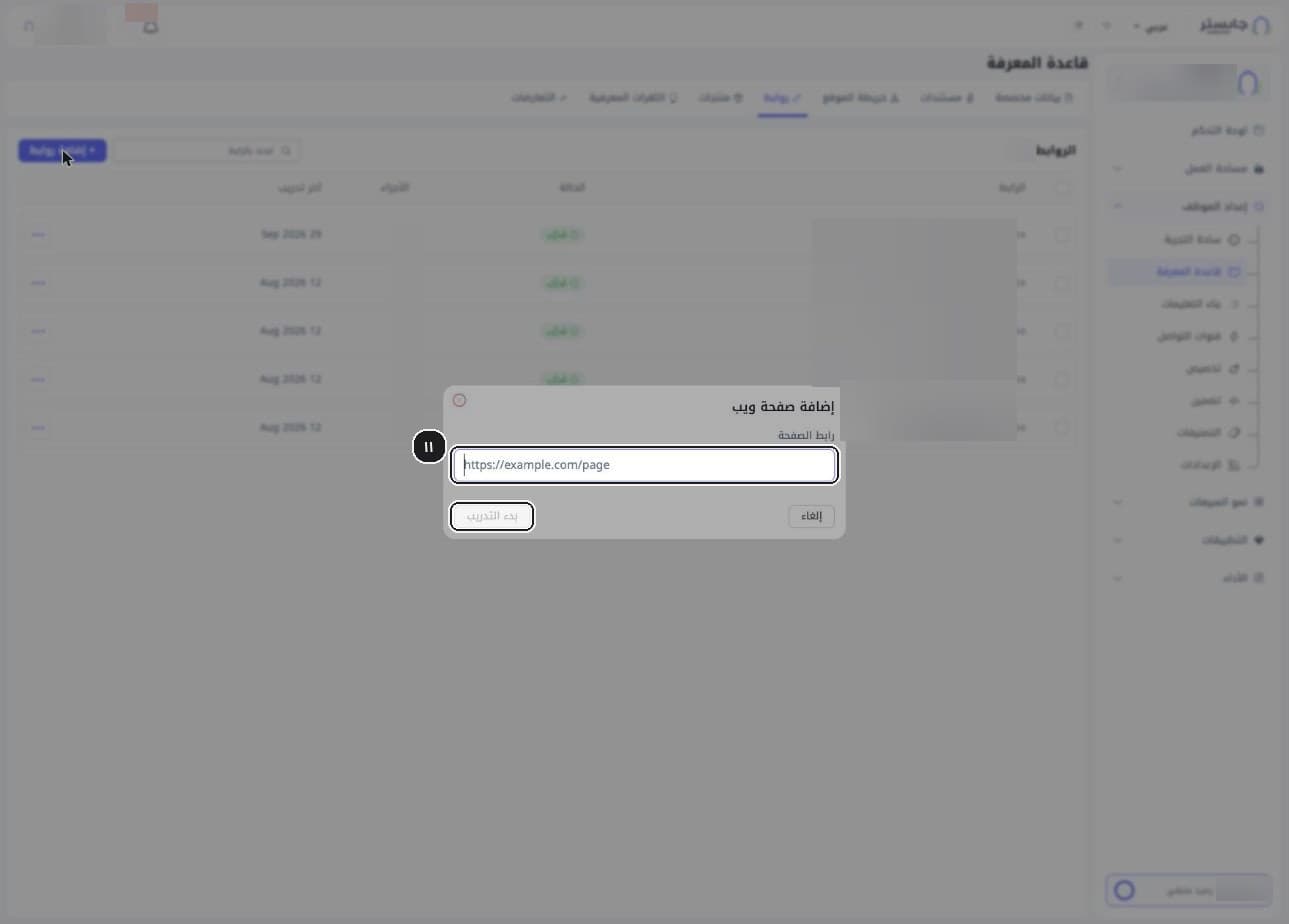
Paste the page URL and click Start training (بدء التدريب).
Result: the button stays disabled while the field is empty.
Only that page is read; links on it are not followed. The page appears in the Links (الروابط) table and trains in the background.
Manage the link
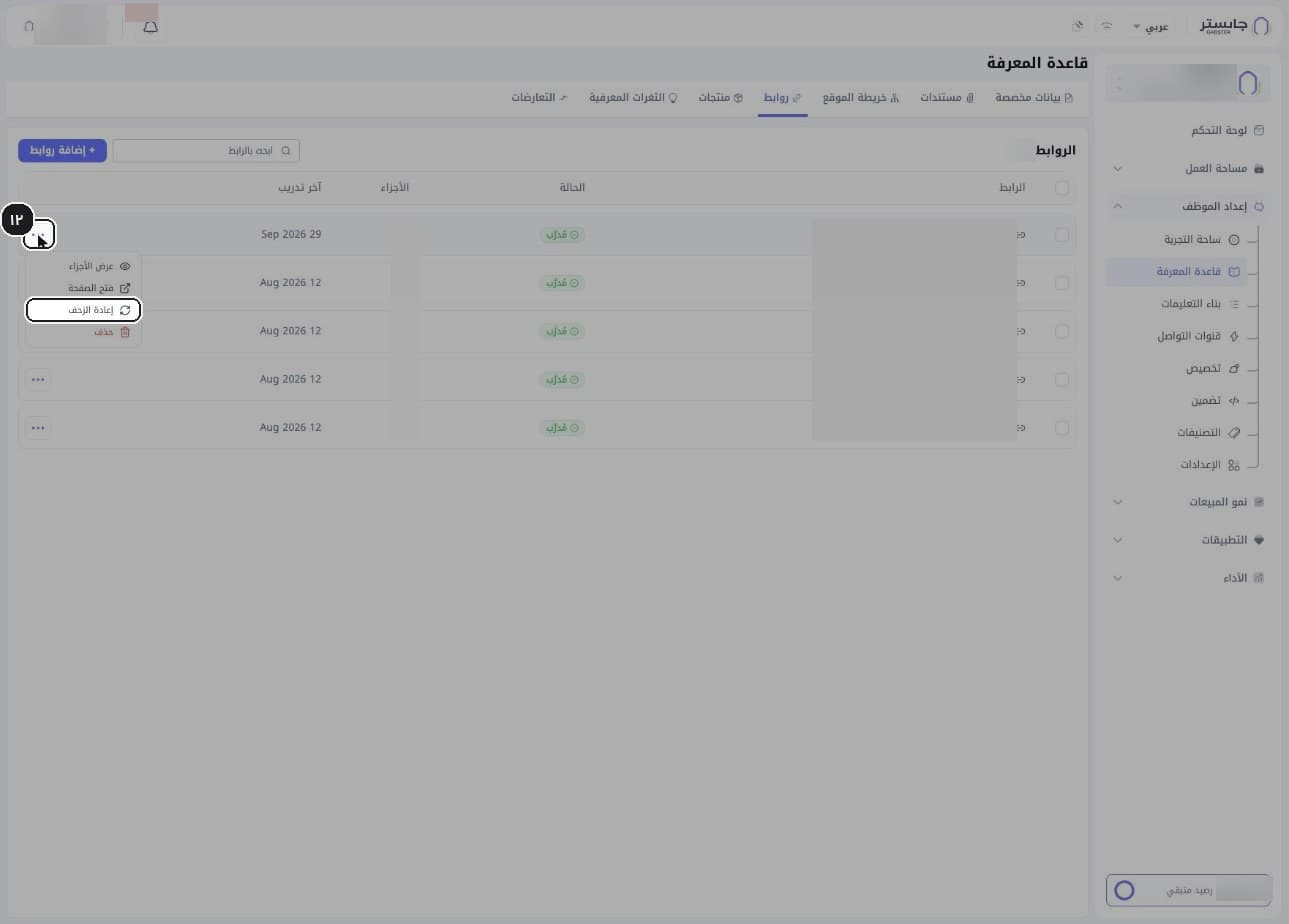
Use the row menu (⋯) to manage the link: View chunks (عرض الأجزاء), Open page (فتح الصفحة), Re-crawl (إعادة الزحف) or Delete (حذف).
When a page changes on your site, delete its row and add the page again so your AI Agent learns the new version. Pages are not re-checked automatically.
Upload your products
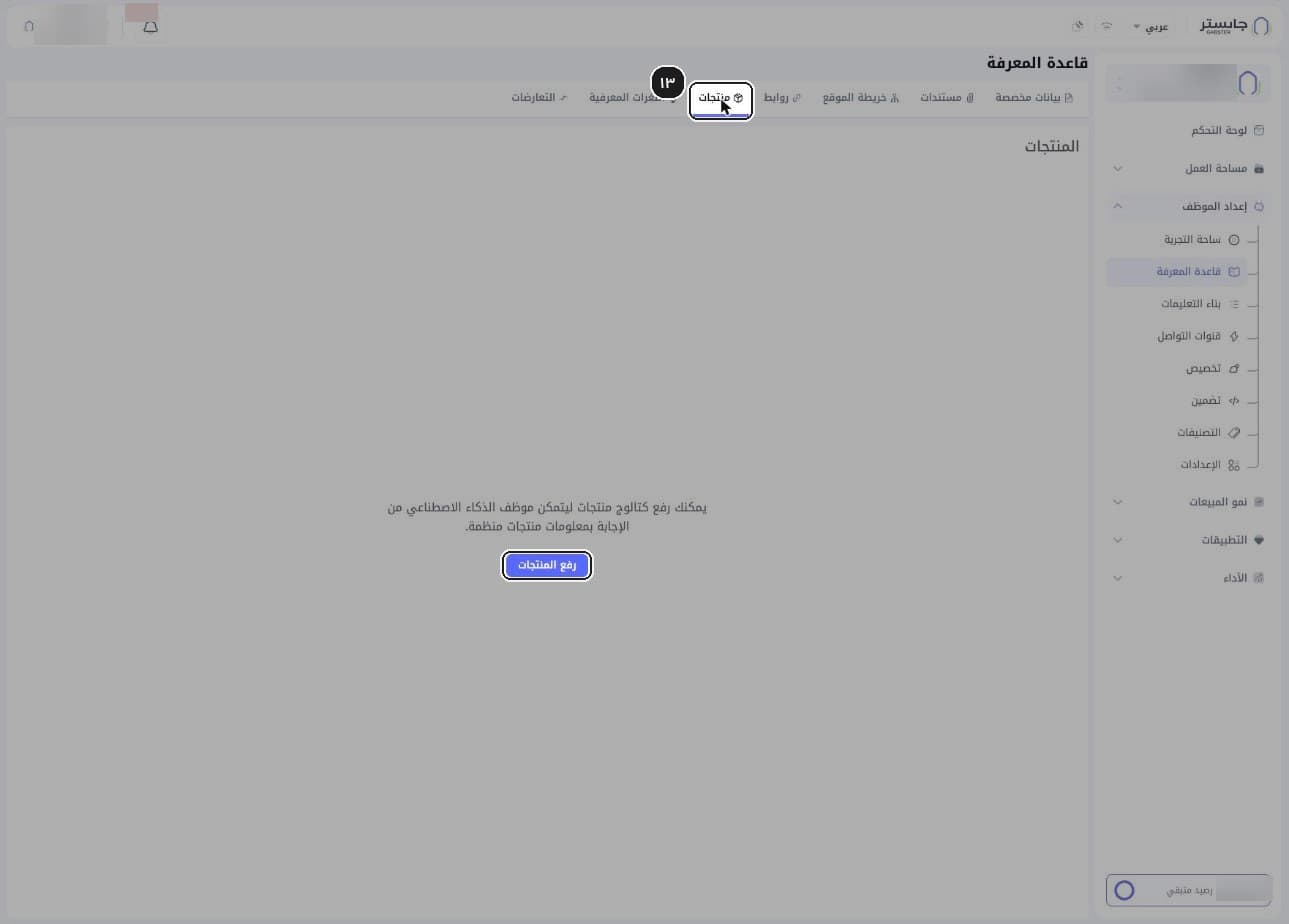
Switch to the Products (منتجات) tab and click Upload products (رفع المنتجات).
Result: the Import products (استيراد المنتجات) wizard opens. A product catalog lets your AI Agent answer with your product information.
Choose the product file
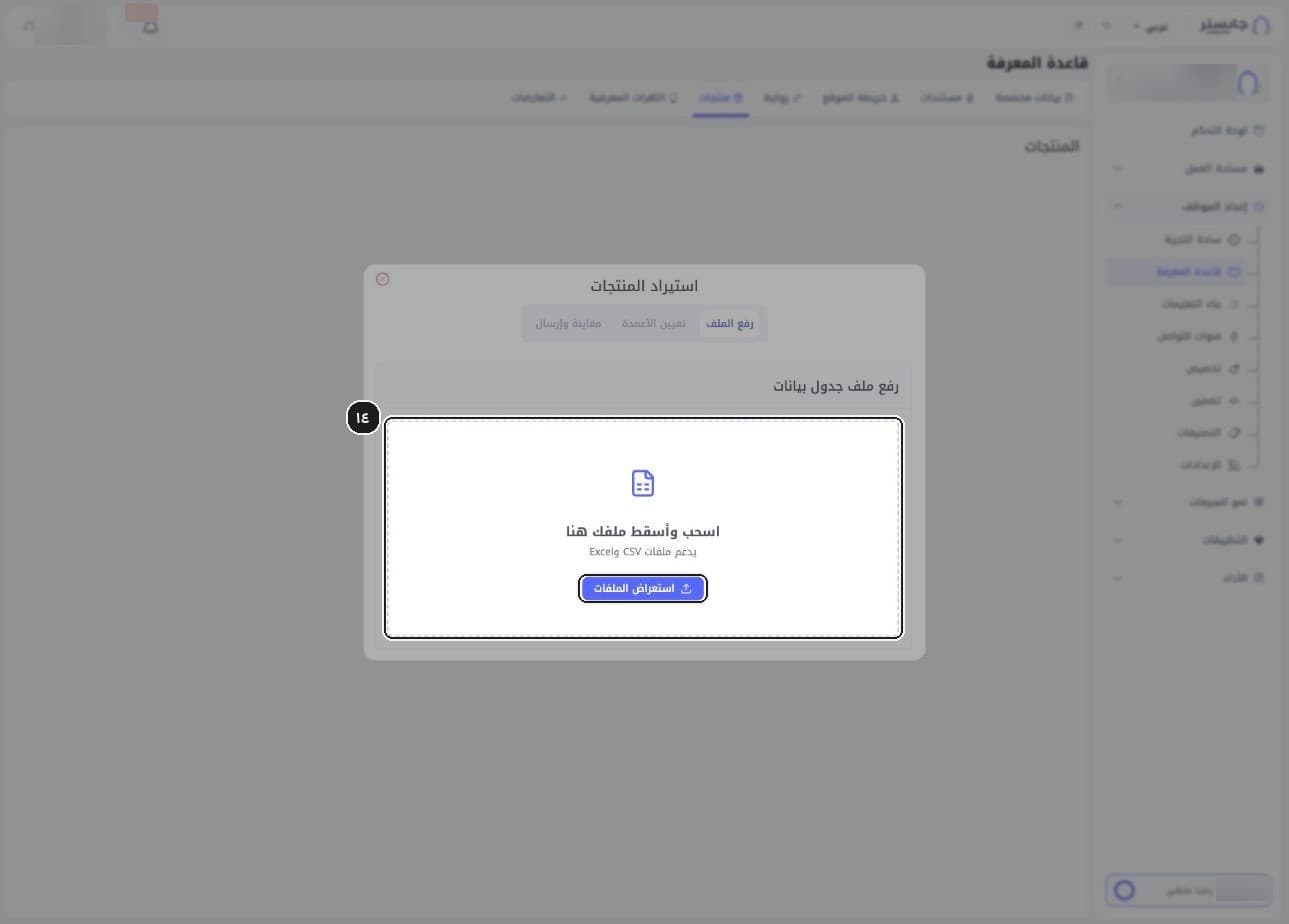
In step 1 of the wizard, drag and drop an Excel or CSV file, or click Browse files (استعراض الملفات).
The wizard has three steps: Upload file (رفع الملف), then Map columns (تعيين الأعمدة), then Preview & submit (معاينة وإرسال).
Open Knowledge Gaps
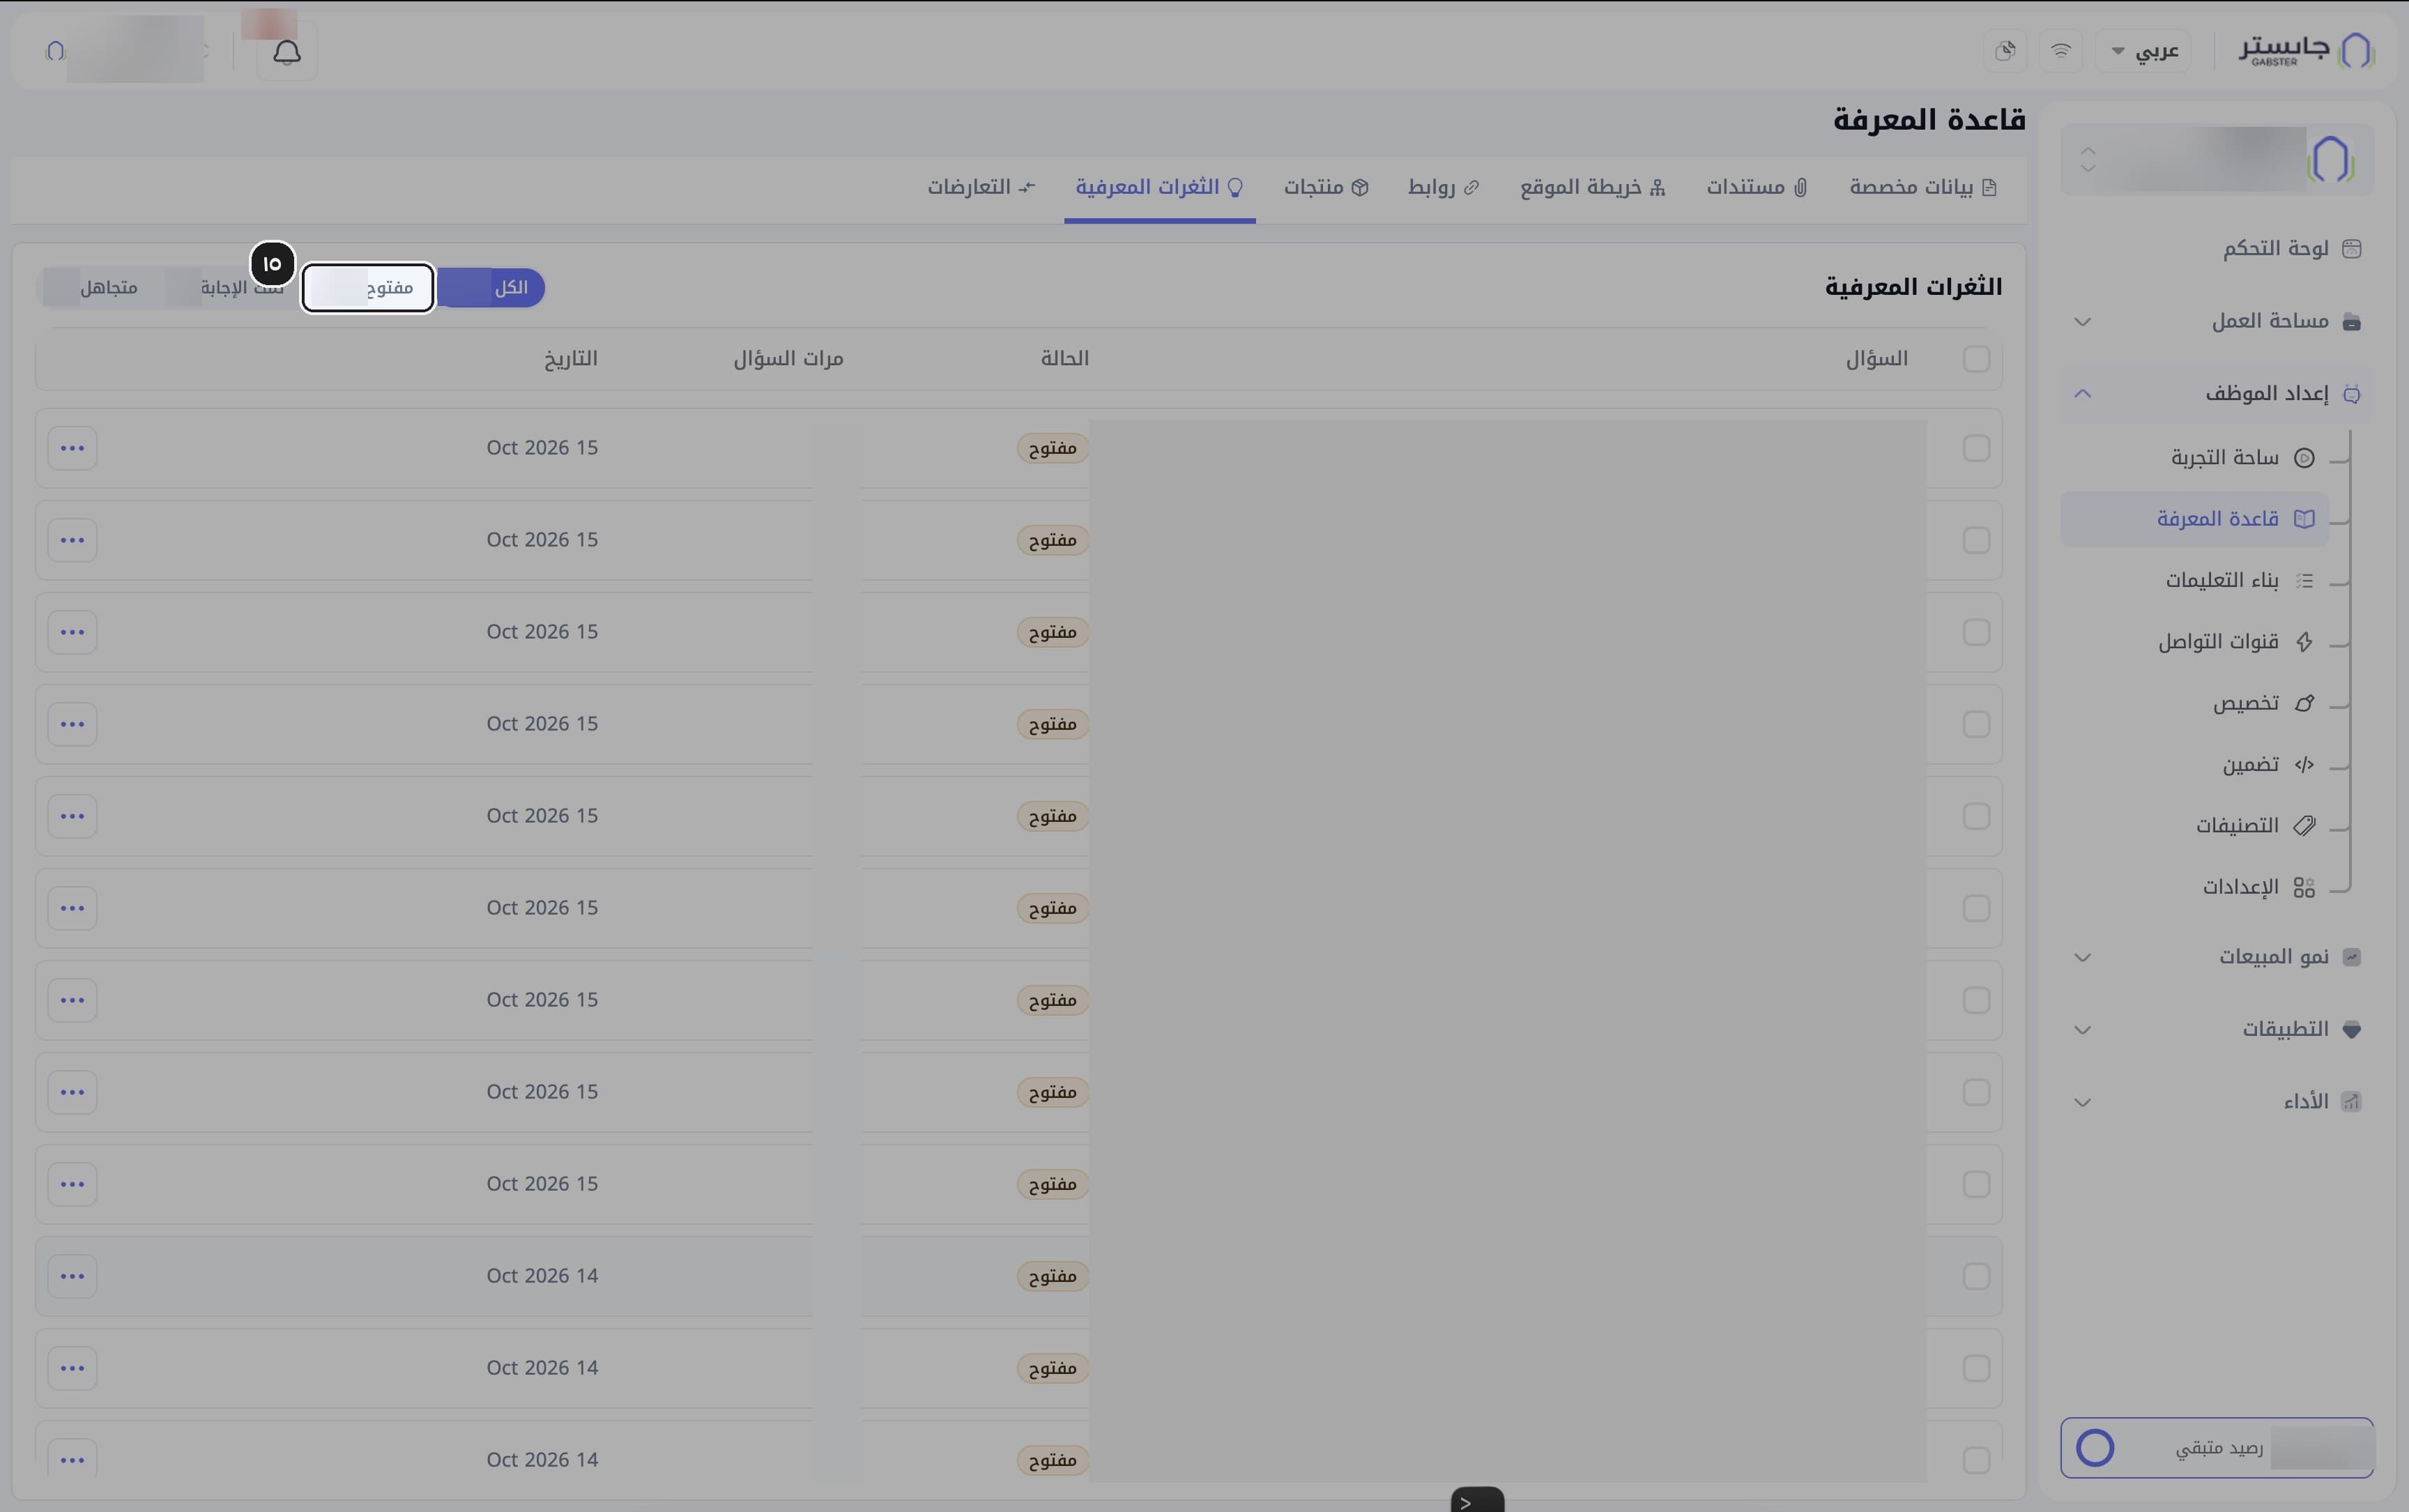
Switch to the Knowledge Gaps (الثغرات المعرفية) tab to see the questions your AI Agent could not answer, and use the filters All (الكل), Open (مفتوح), Answered (تمت الإجابة) and Ignored (متجاهل).
Result: each filter shows how many questions it holds.
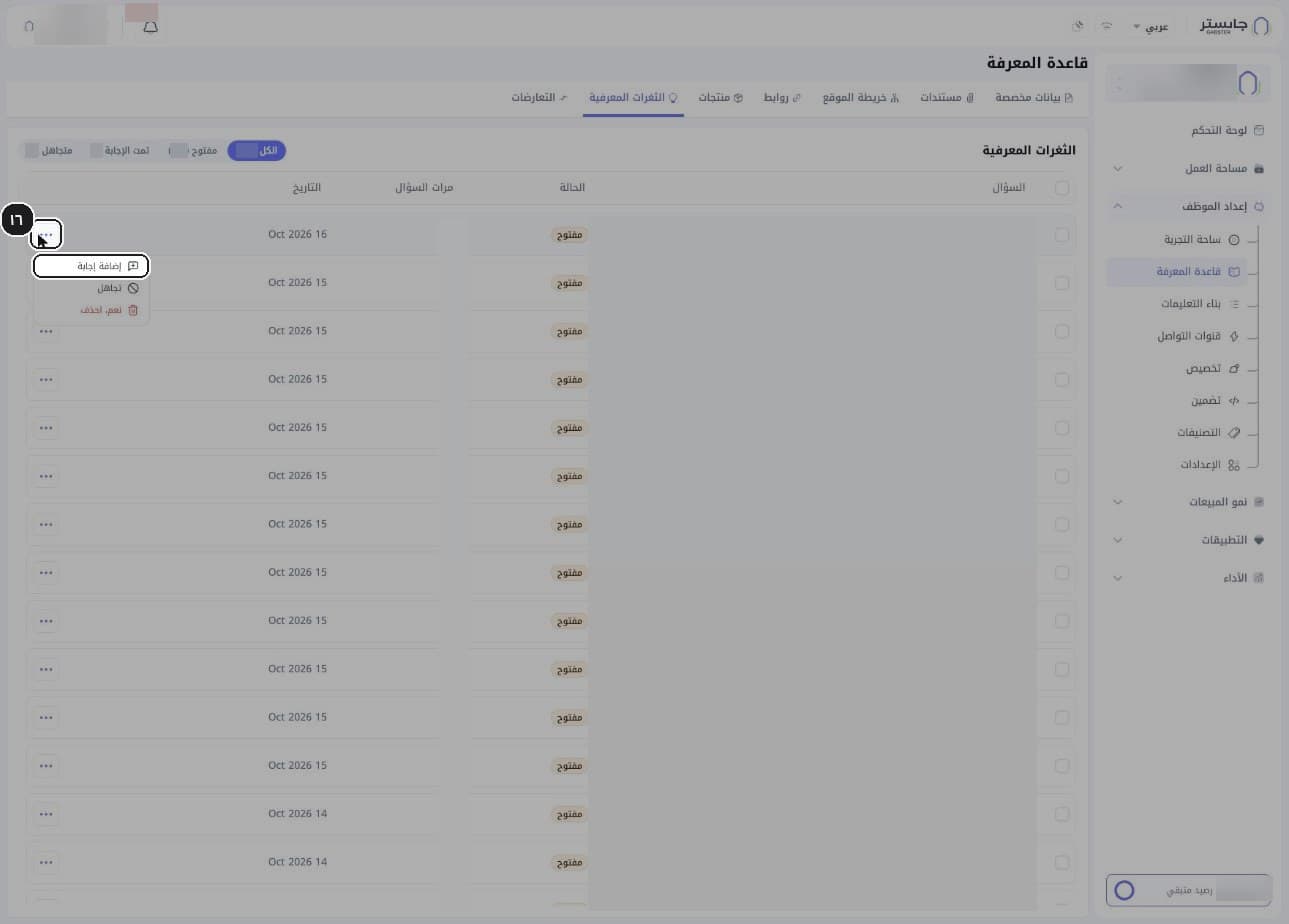
Choose Add answer
Open a question's row menu (⋯) and choose Add answer (إضافة إجابة), or Ignore (تجاهل) if it needs no answer.
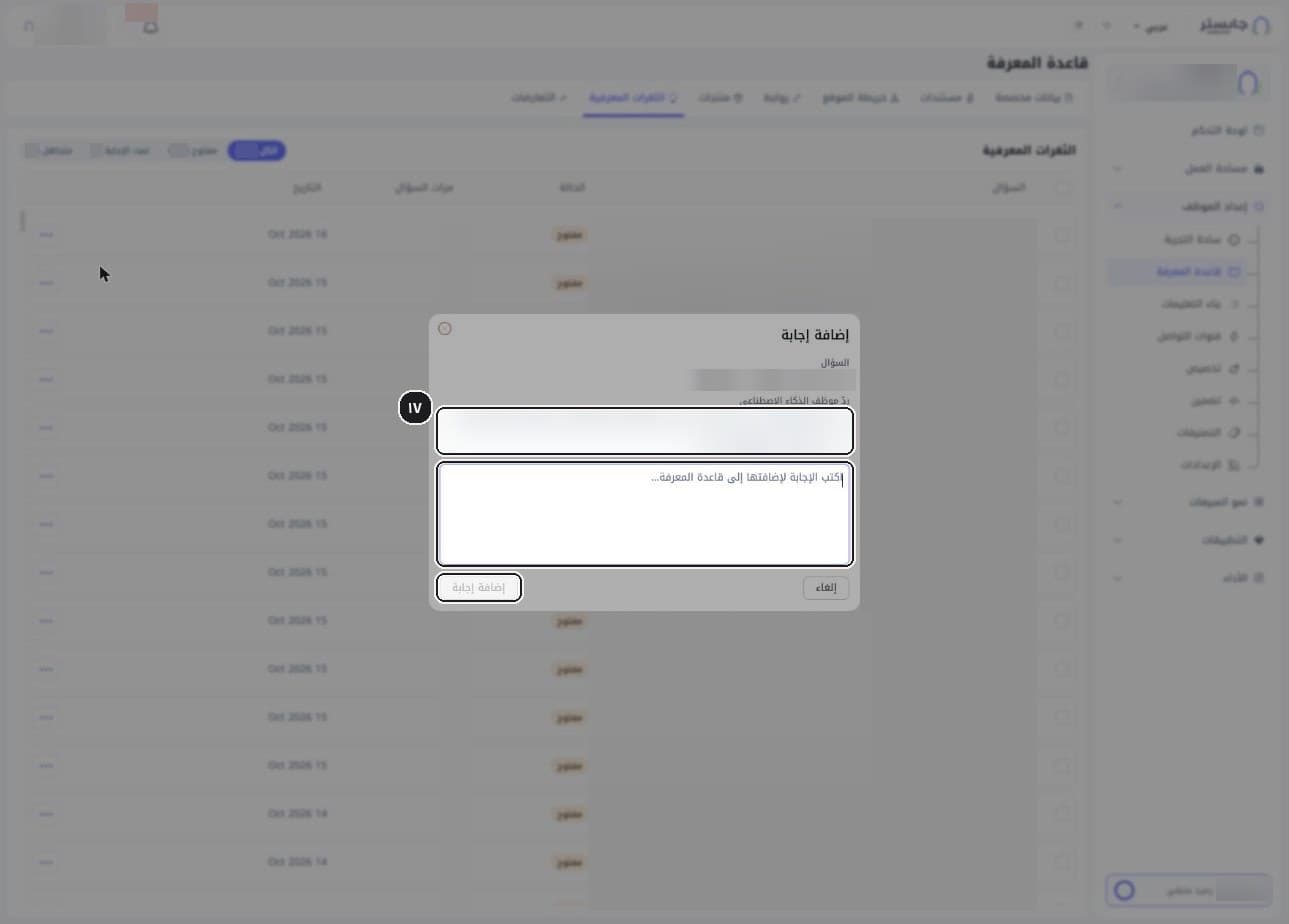
Result: the Add answer dialog opens.
Write the correct answer
Read the customer's question and the reply your AI Agent gave, write the correct answer, and click Add answer (إضافة إجابة).
Result: the button stays disabled while the box is empty.
Your answer goes straight into your AI Agent's knowledge, and the question moves to Answered (تمت الإجابة).
This is the quickest way to fix a wrong answer: you see the question and the reply side by side and add the missing information right away.
Check for conflicts
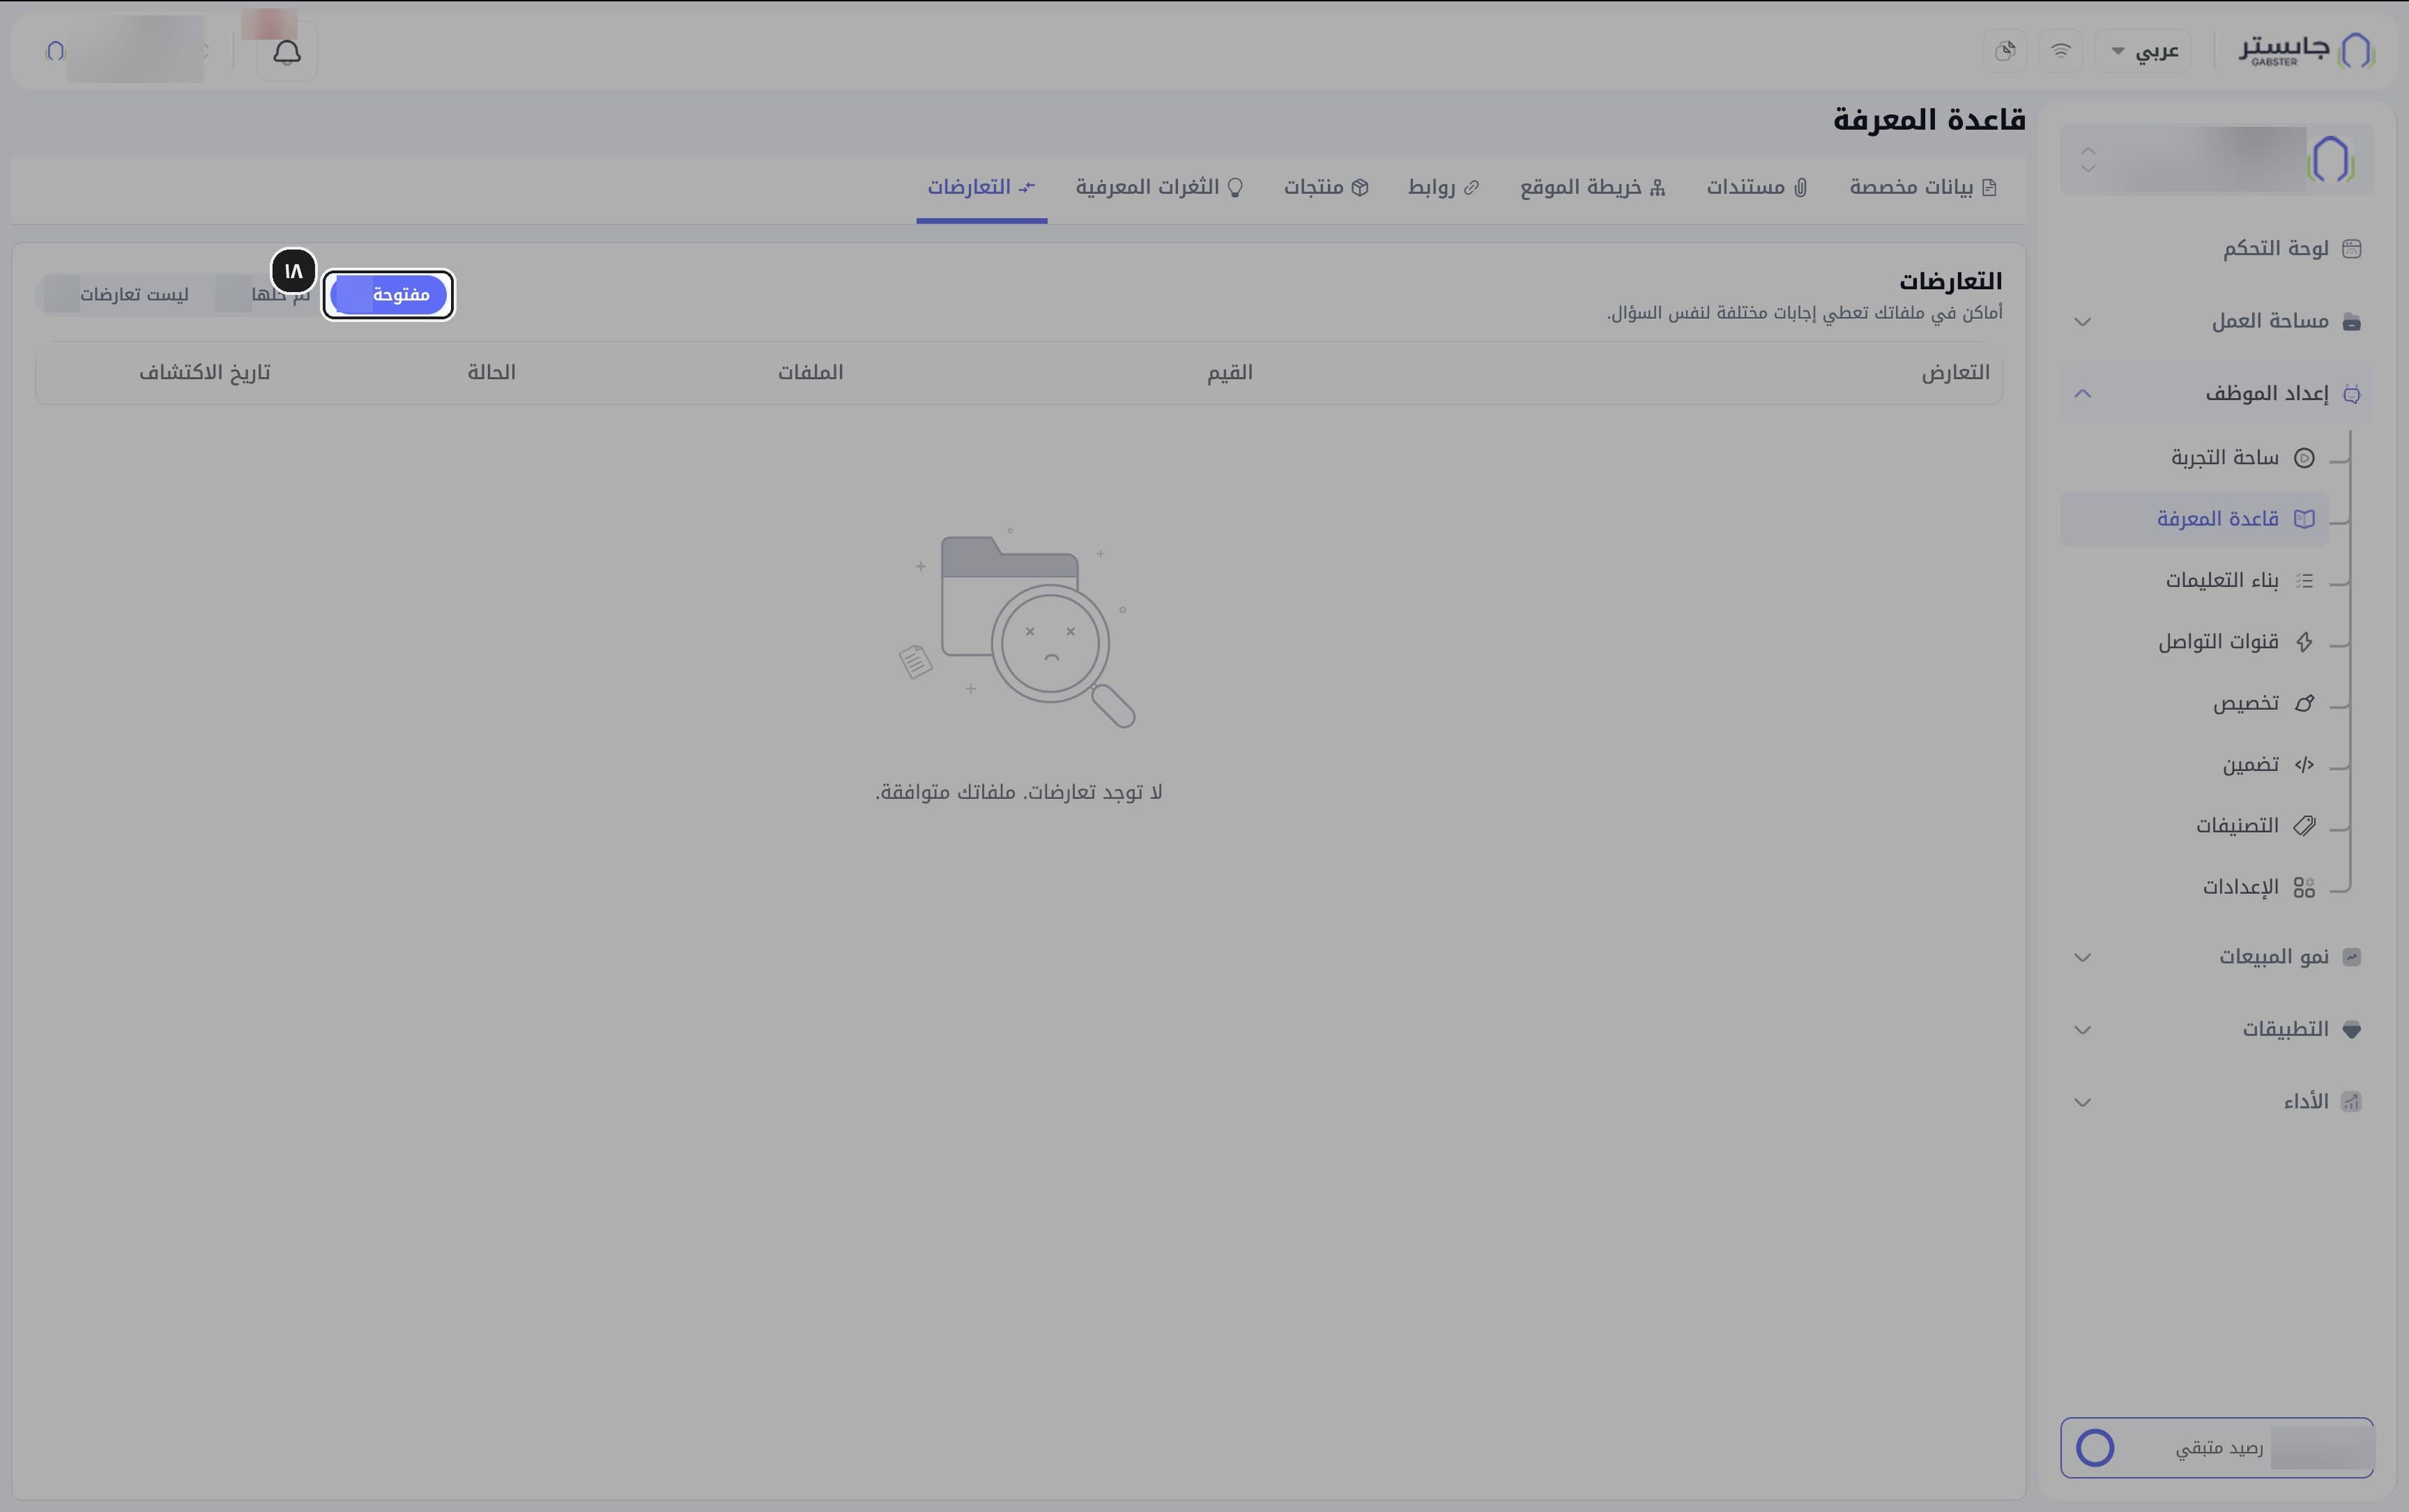
Switch to the Conflicts (التعارضات) tab to make sure your sources don't contradict each other.
The tab lists places in your files that give different answers to the same question, with the filters Open (مفتوحة), Resolved (تم حلها) and Not conflicts (ليست تعارضات).
Result: when there are none, the message "No conflicts. Your files are consistent." (لا توجد تعارضات. ملفاتك متوافقة.) appears.
B. Instruction Builder
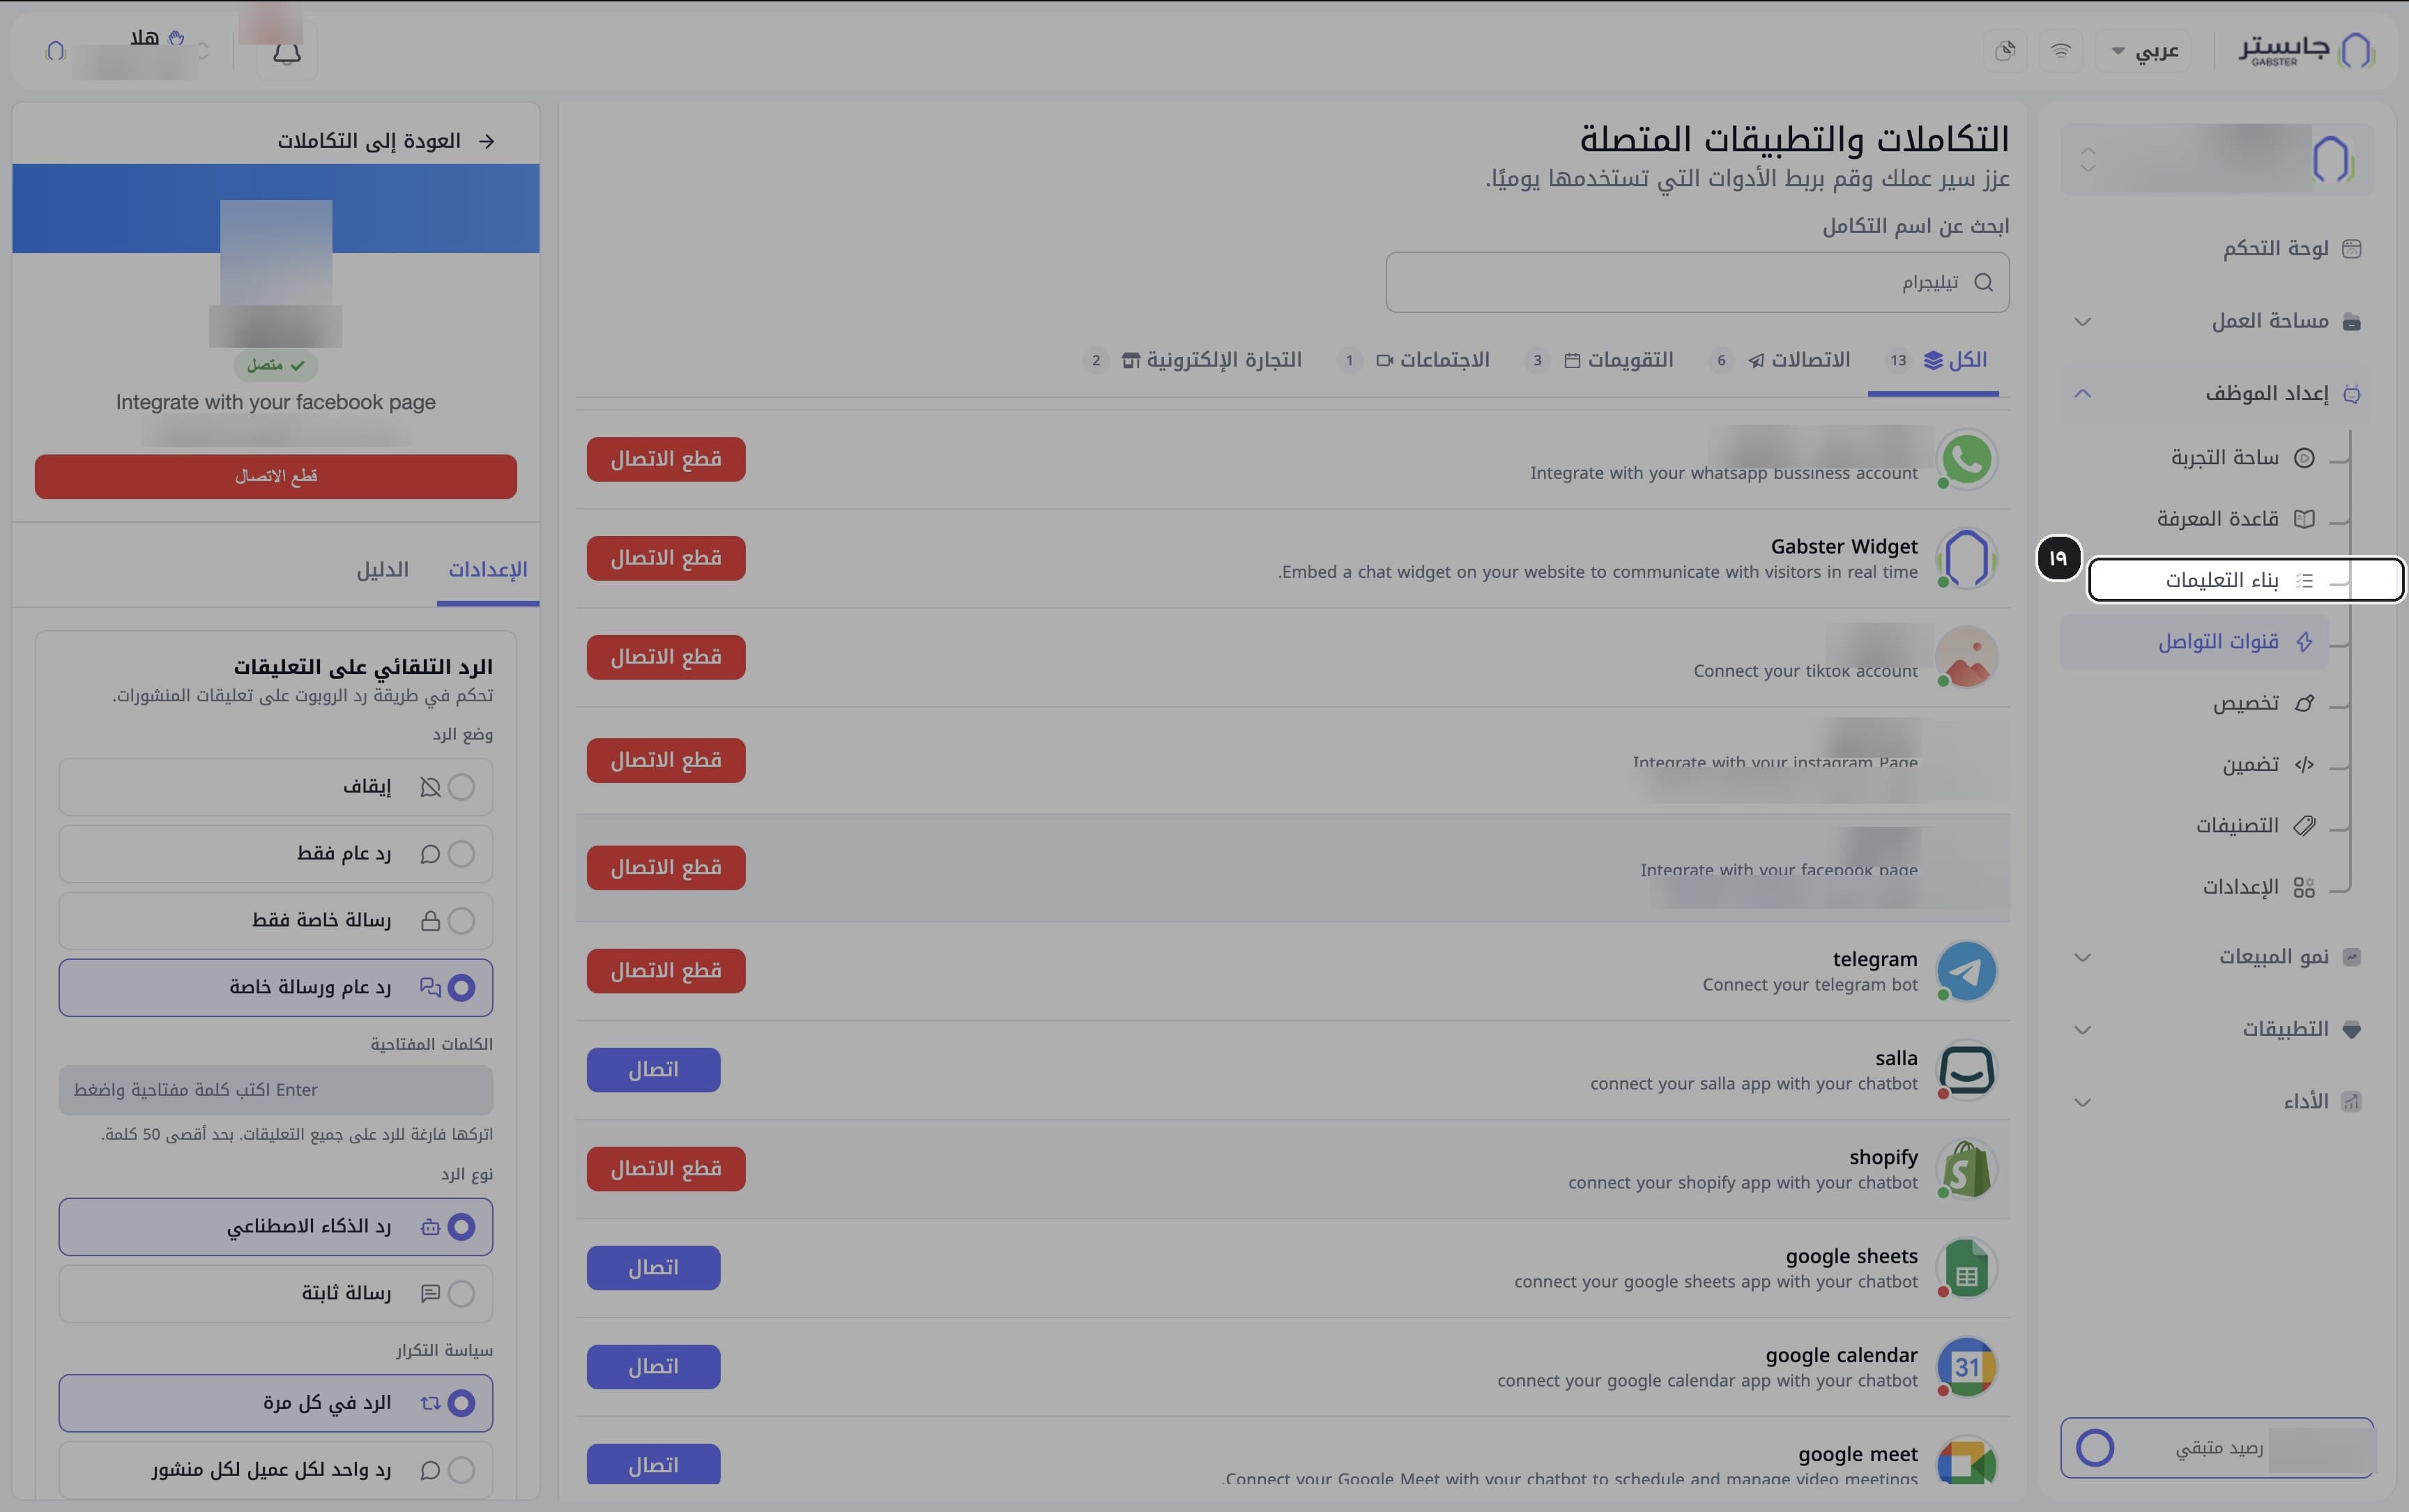
Open the Instruction Builder
In the AI Agent Setup group, choose Instruction Builder (بناء التعليمات).
Result: the Instruction Builder opens (its page title reads بناء تعليمات الوكيل).
Write a rule
Type a rule you want your AI Agent to follow, in plain language.
Result: the text appears in the input box. Below it, the Quick options (خيارات سريعة) row holds three dropdowns: Fast (سريع), Numbered points (نقاط مرقّمة) and the instruction language.
Fast sets the writing mode (a quick draft, or High quality (جودة عالية), where the card arrives already scored), Numbered points sets the text format (bullet rules, numbered steps, paragraph, if-then, or all four), and the language list sets the language of the generated cards.
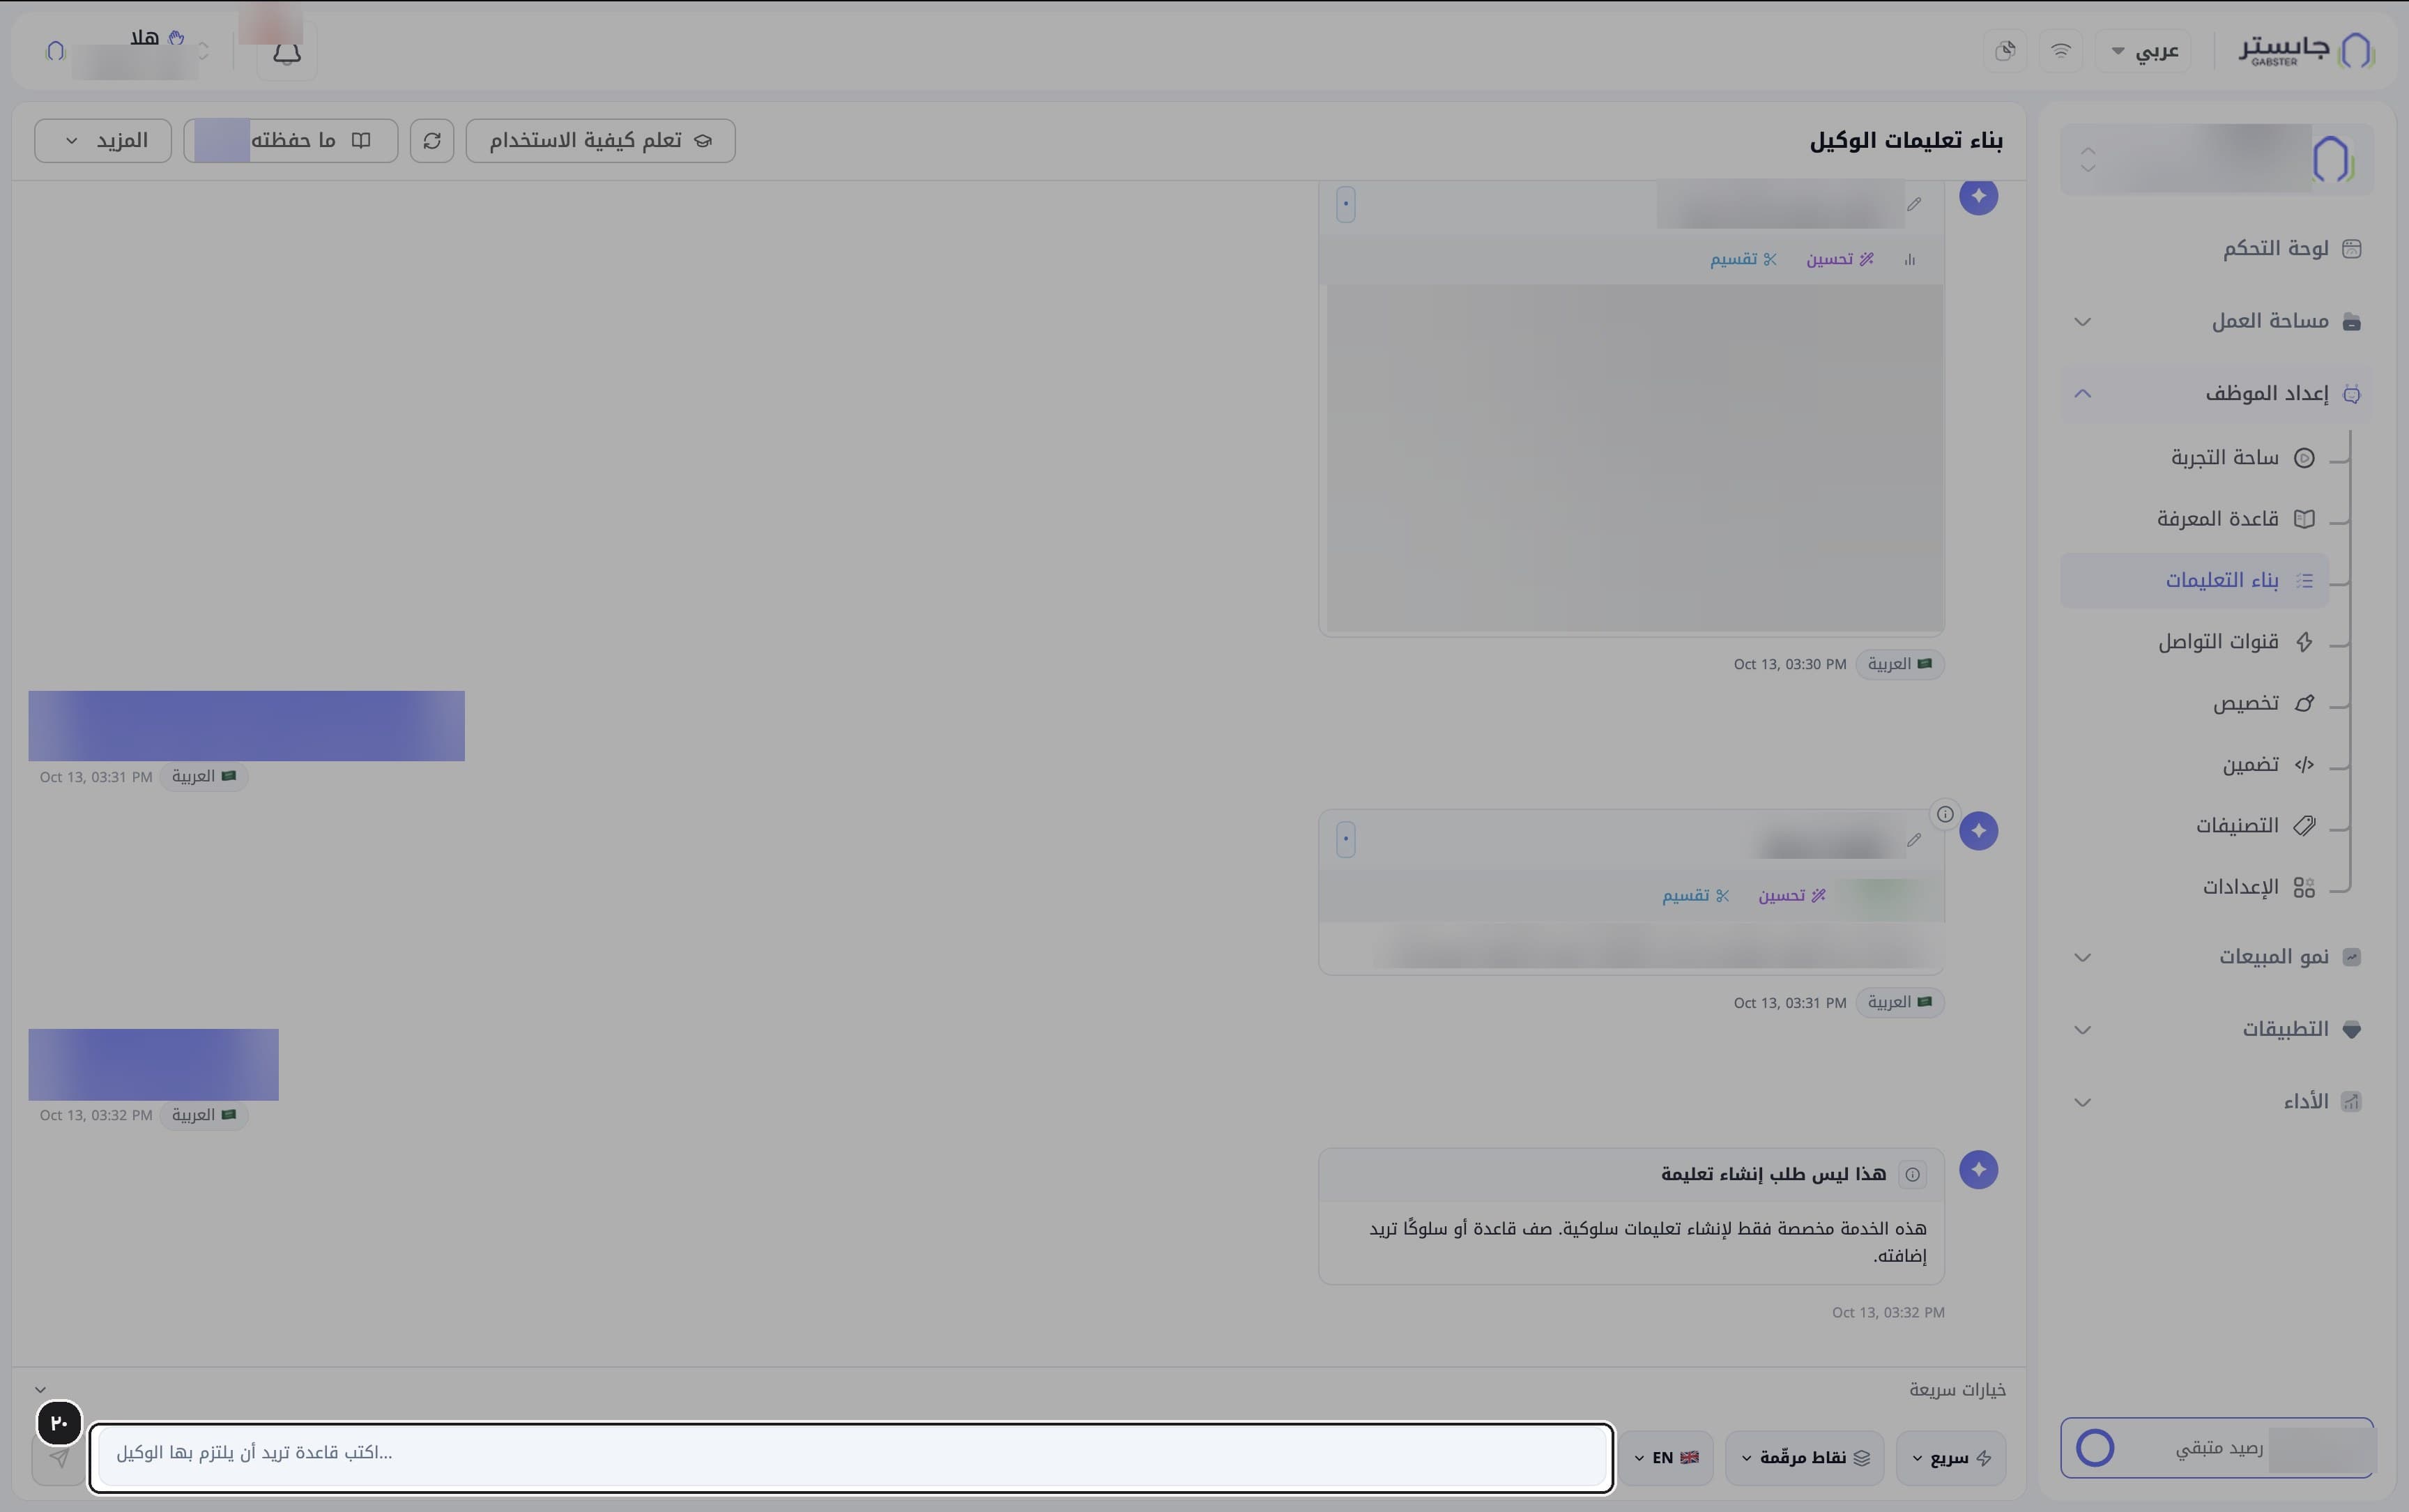
Send the rule
Click the send button.
Review the card
Review the instruction card: its title, text and score badge (for example PASS with a score).
The score comes from an AI review of the card, from 0 to 10: PASS is 7 or above, REVIEW 5 to 6.9 and FAIL below 5. The review lists issues with suggested fixes.
If what you typed is not a behavior rule, a card titled "This is not an instruction request" (هذا ليس طلب إنشاء تعليمة) appears and asks you to describe a rule or behavior you want to add.
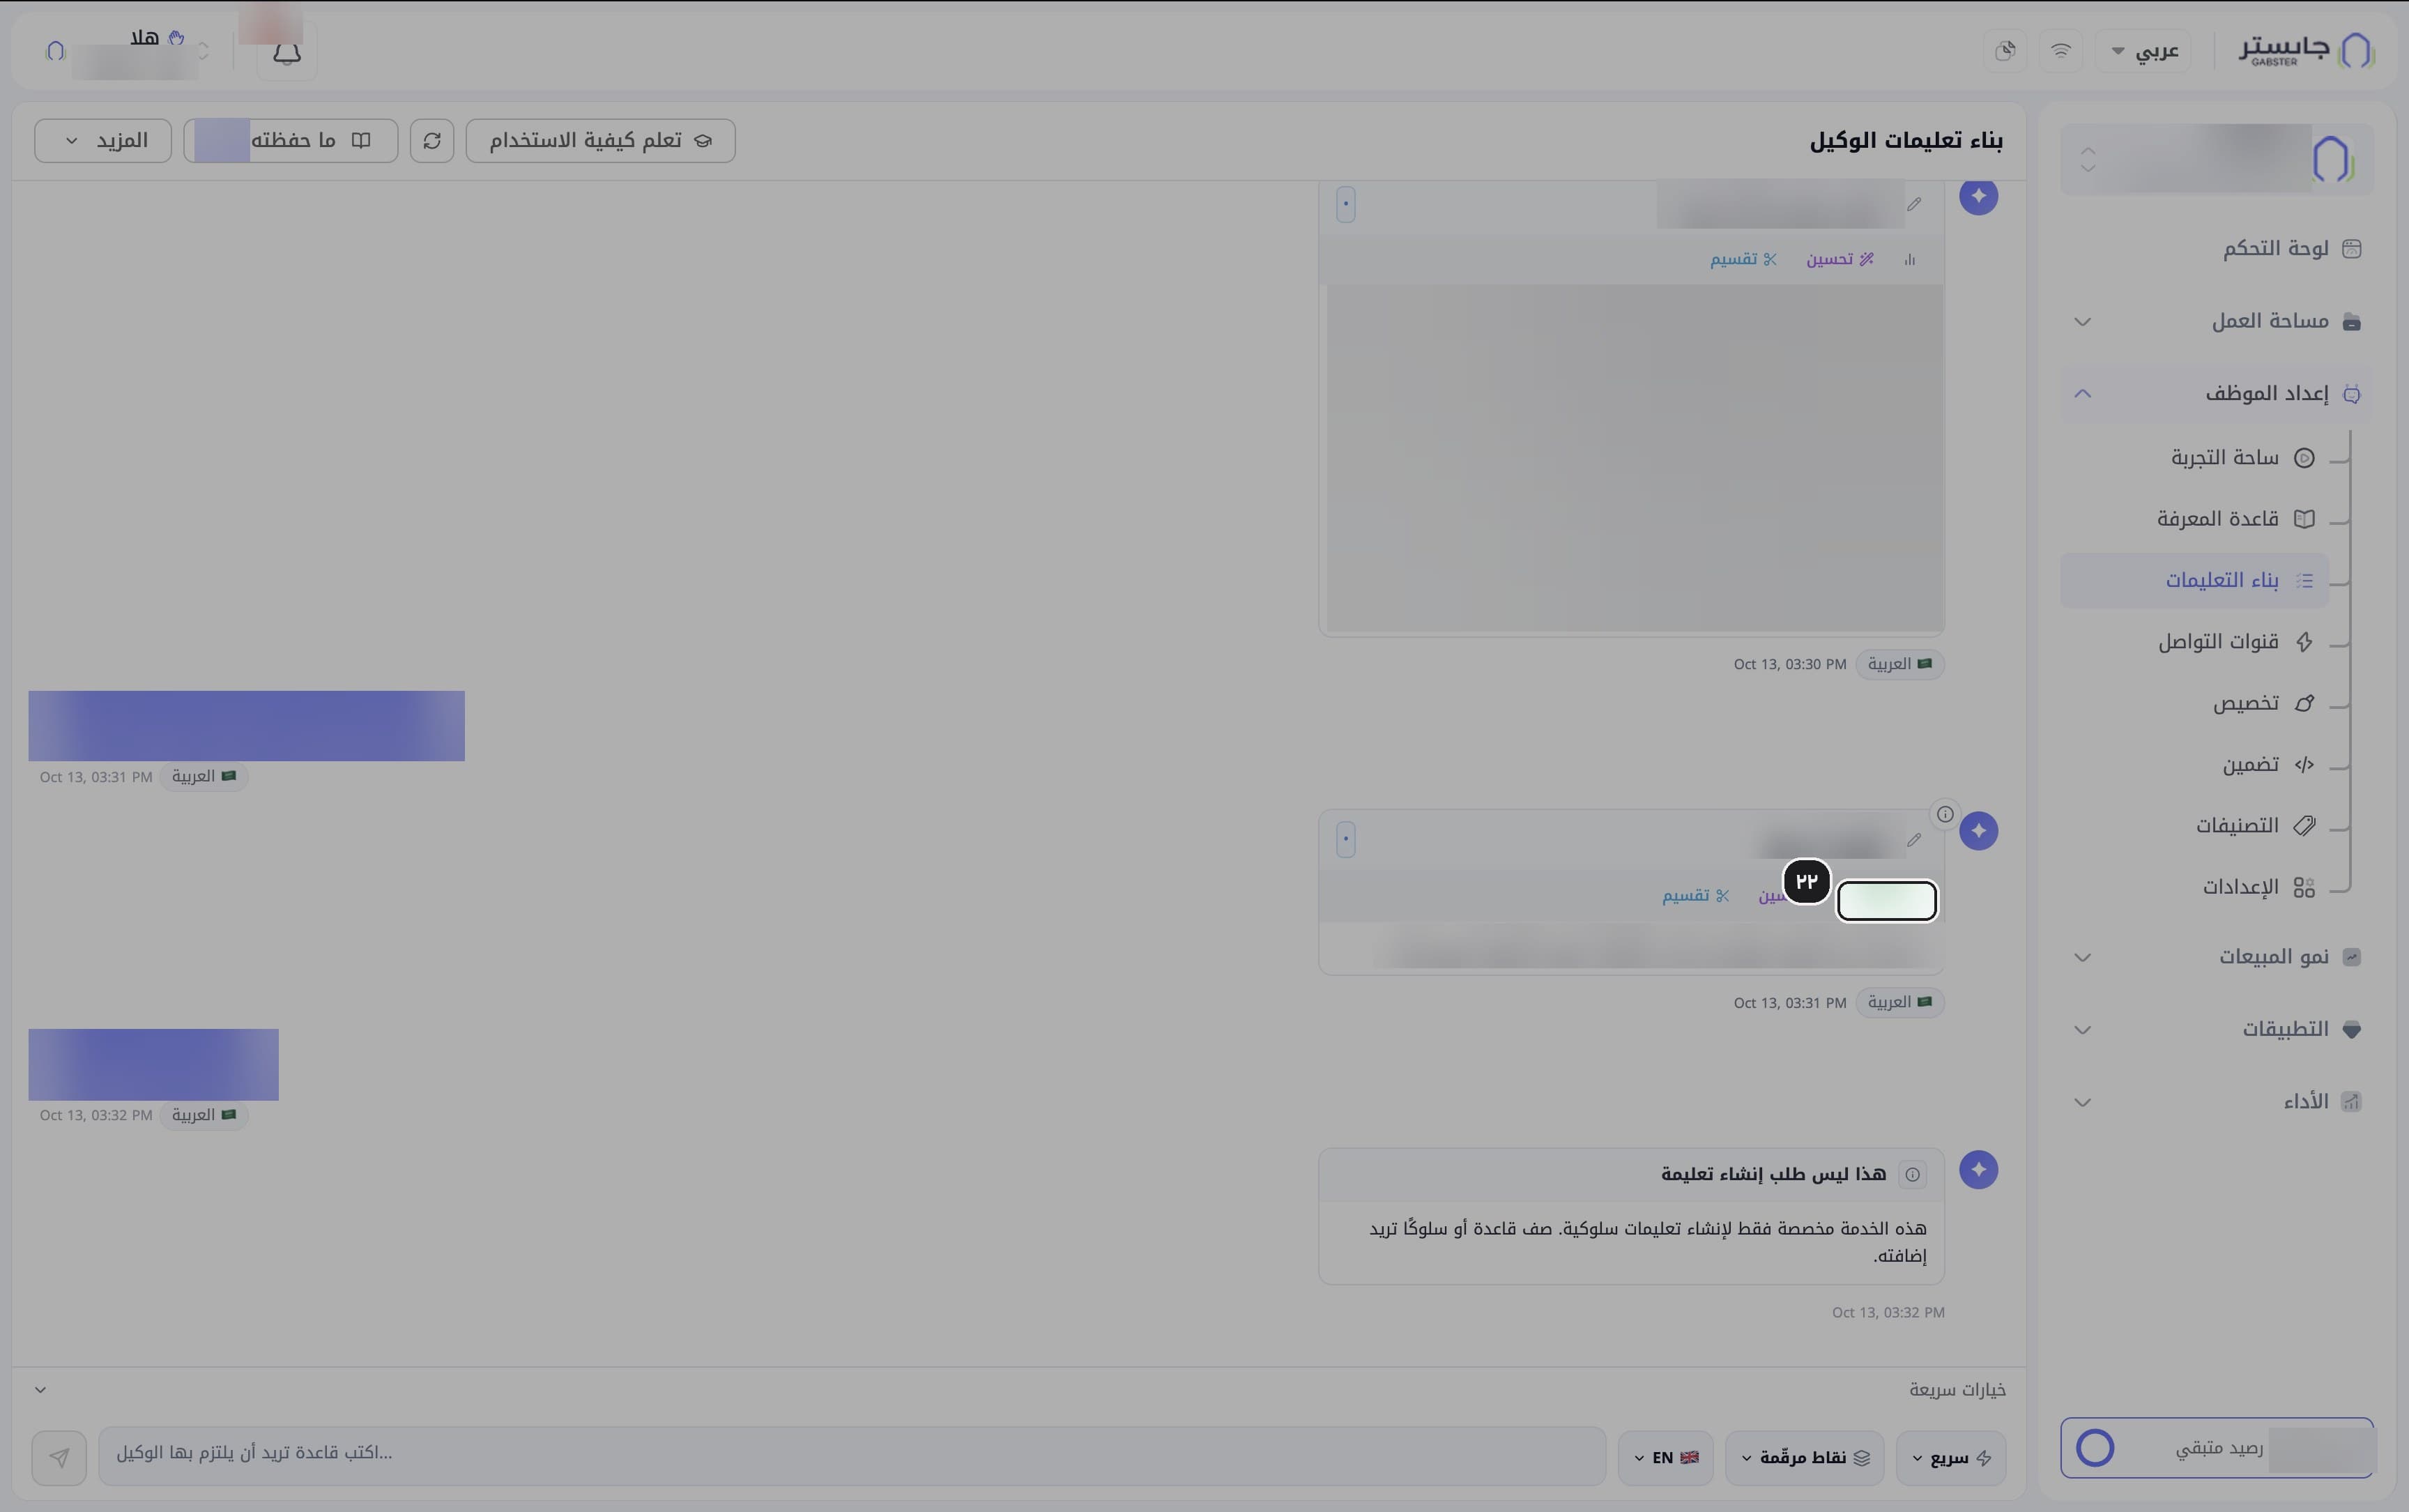
Improve or split the instruction
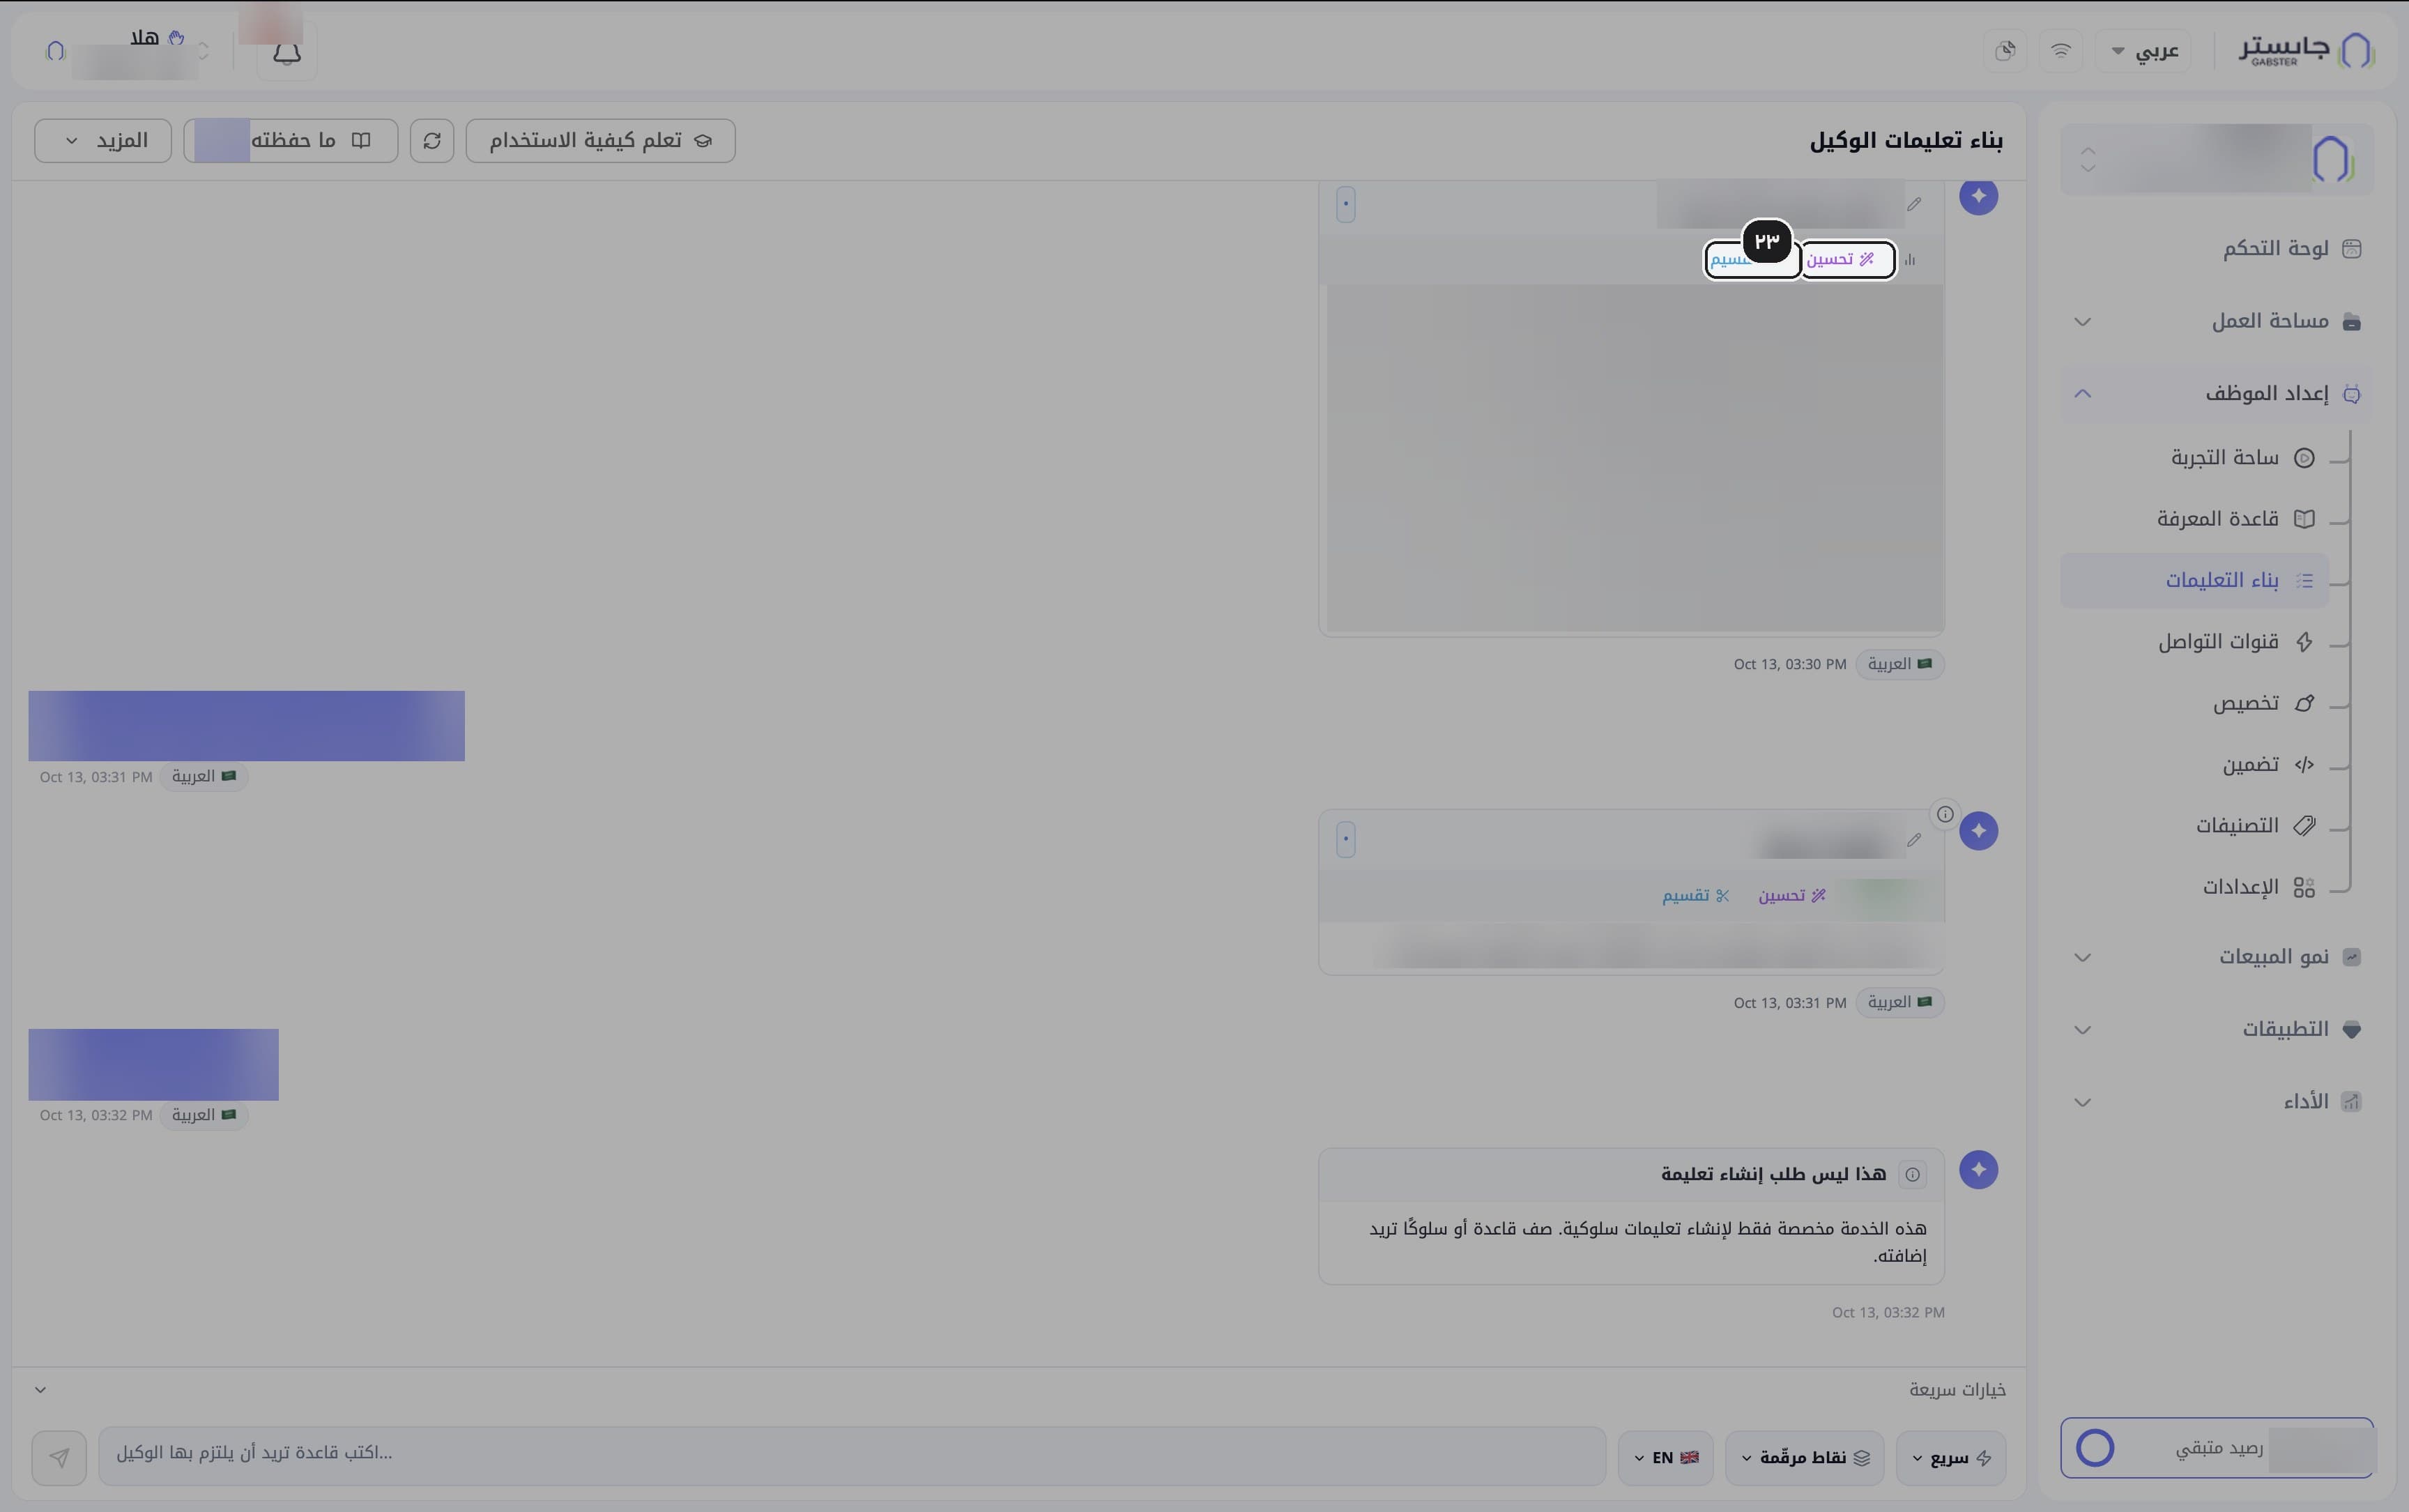
If needed, use Improve (تحسين) or Split (تقسيم) on the card.
Improve rewrites the card the way you ask; select part of the text to change only that part. Split proposes several smaller cards, one per topic, and warns about anything it could not place.
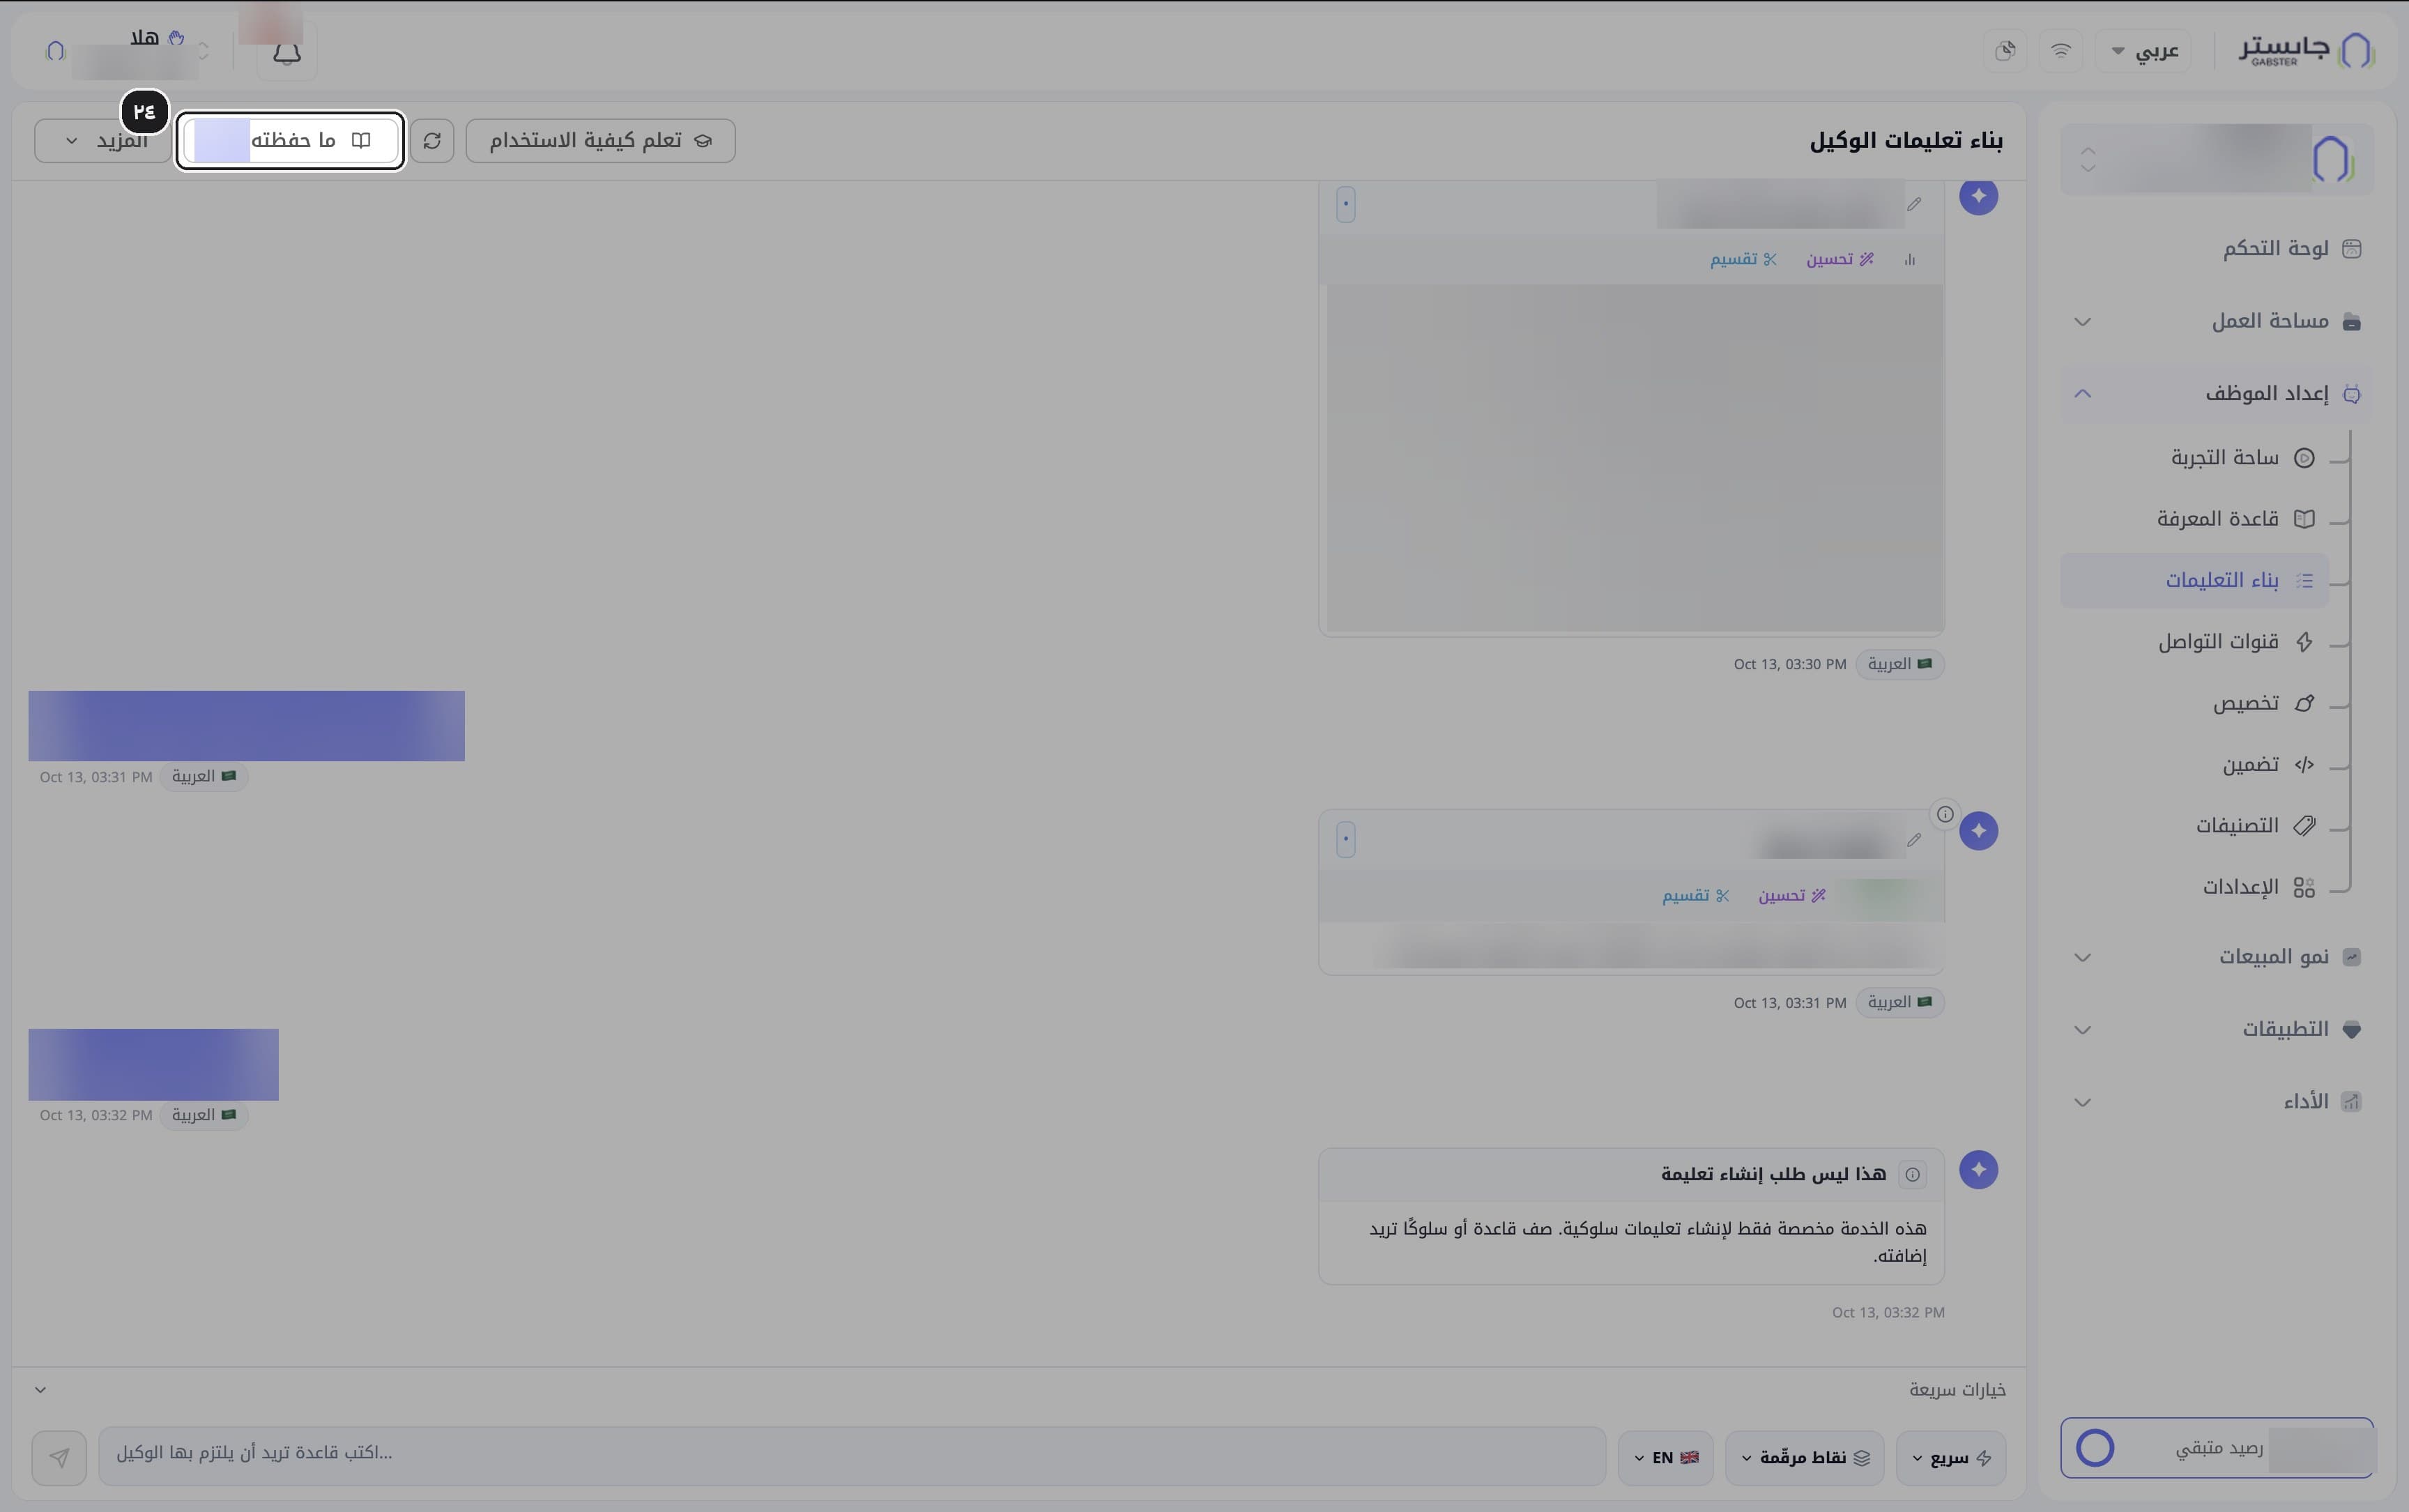
Open your saved instructions
Click Saved (ما حفظته); the button shows how many instructions you have saved.
It lists everything active on your AI Agent. A card is saved only when you click Add (إضافة) on it, and saving updates your live AI Agent straight away.
C. Playground: instructions and testing
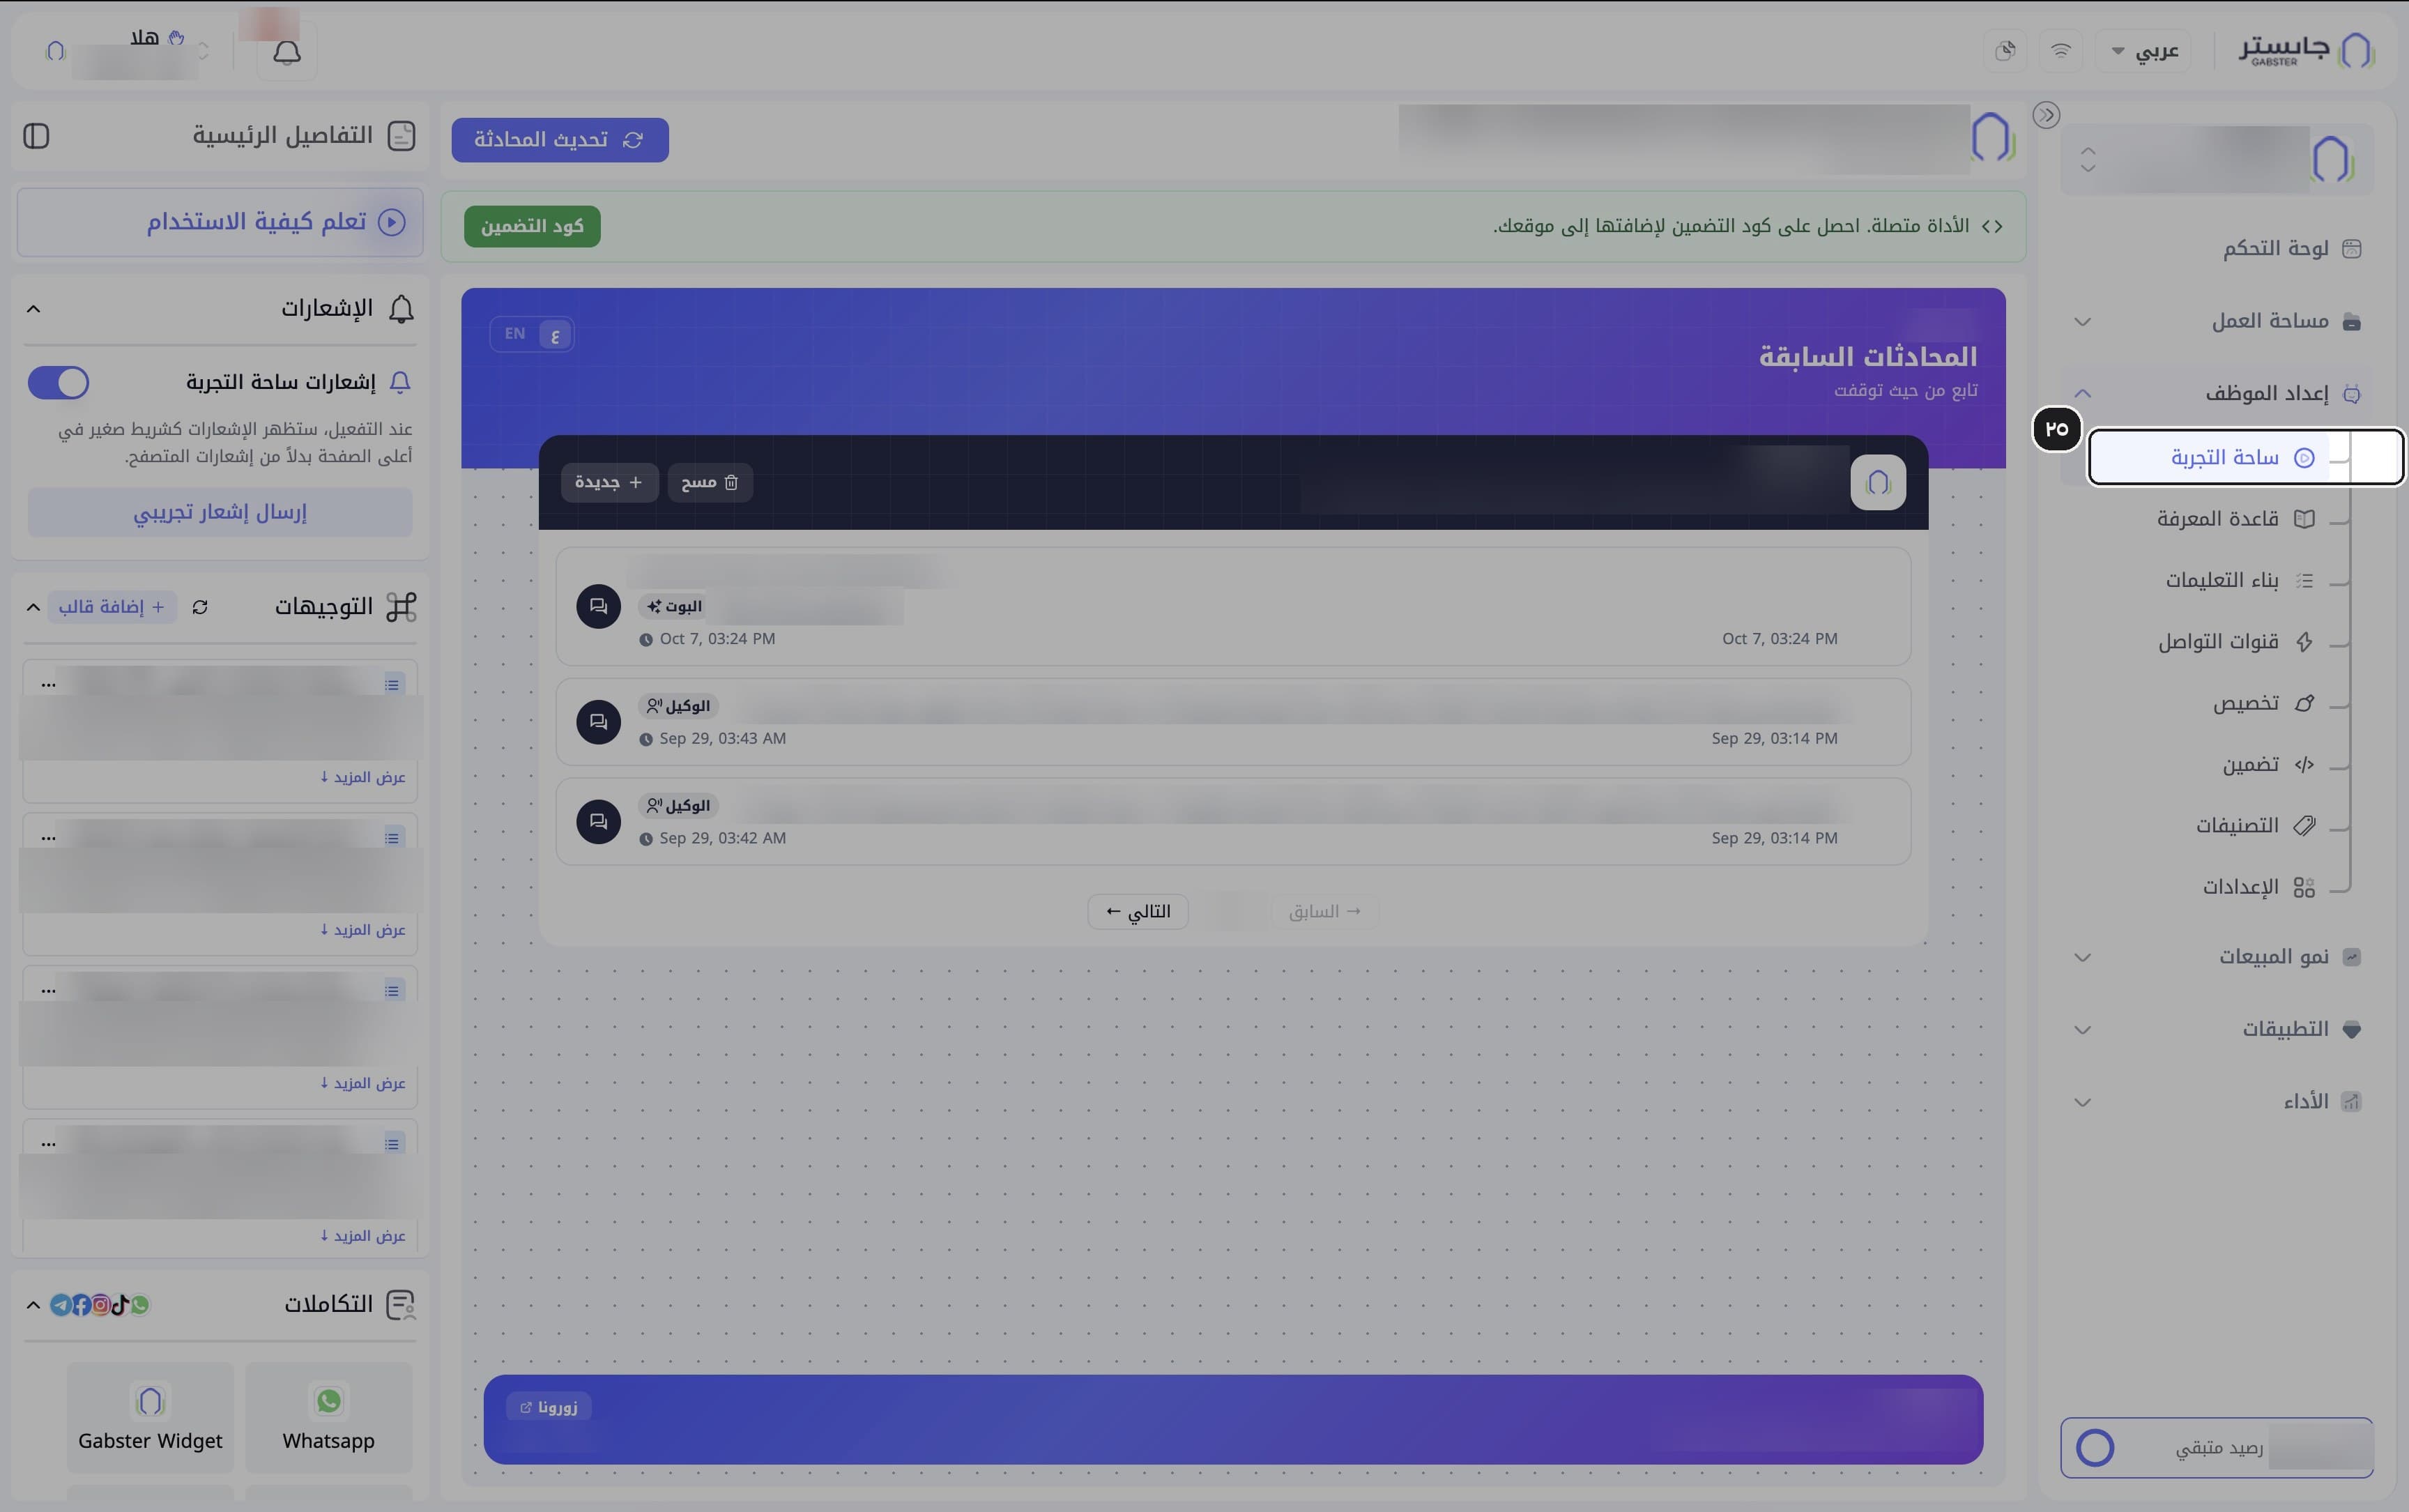
Open the Playground
In the AI Agent Setup group, choose Playground (ساحة التجربة).
Result: a live preview of the chat widget appears in the center, with the Main details (التفاصيل الرئيسية) panel on the left.
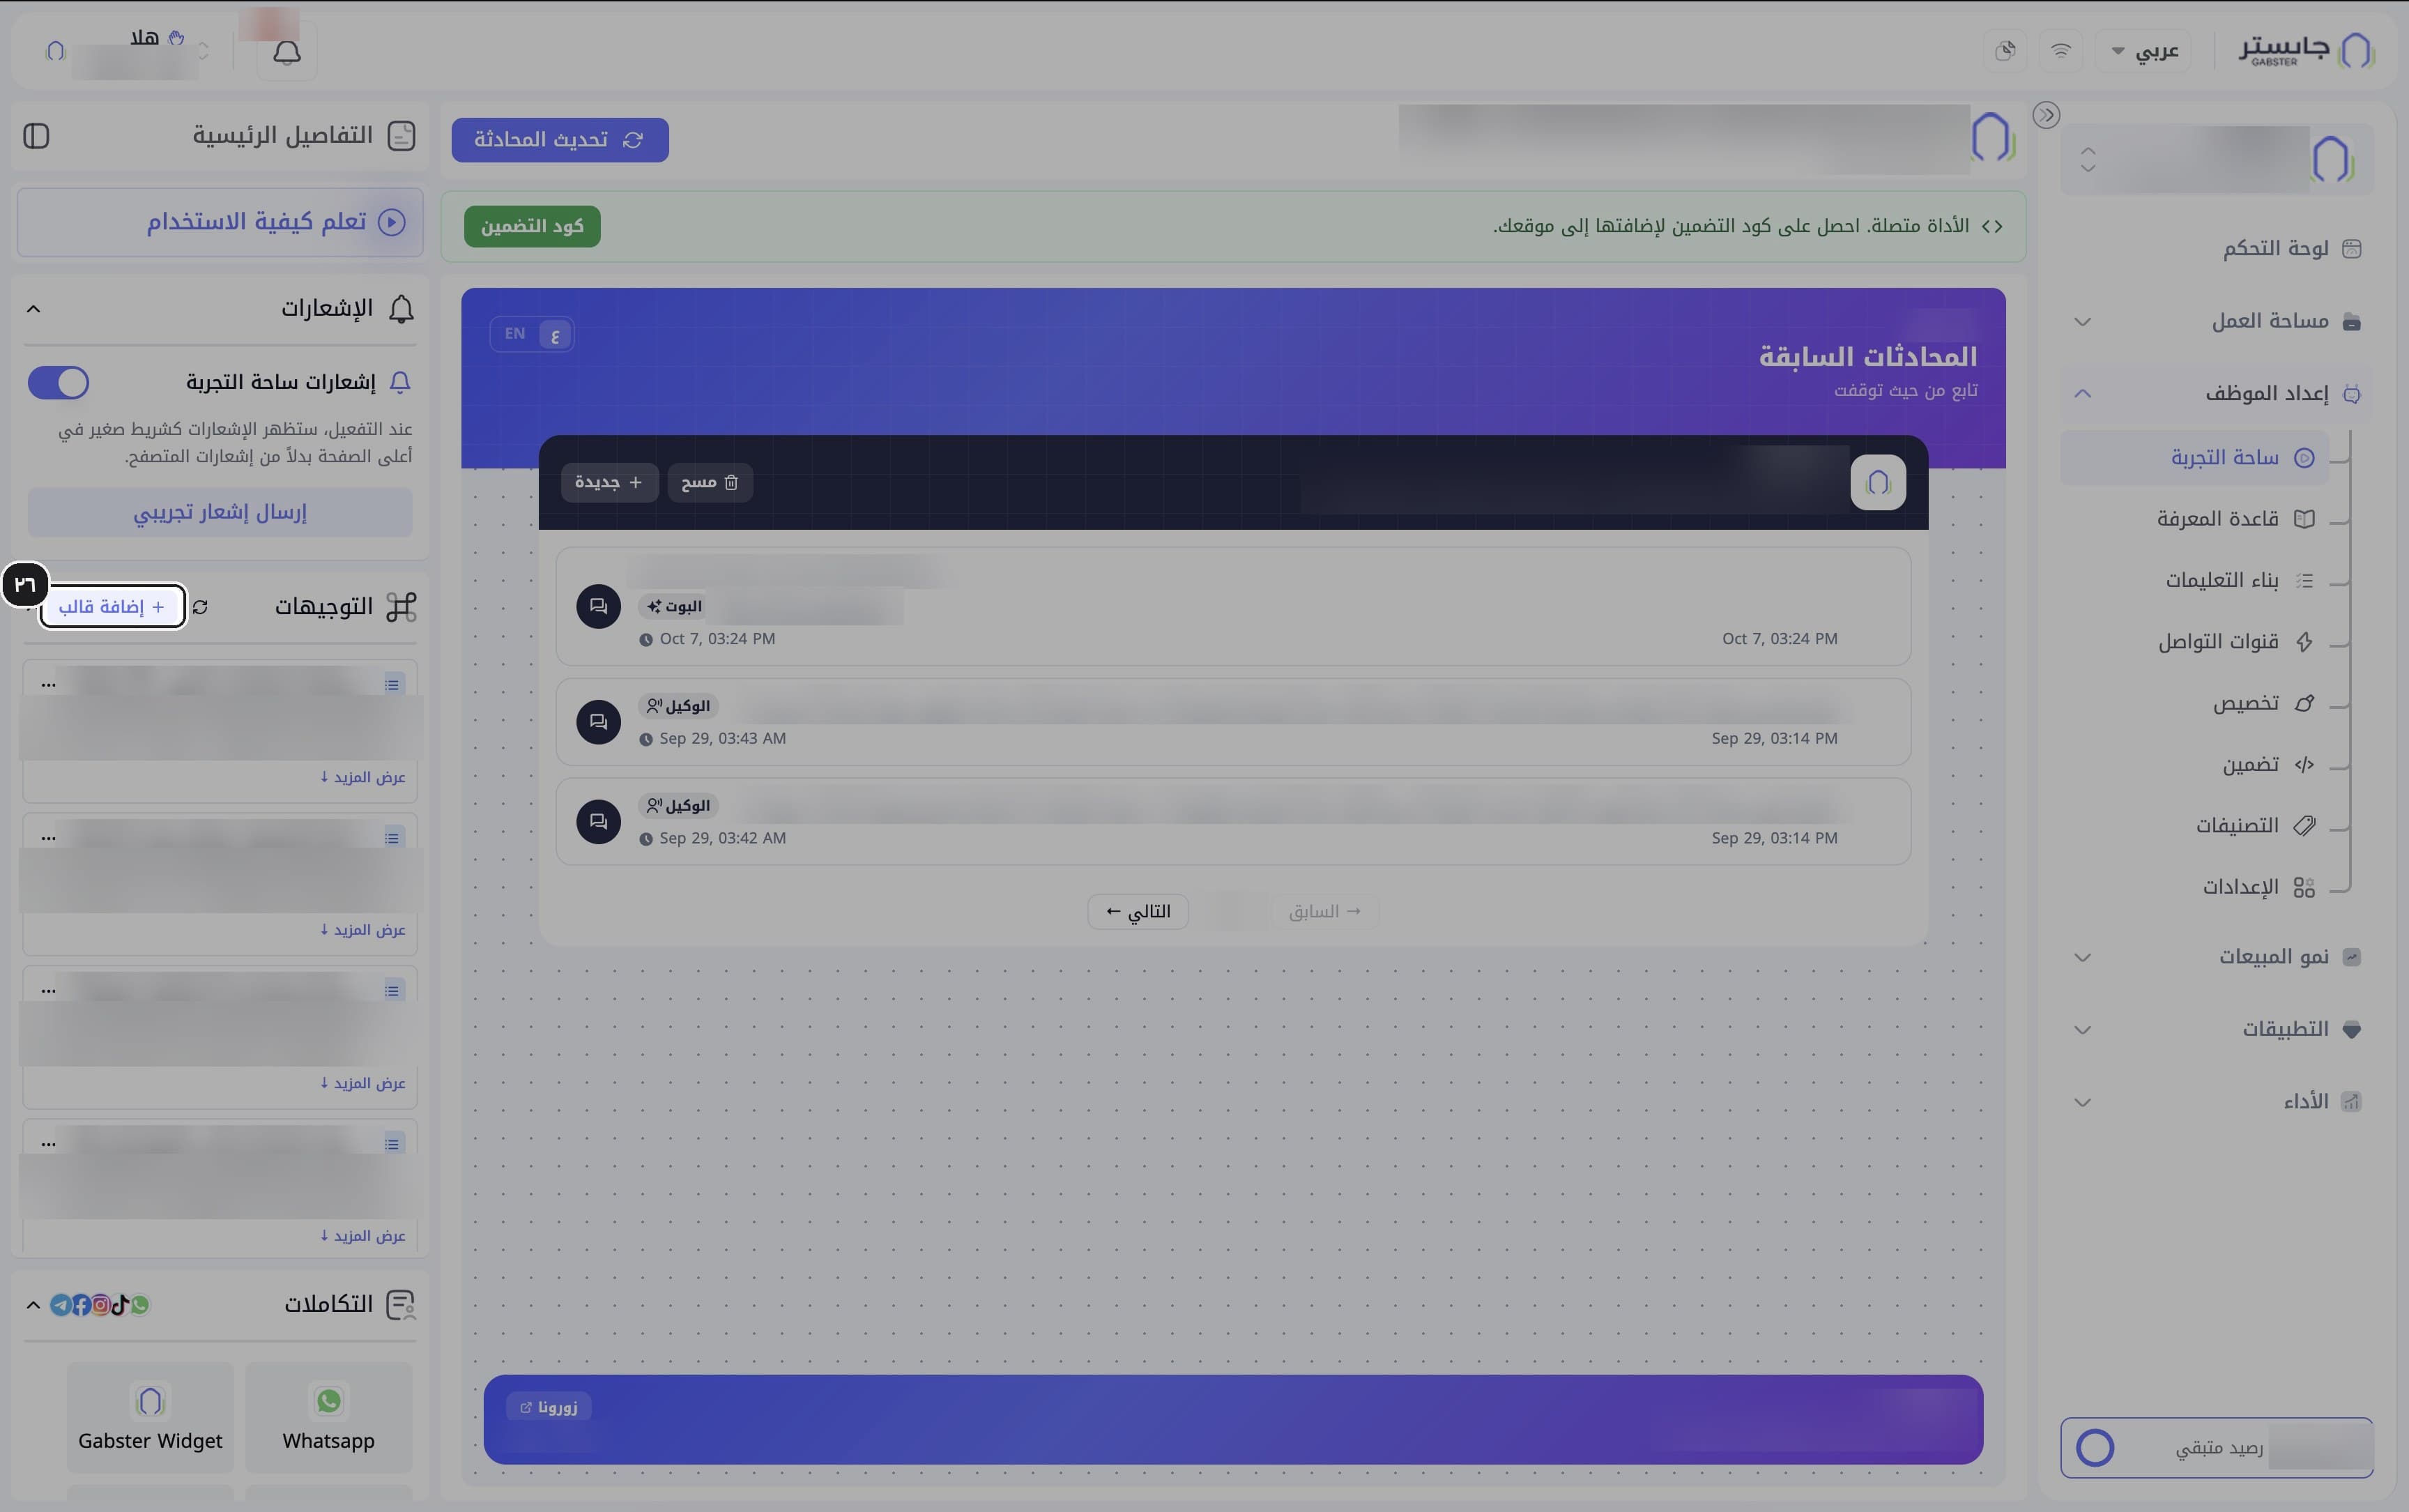
Add an Instruction template
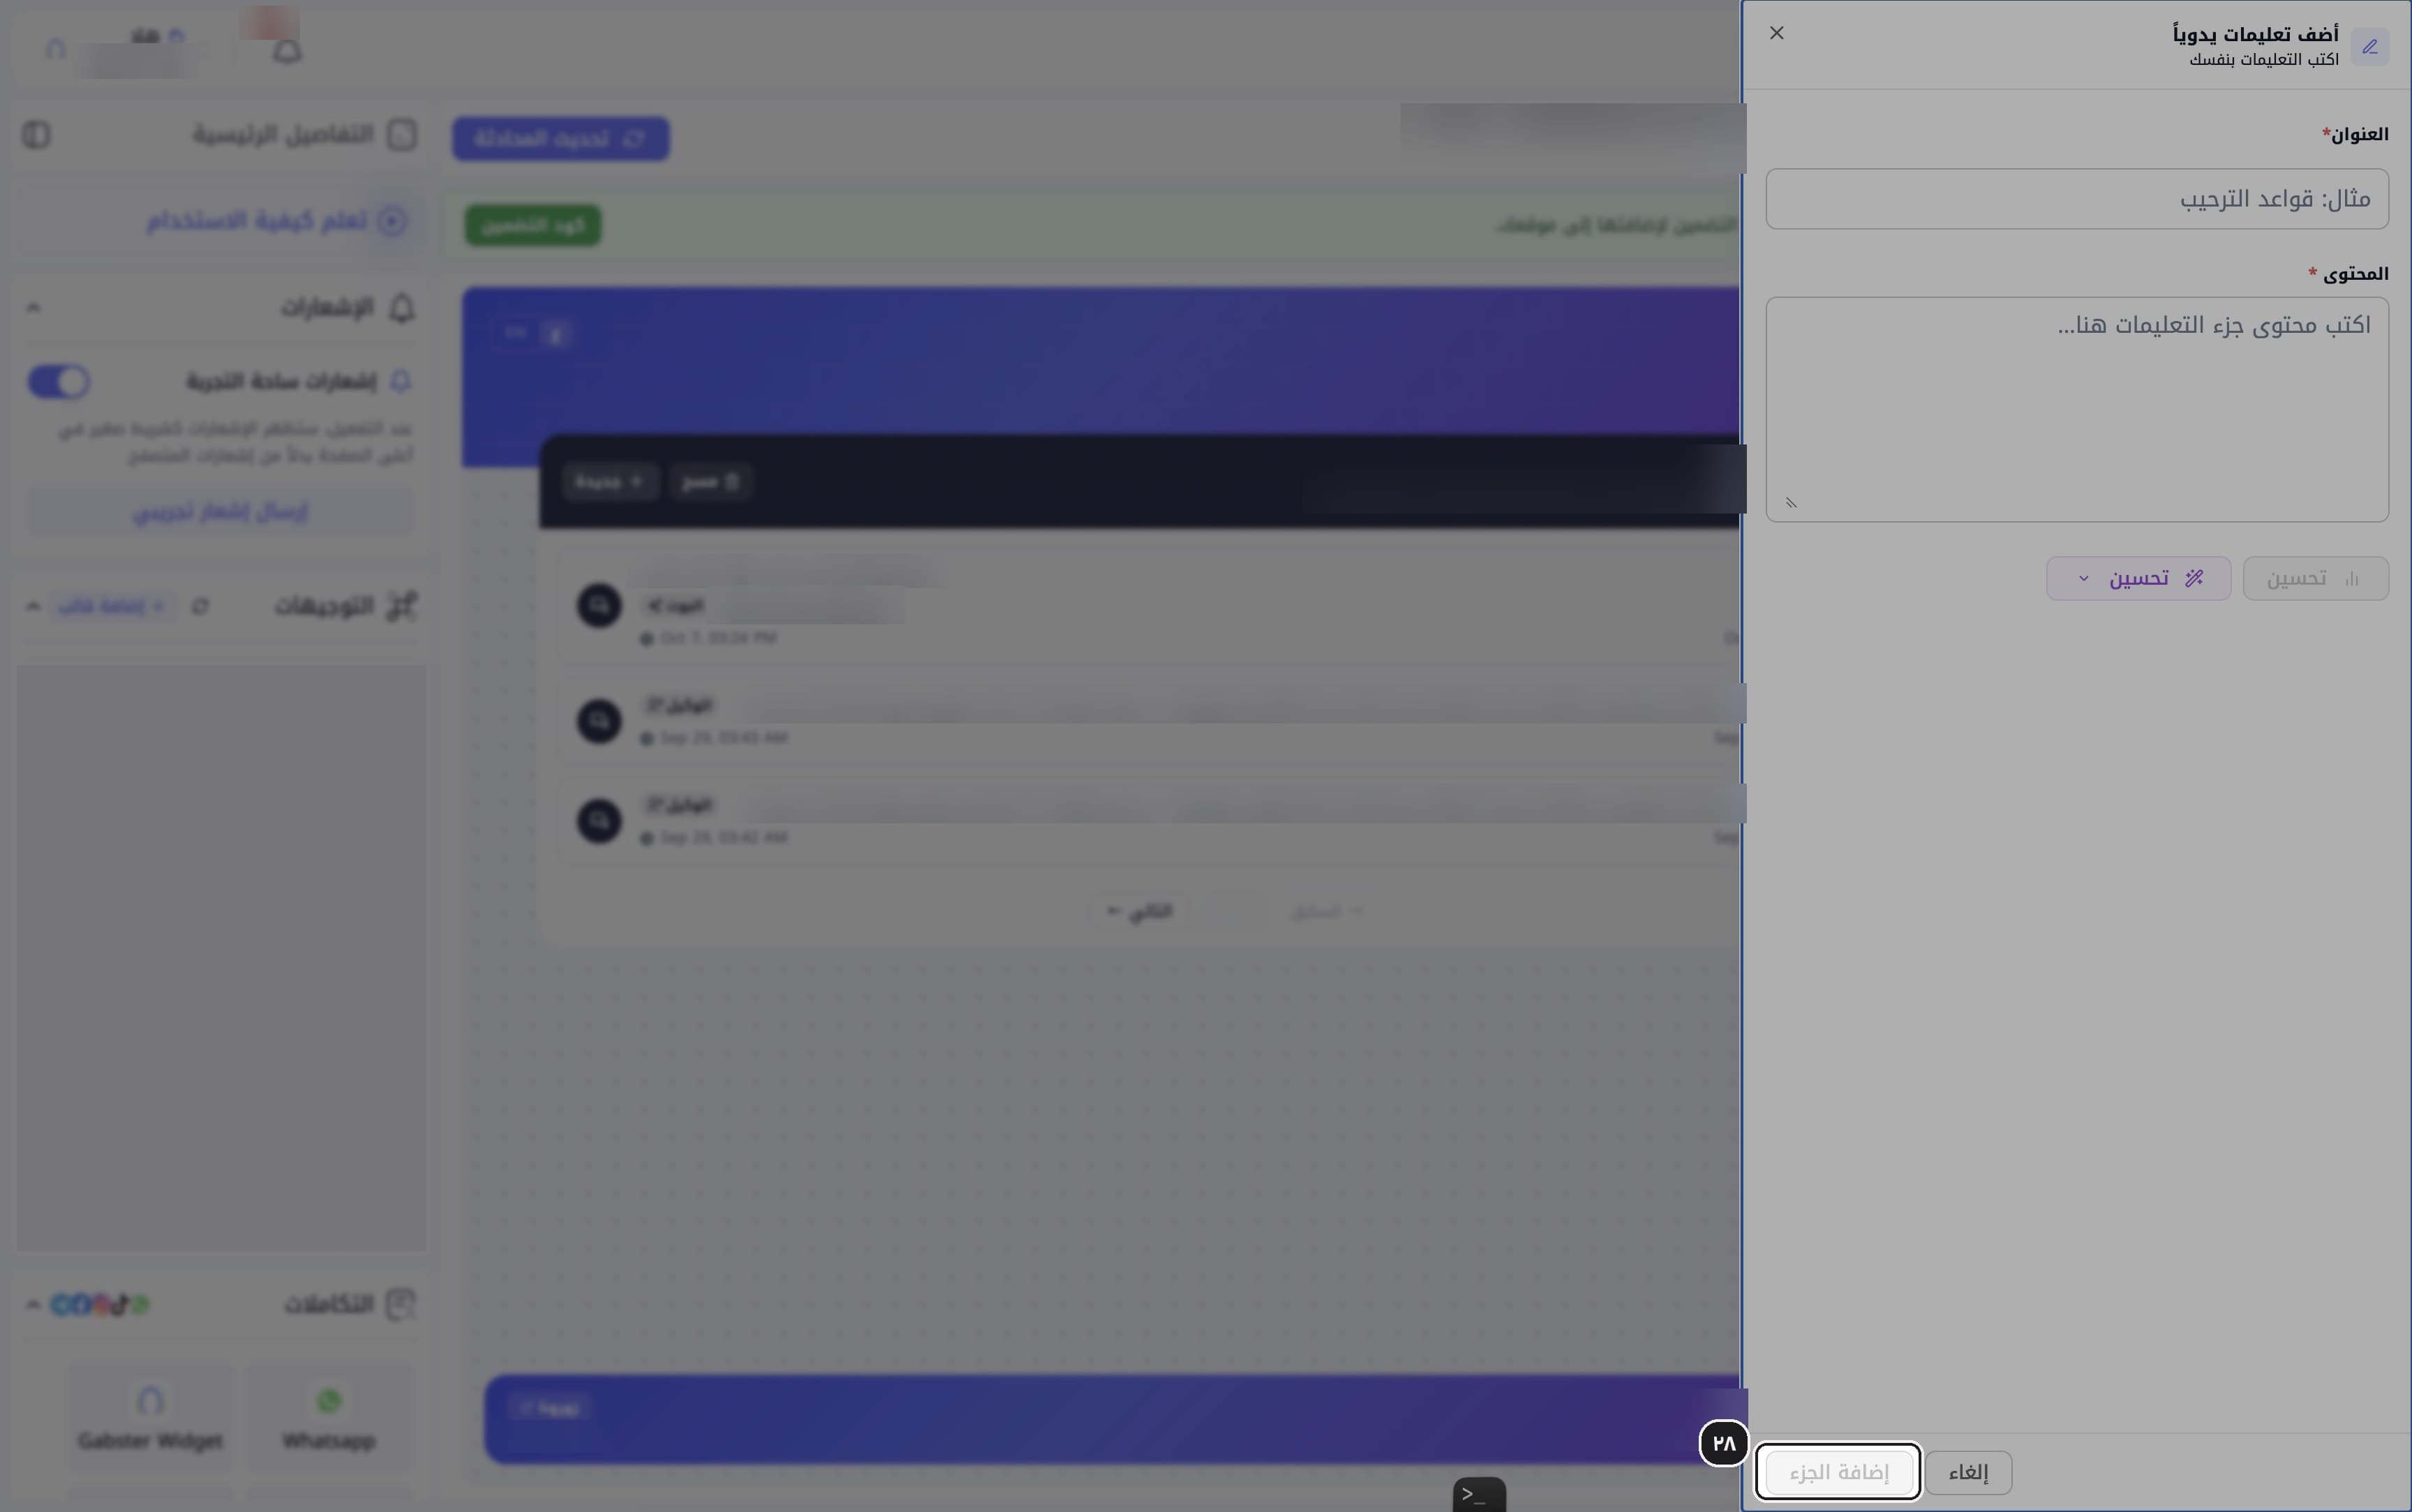
In the Instructions (التوجيهات) section, click Add template + (إضافة قالب +).
Enter the title and content
Fill in Title (العنوان) and Content (المحتوى); both are required.
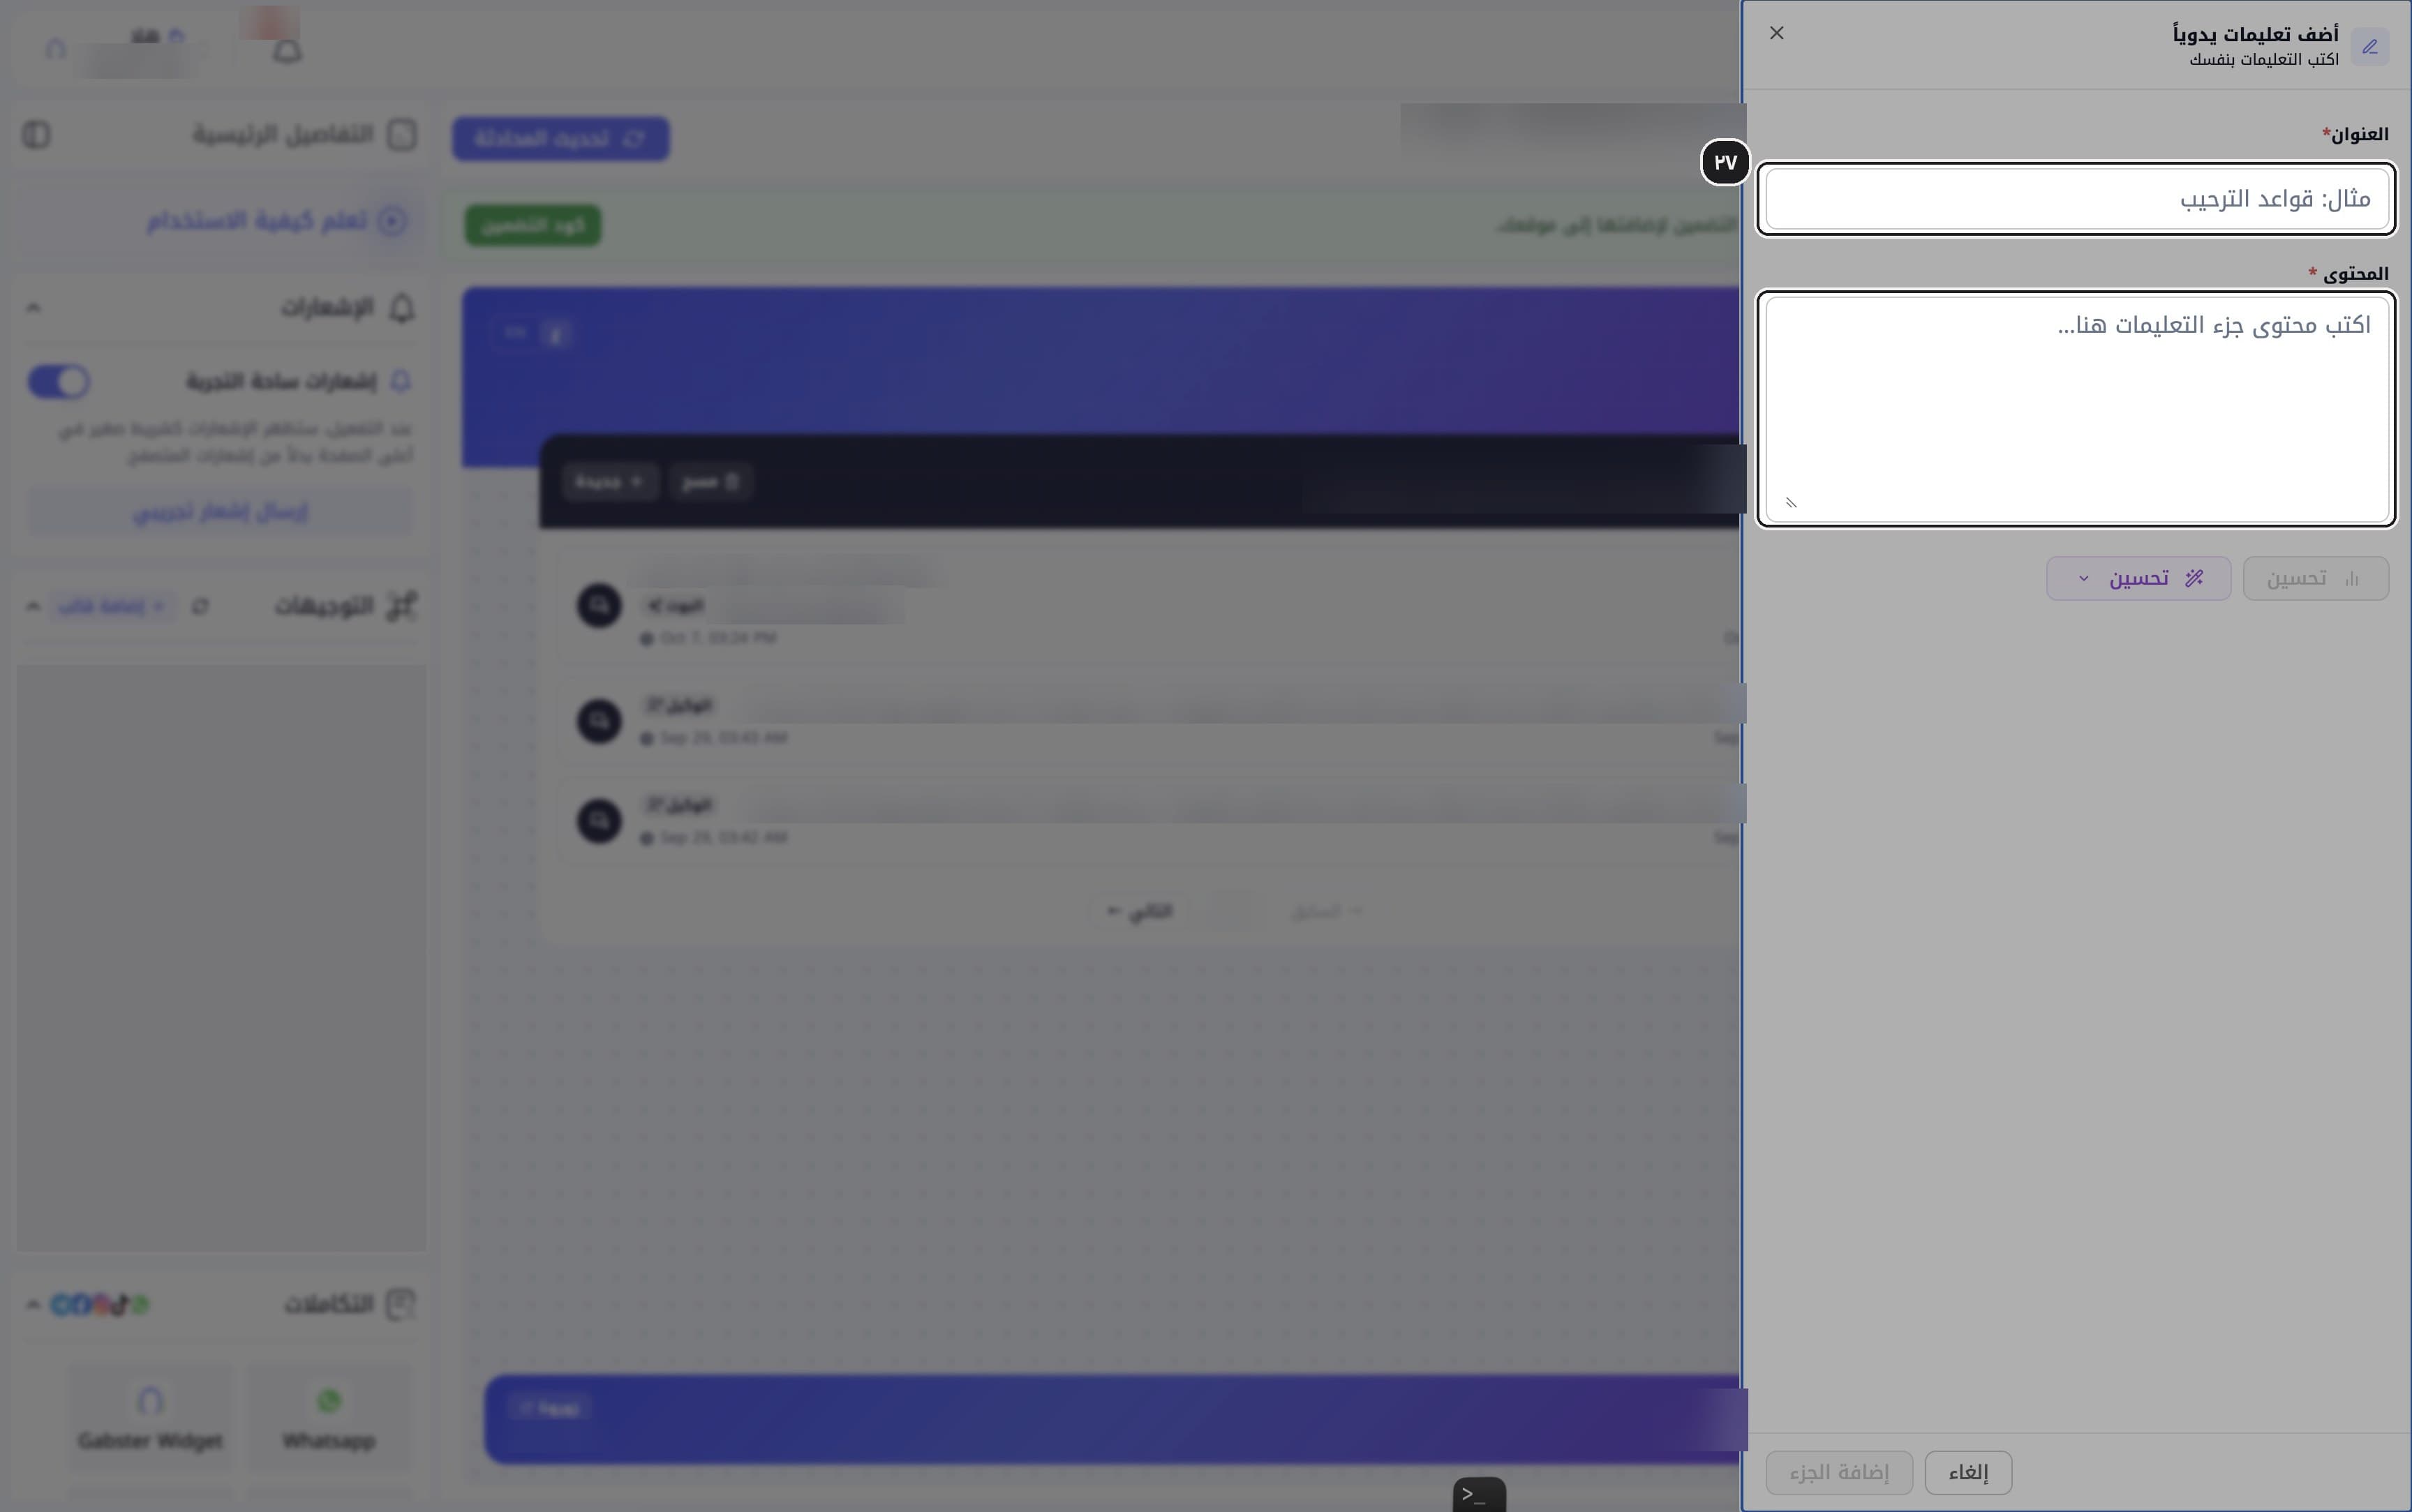
Add the section
Click Add section (إضافة الجزء).
Result: the button is disabled while the form is empty.
Edit an existing section
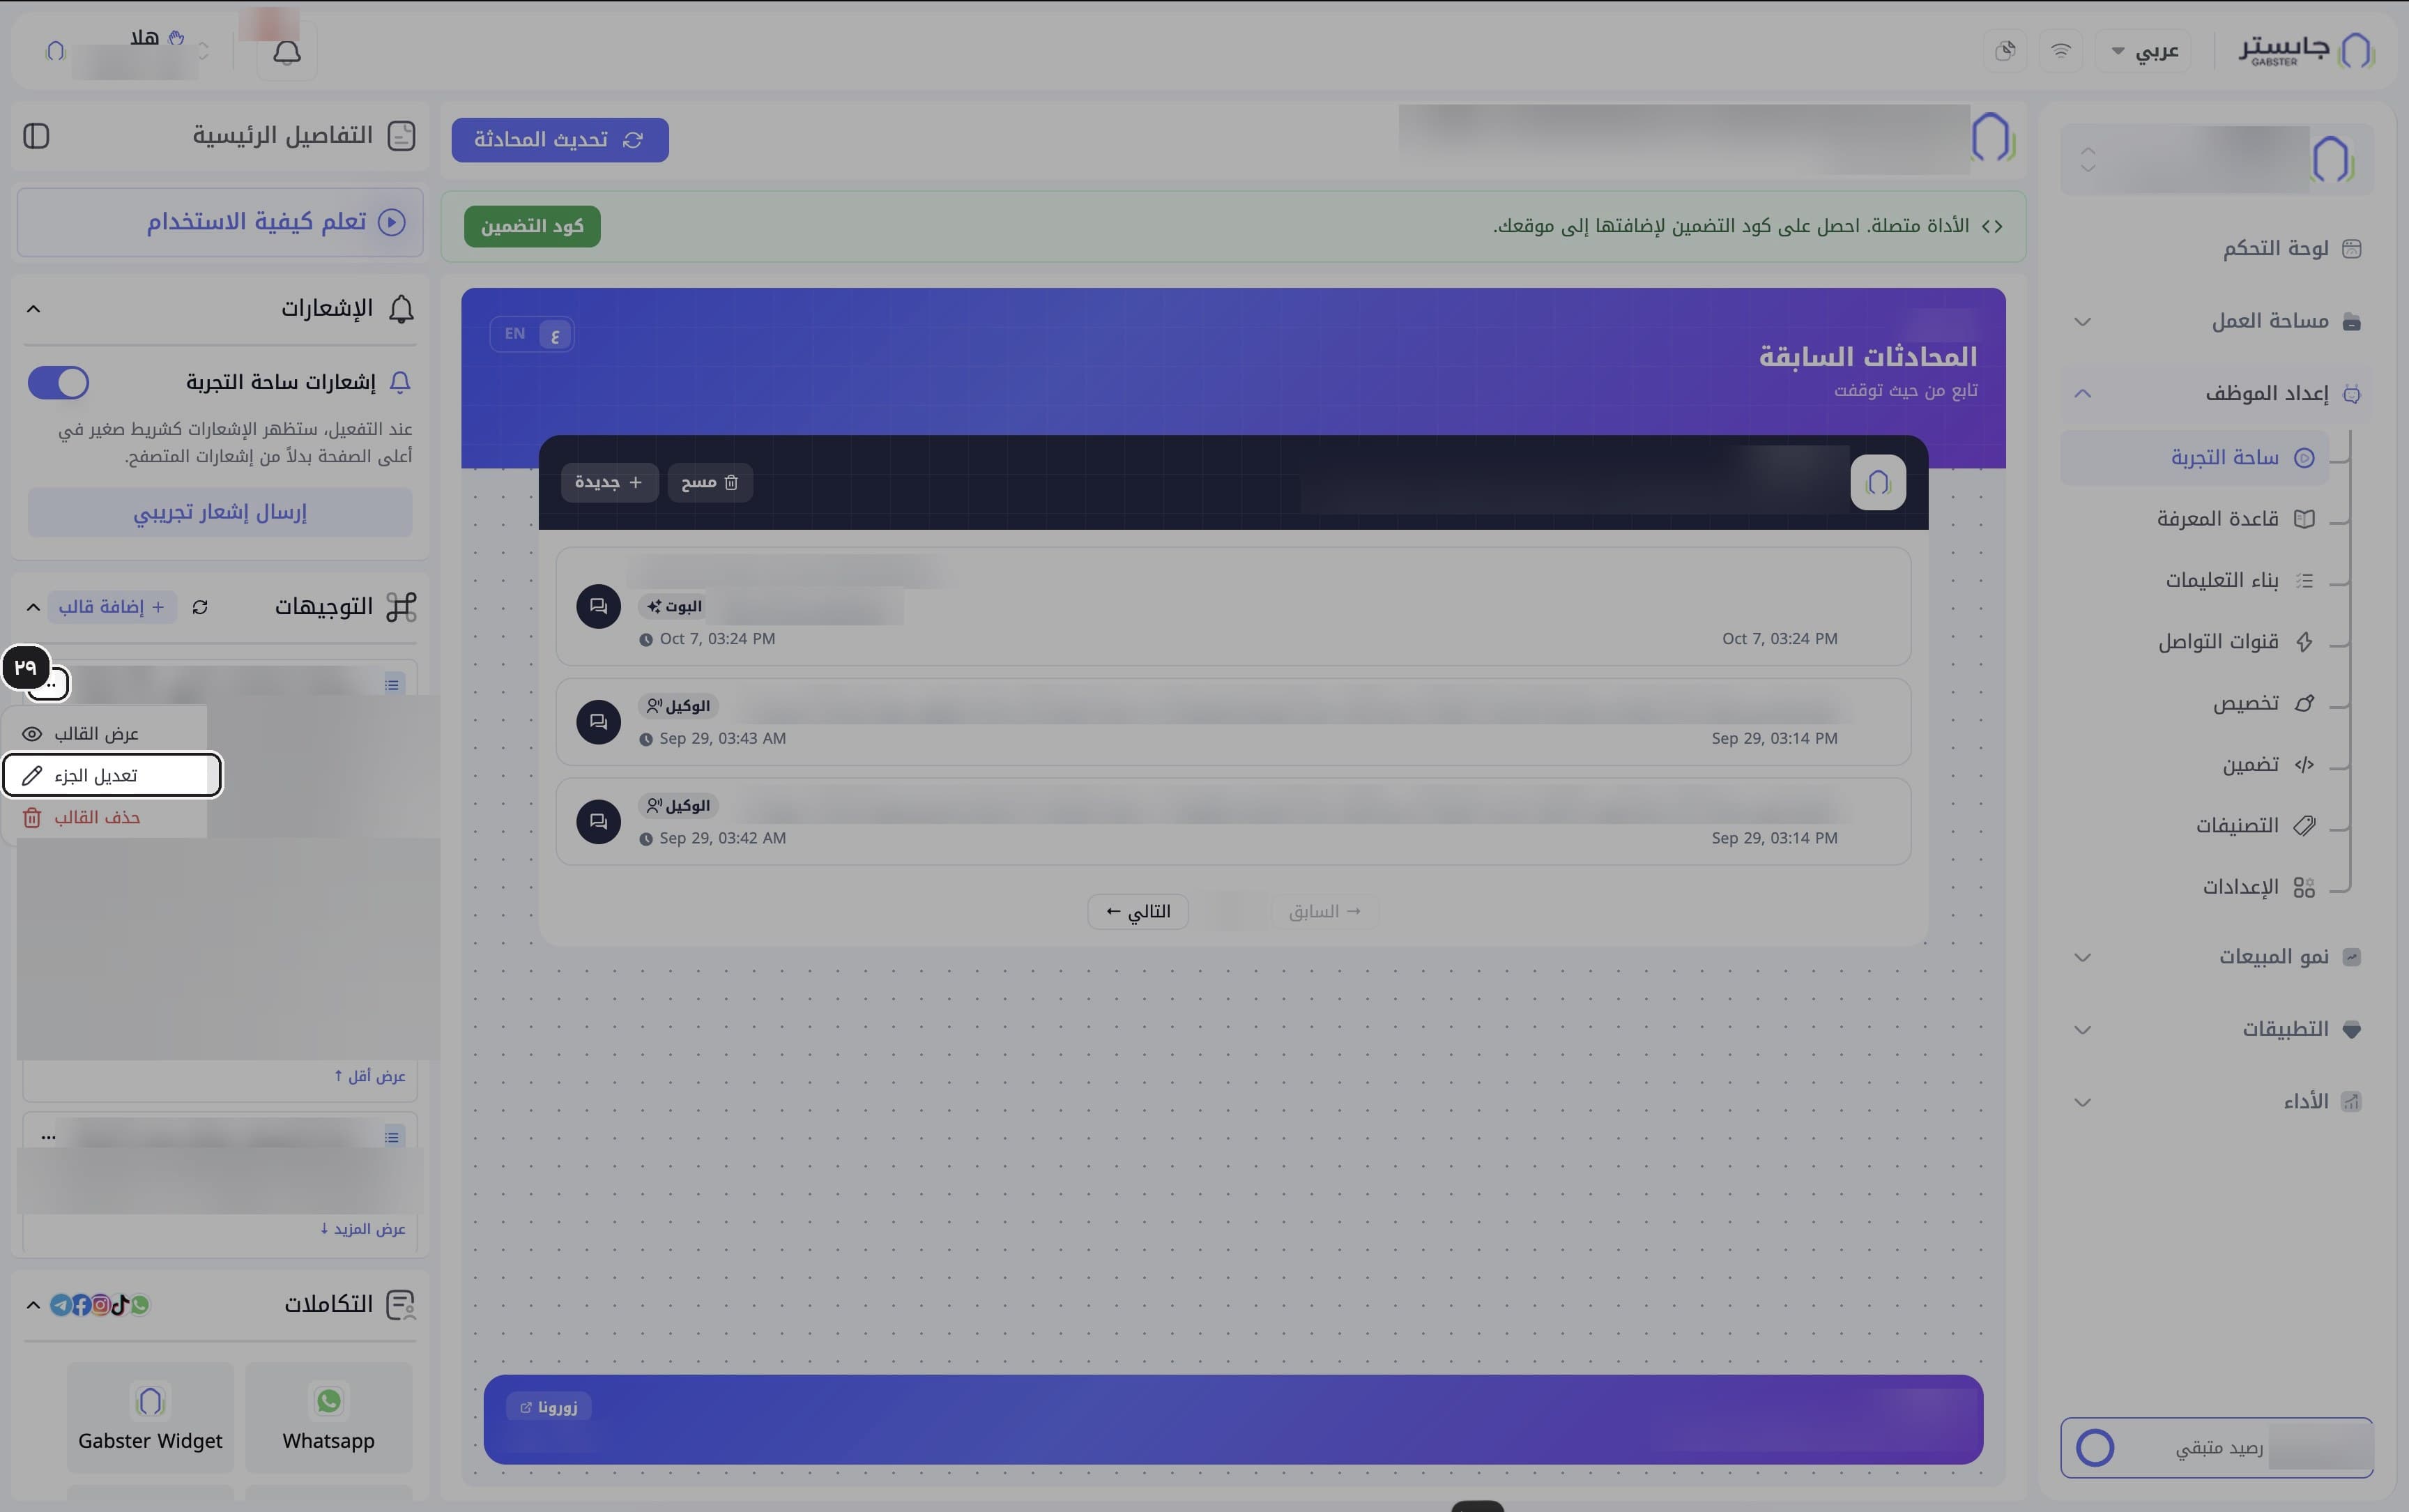
To edit a section, open the ⋯ menu on its card and choose Edit section (تعديل الجزء).
Result: the Edit section panel opens for that card.
Improve the content
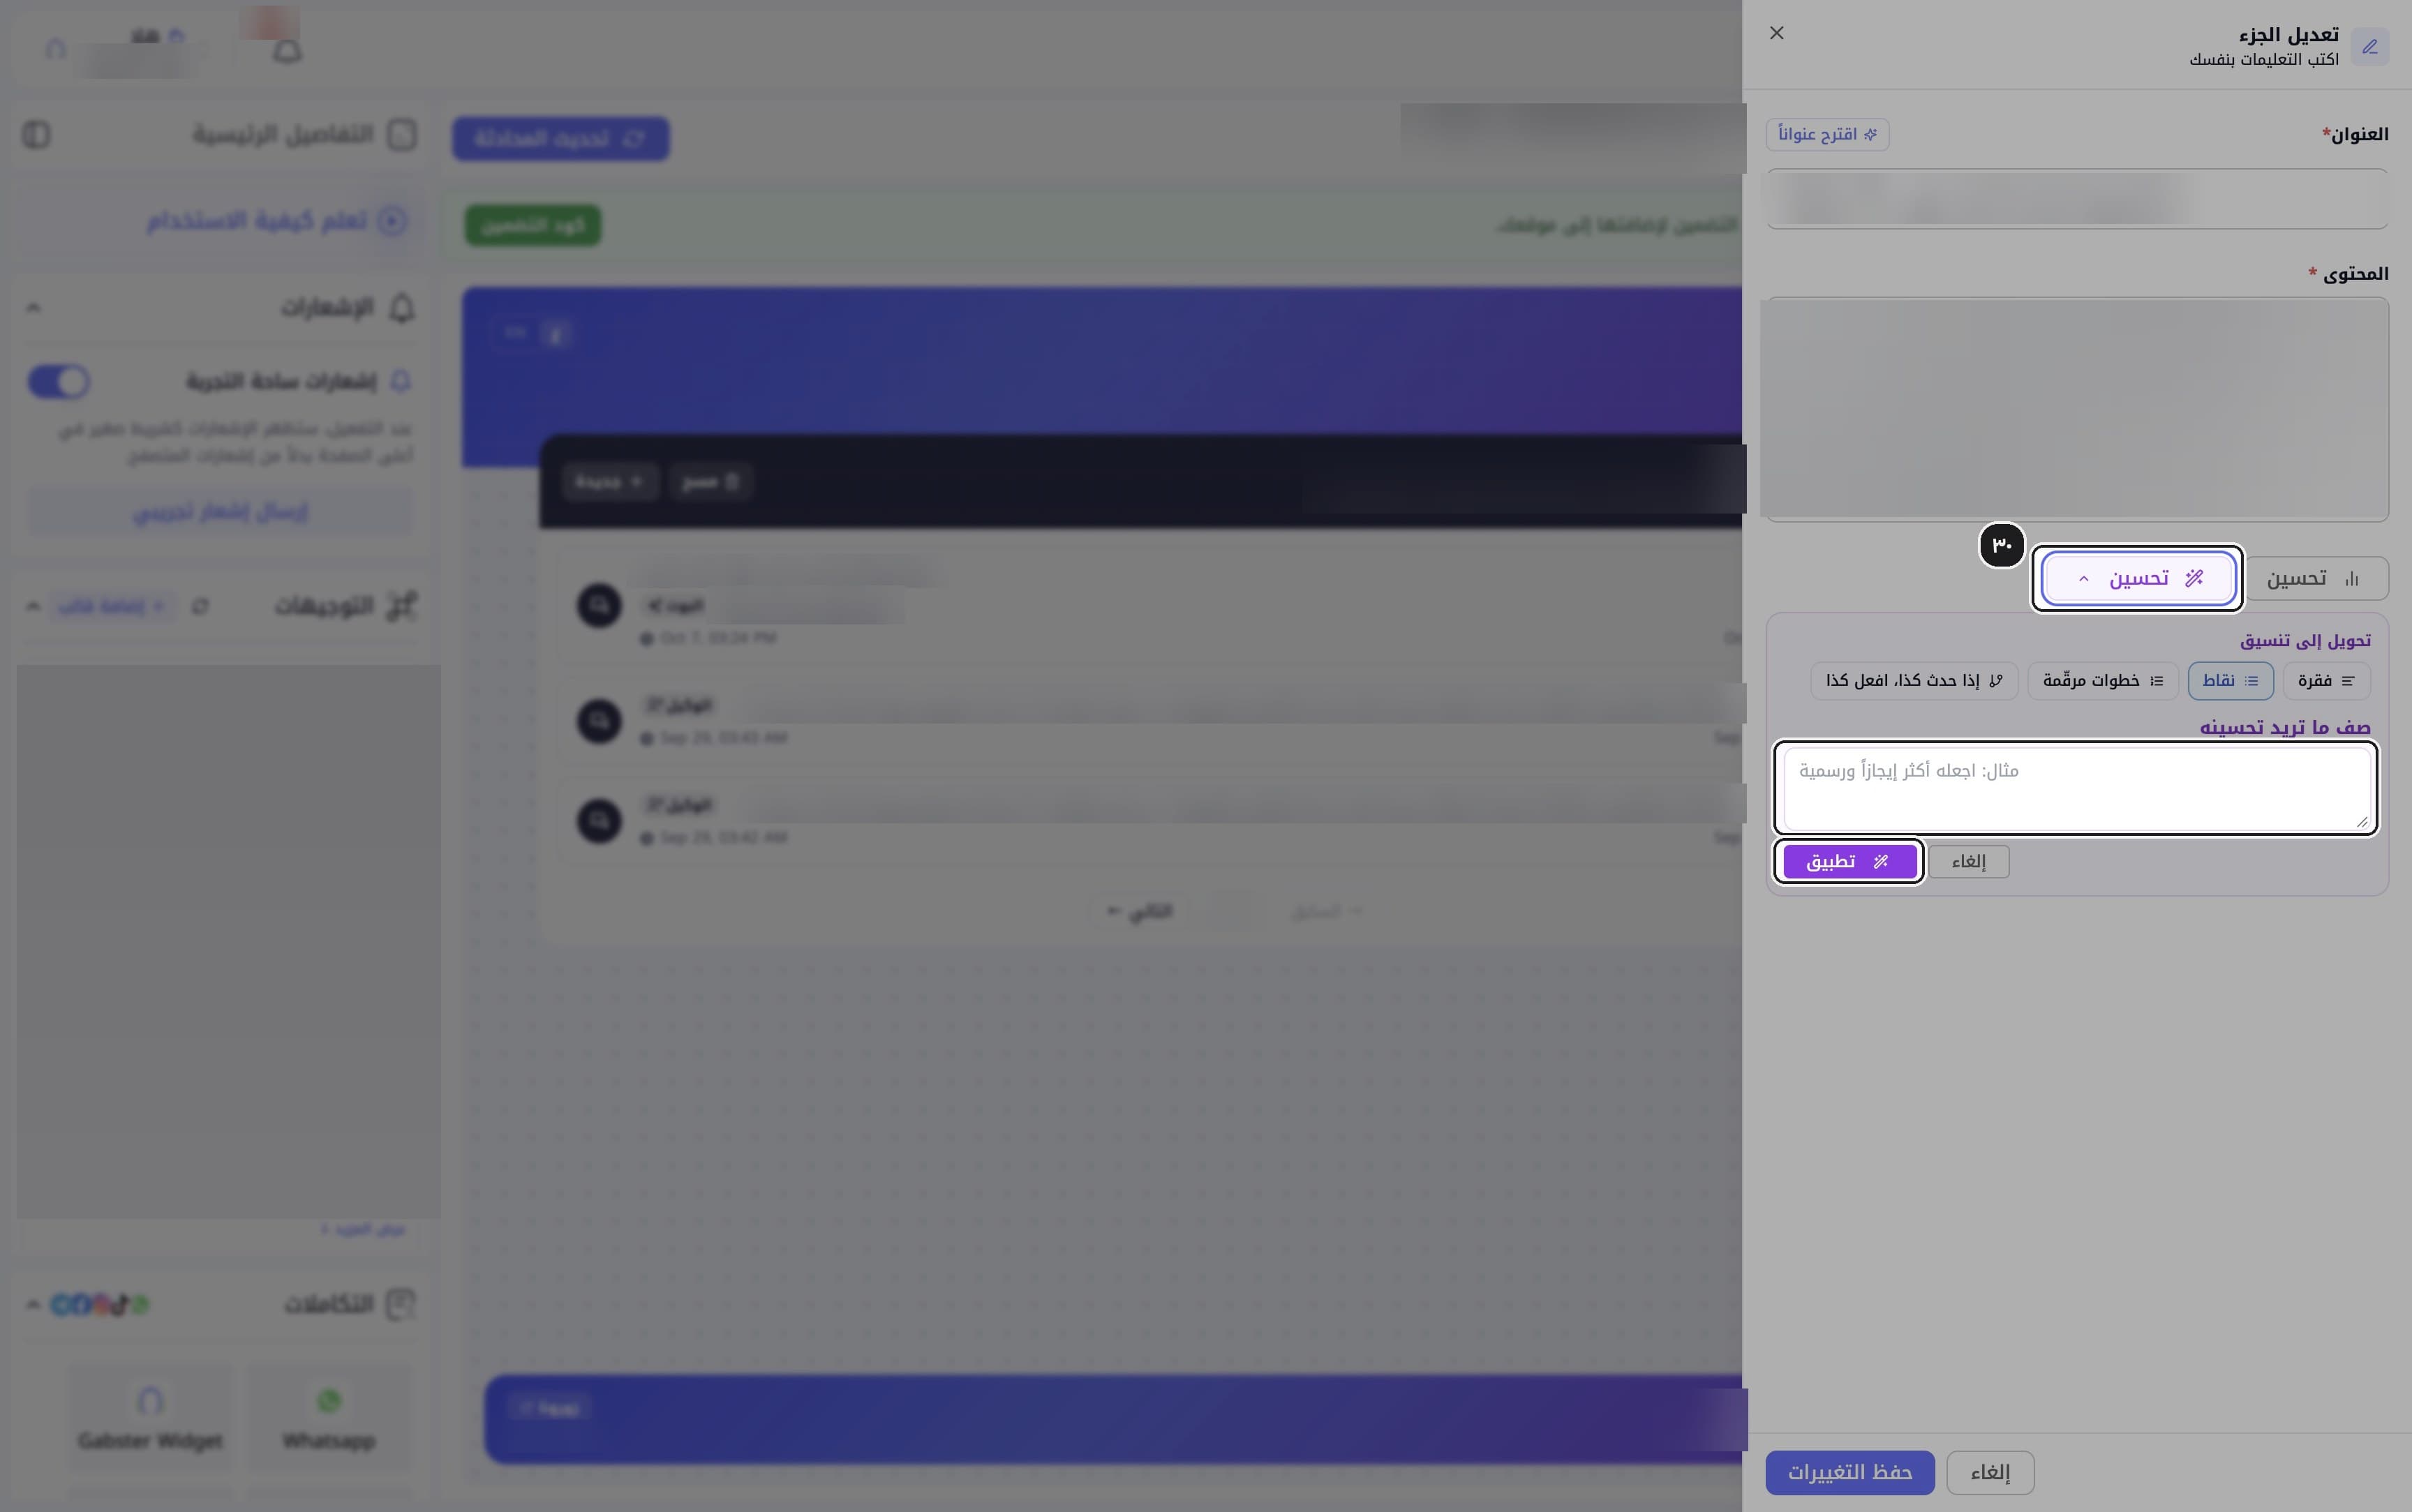
Click the purple Improve (تحسين) button with the arrow to open the improve panel, pick a format under Convert to format (تحويل إلى تنسيق): Paragraph (فقرة), Bullets (نقاط), Numbered steps (خطوات مرقّمة) or If this happens, do that (إذا حدث كذا، افعل كذا). Describe what to change in Describe what to improve (صف ما تريد تحسينه), then click Apply (تطبيق). You can also use Suggest a title (اقترح عنواناً) next to the title field.
Save changes
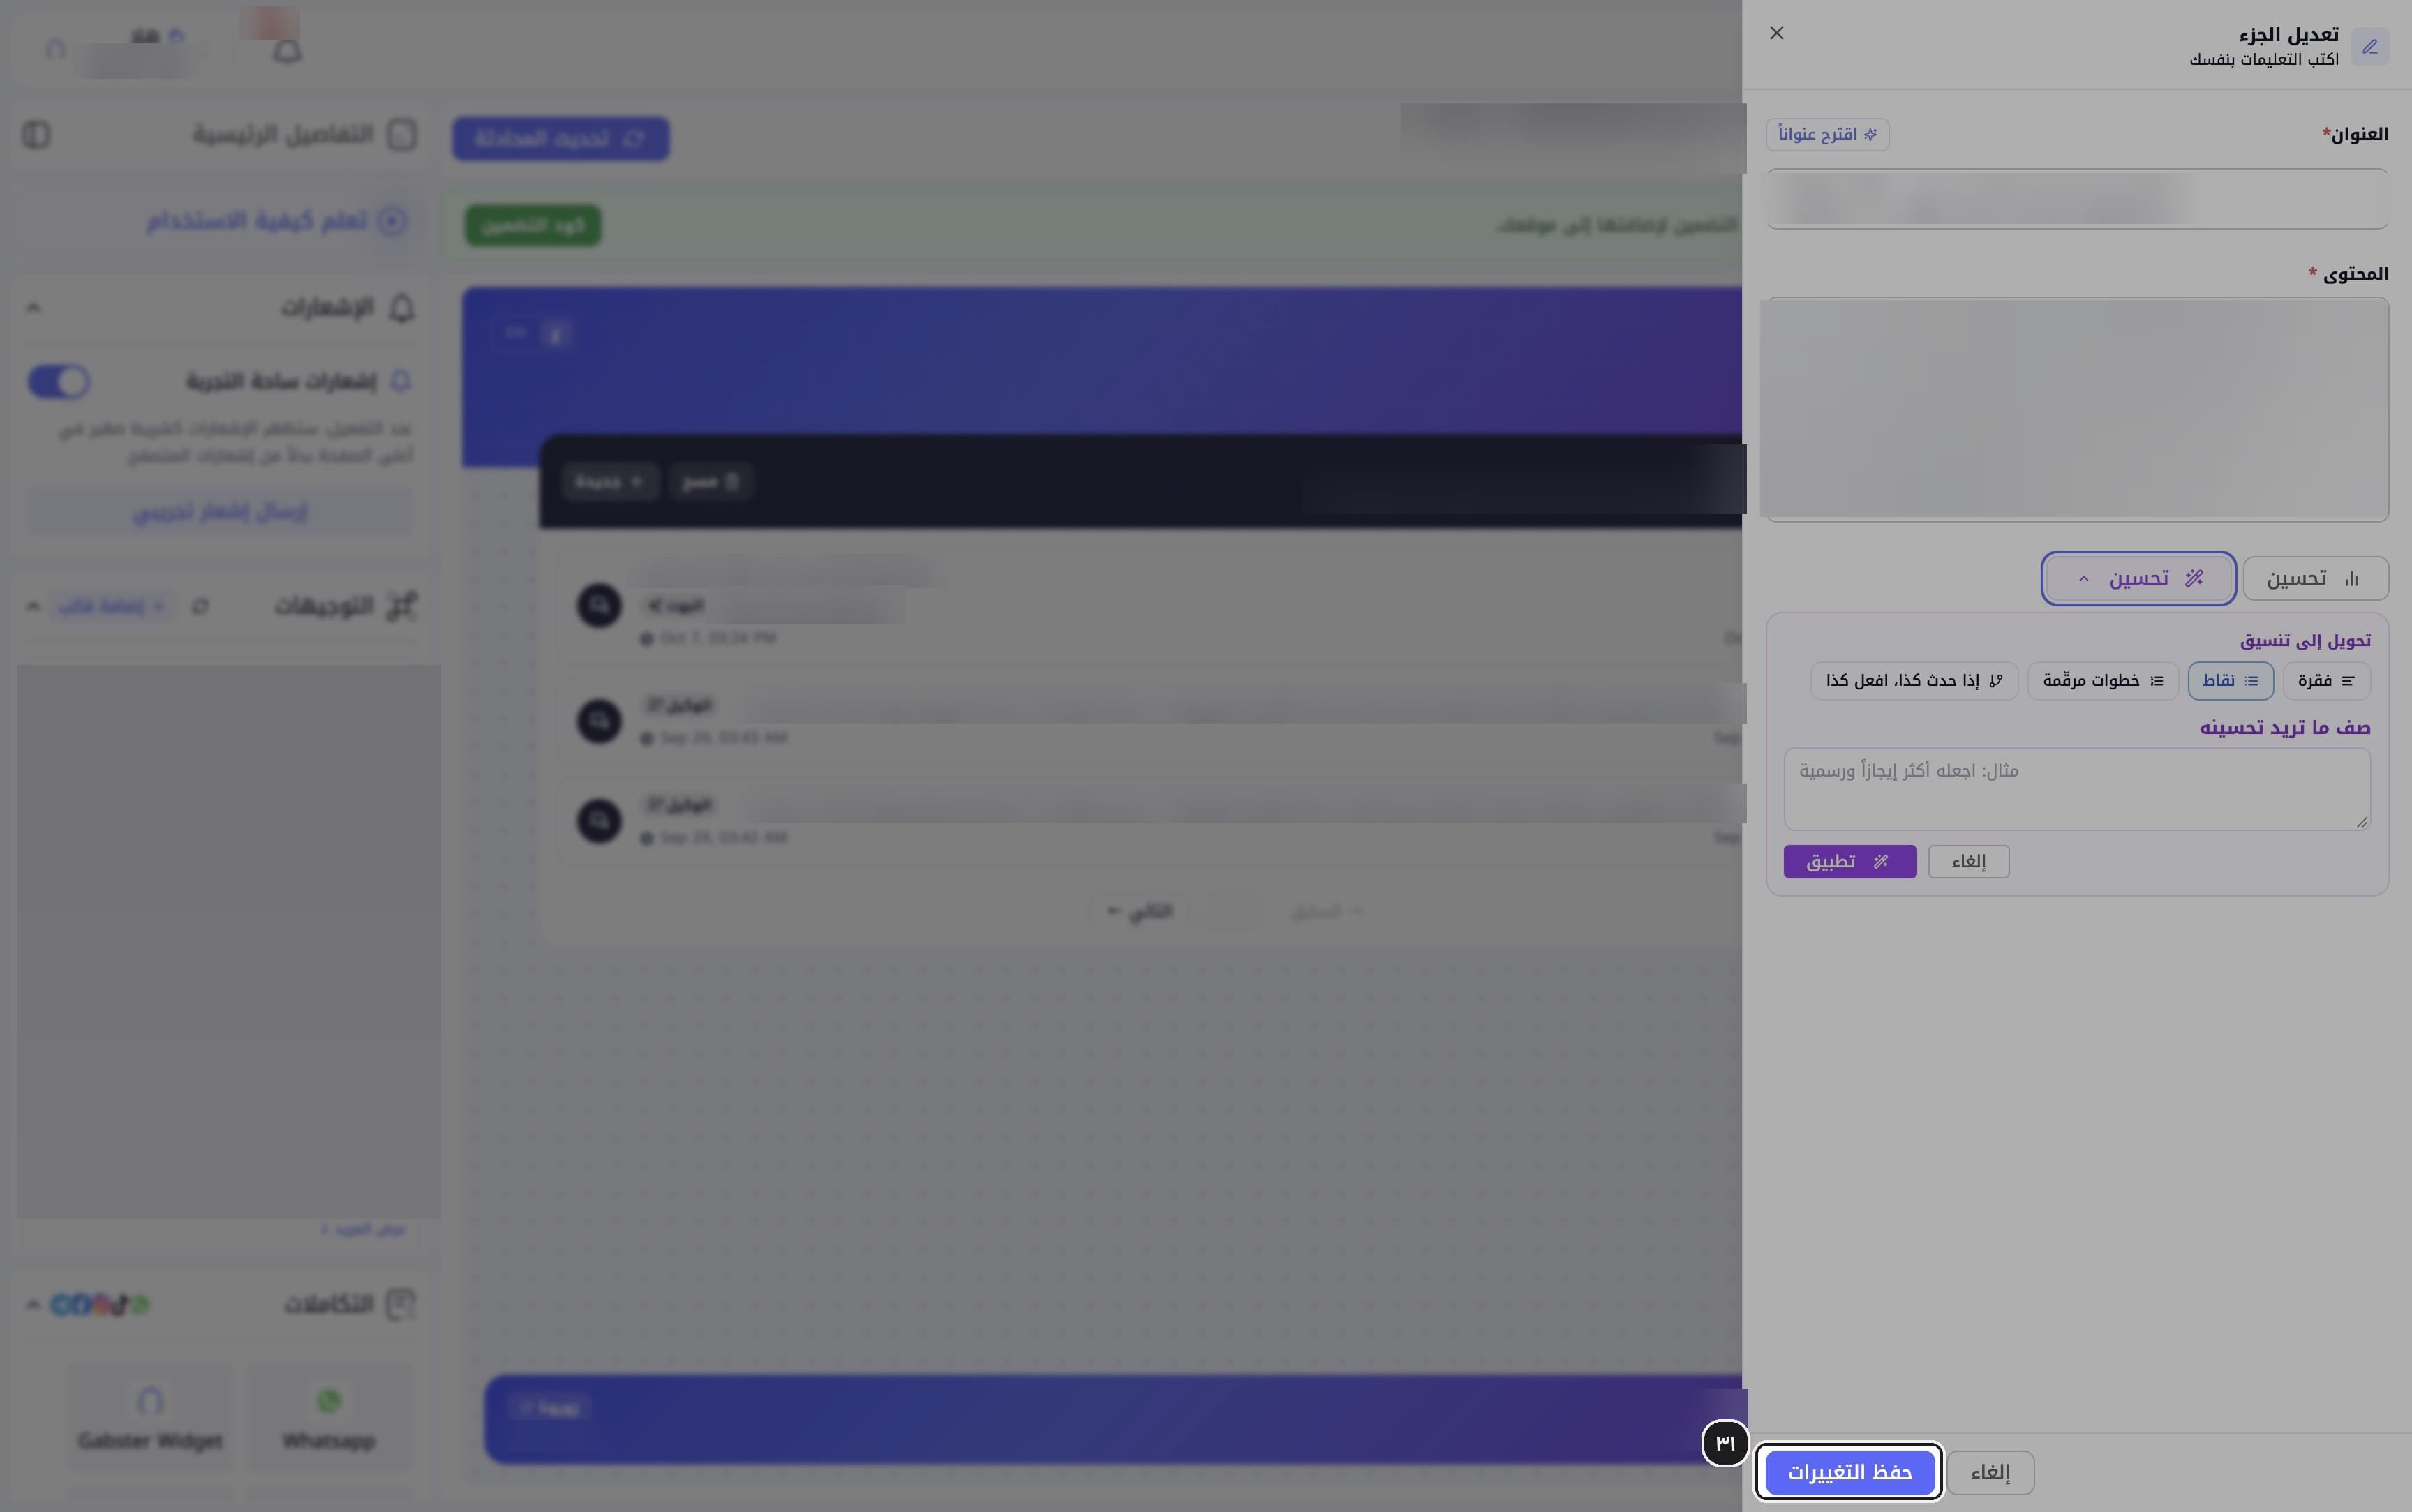
Click Save changes (حفظ التغييرات).
Review integrations
Review the connected apps in the Integrations (التكاملات) section, and click Add (إضافة) to add more.
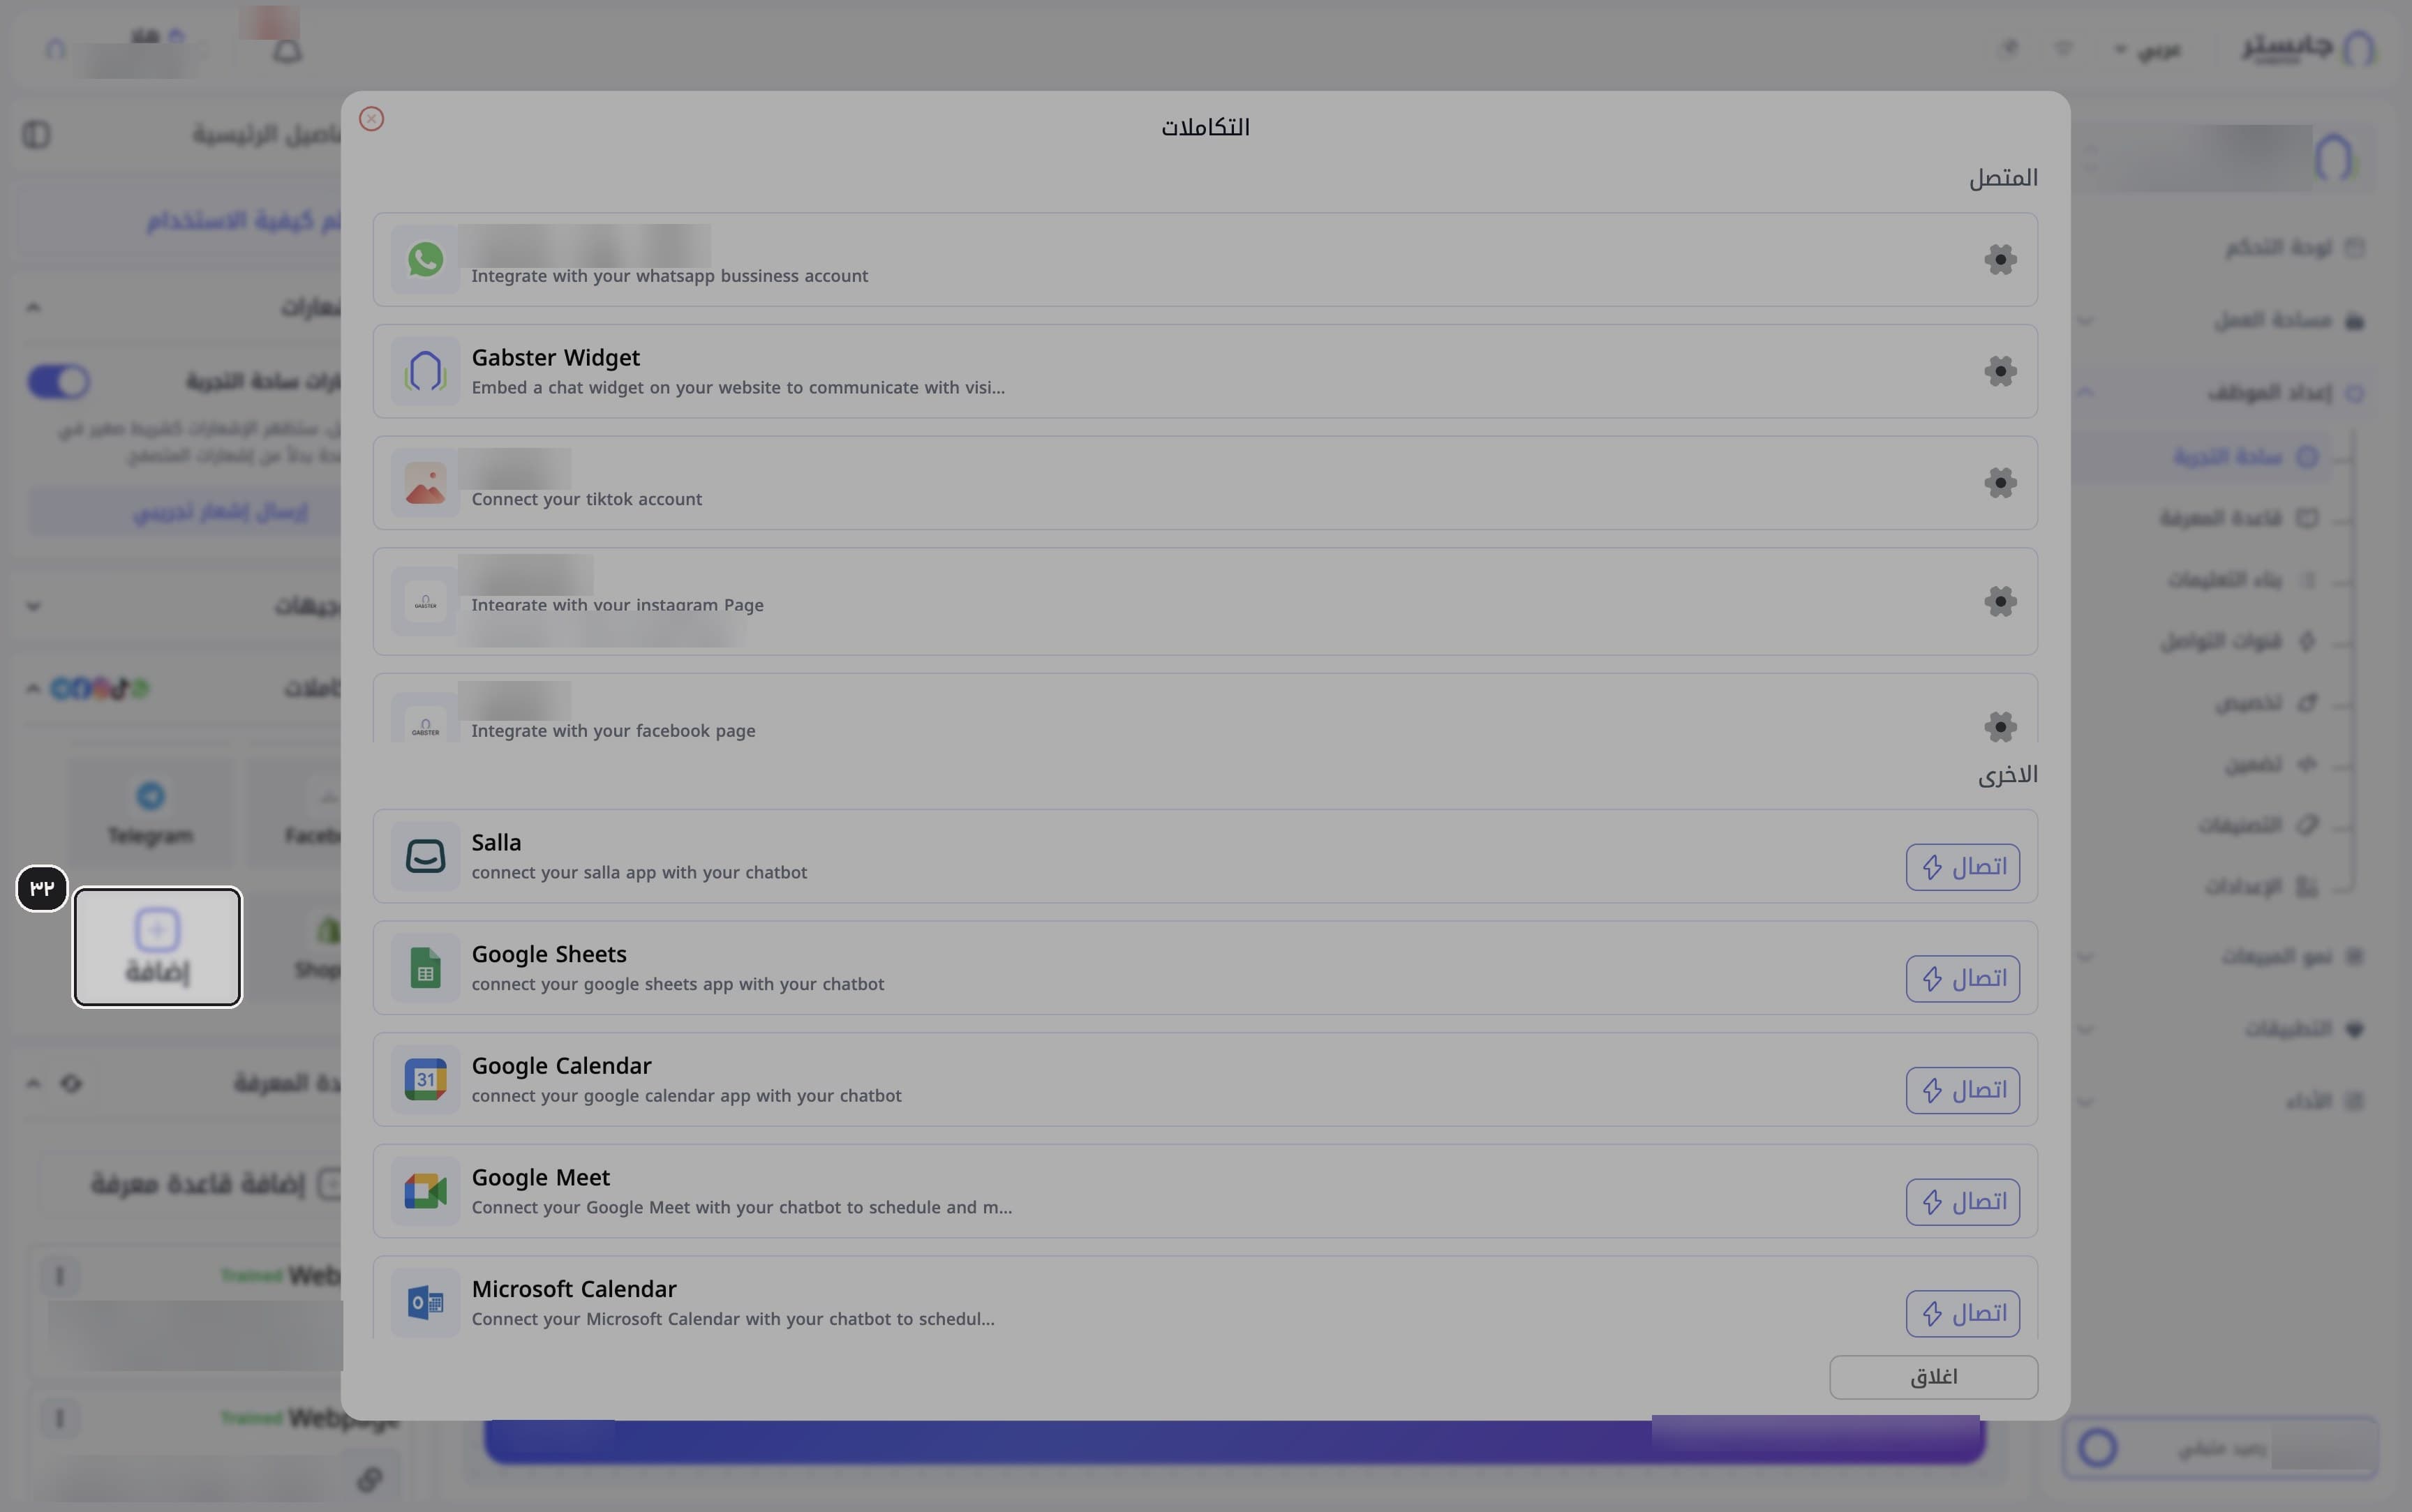
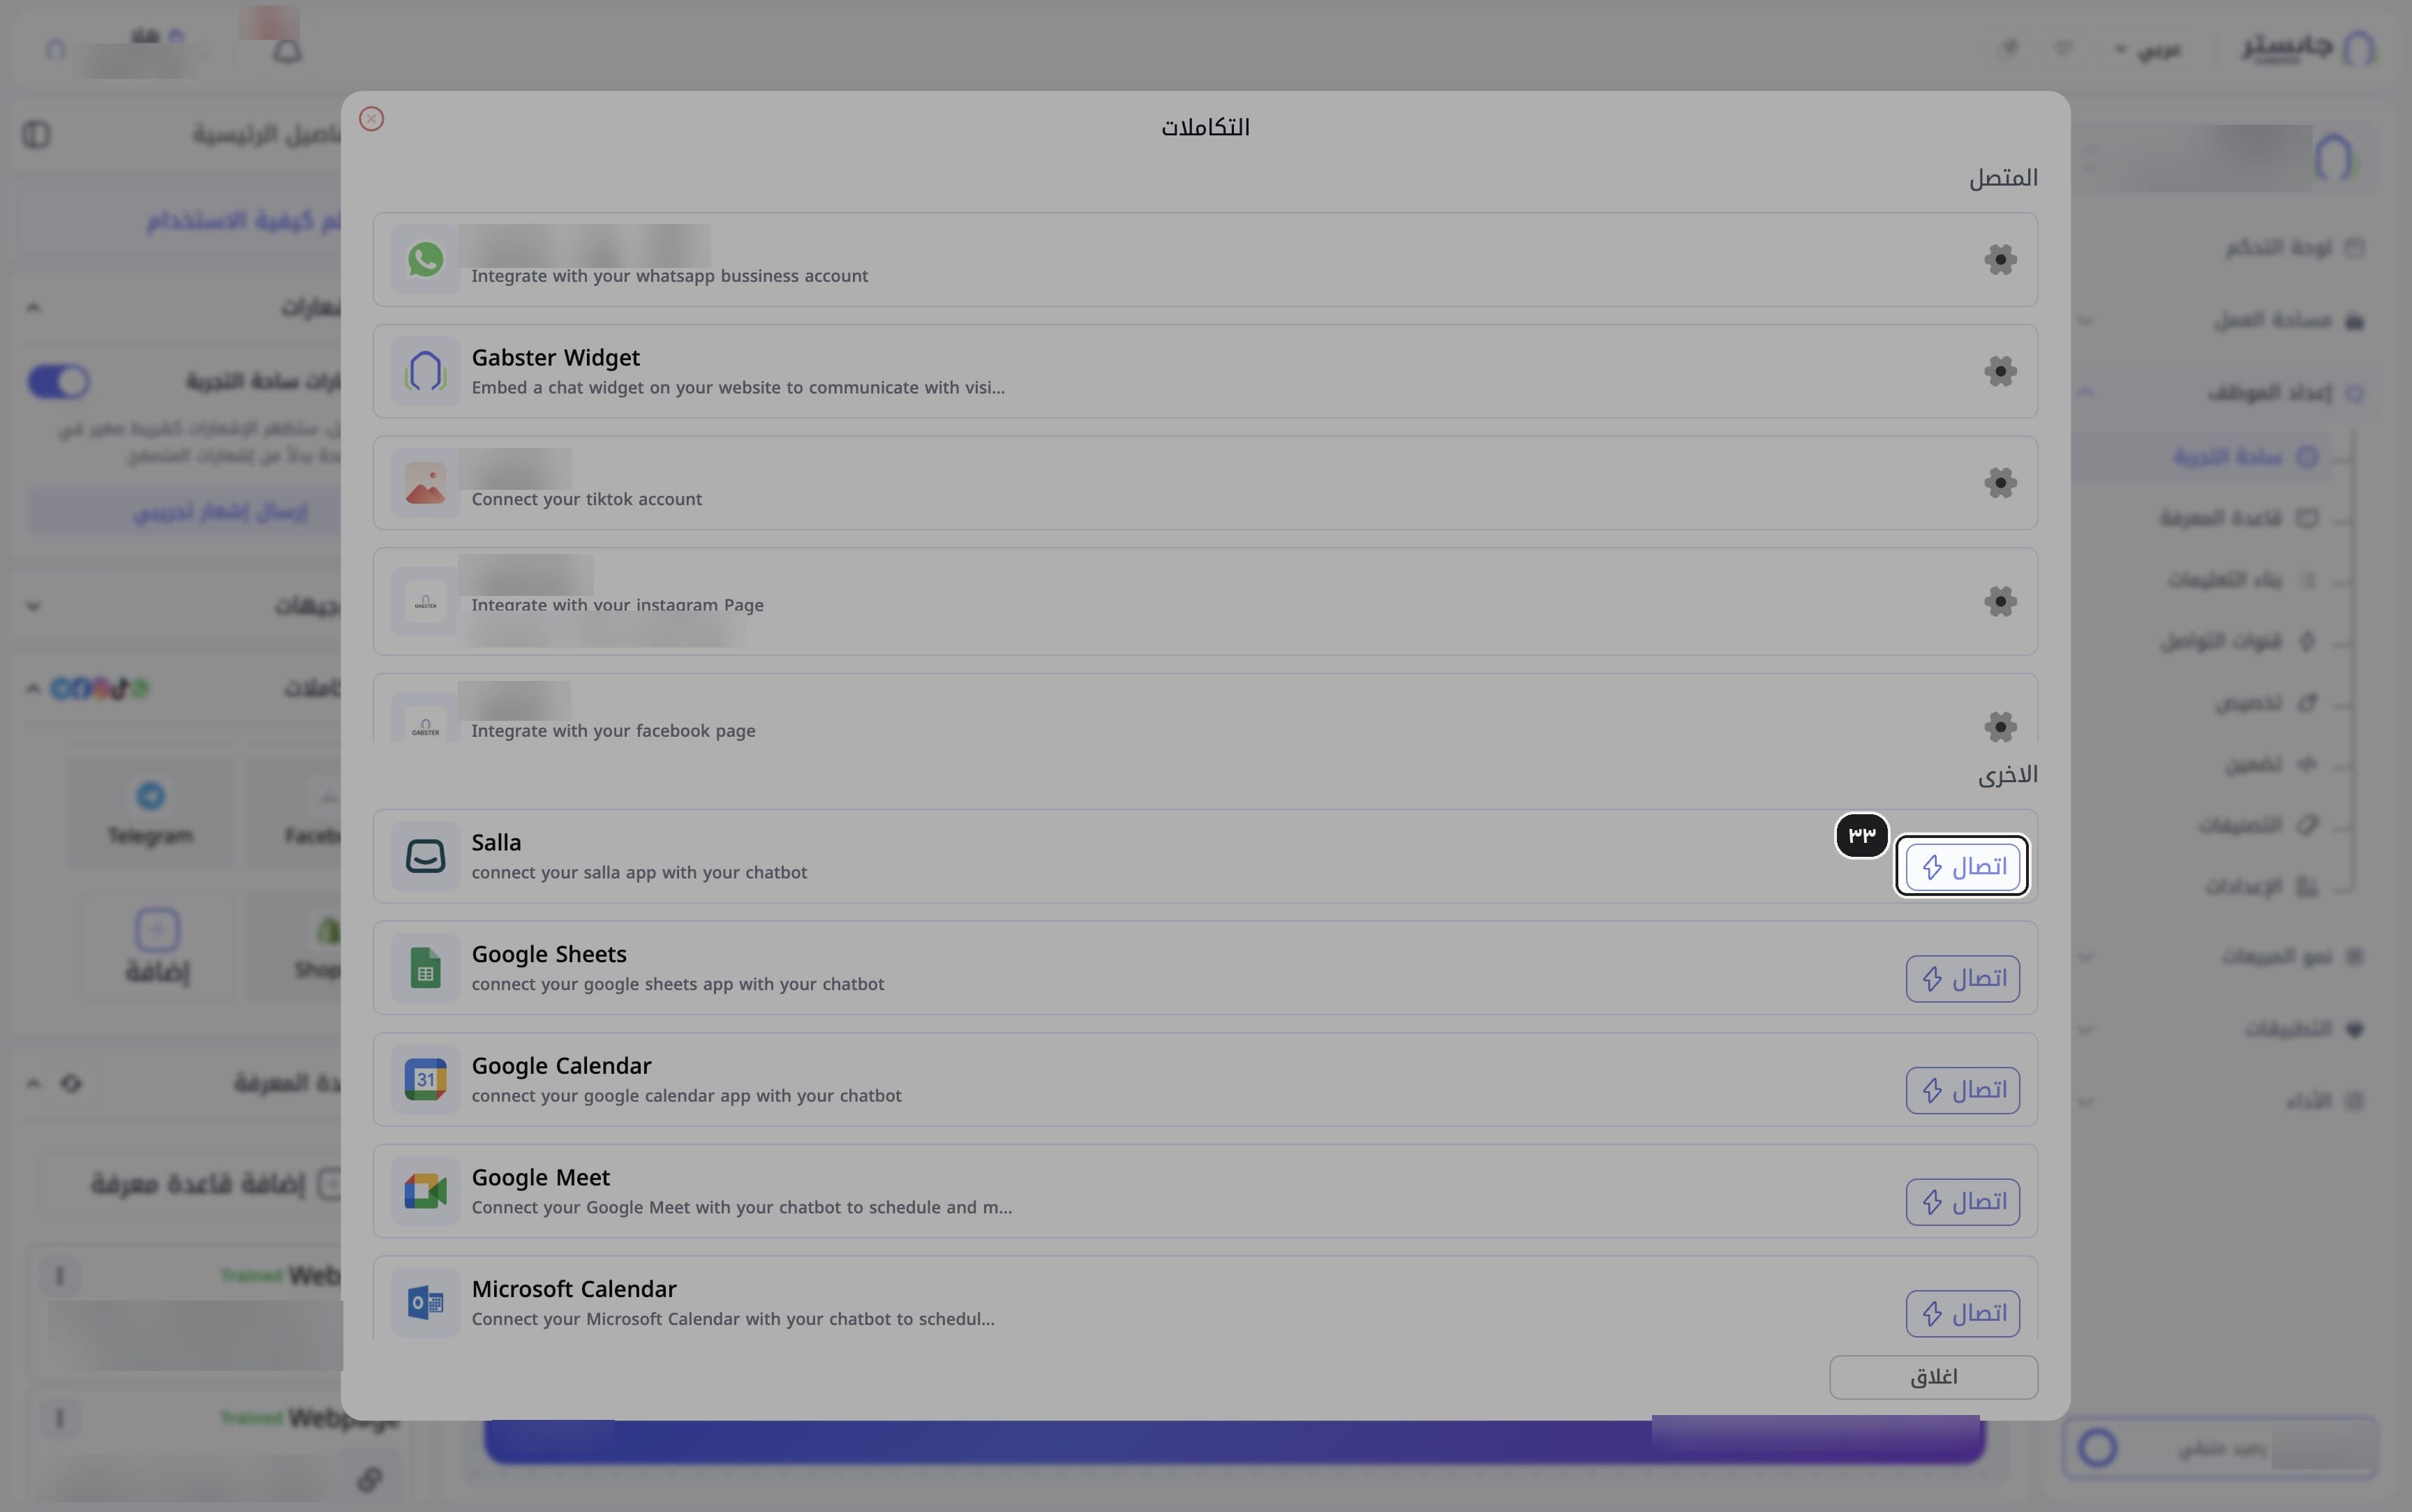
Connect another app
The Integrations window has two sections: Connected (المتصل), where each connected app has a gear button, and Others (الاخرى), with the apps you can add. Click Connect (اتصال) next to the app you want to connect (for example Google Calendar).
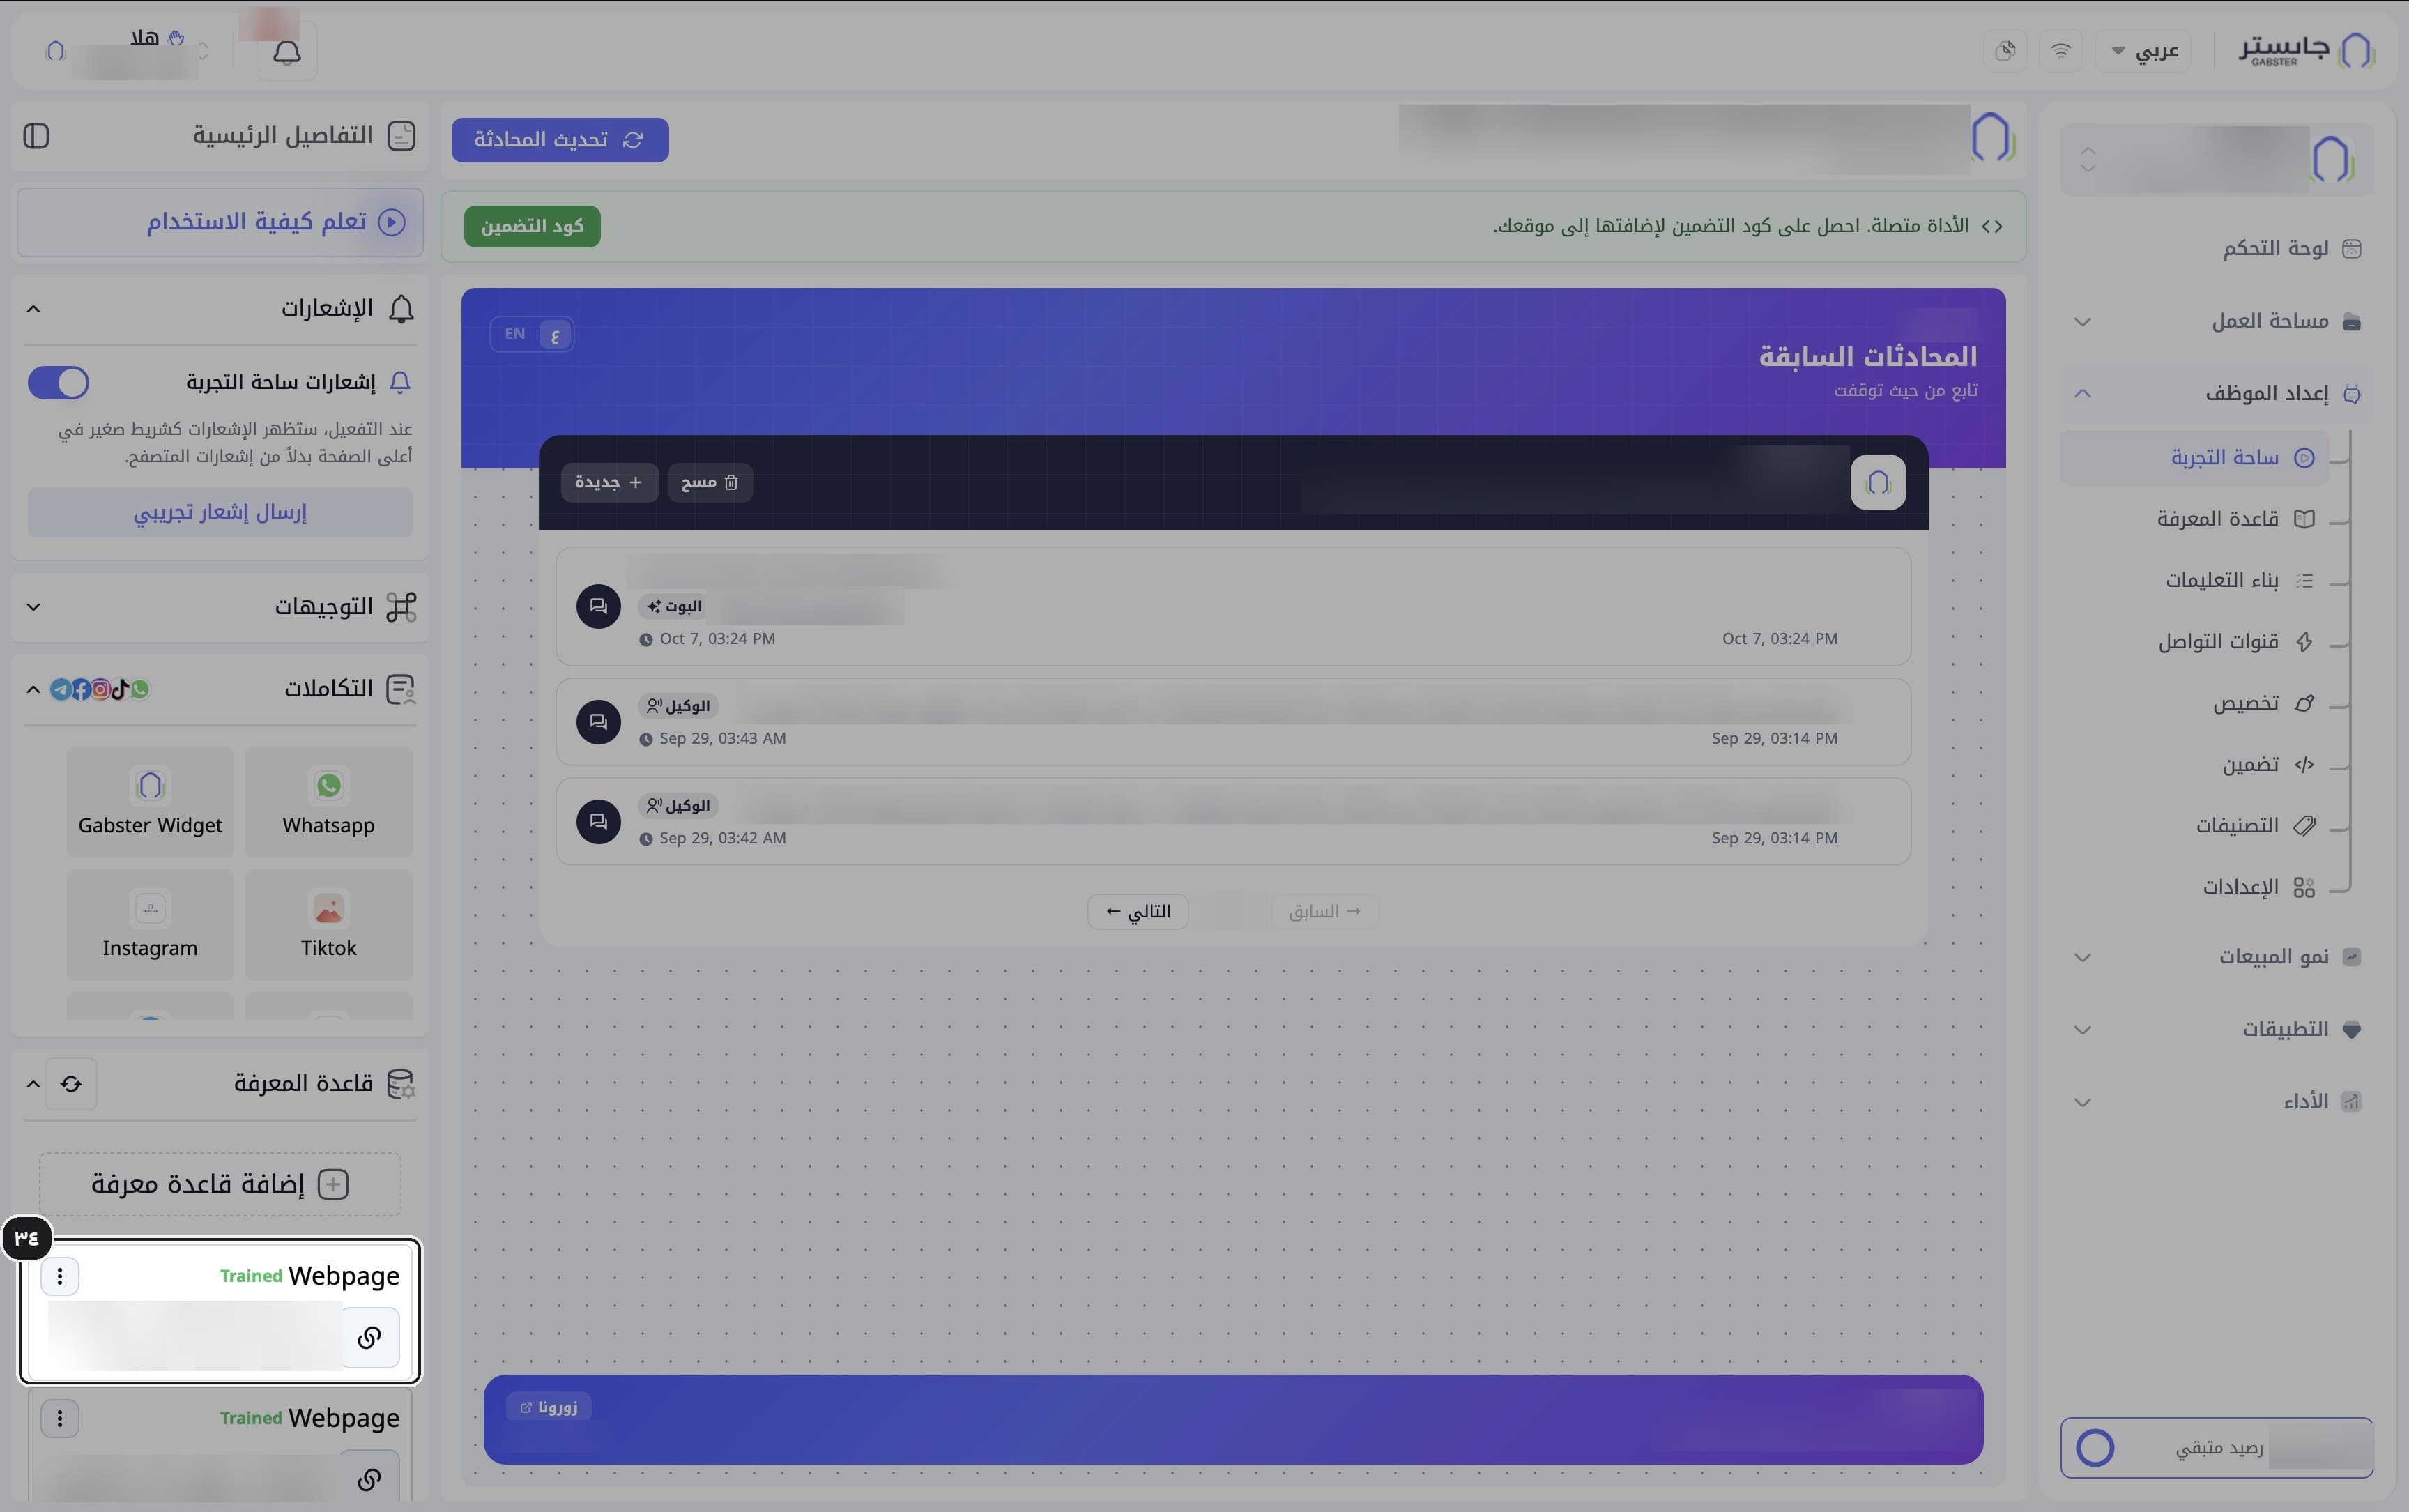
Check your knowledge sources
Review the Knowledge Base source cards in the side panel.
Result: each card shows the source type and a Trained status.
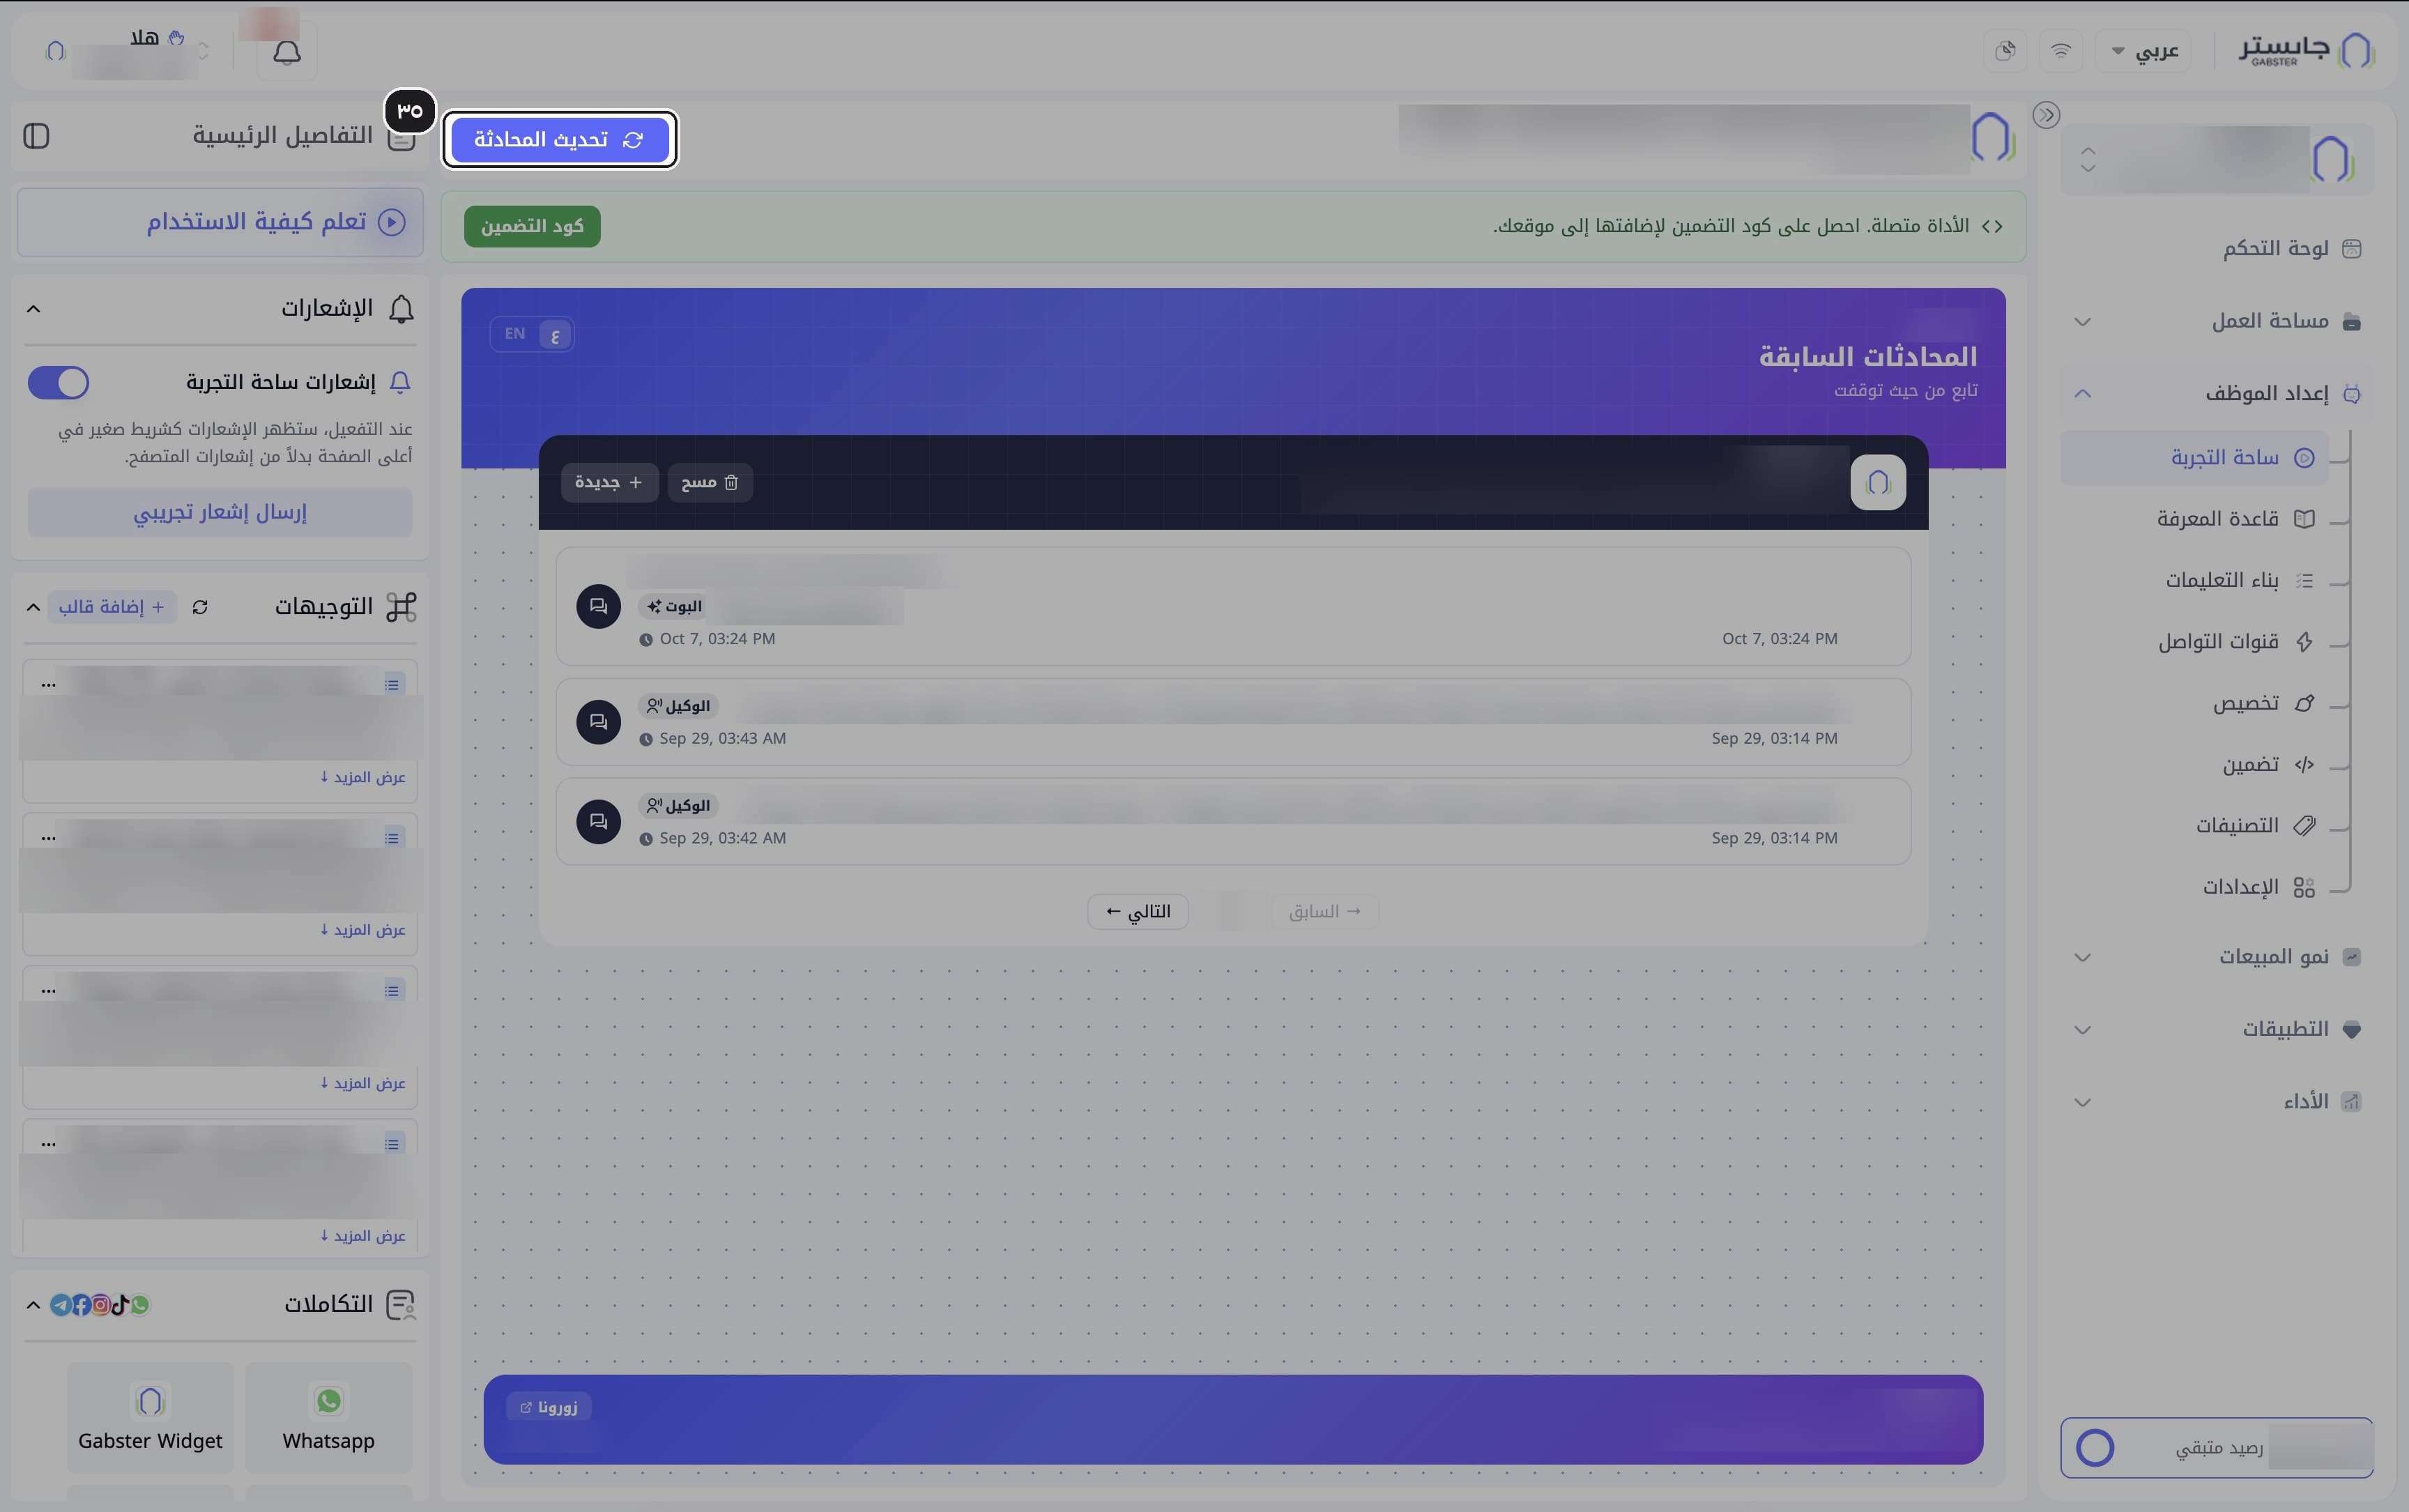
Test your AI Agent
Type questions into the live preview the way a customer would. To start over, click Refresh conversation (تحديث المحادثة).
D. Settings basics
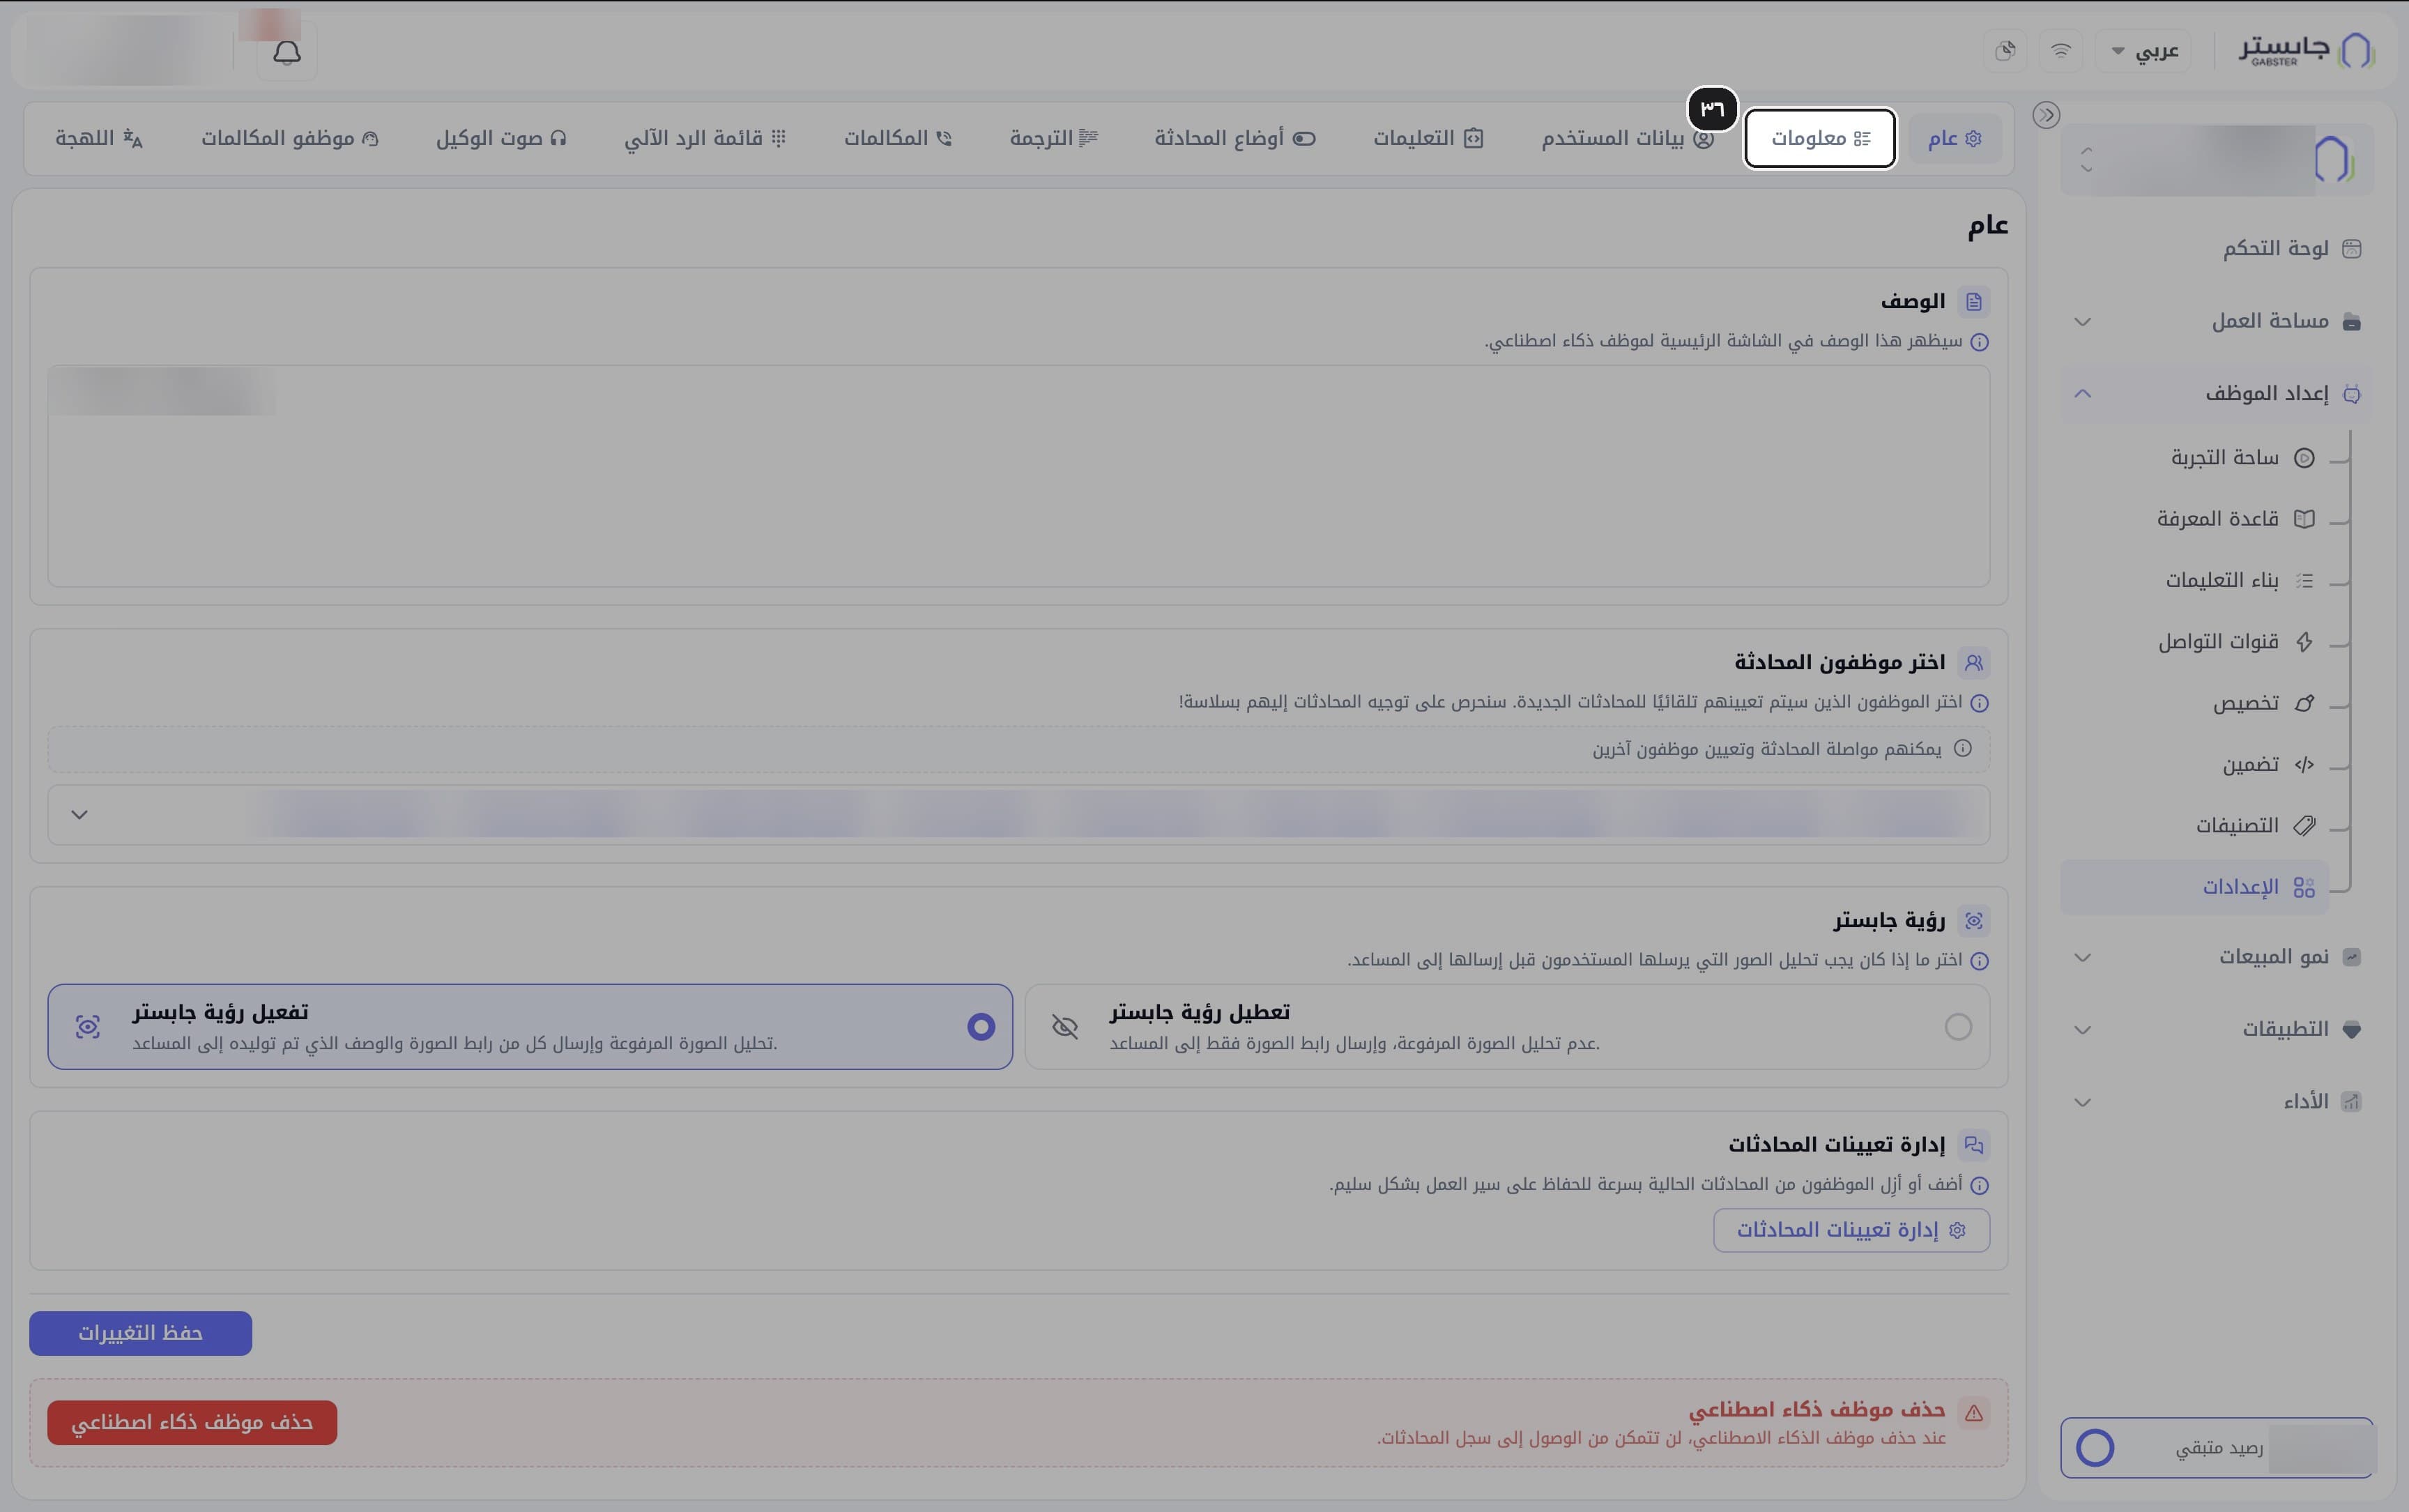
Open the Info tab
In the AI Agent Setup group, open Settings (الإعدادات), then the Info (معلومات) tab.
Result: the Info tab opens, headed AI Agent details (تفاصيل موظف ذكاء اصطناعي).
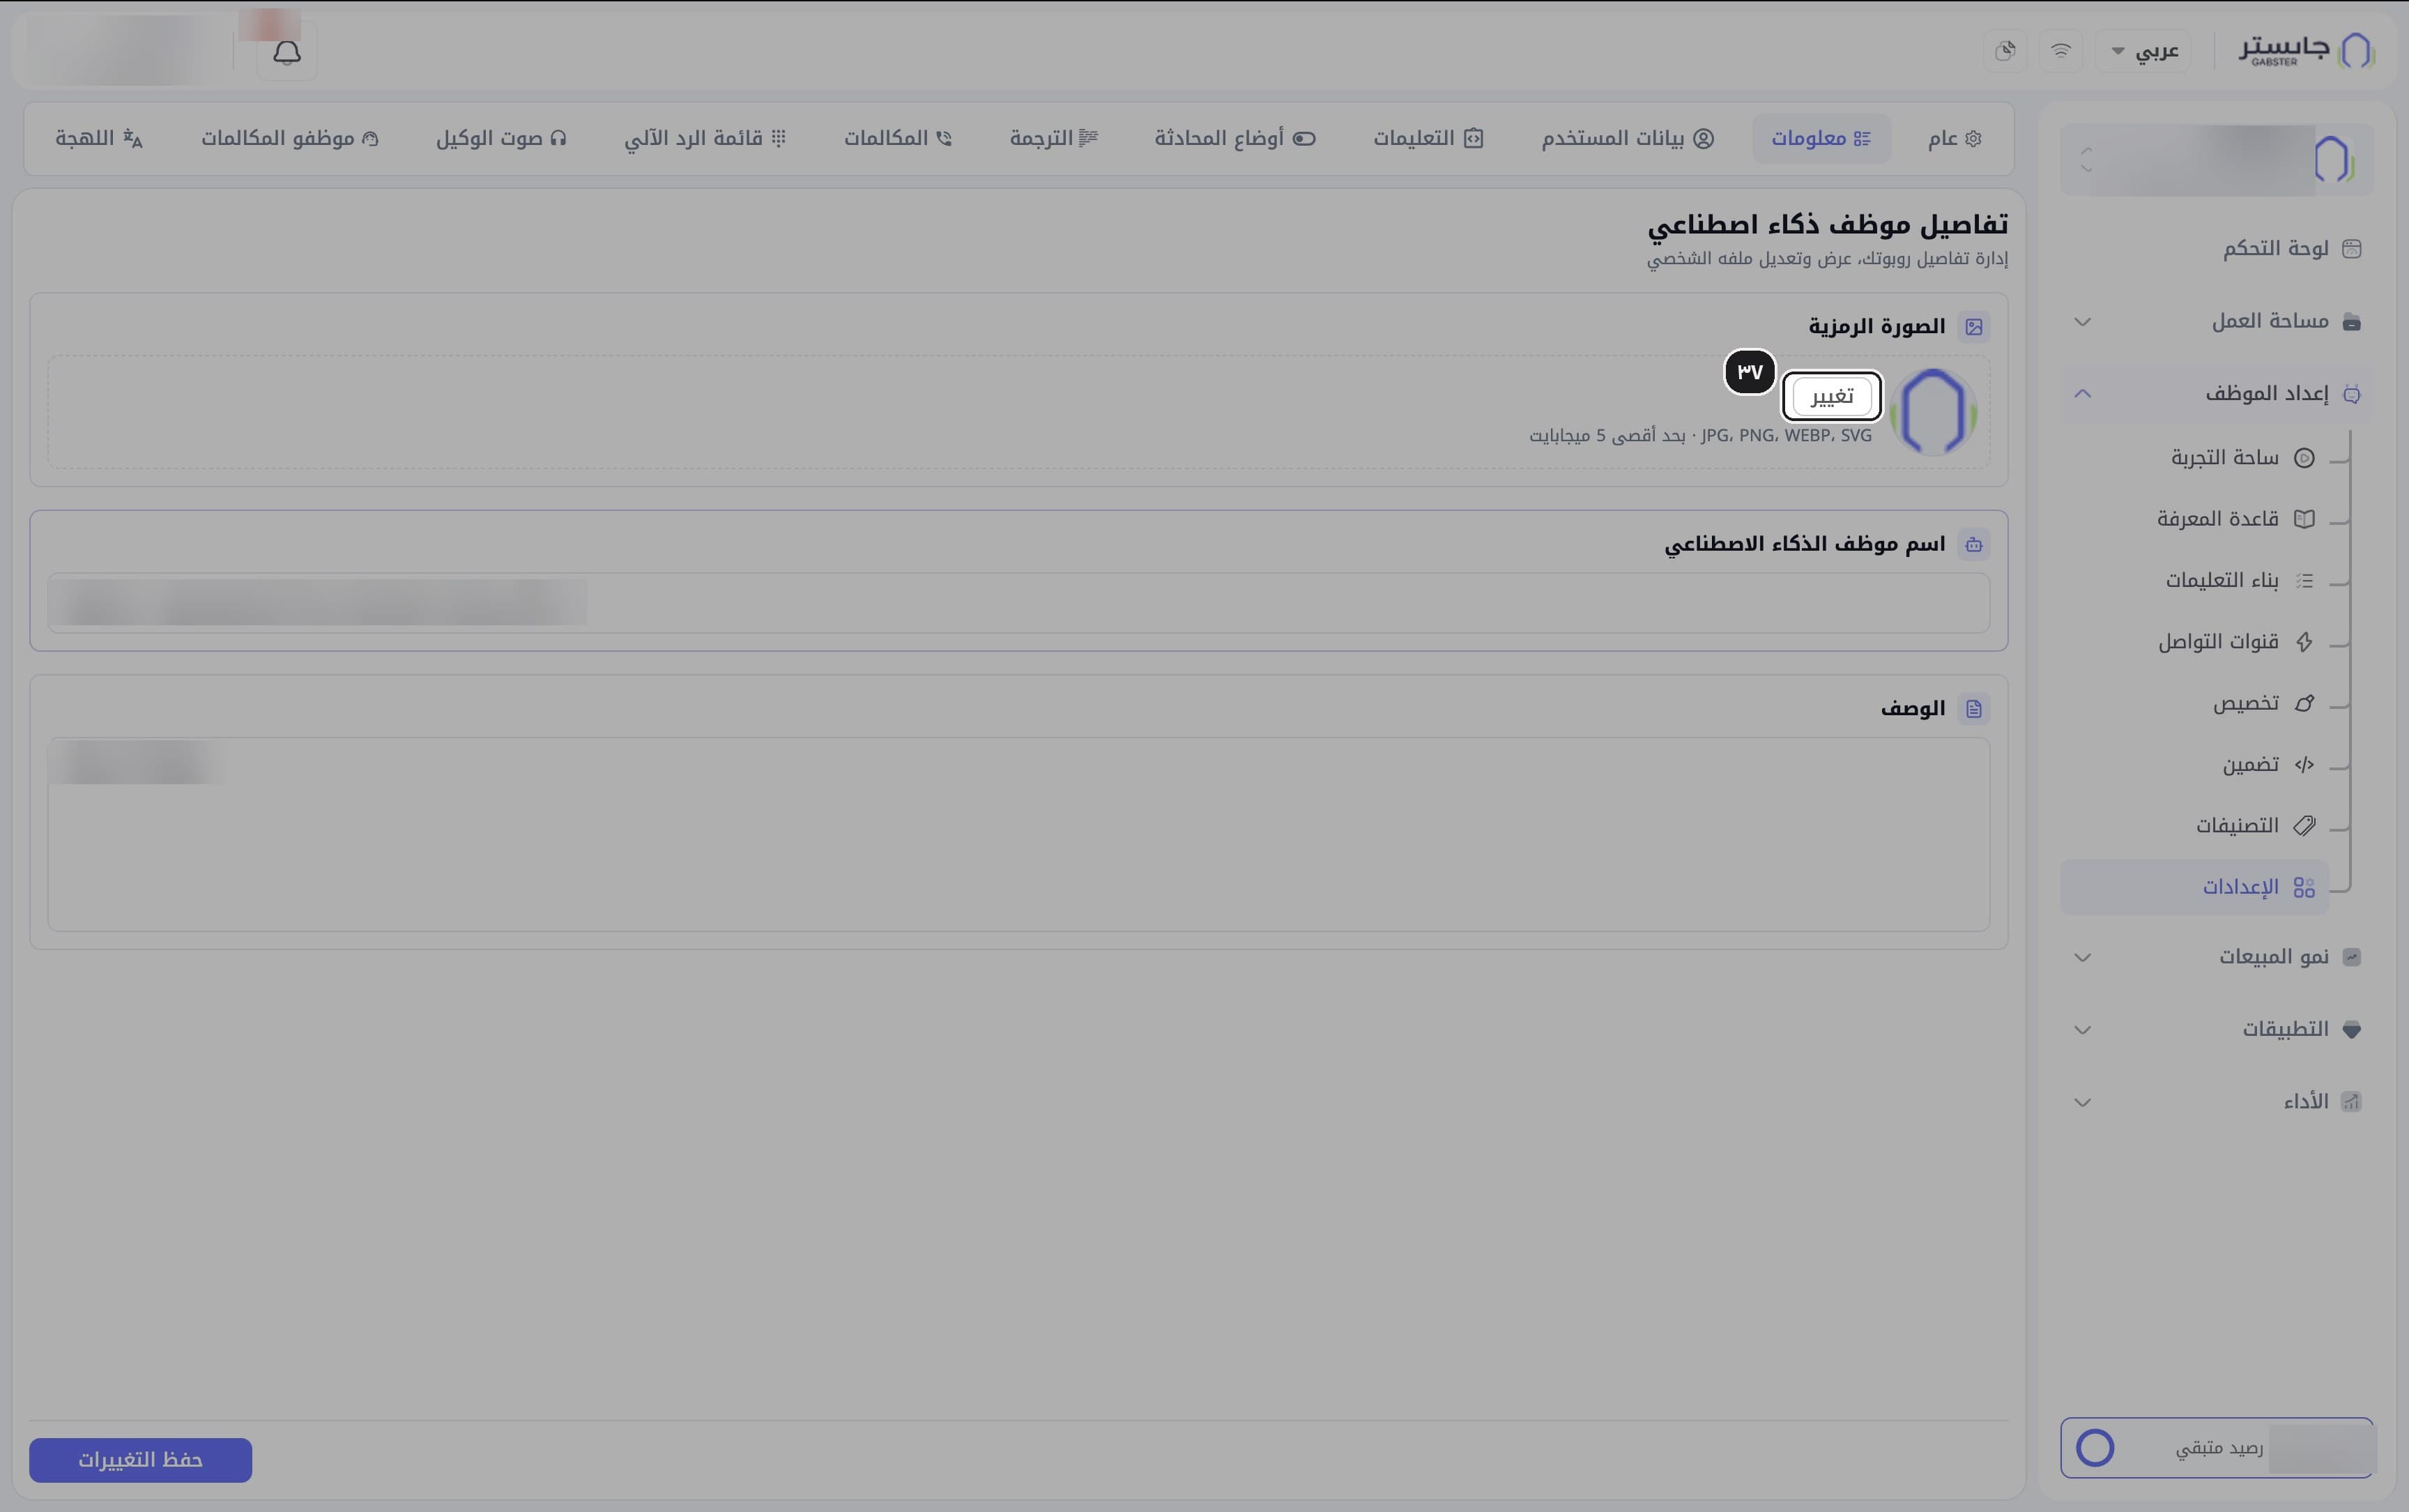
Change the avatar
Click Change (تغيير) next to the avatar. Accepted formats: JPG, PNG, WEBP and SVG, up to 5 MB.
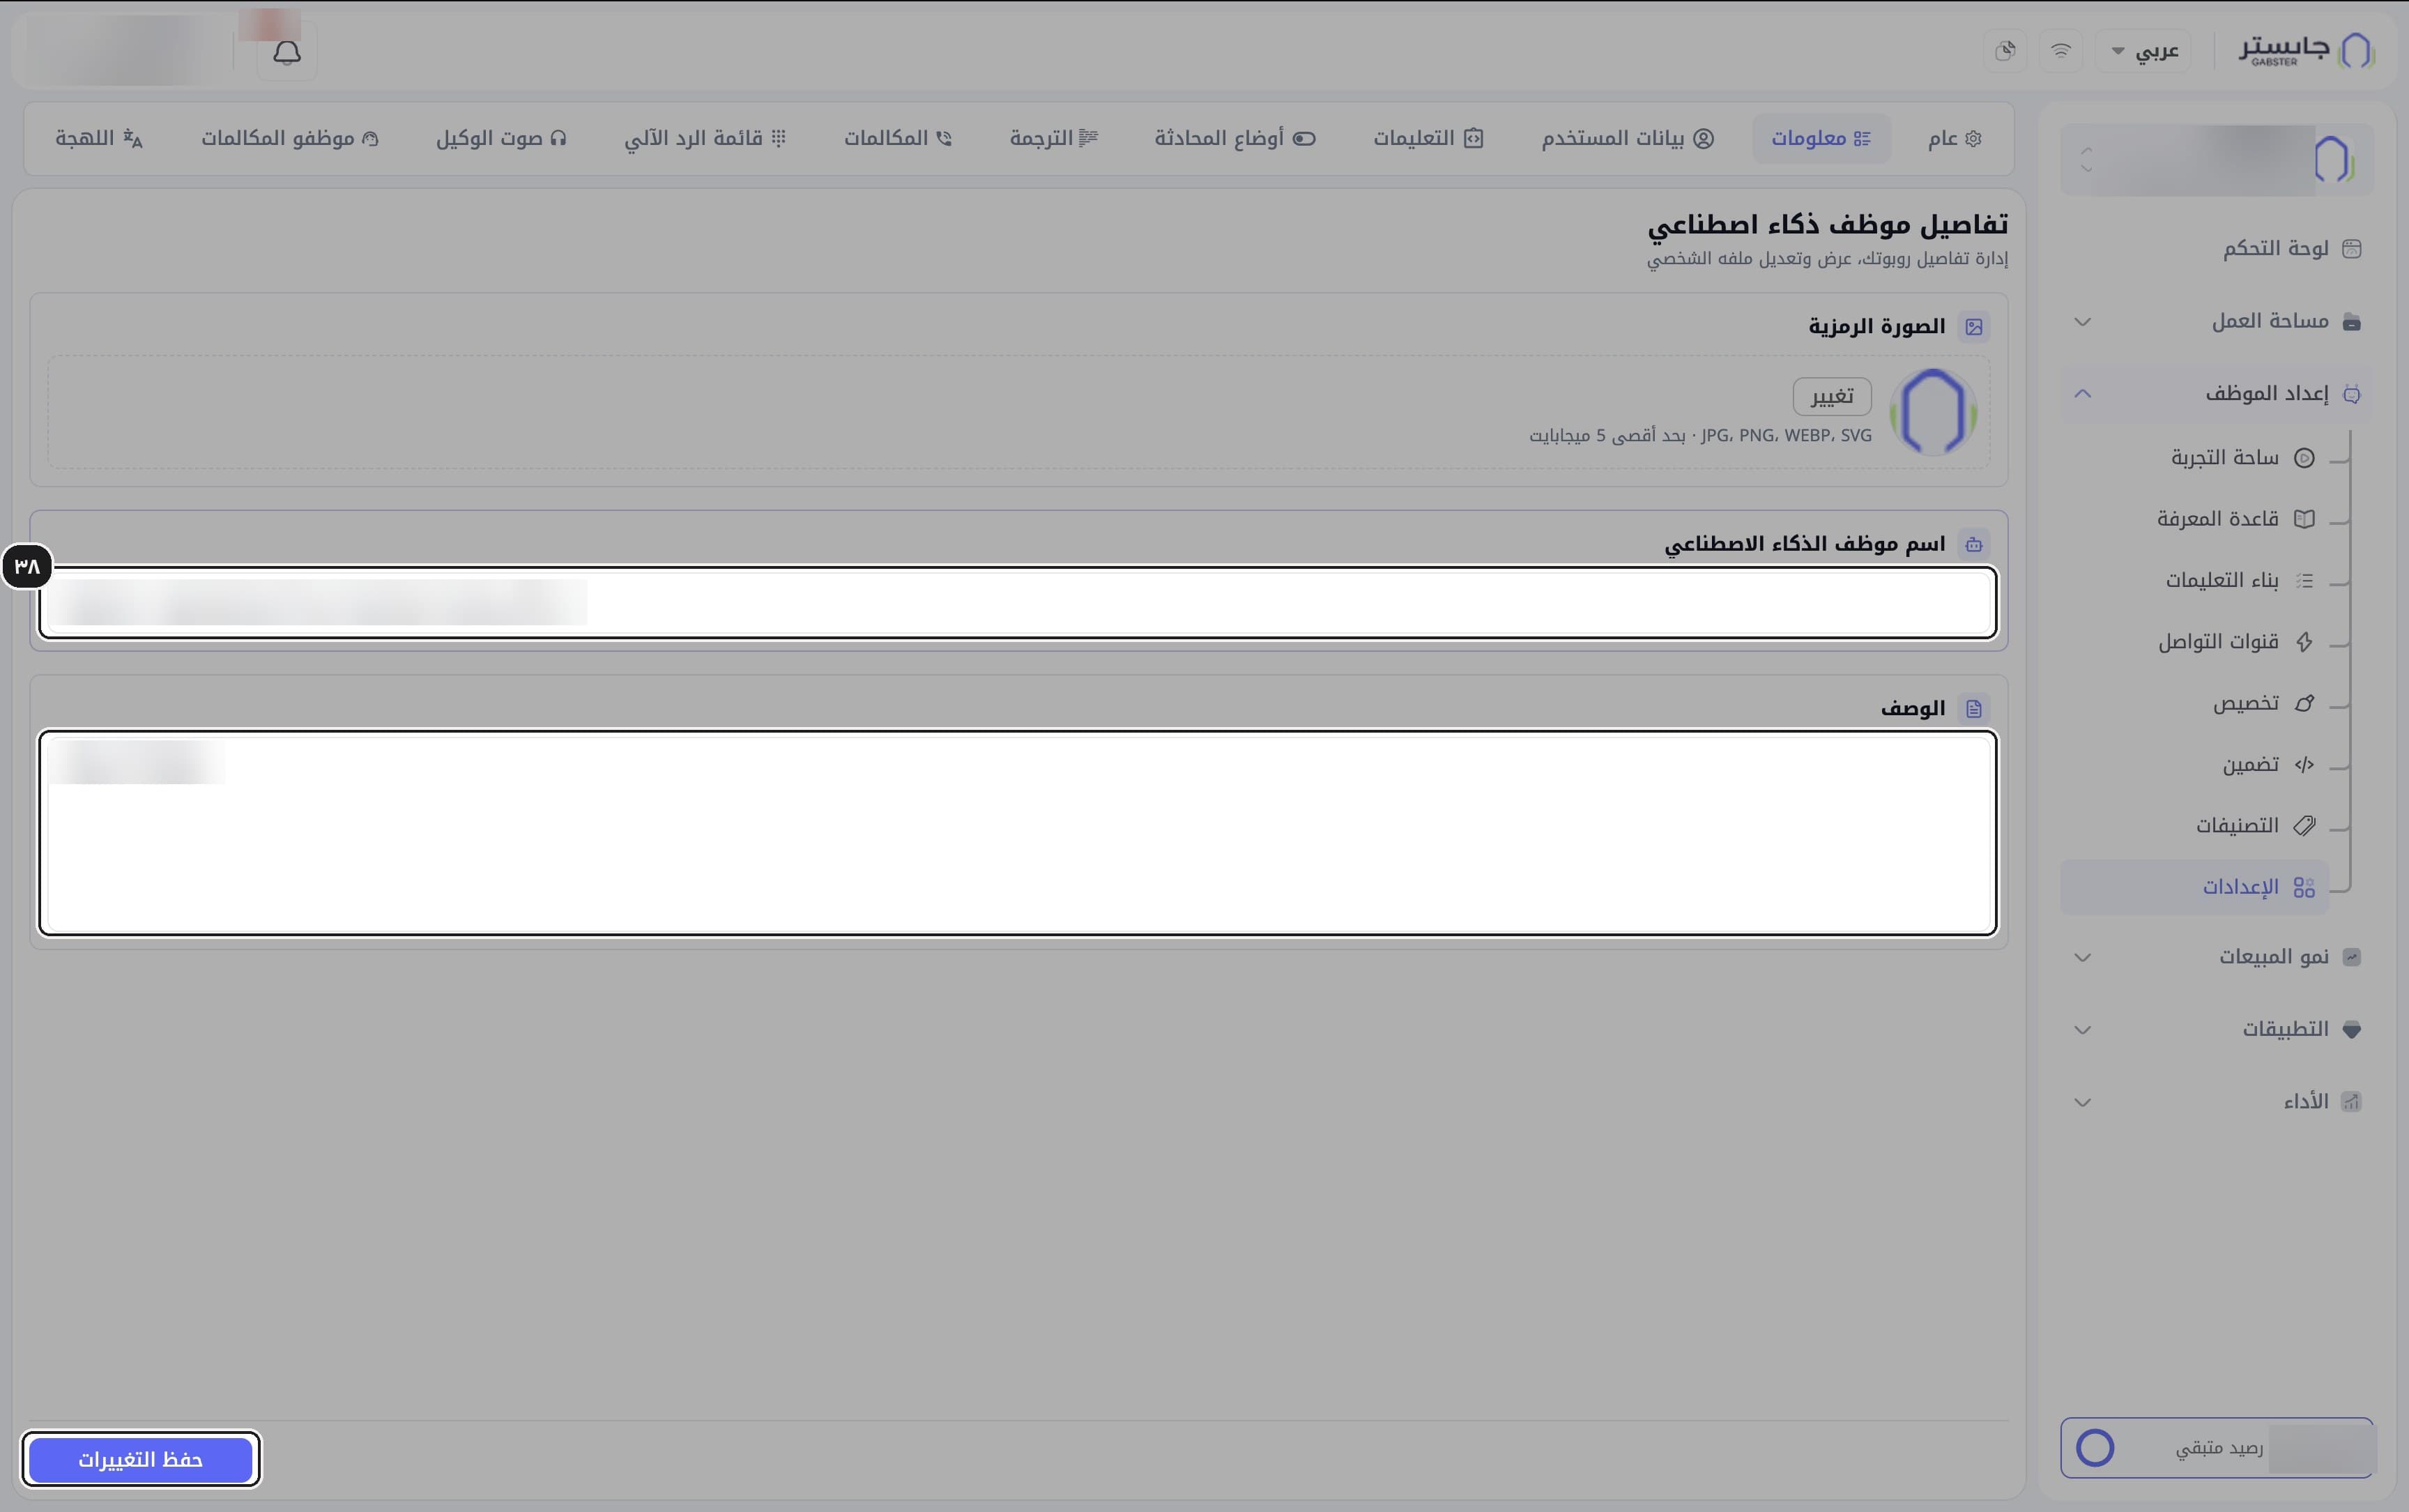
Set the name and description
Enter your AI Agent's name and description, then click Save changes (حفظ التغييرات).
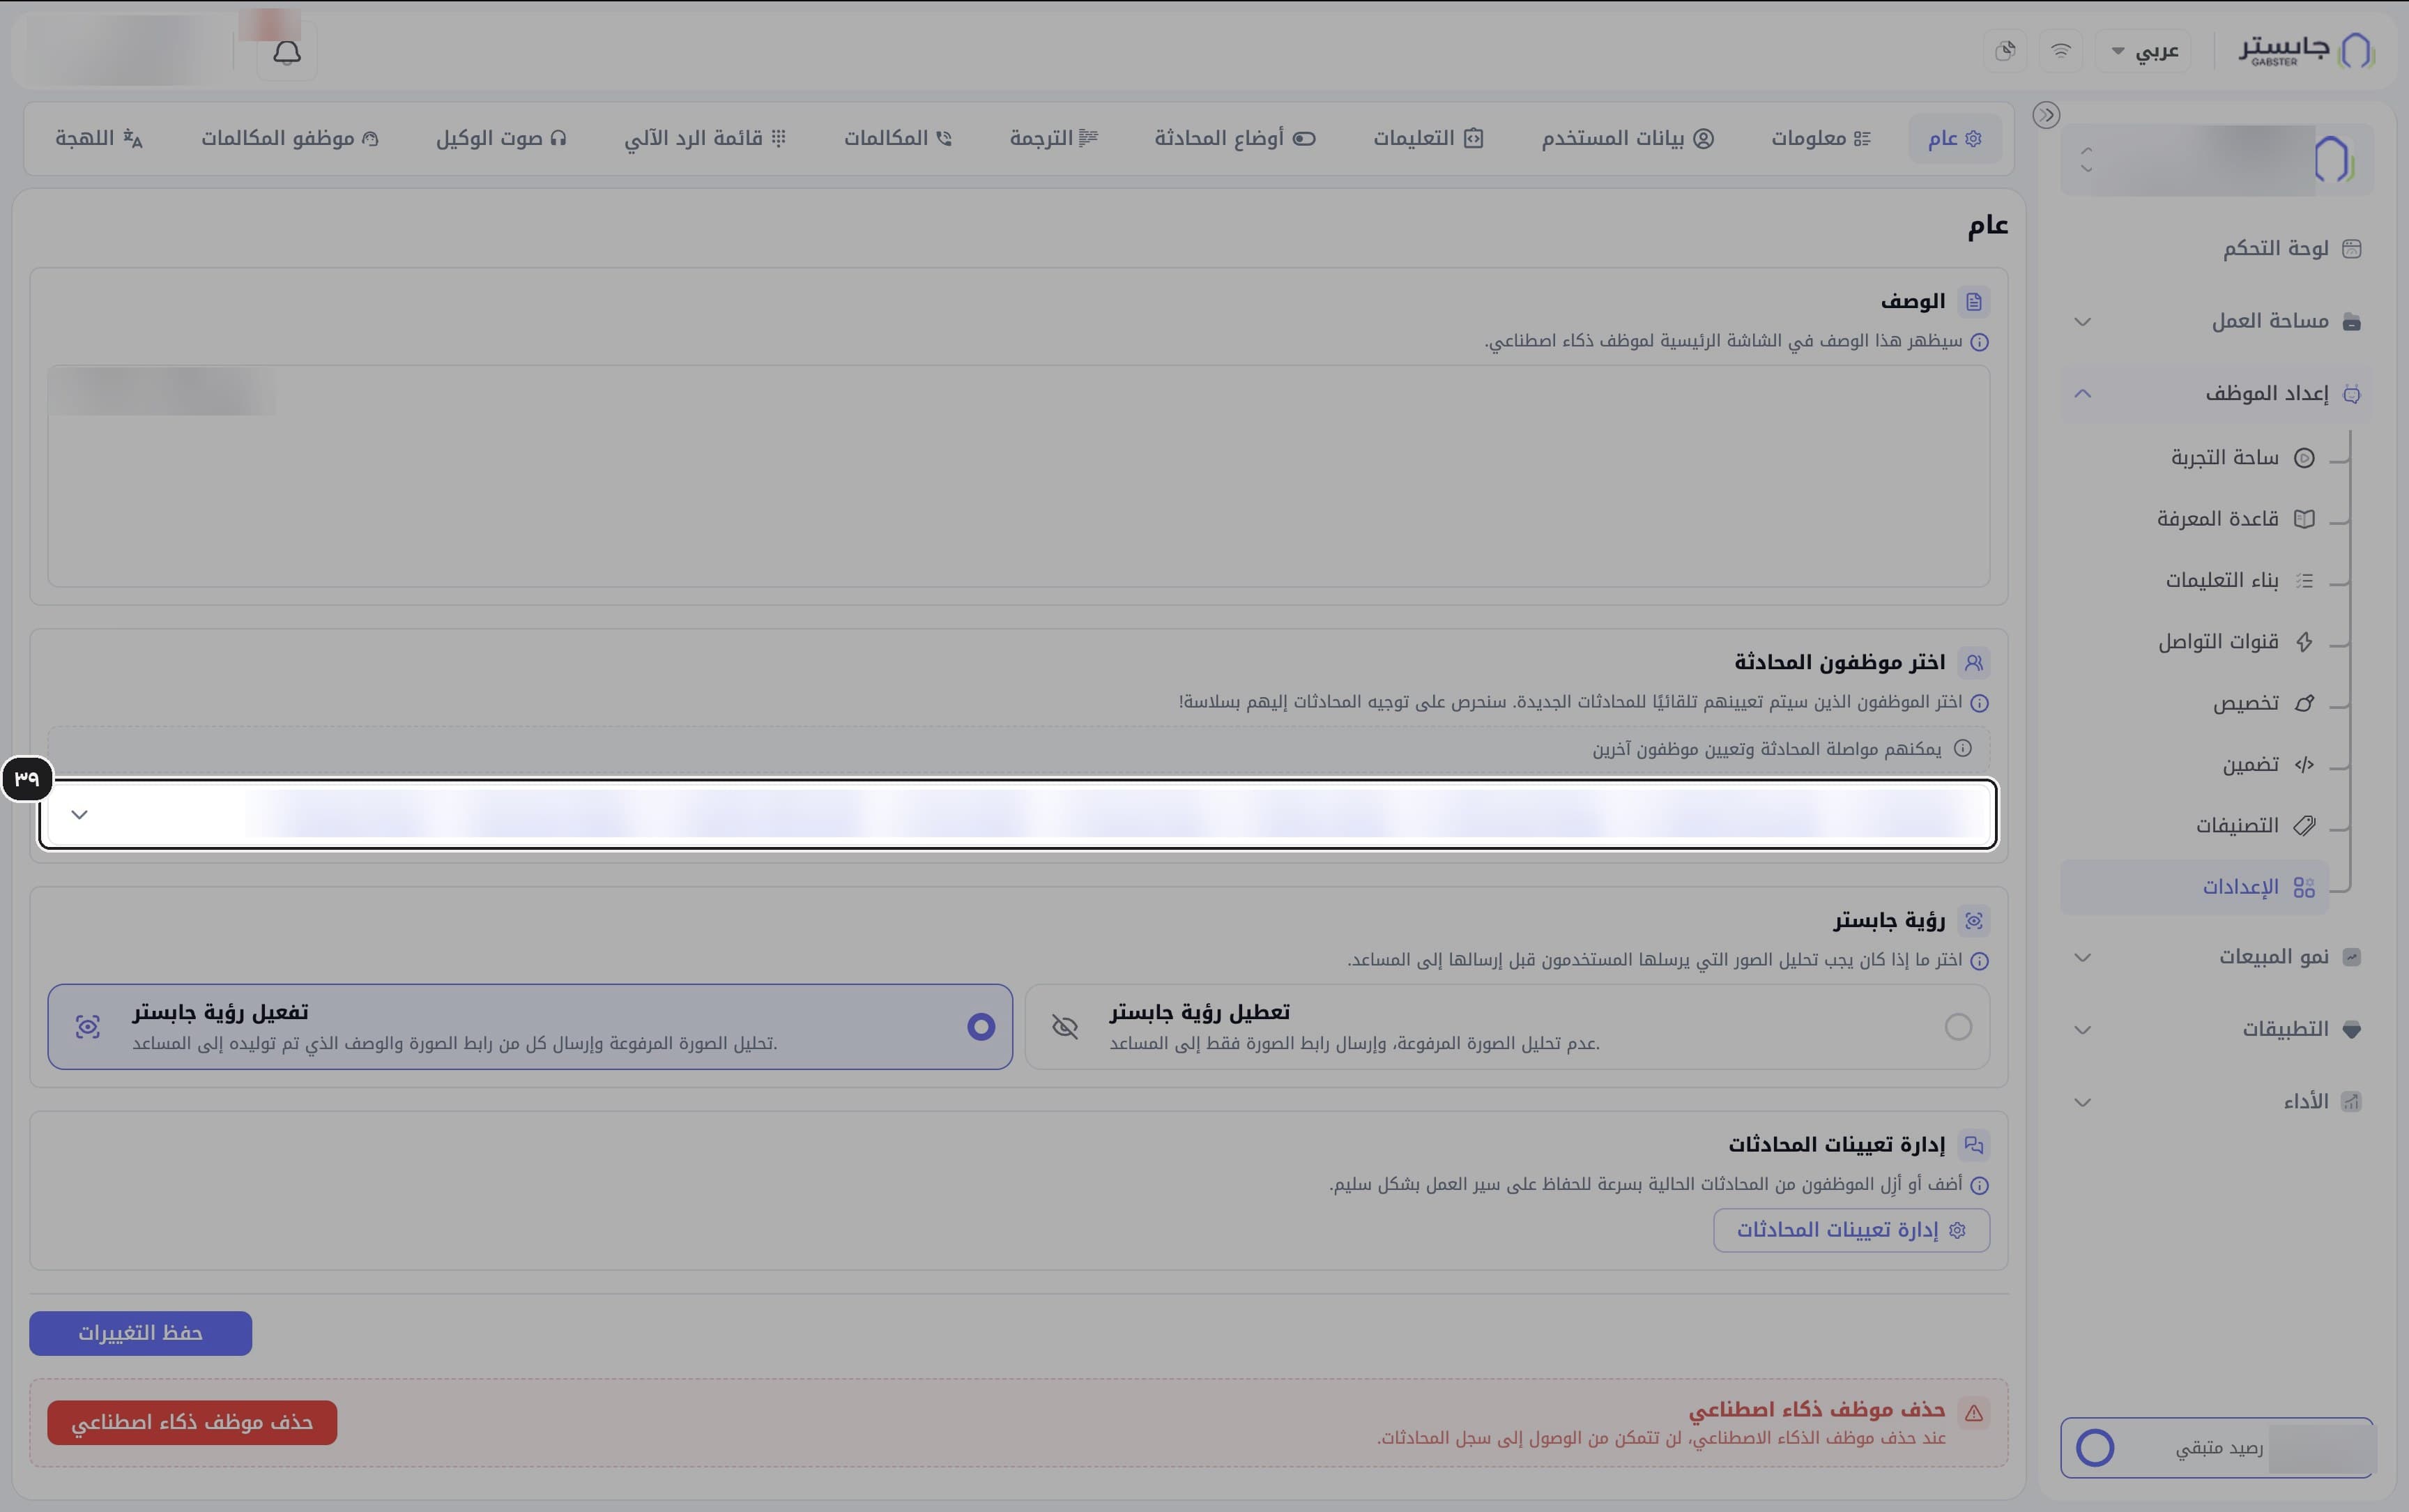
Choose the staff
On the General (عام) tab, use the Choose conversation staff (اختر موظفون المحادثة) field to choose the staff members who are assigned automatically to new conversations. They can continue the conversation and assign other staff.
Result: each selected staff member appears as a chip in the field.
Set Gabster Vision
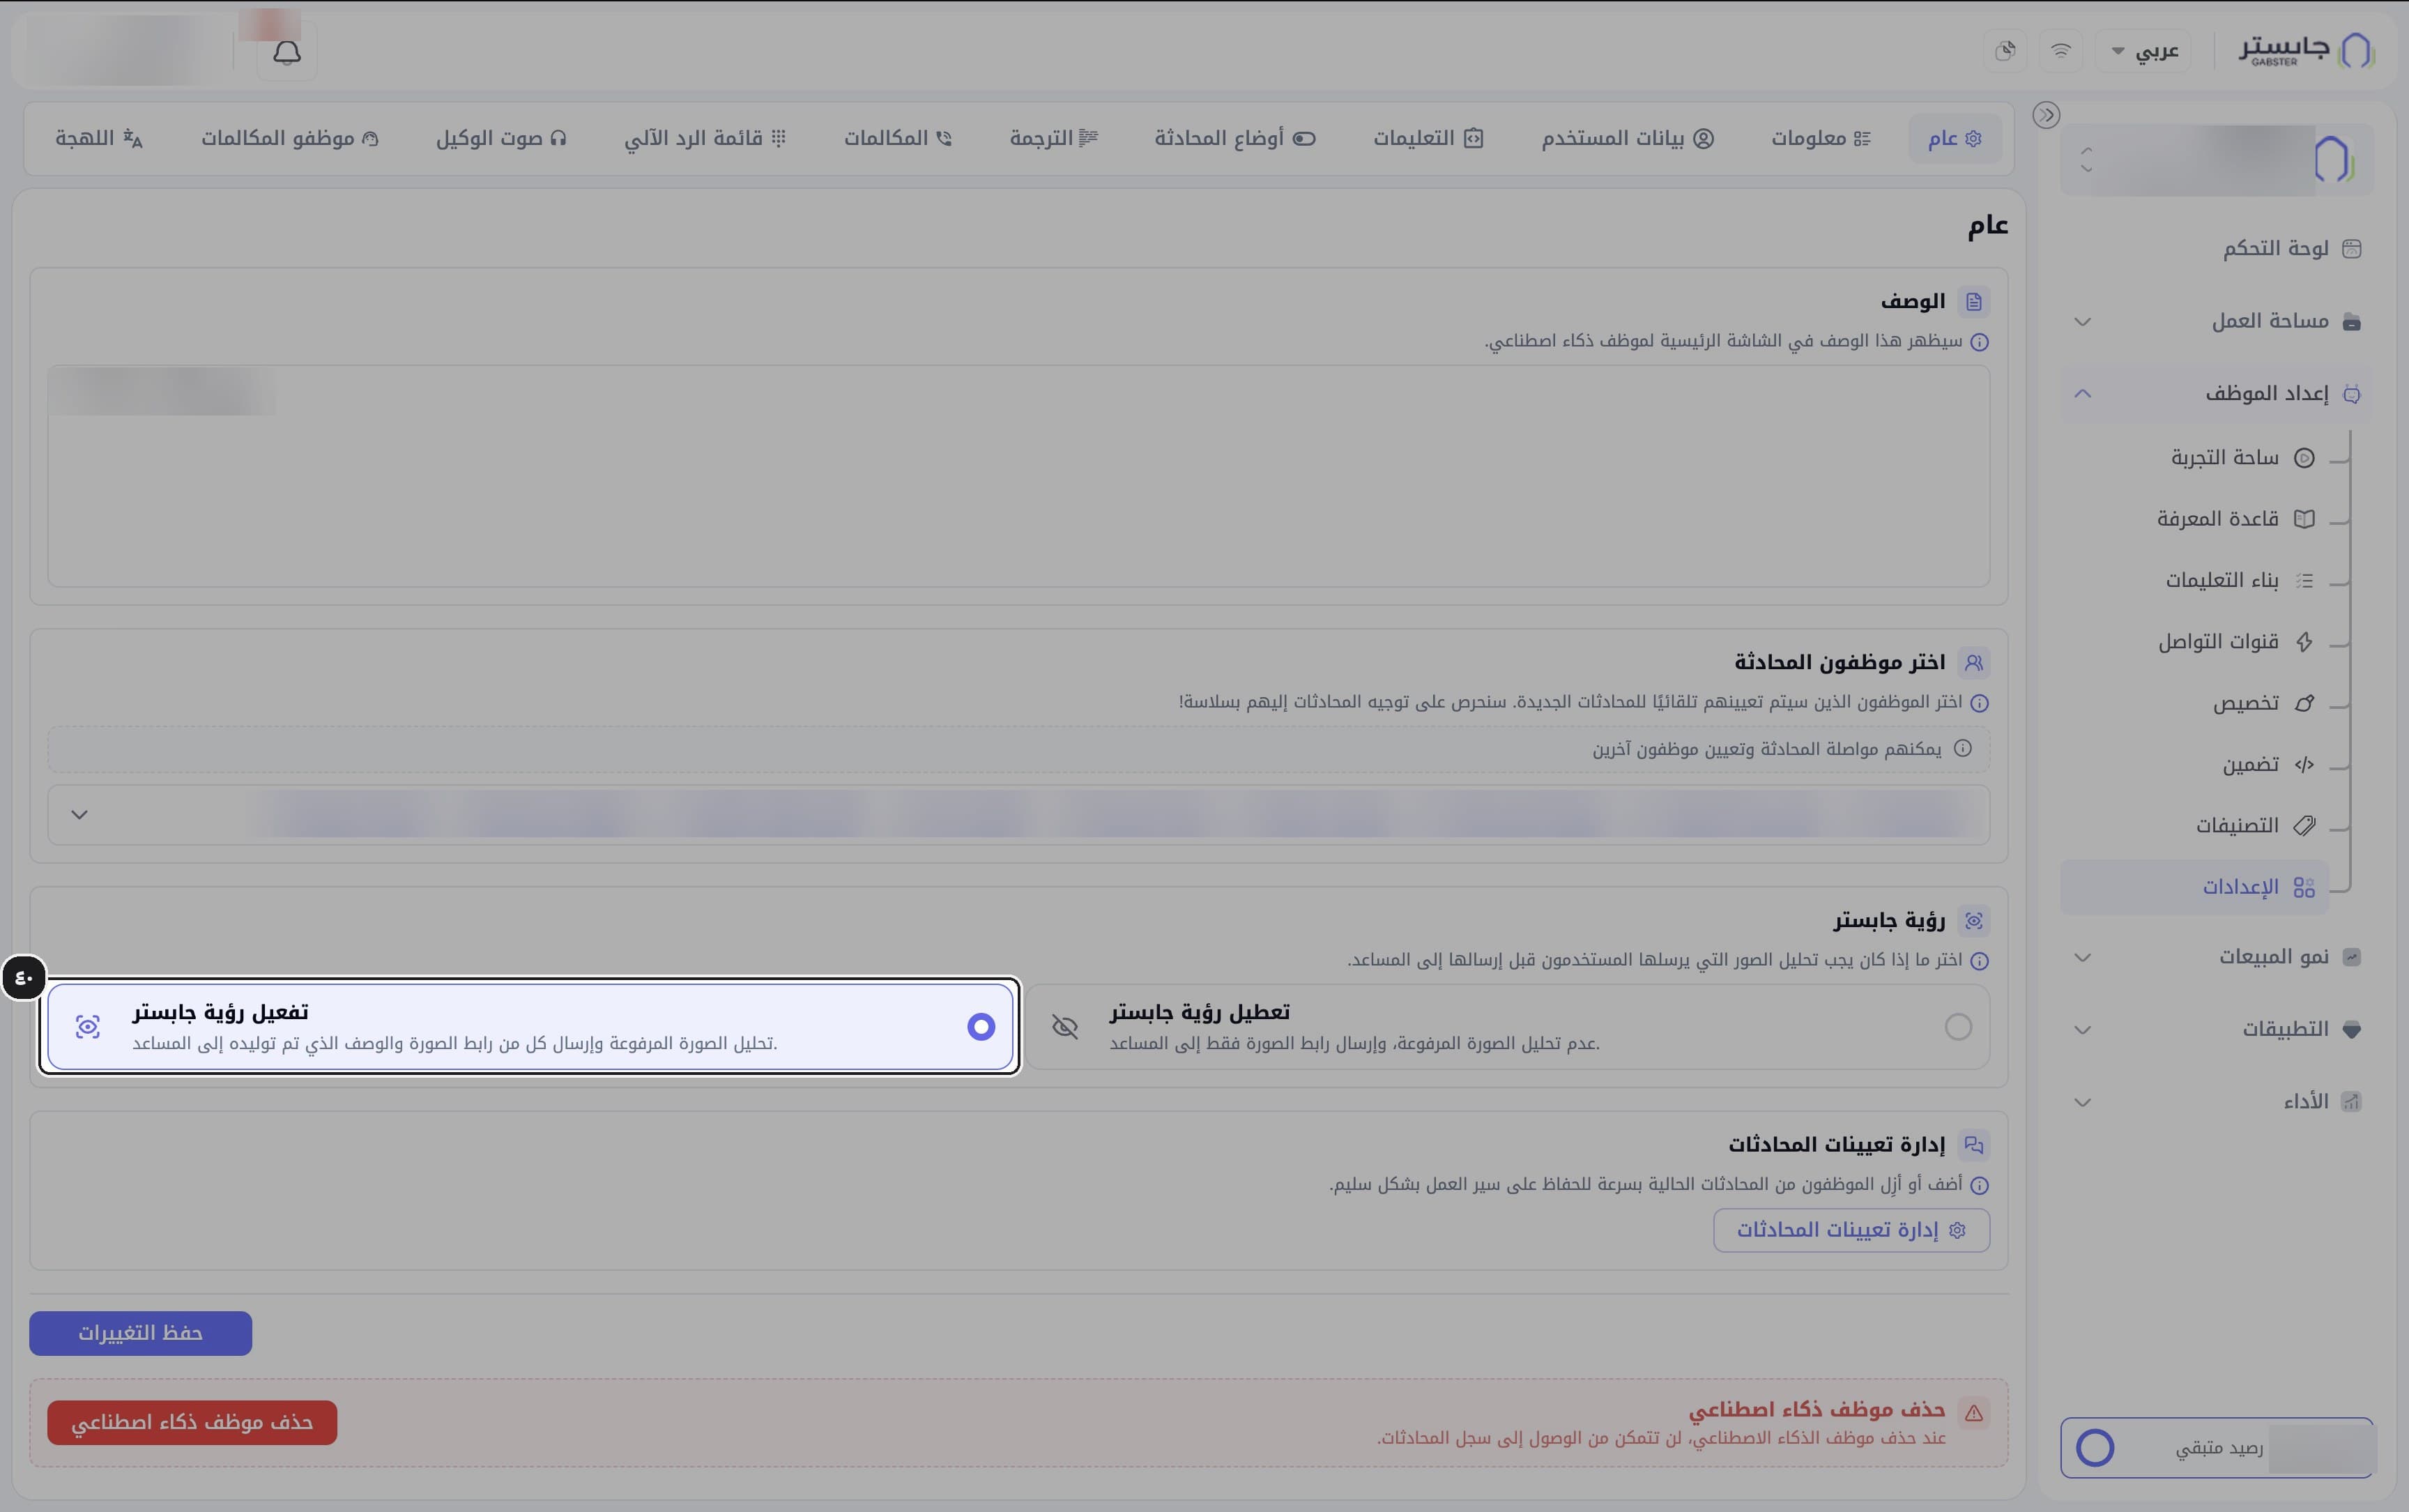
In the Gabster Vision (رؤية جابستر) card, choose Enable Gabster Vision (تفعيل رؤية جابستر) to analyze images customers send and pass both the image link and its generated description to your AI Agent, or Disable Gabster Vision (تعطيل رؤية جابستر) to send only the image link, without analysis.
Result: the selected option gets a blue border.
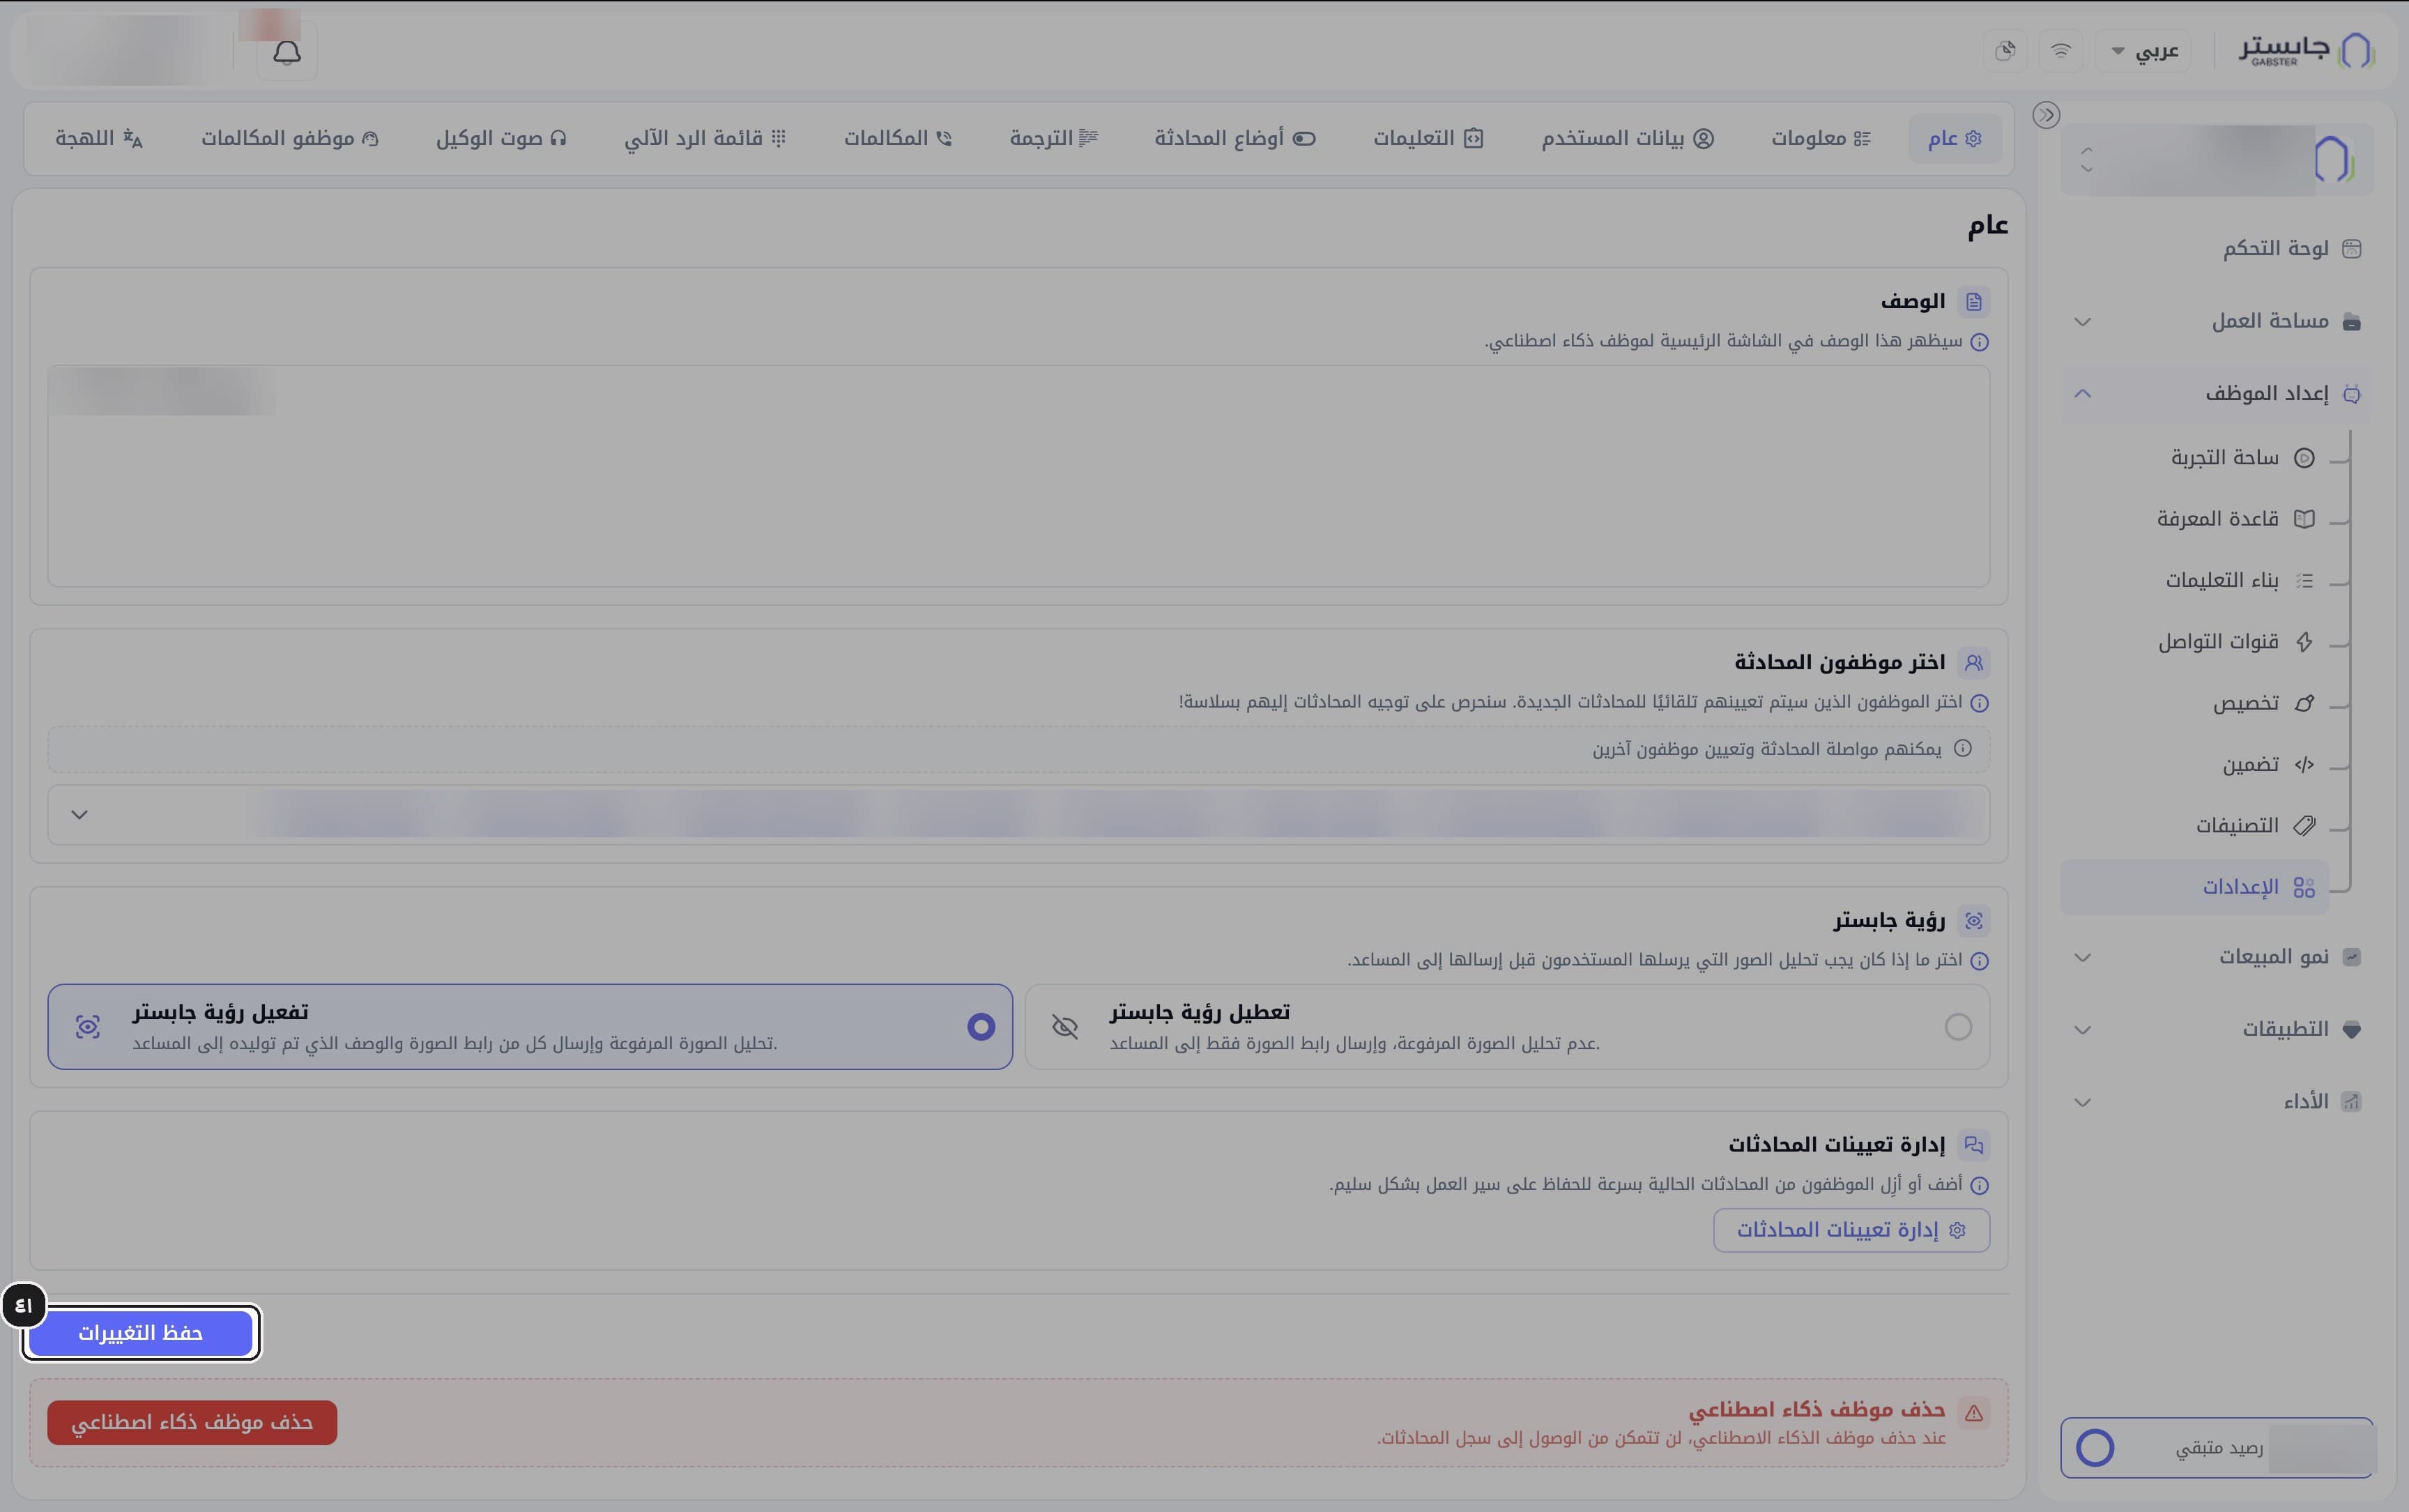
Save changes
Click Save changes (حفظ التغييرات).
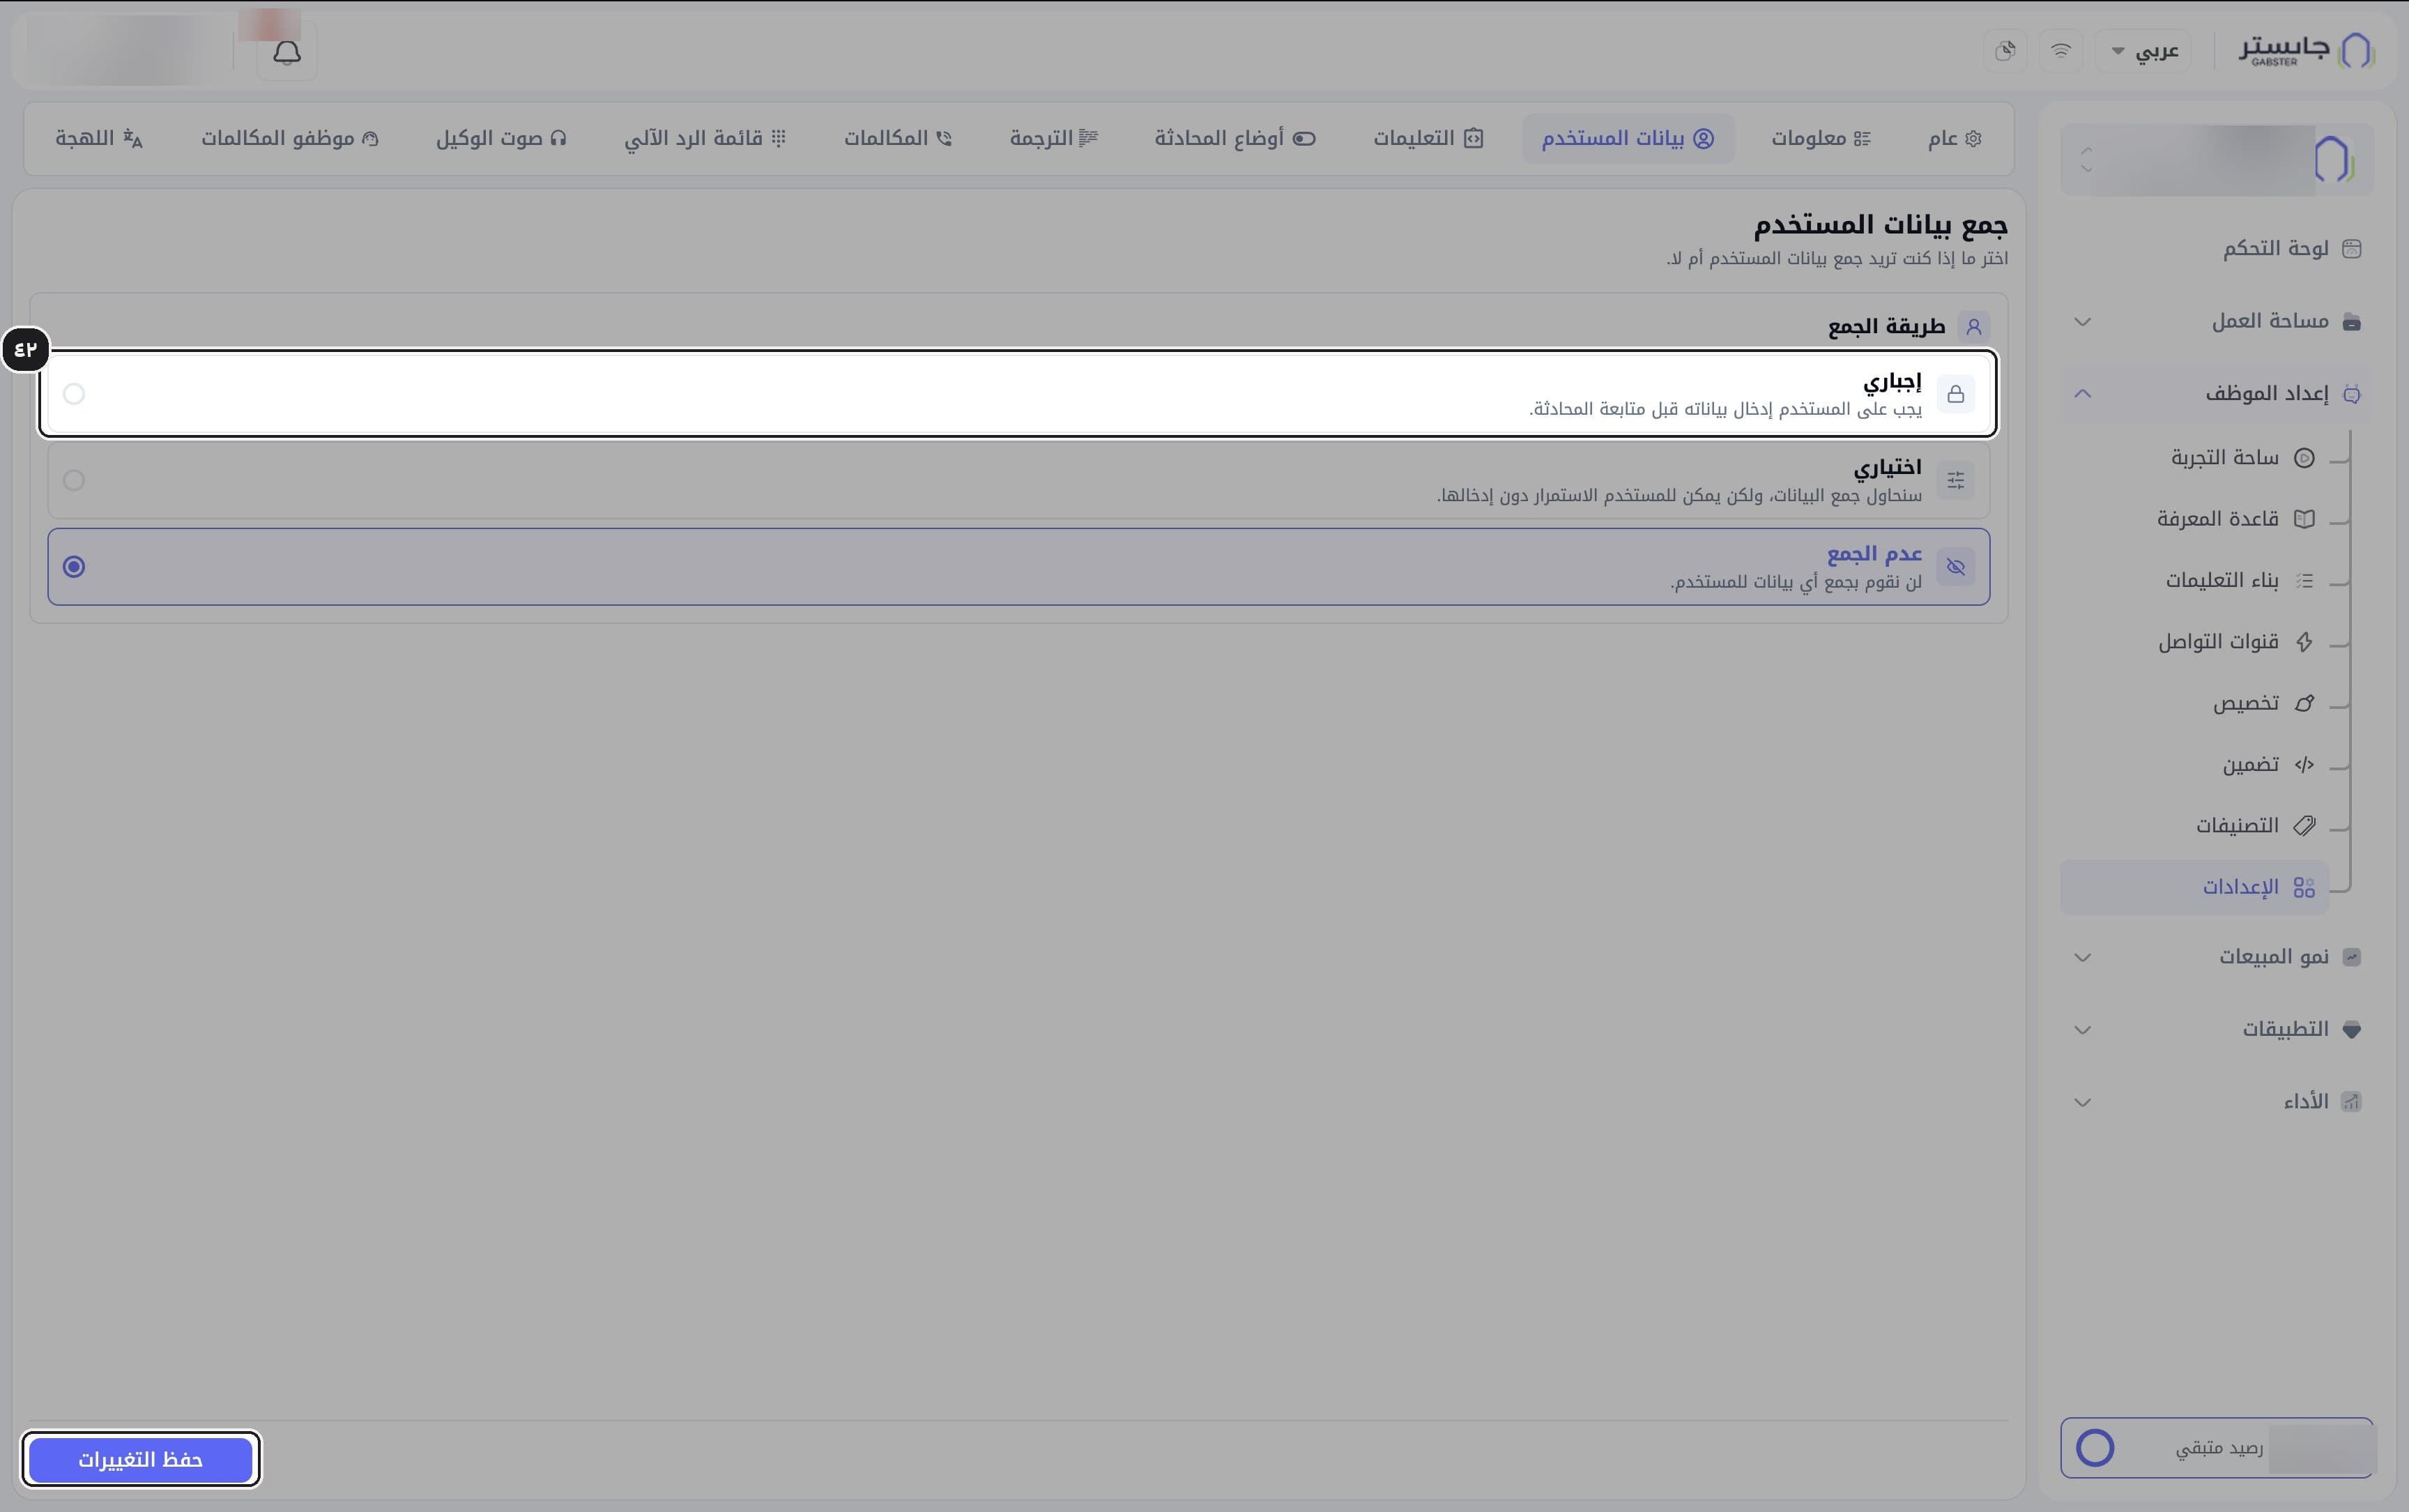
Choose how customer data is collected
On the User Data (بيانات المستخدم) tab, choose Required (إجباري), Optional (اختياري) or Don't collect (عدم الجمع), then click Save changes.
- Required: the customer must enter their data before continuing the conversation.
- Optional: Gabster tries to collect the data, but the customer can continue without it.
- Don't collect: no data is collected.
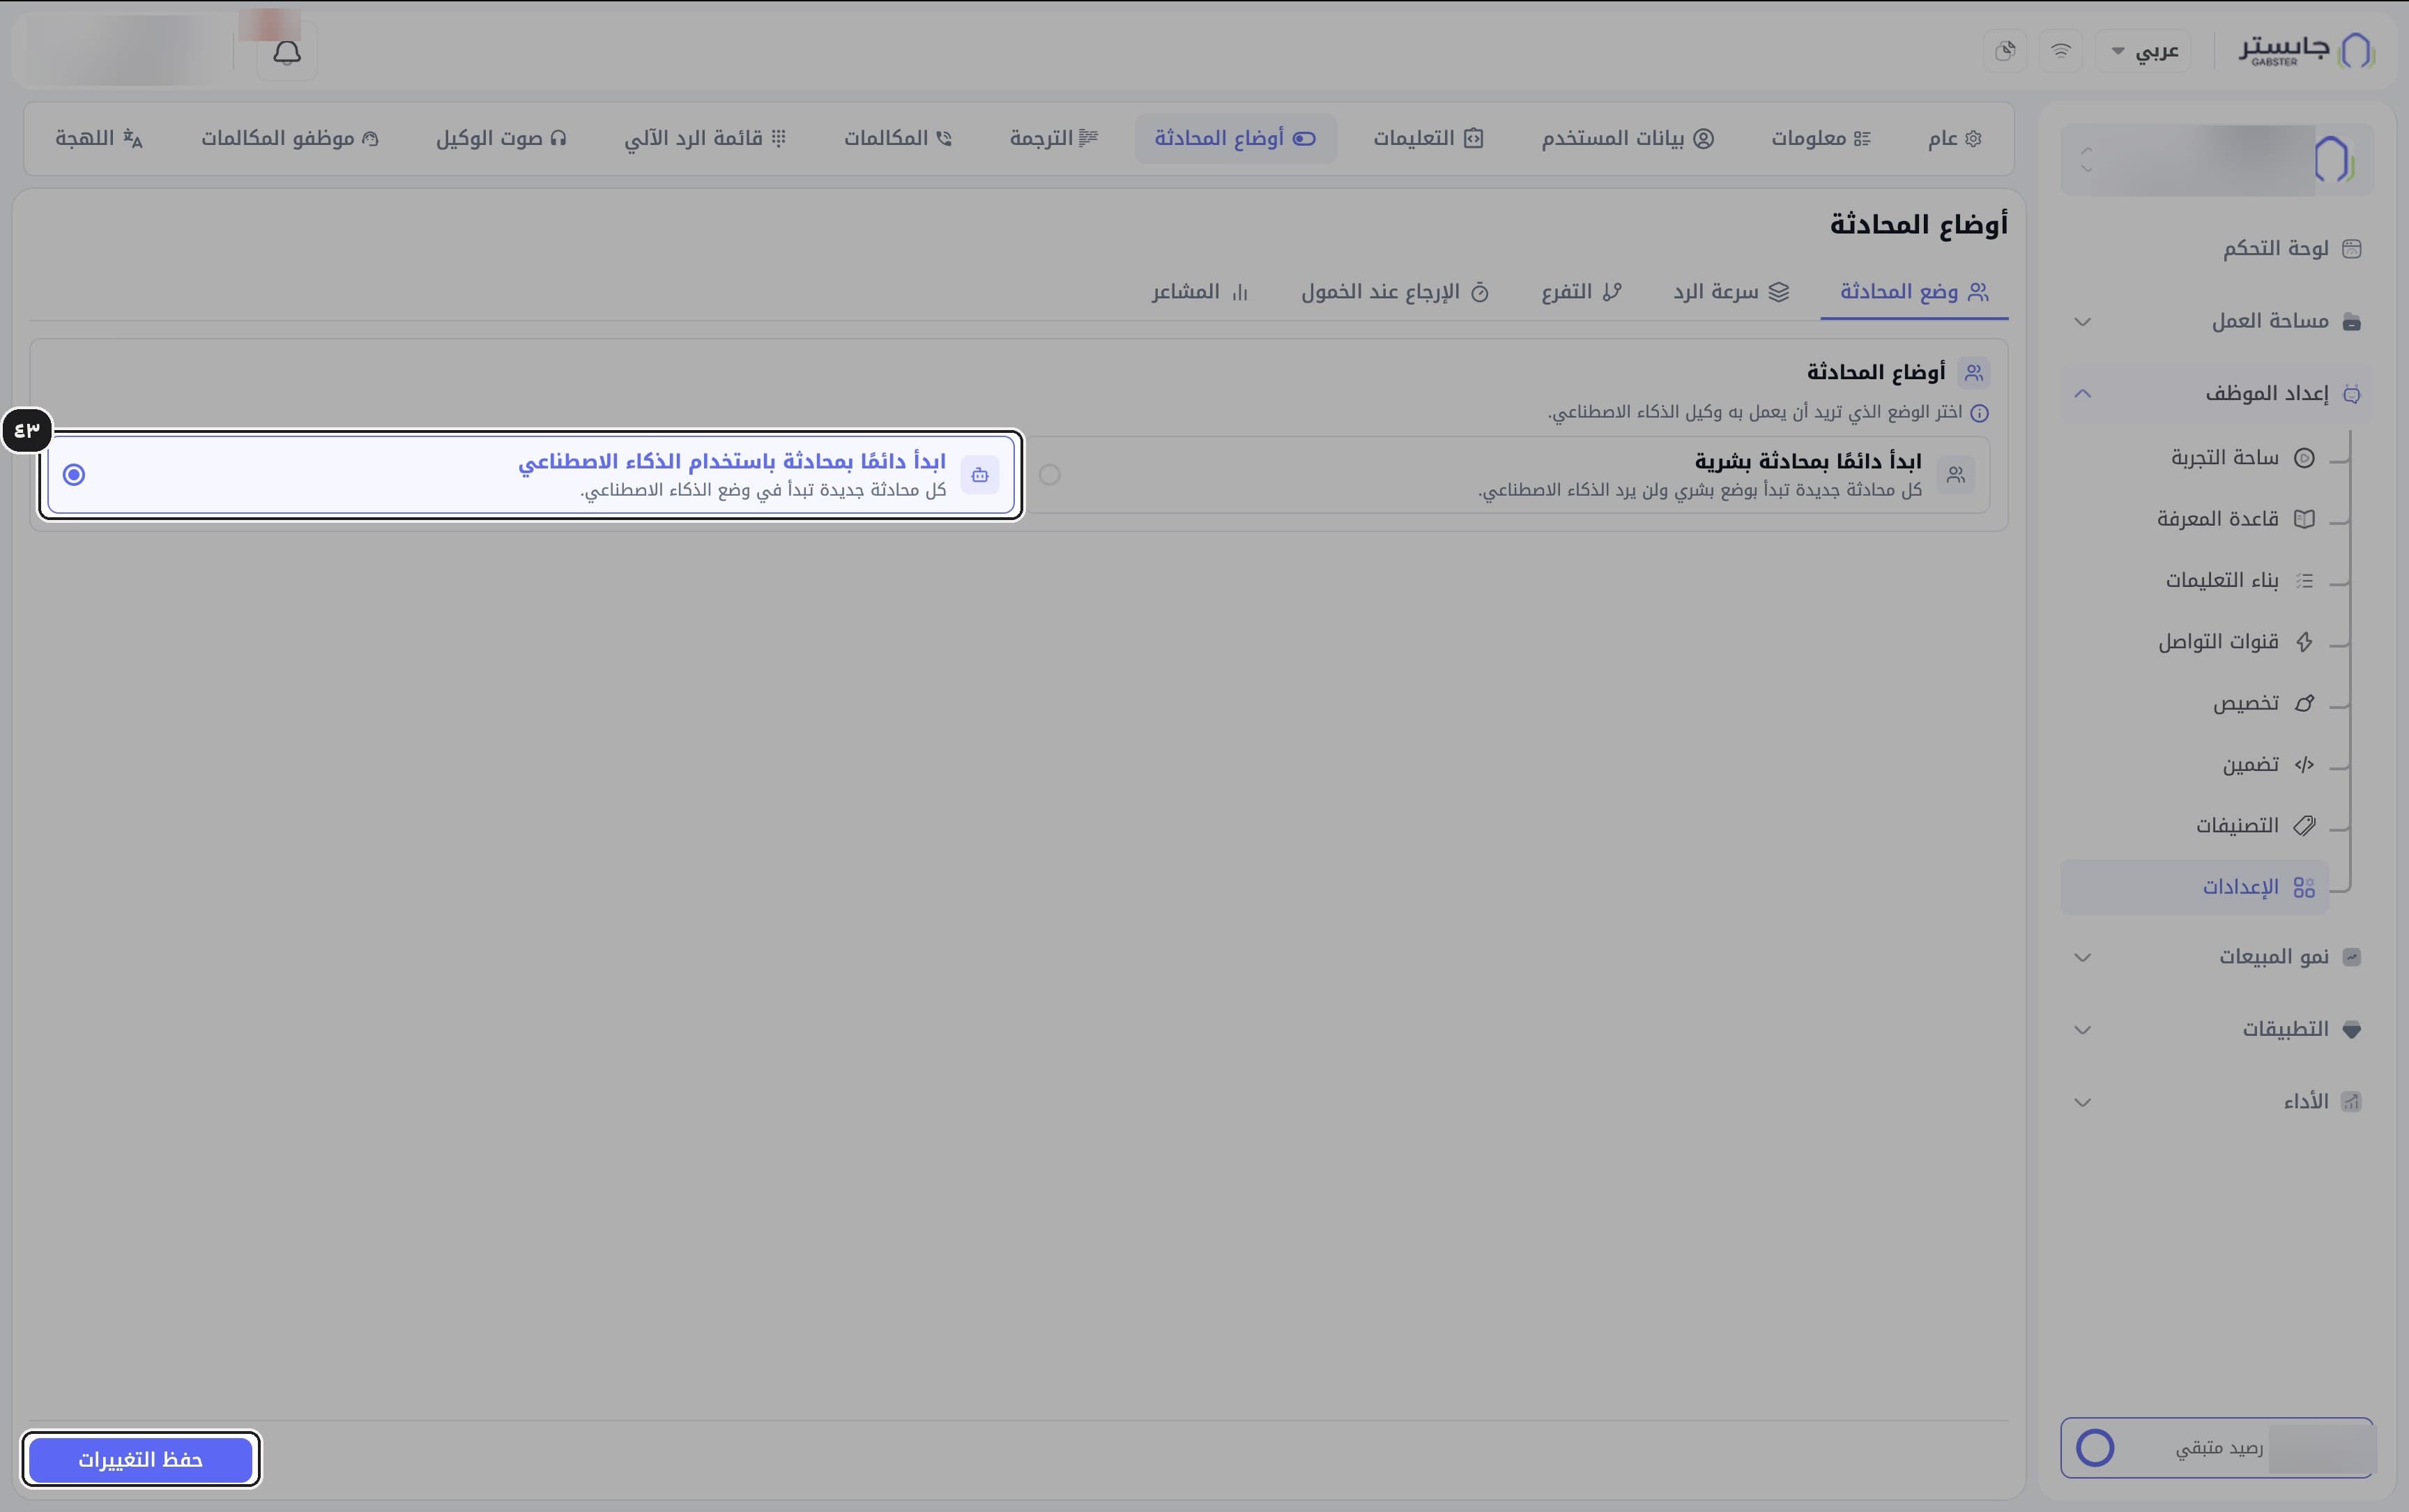
Choose how conversations start
On the Conversation Modes (أوضاع المحادثة) tab, in the Conversation Mode (وضع المحادثة) sub-tab, choose Always start with an AI conversation (ابدأ دائمًا بمحادثة باستخدام الذكاء الاصطناعي) or Always start with a human conversation (ابدأ دائمًا بمحادثة بشرية), in which your AI Agent does not reply. Then click Save changes.
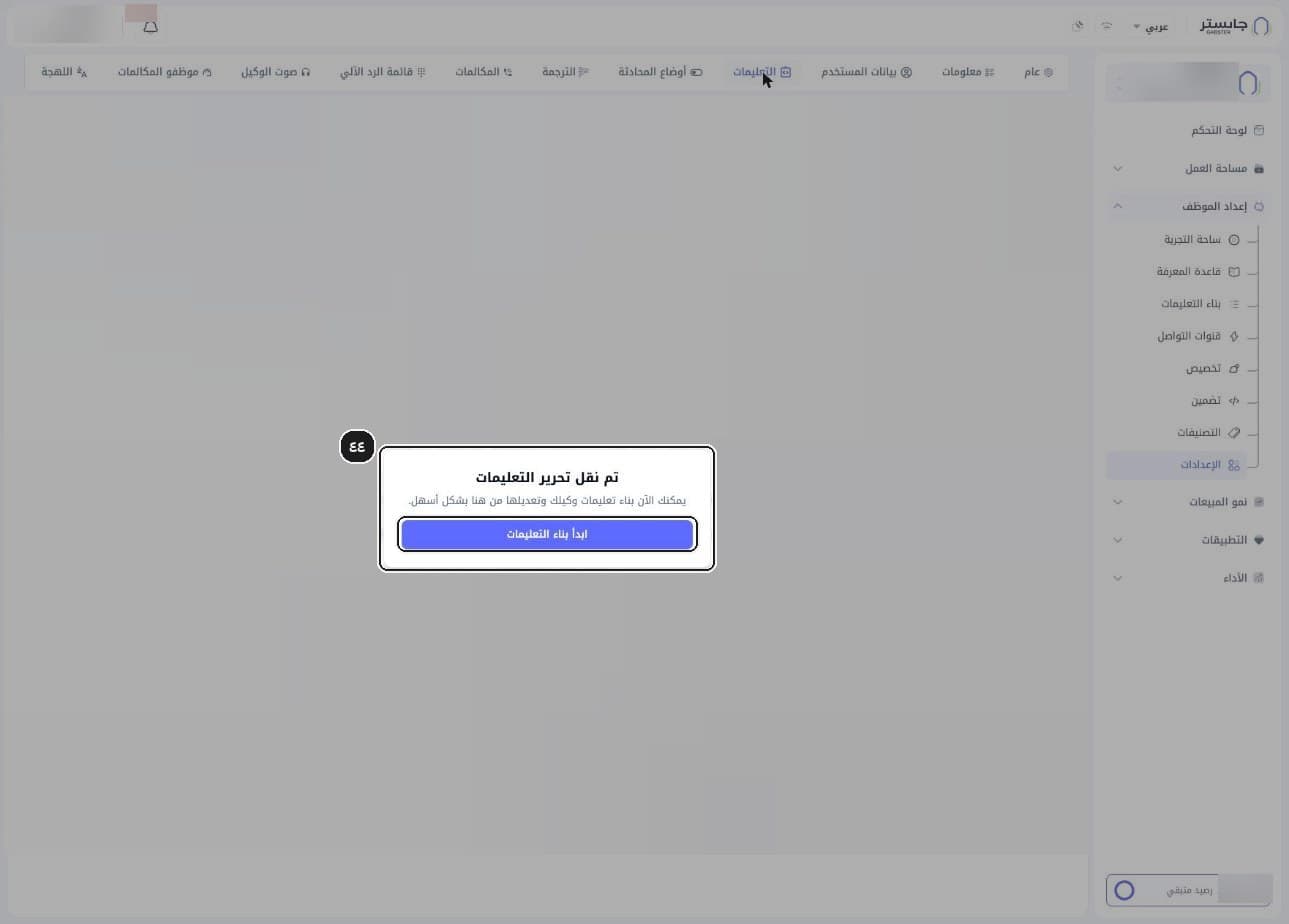
Go to the Instruction Builder from Settings
The Instructions (التعليمات) tab shows Instruction editing has moved (تم نقل تحرير التعليمات): instructions are now written in the Instruction Builder. Click Start building instructions (ابدأ بناء التعليمات) to go there (section B).