Tutorials
Follow customer conversations and step in
Find a conversation, take over from your AI Agent, leave internal notes, check the customer's details and set the dialect for improved replies.
In this tutorial you find the conversation you need, read what your AI Agent has said, take over when needed, leave internal notes and use the conversation actions menu, then review the Conversation info panel, the customer's details and their full profile. Finally, you set the dialect and banned words used when you improve a draft reply. It is meant for customer-service and sales staff.
Before you start:
- A staff account with access to Customer Conversations (محادثة العميل).
- At least one connected channel (see Customize and embed the widget and Connect channels).
A. Find a conversation
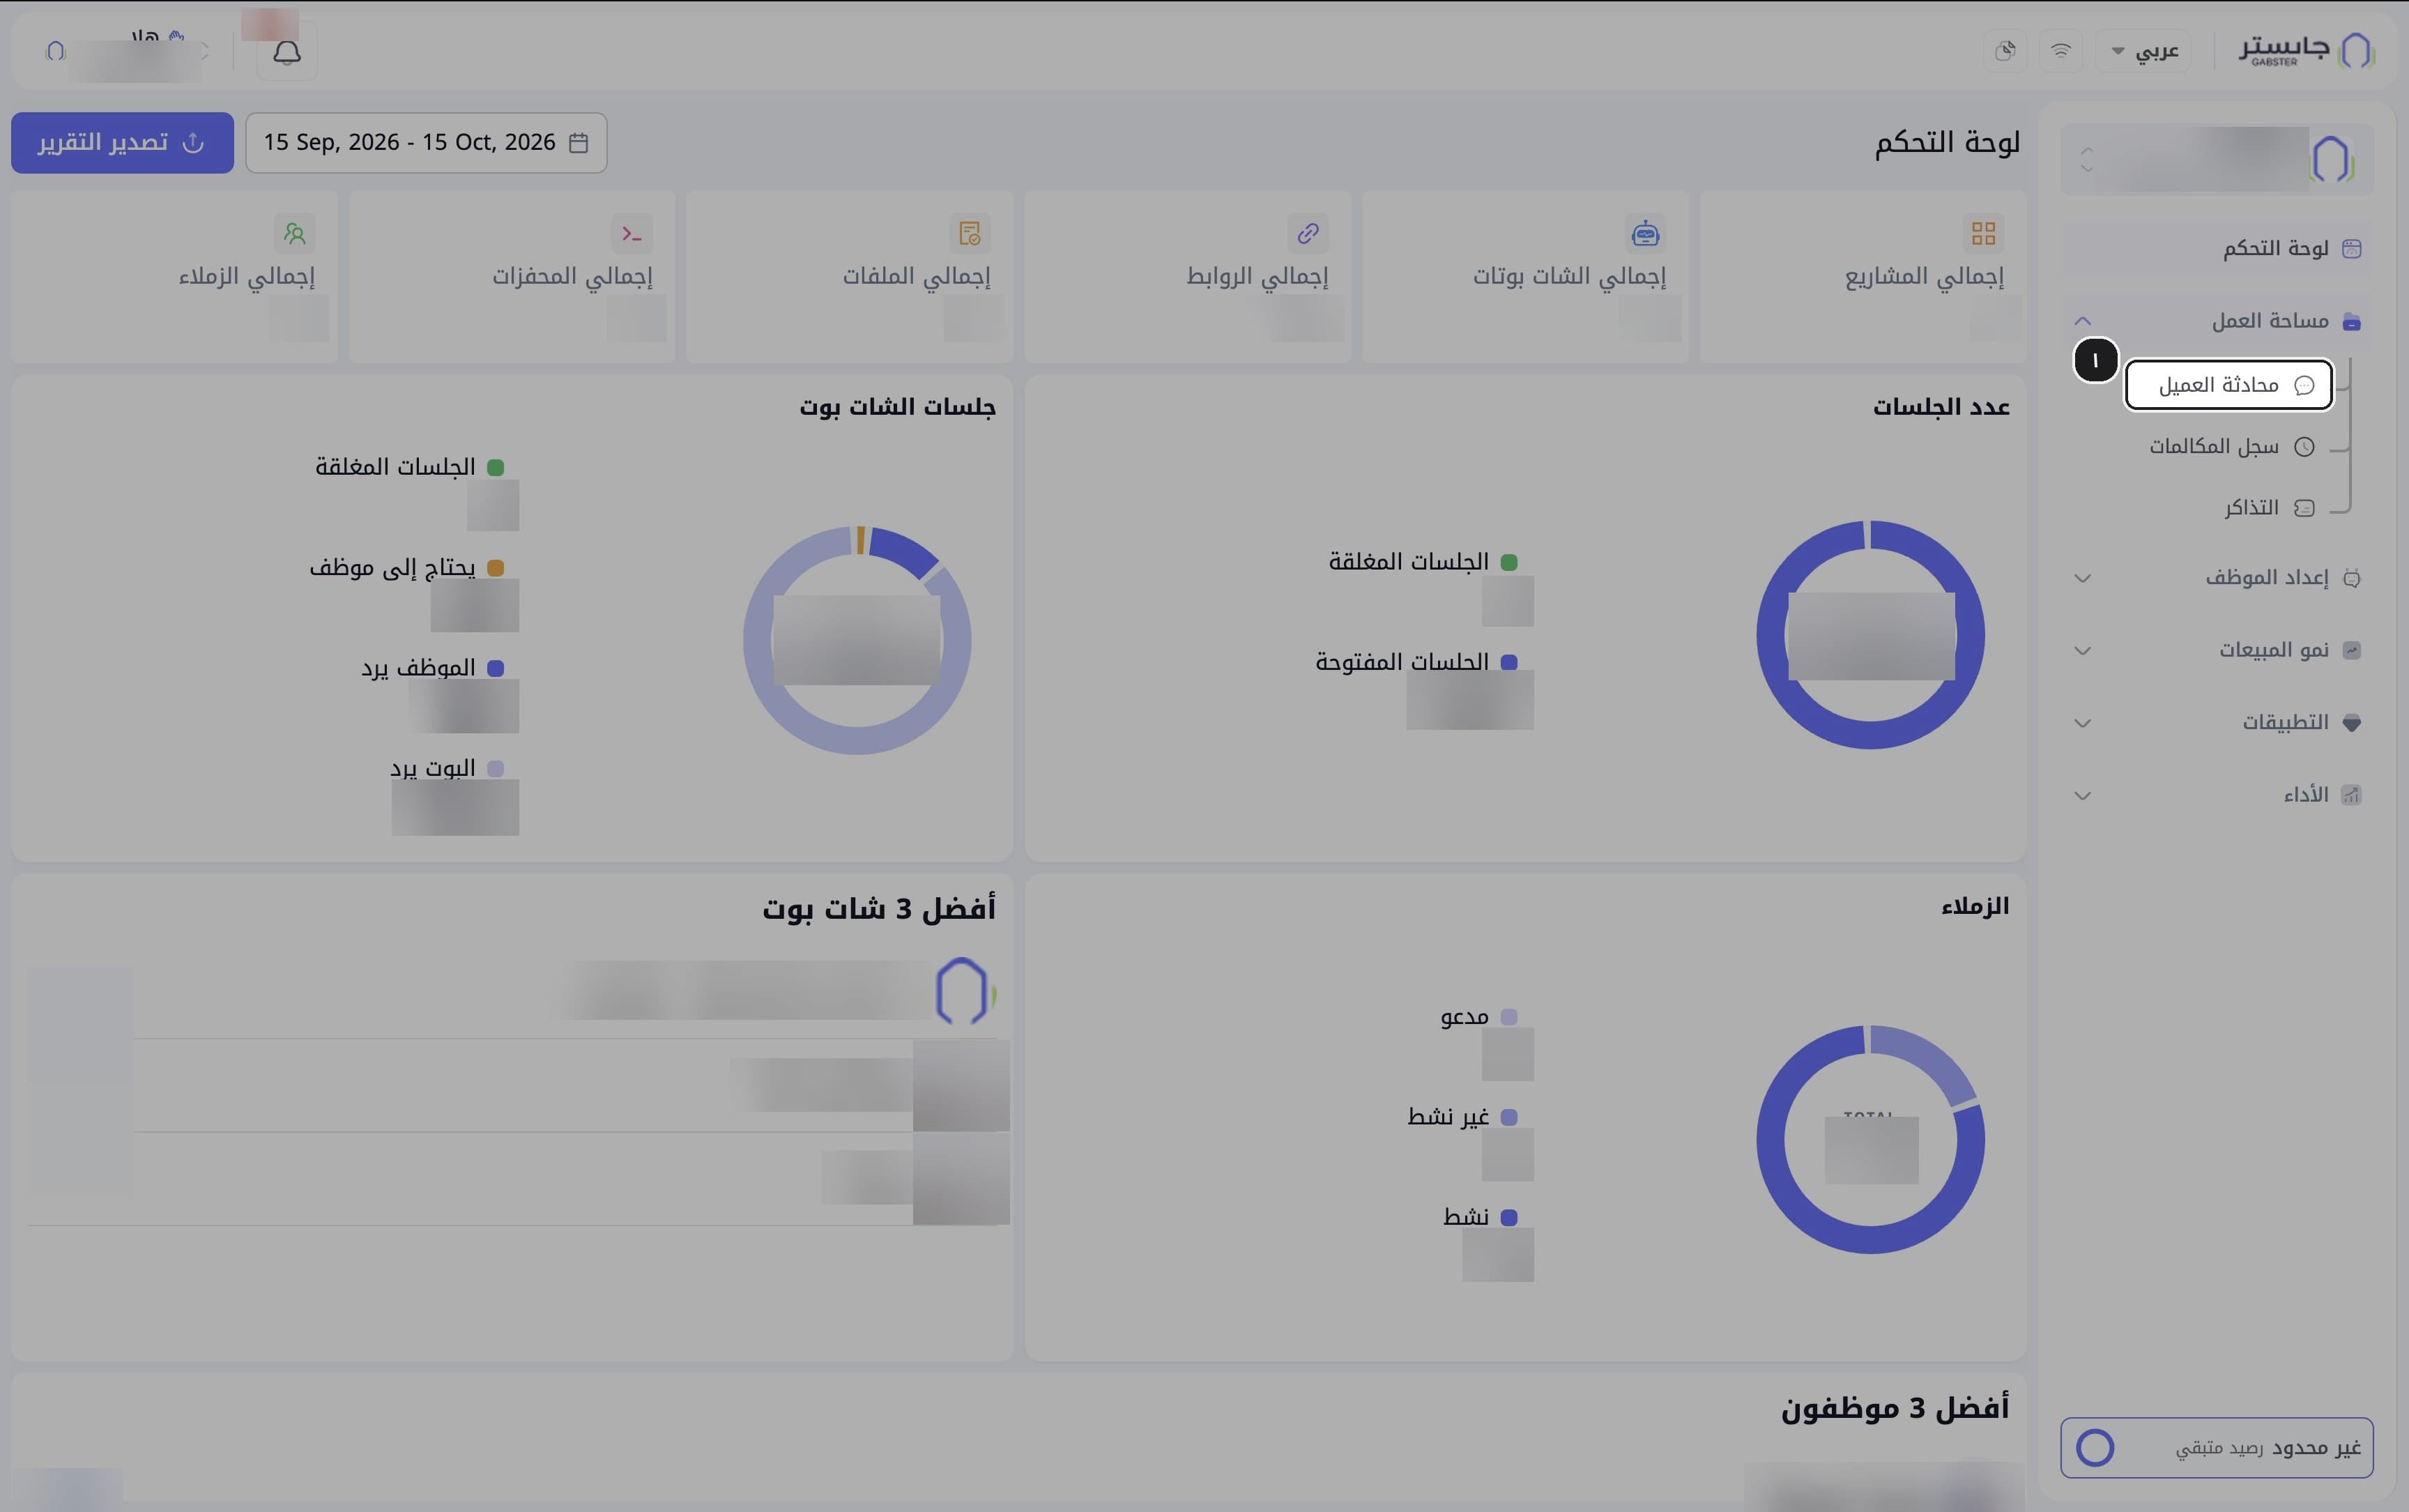
Open Customer Conversations
In the sidebar, open the Workspace (مساحة العمل) group and choose Customer Conversations (محادثة العميل).
Result: the conversation list opens.
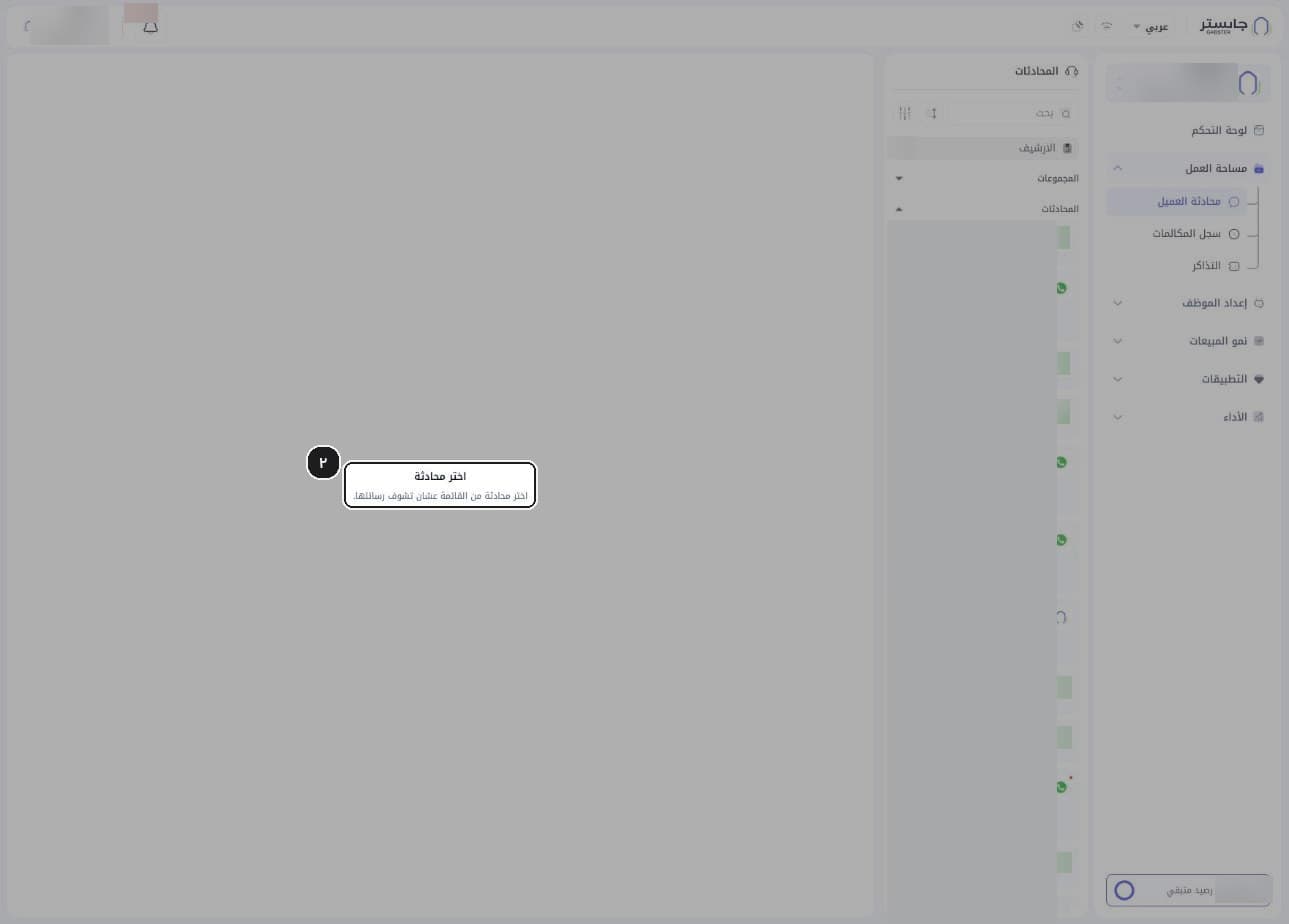
Note the empty state
Until you pick a conversation, the middle of the page says Select a conversation (اختر محادثة), with no messages and no info panel.
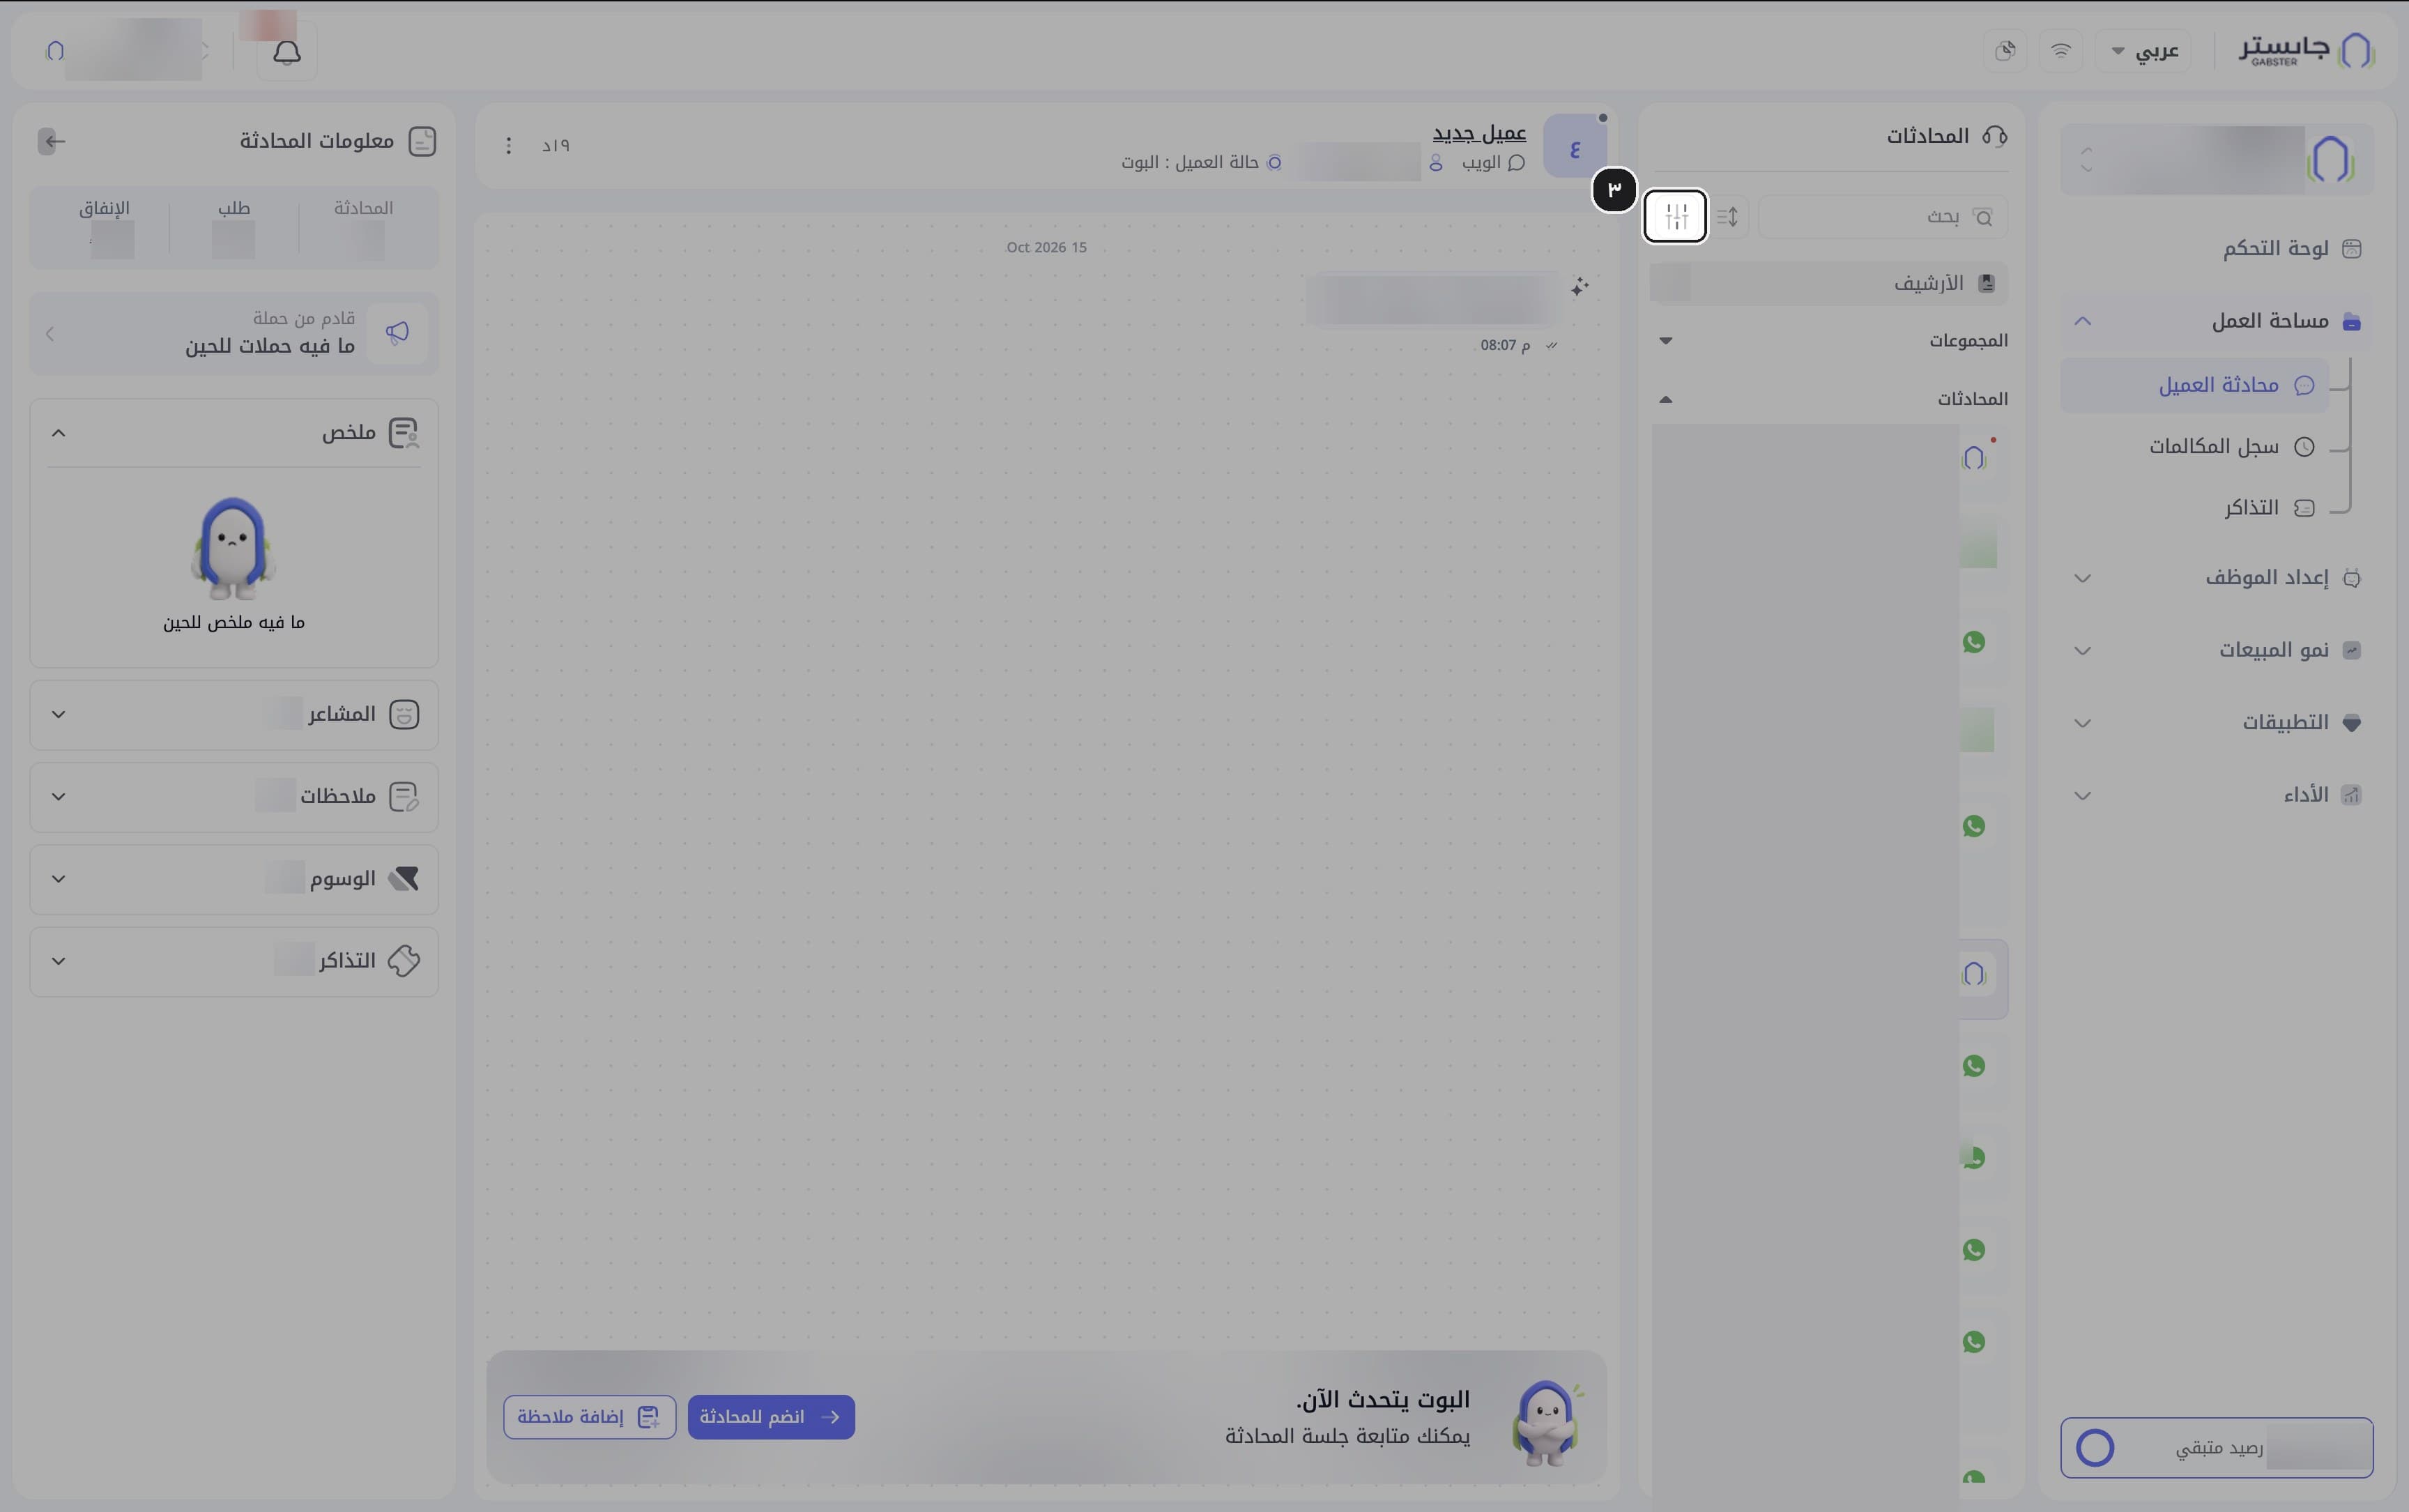
Open the filters
Click the filters icon next to the search box.
Result: the Filters (الفلاتر) panel opens over the conversation area.
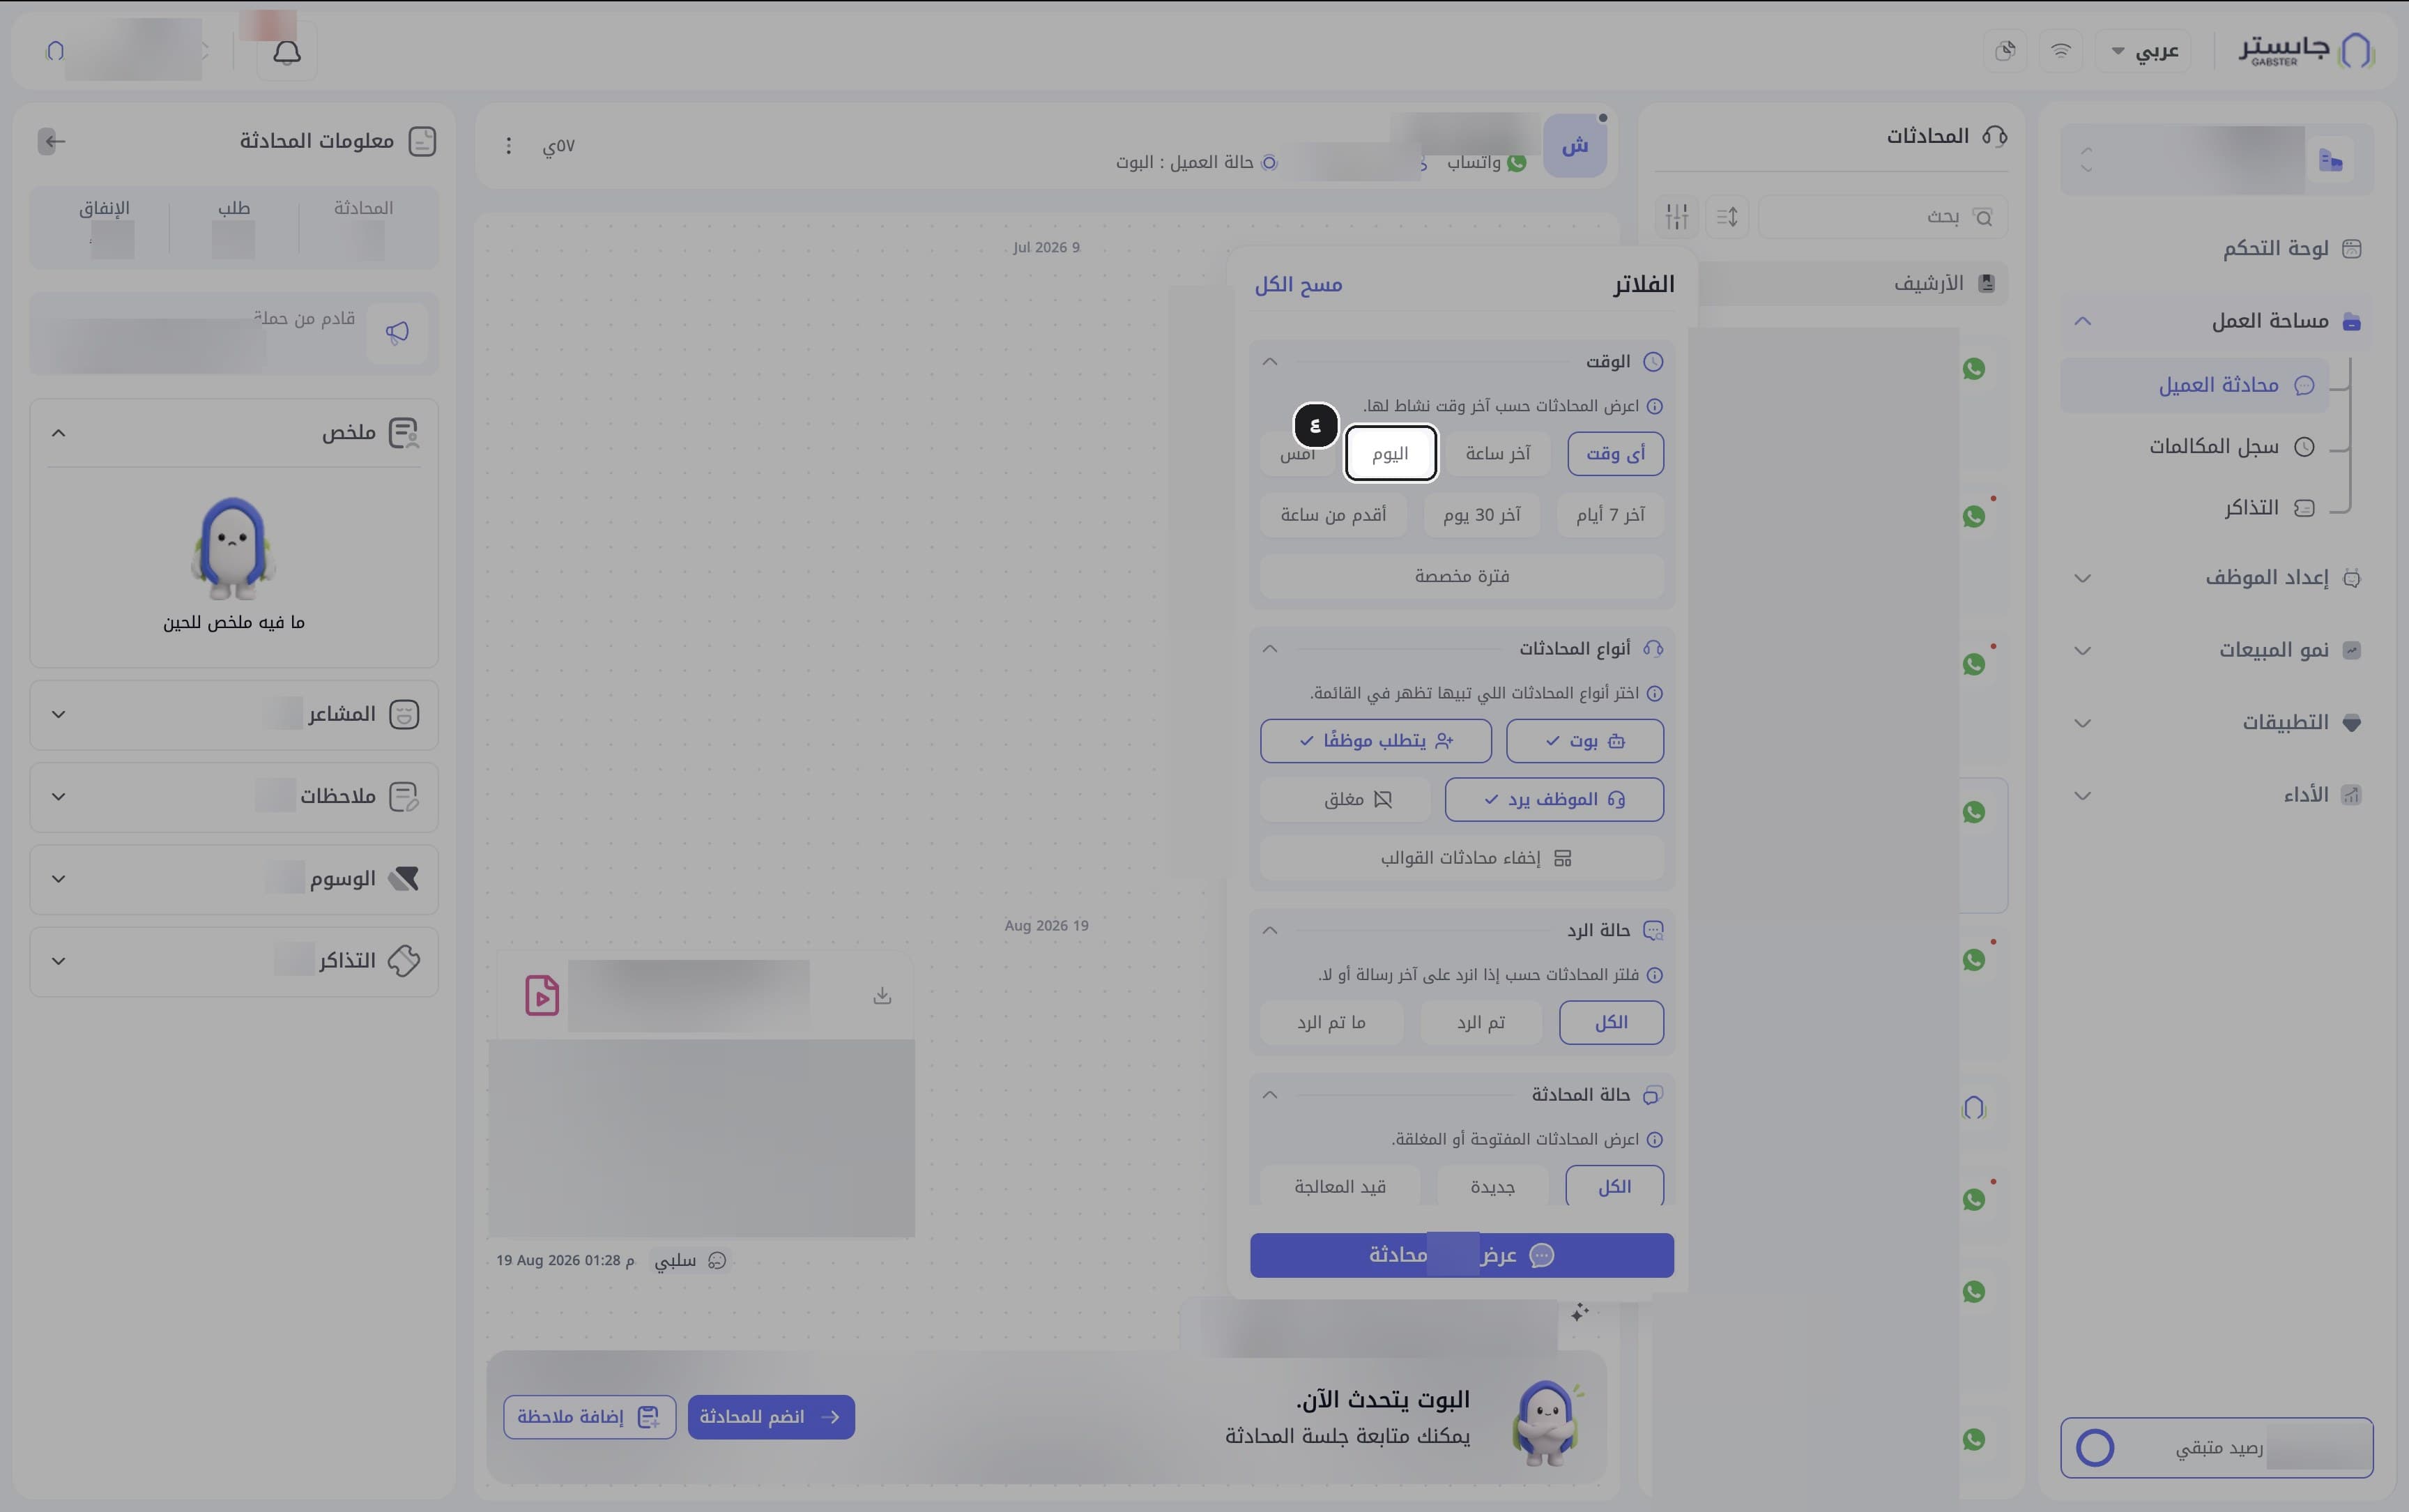
Pick a time range
Under Time (الوقت), pick a period such as Today (اليوم). Only one period can be selected; the default is Any time (أى وقت).
Choose conversation types
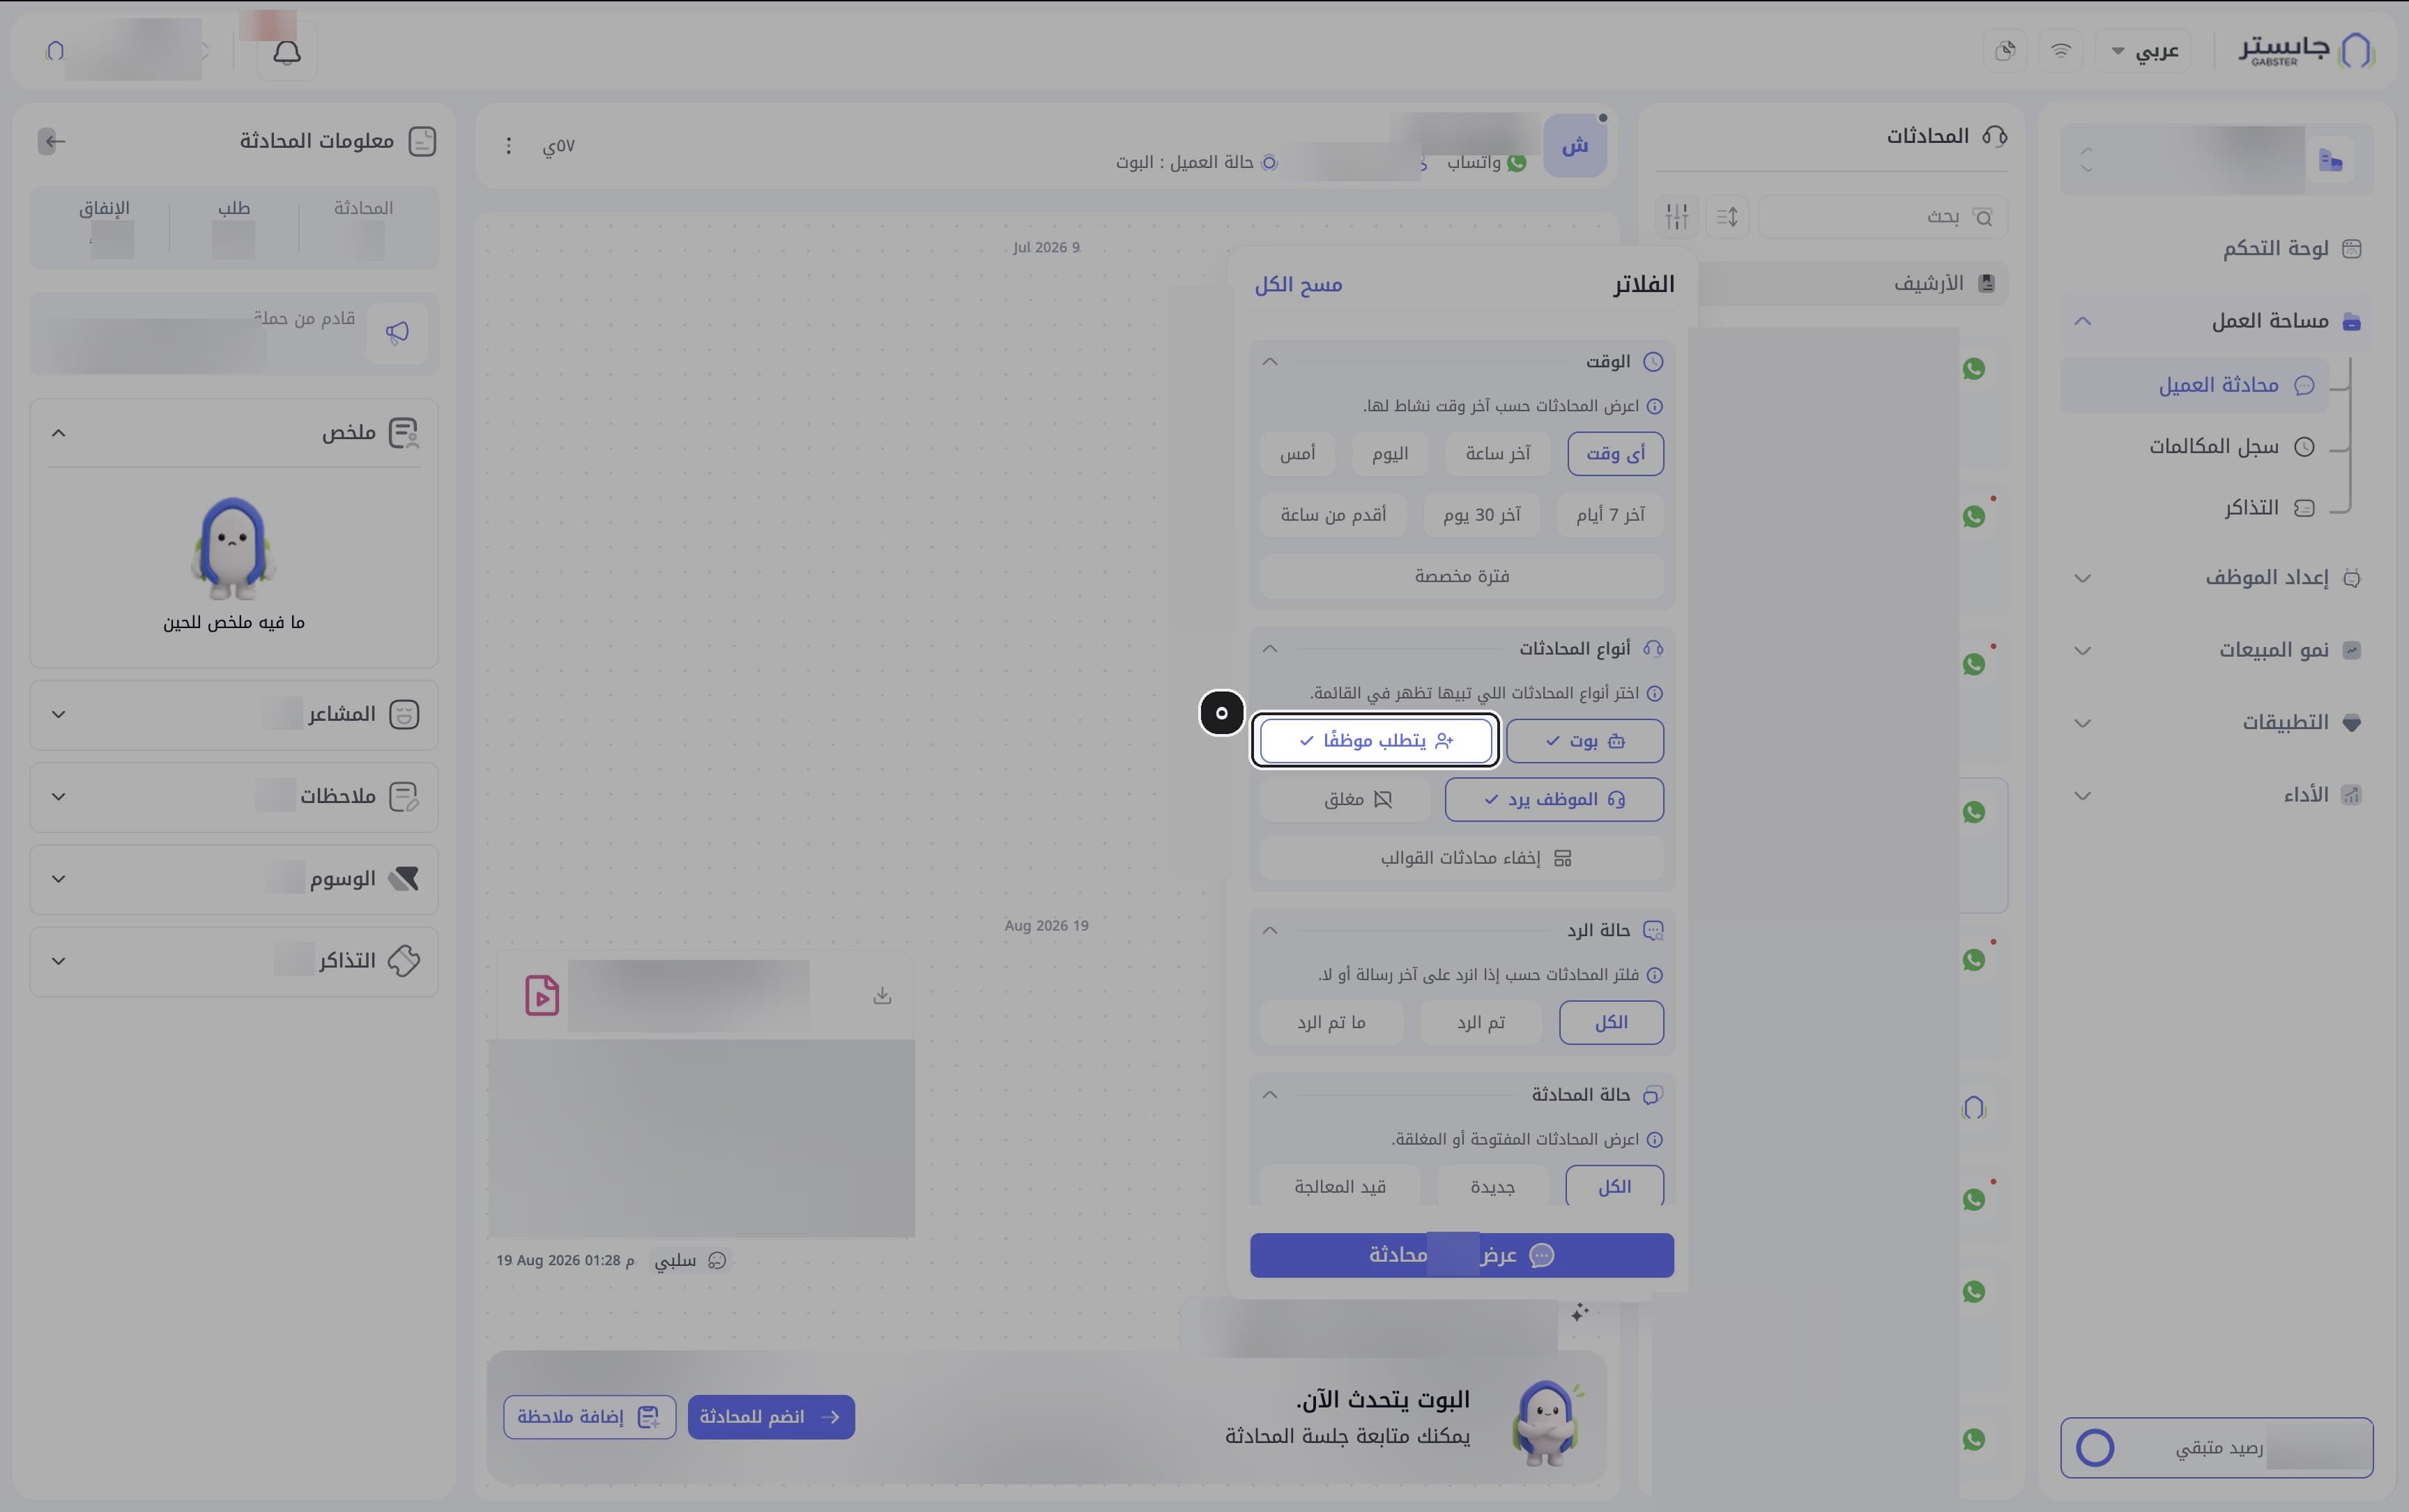
Under Conversation types (أنواع المحادثات), select the types you want to see from AI Agent (بوت), Needs staff (يتطلب موظفًا), Staff replying (الموظف يرد) and Closed (مغلق), for example only Needs staff. You can select more than one, and you can also turn on Hide template conversations (إخفاء محادثات القوالب).
Closed (مغلق) conversations are hidden by default; turn that type on to see them.
Set reply and conversation status (optional)
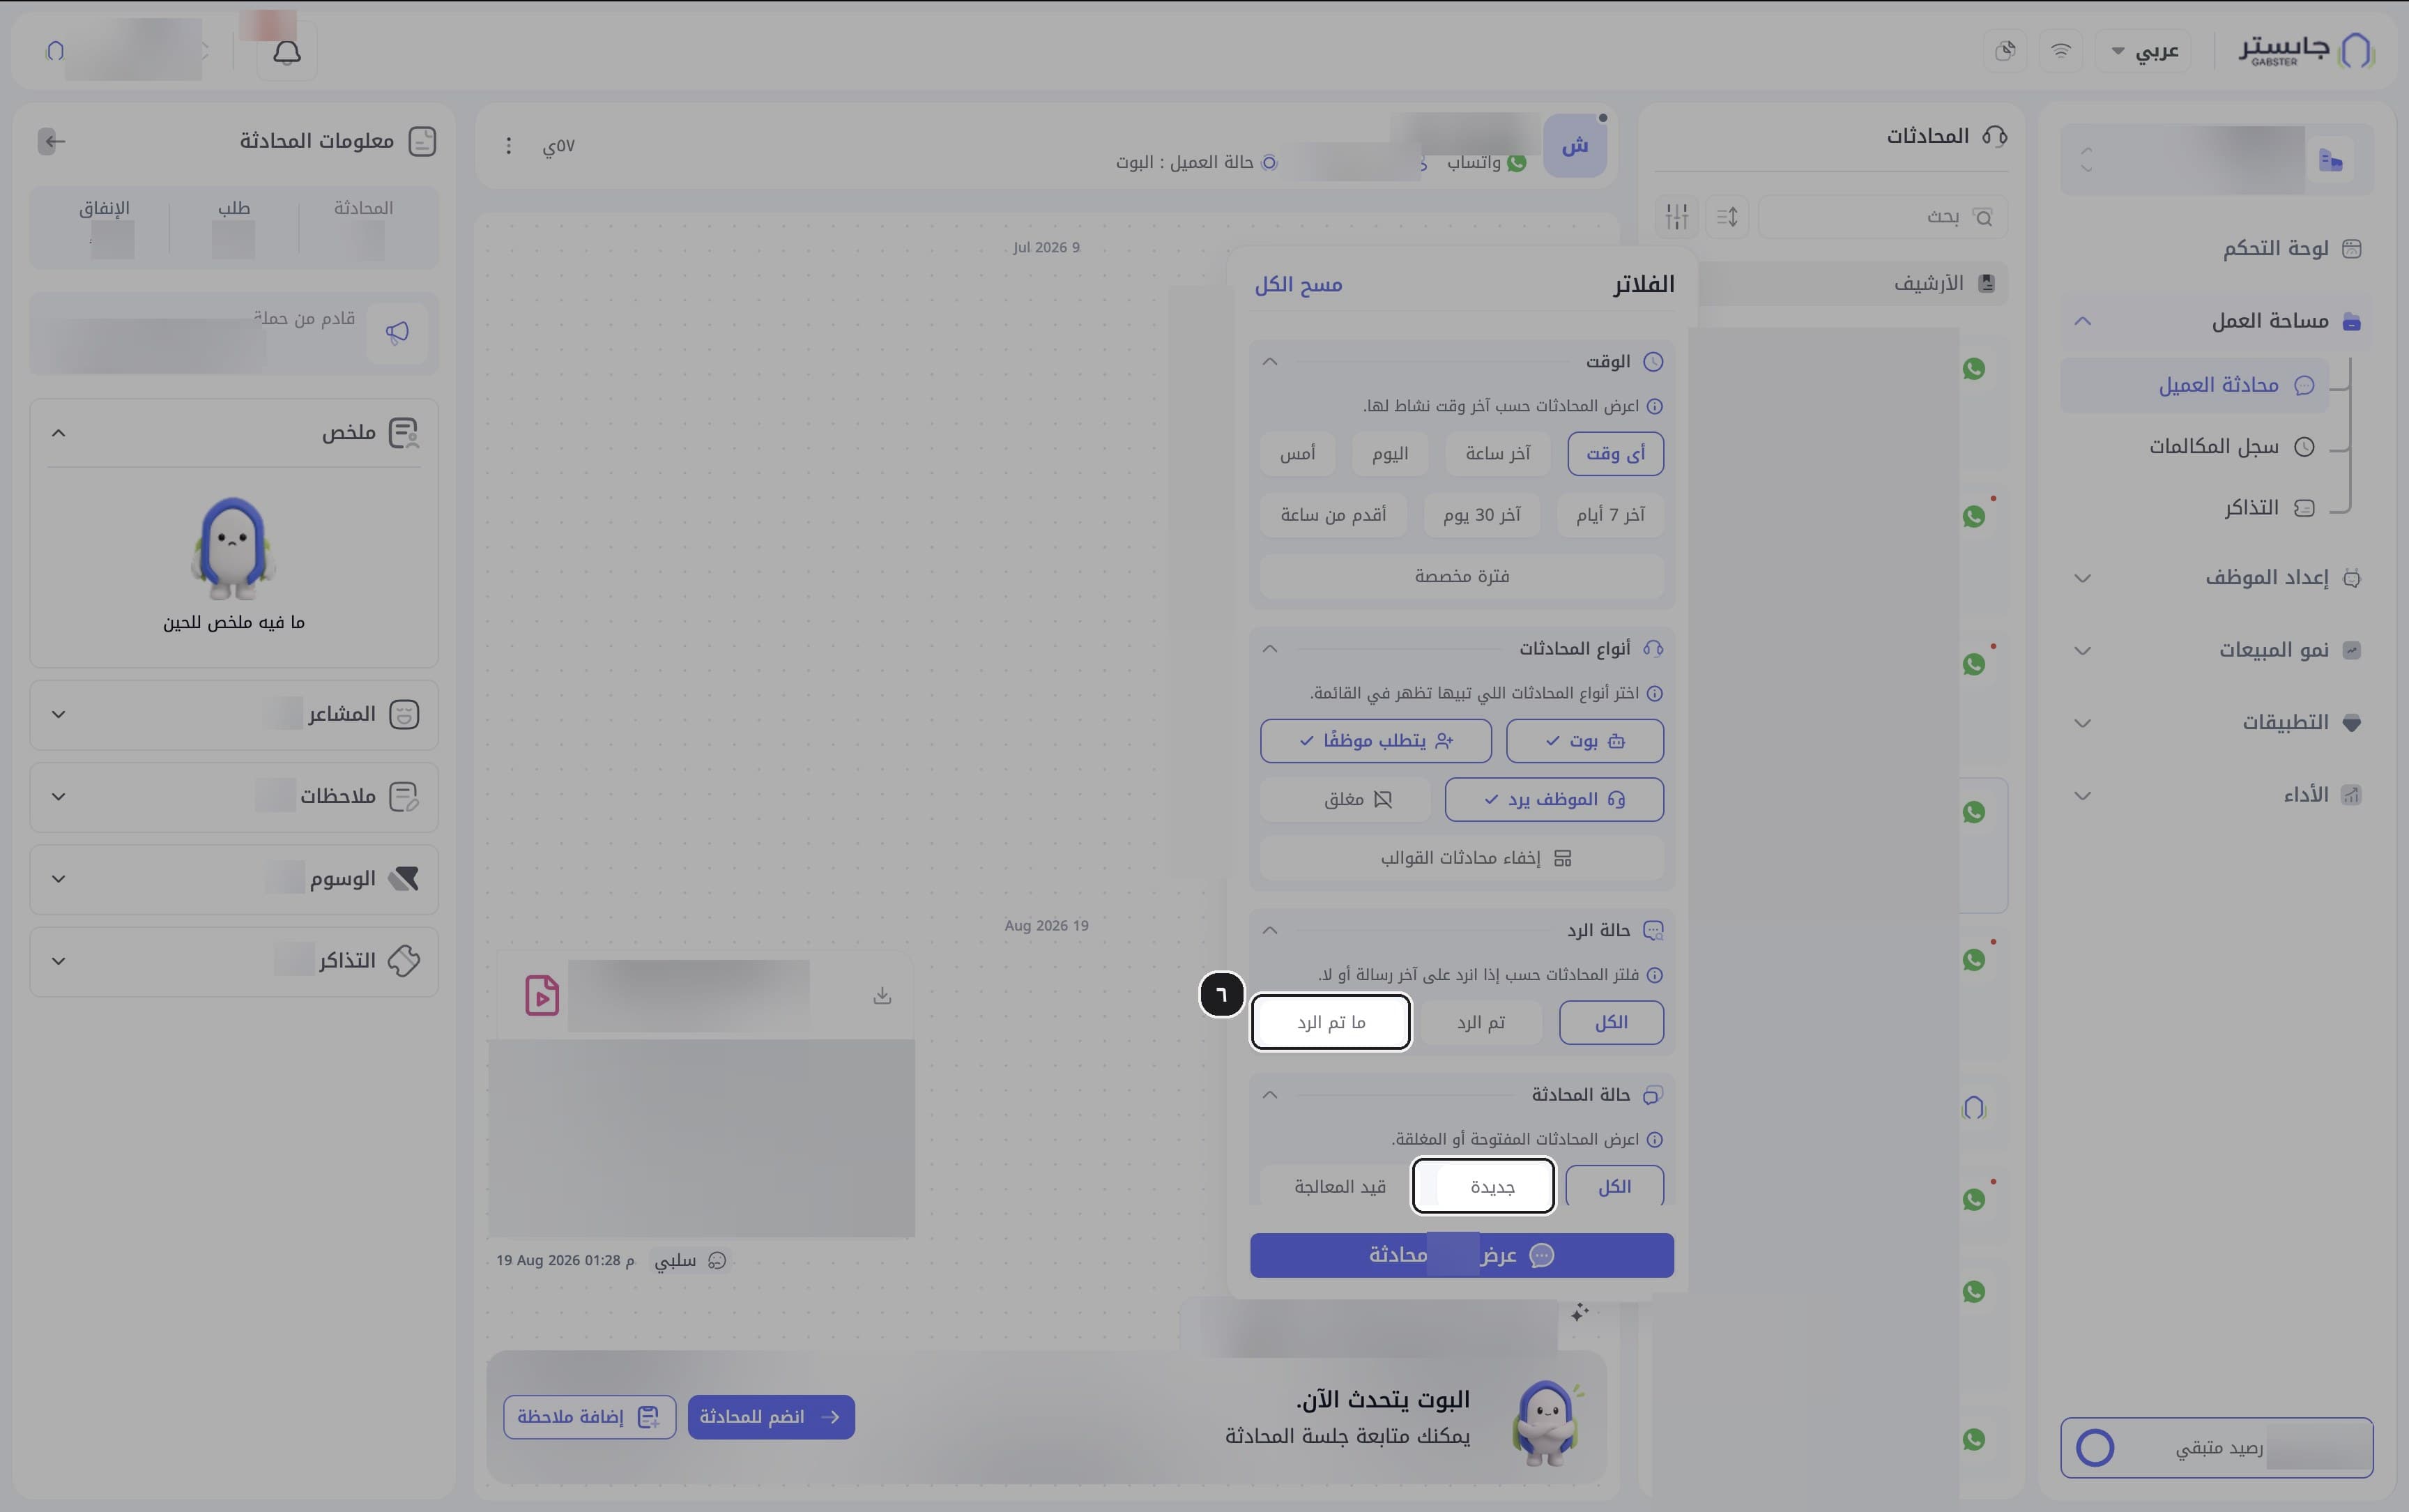
Under Reply status (حالة الرد), choose for example Not replied (ما تم الرد); under Conversation status (حالة المحادثة), for example New (جديدة).
Apply the filters
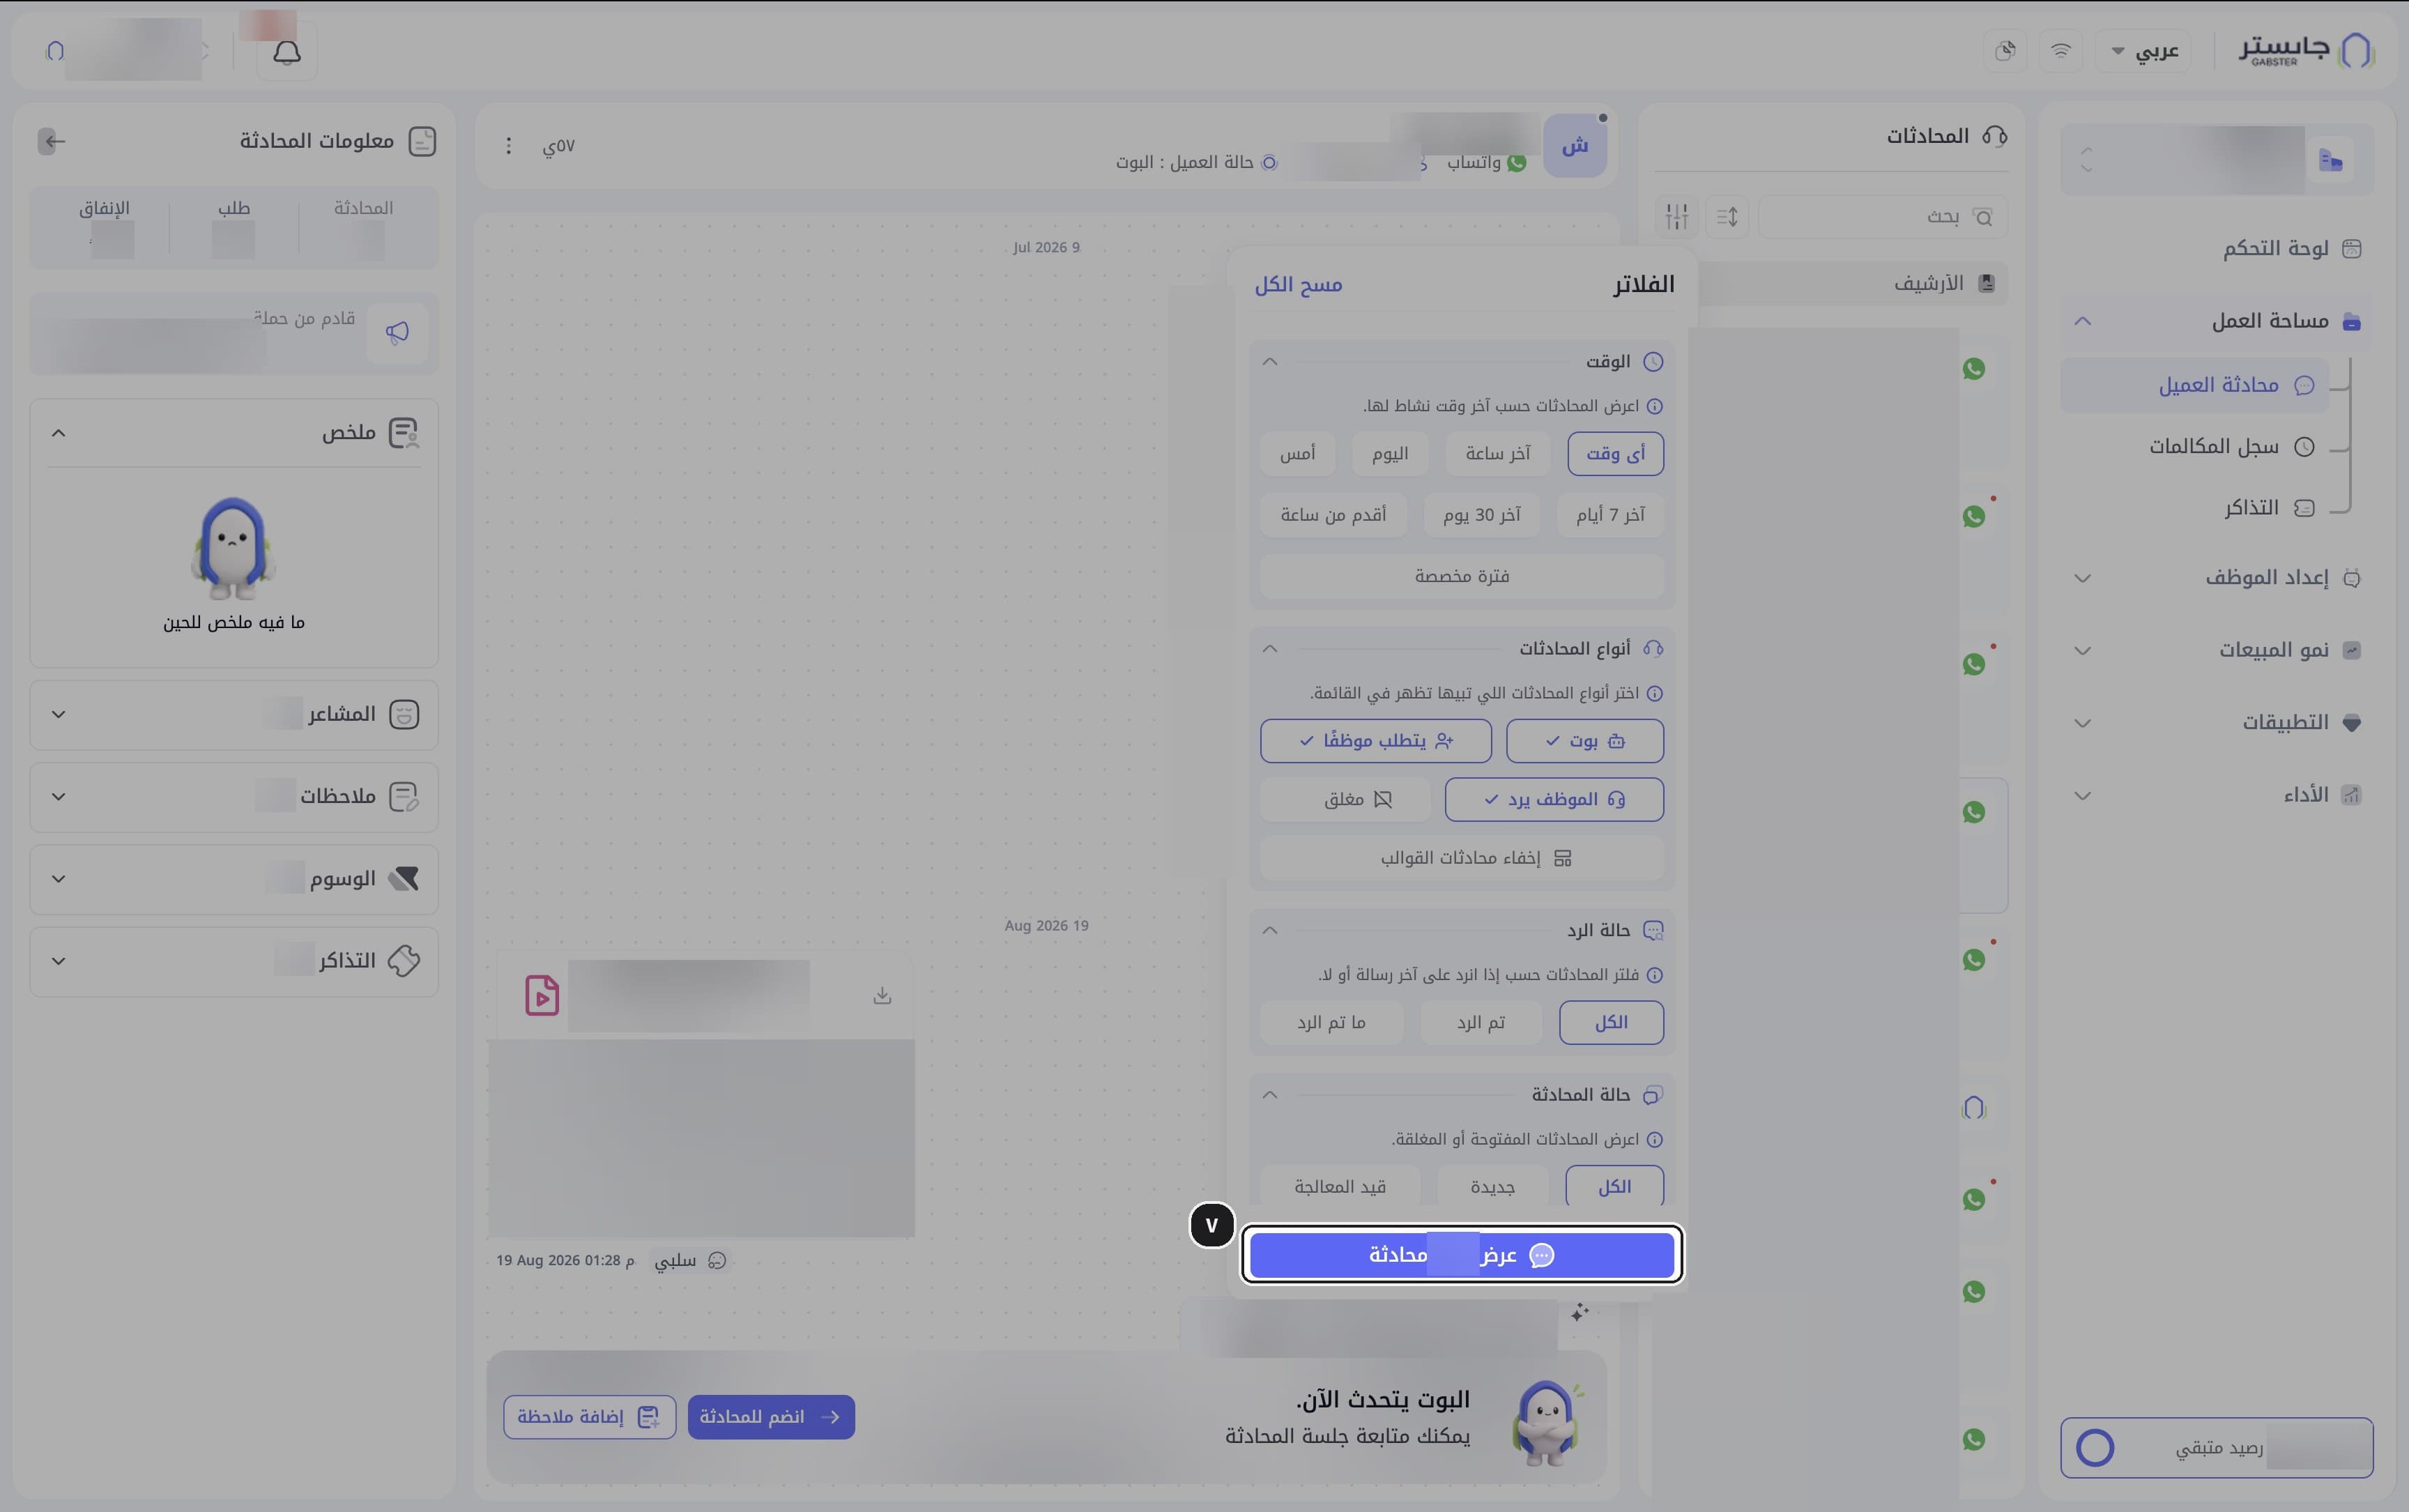
Click Show N conversations (عرض N محادثة) to apply your choices. The number on the button updates as you choose, so you see how many conversations match first. To start over, click Clear all (مسح الكل).
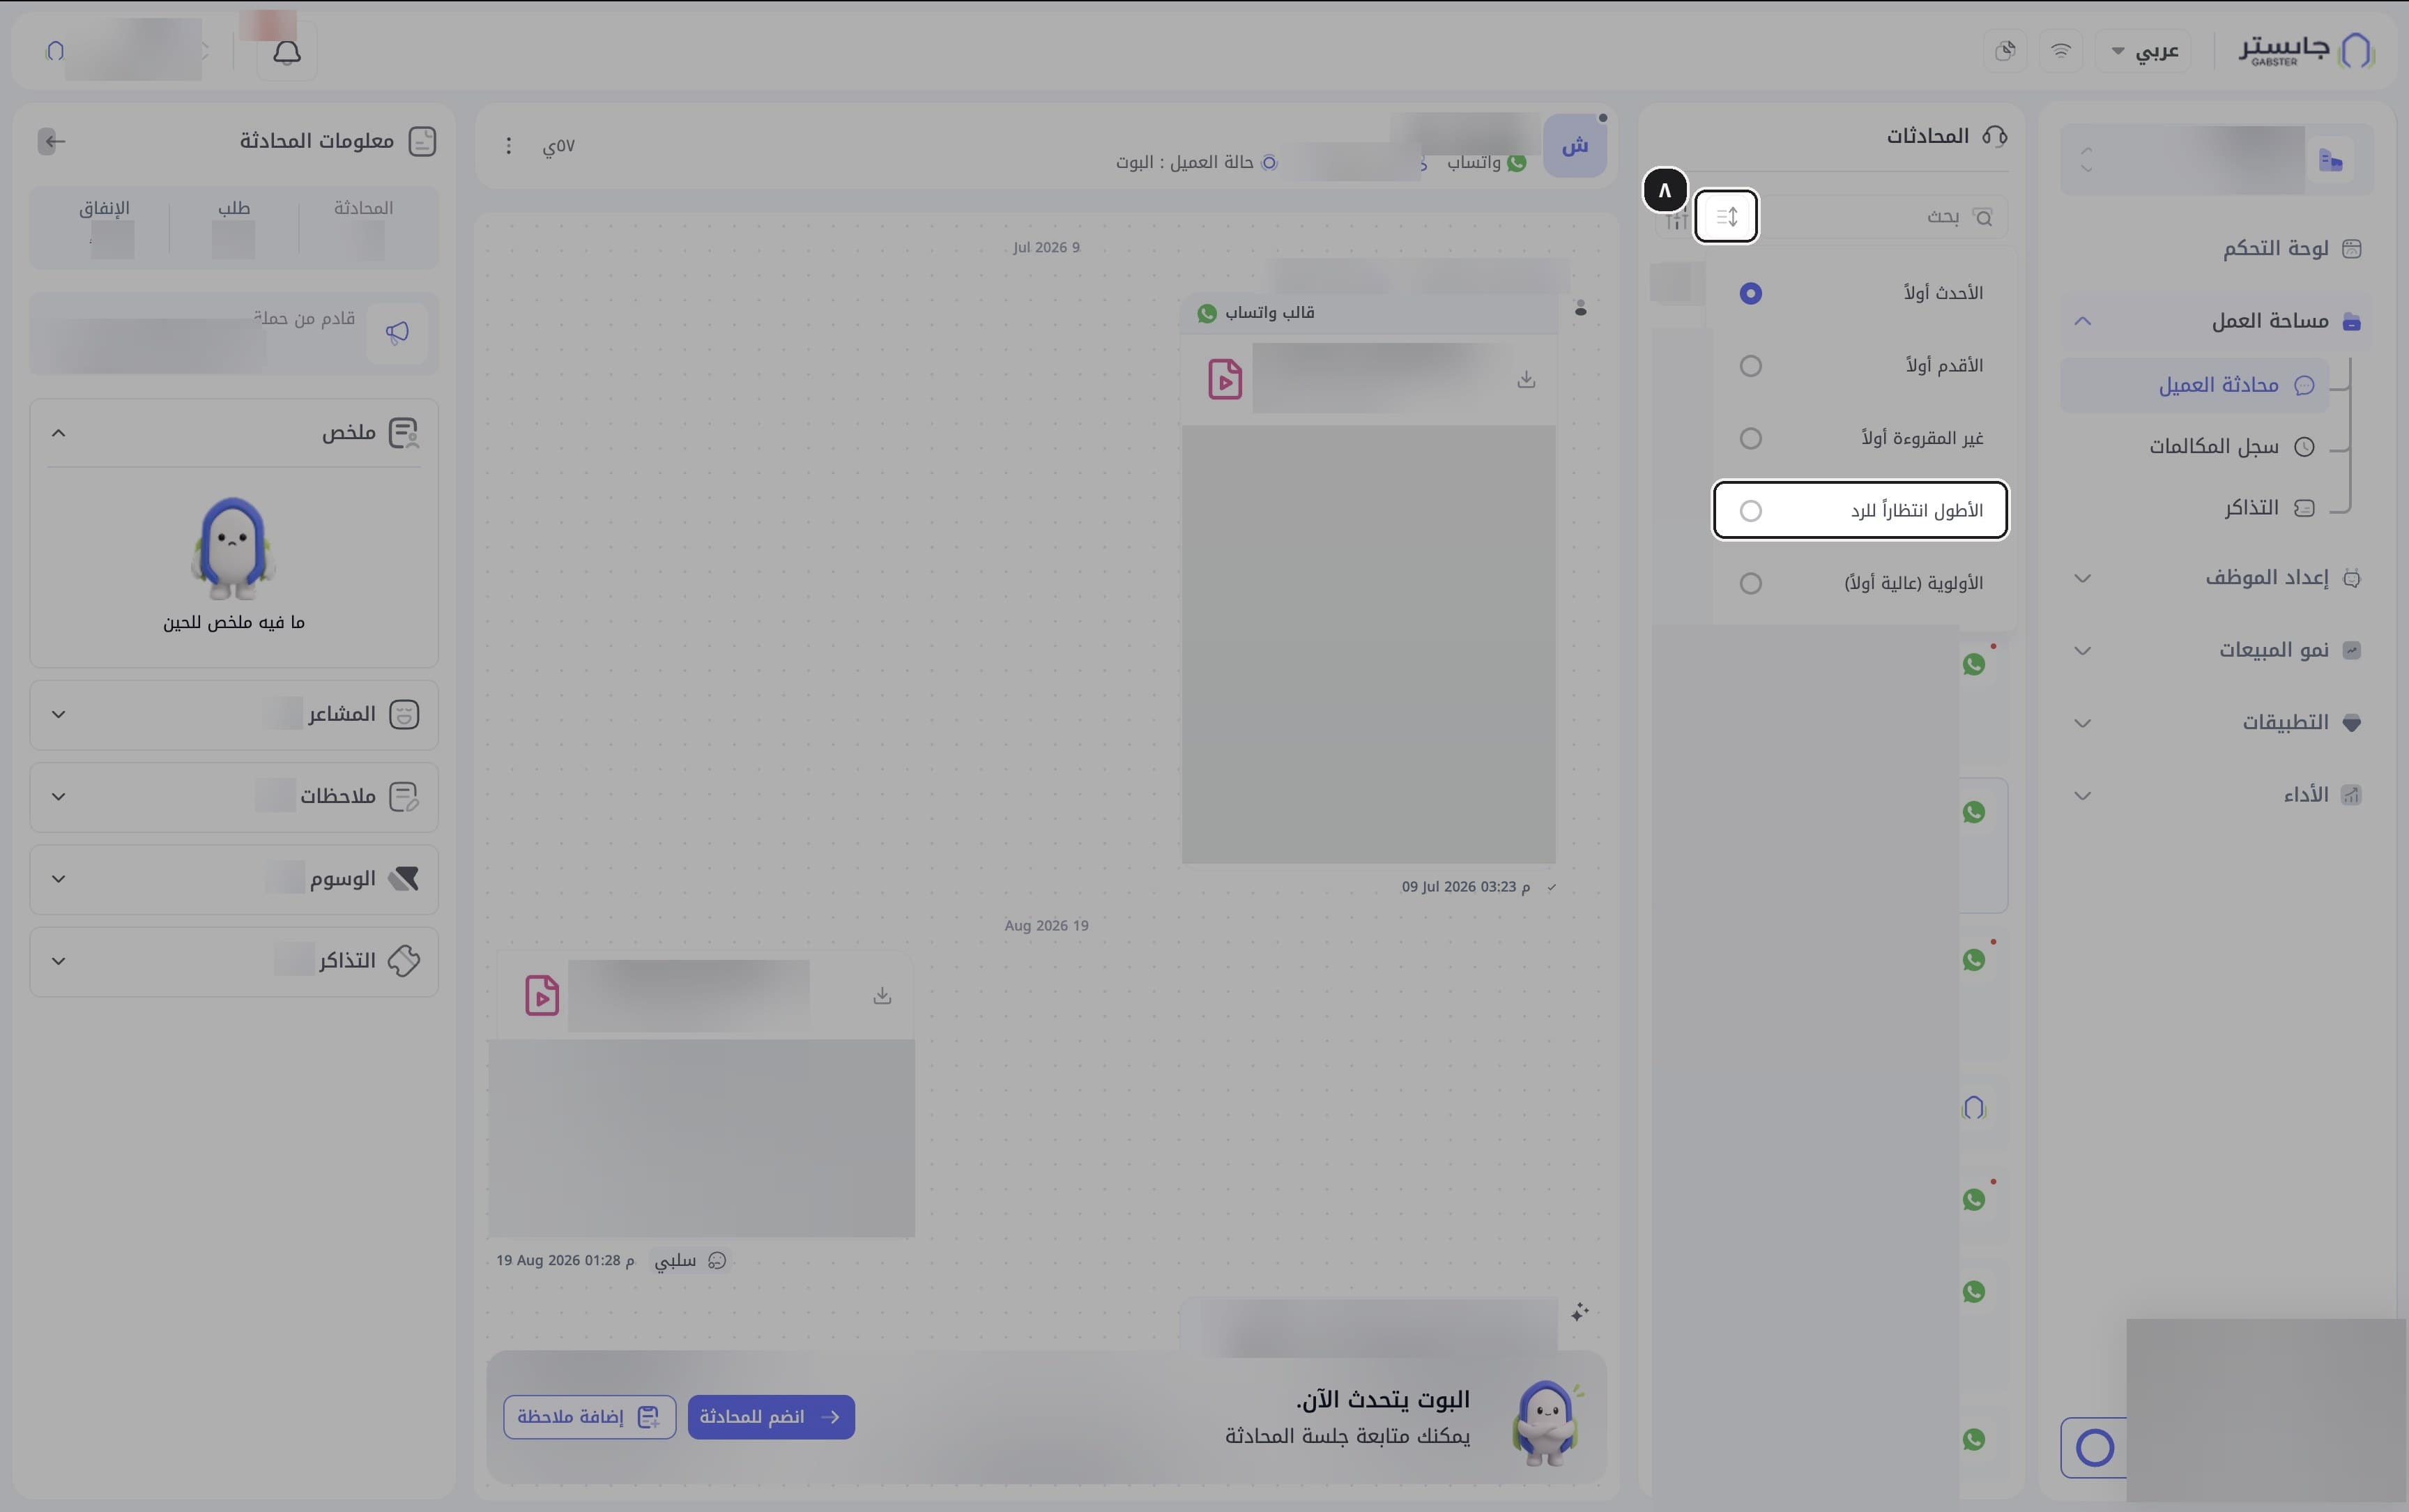
Sort the list
Click the sort icon and pick an order such as Longest waiting for reply (الأطول انتظاراً للرد).
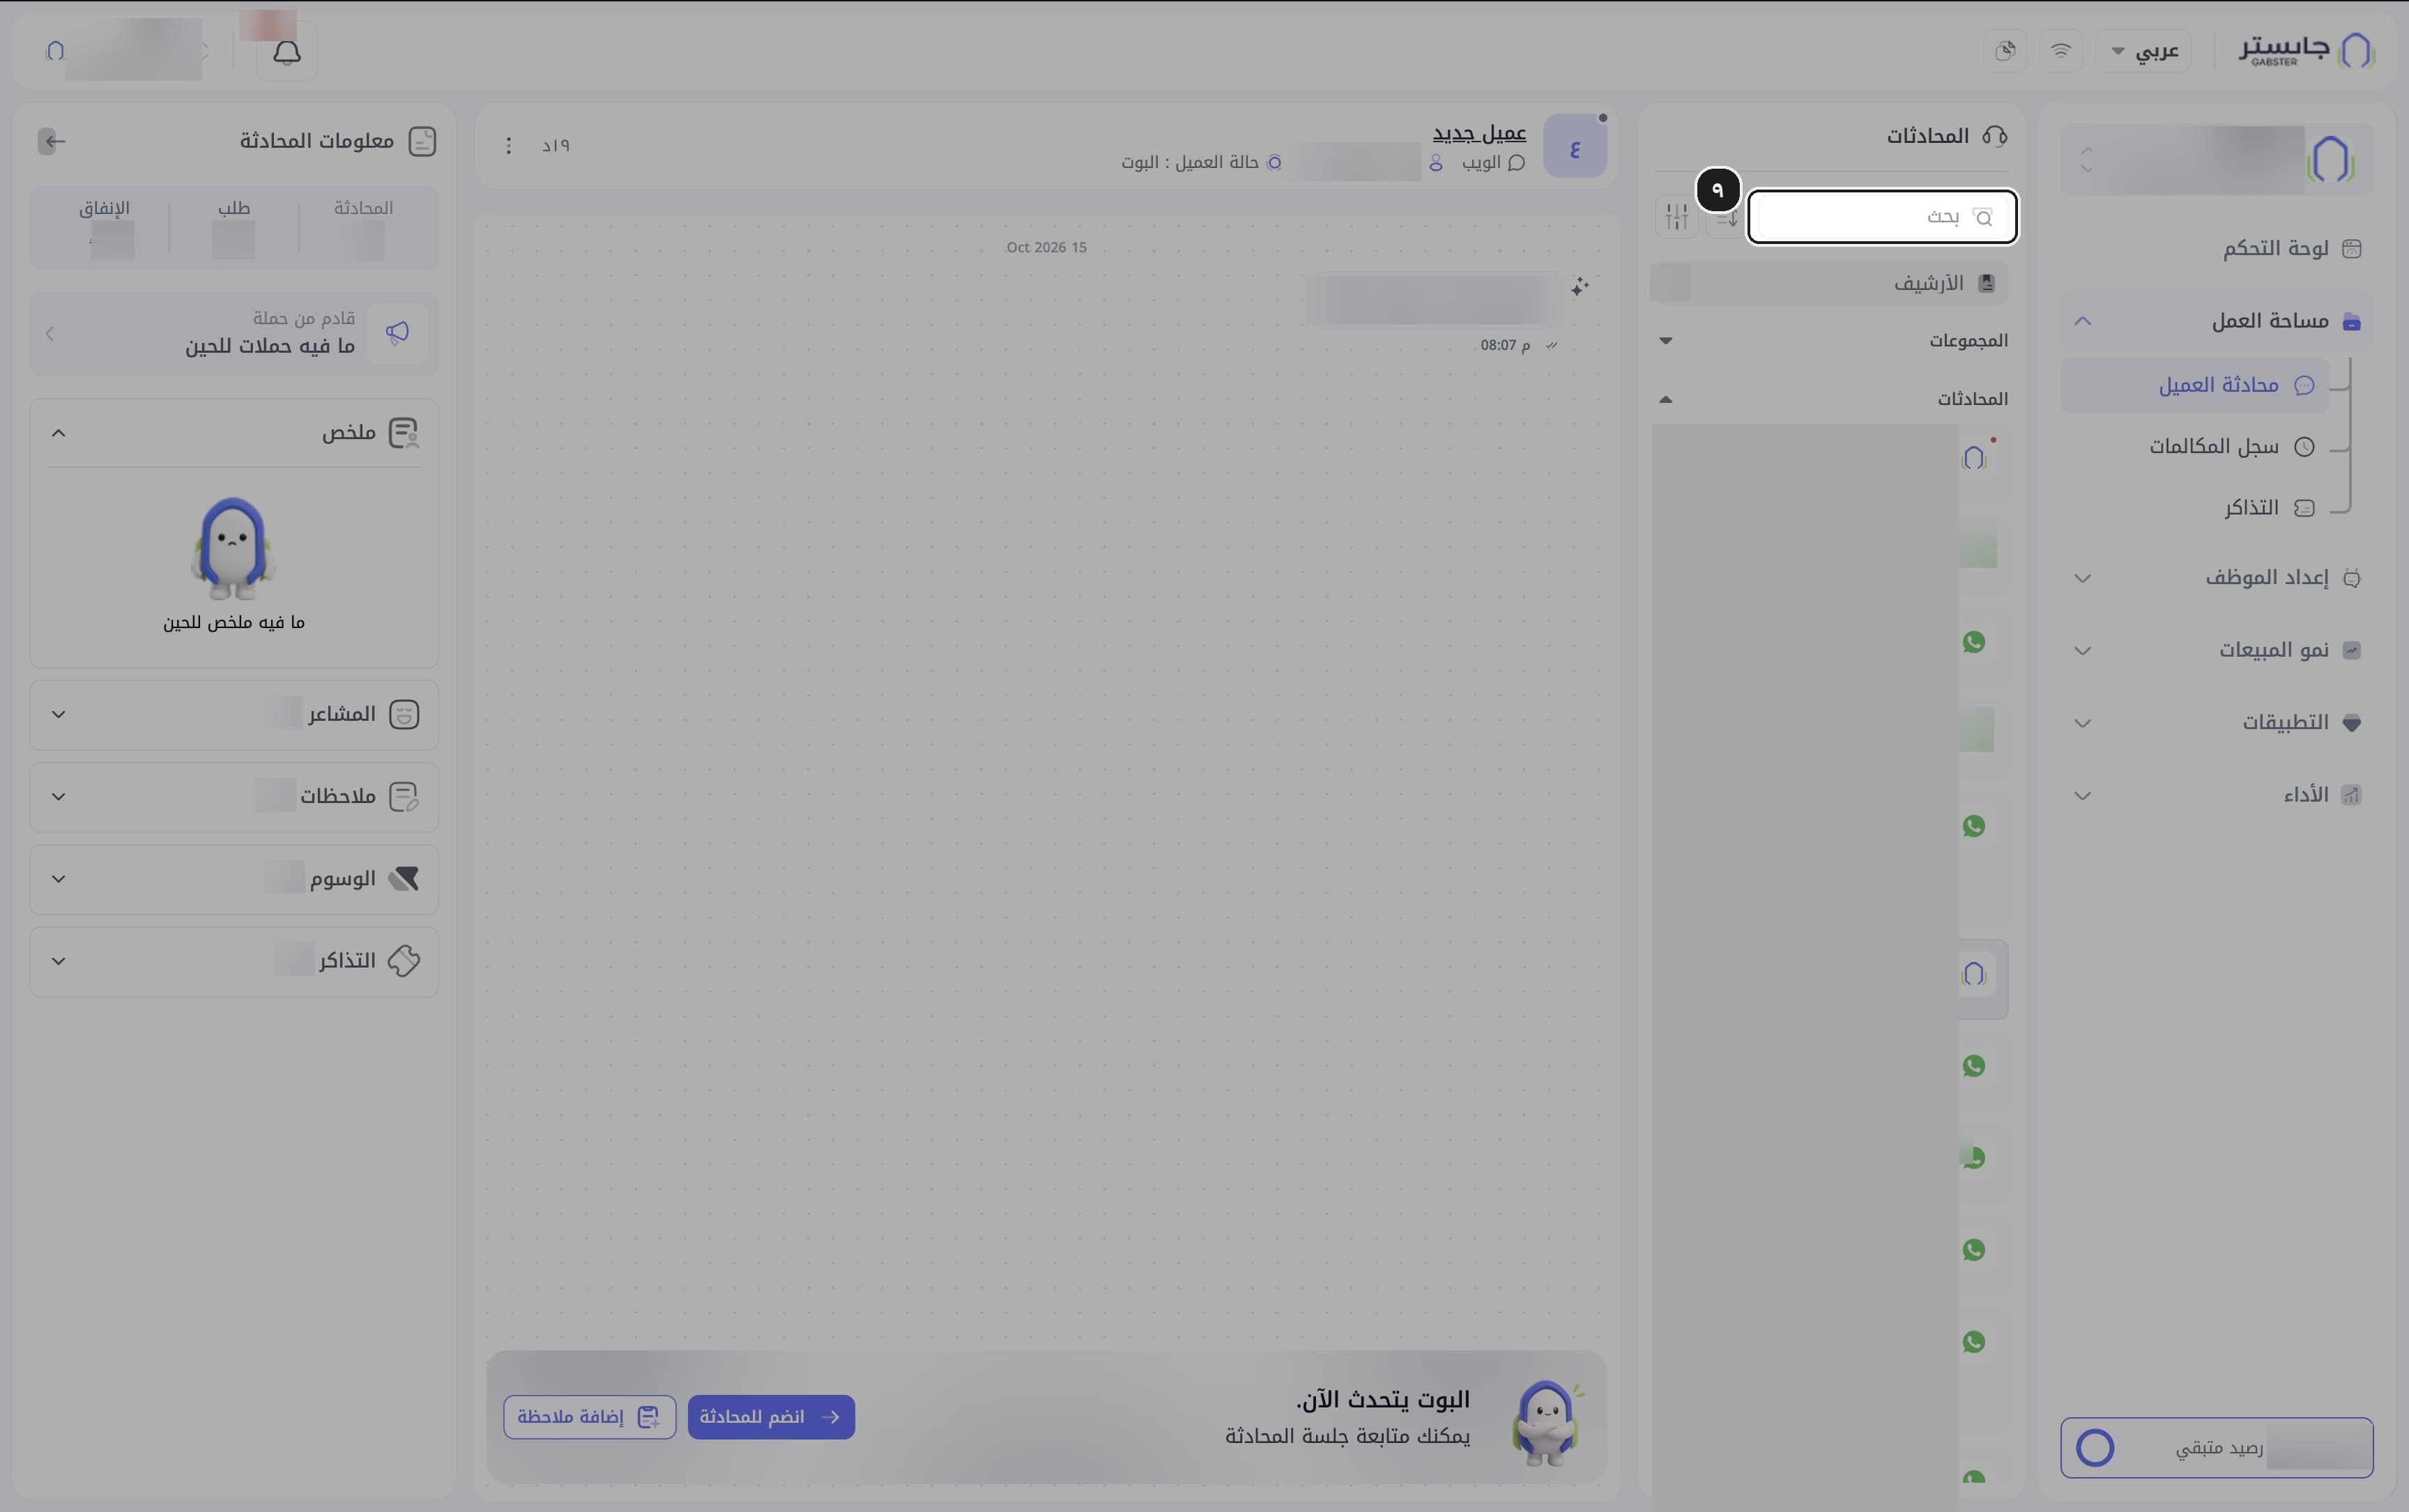
Or search the list
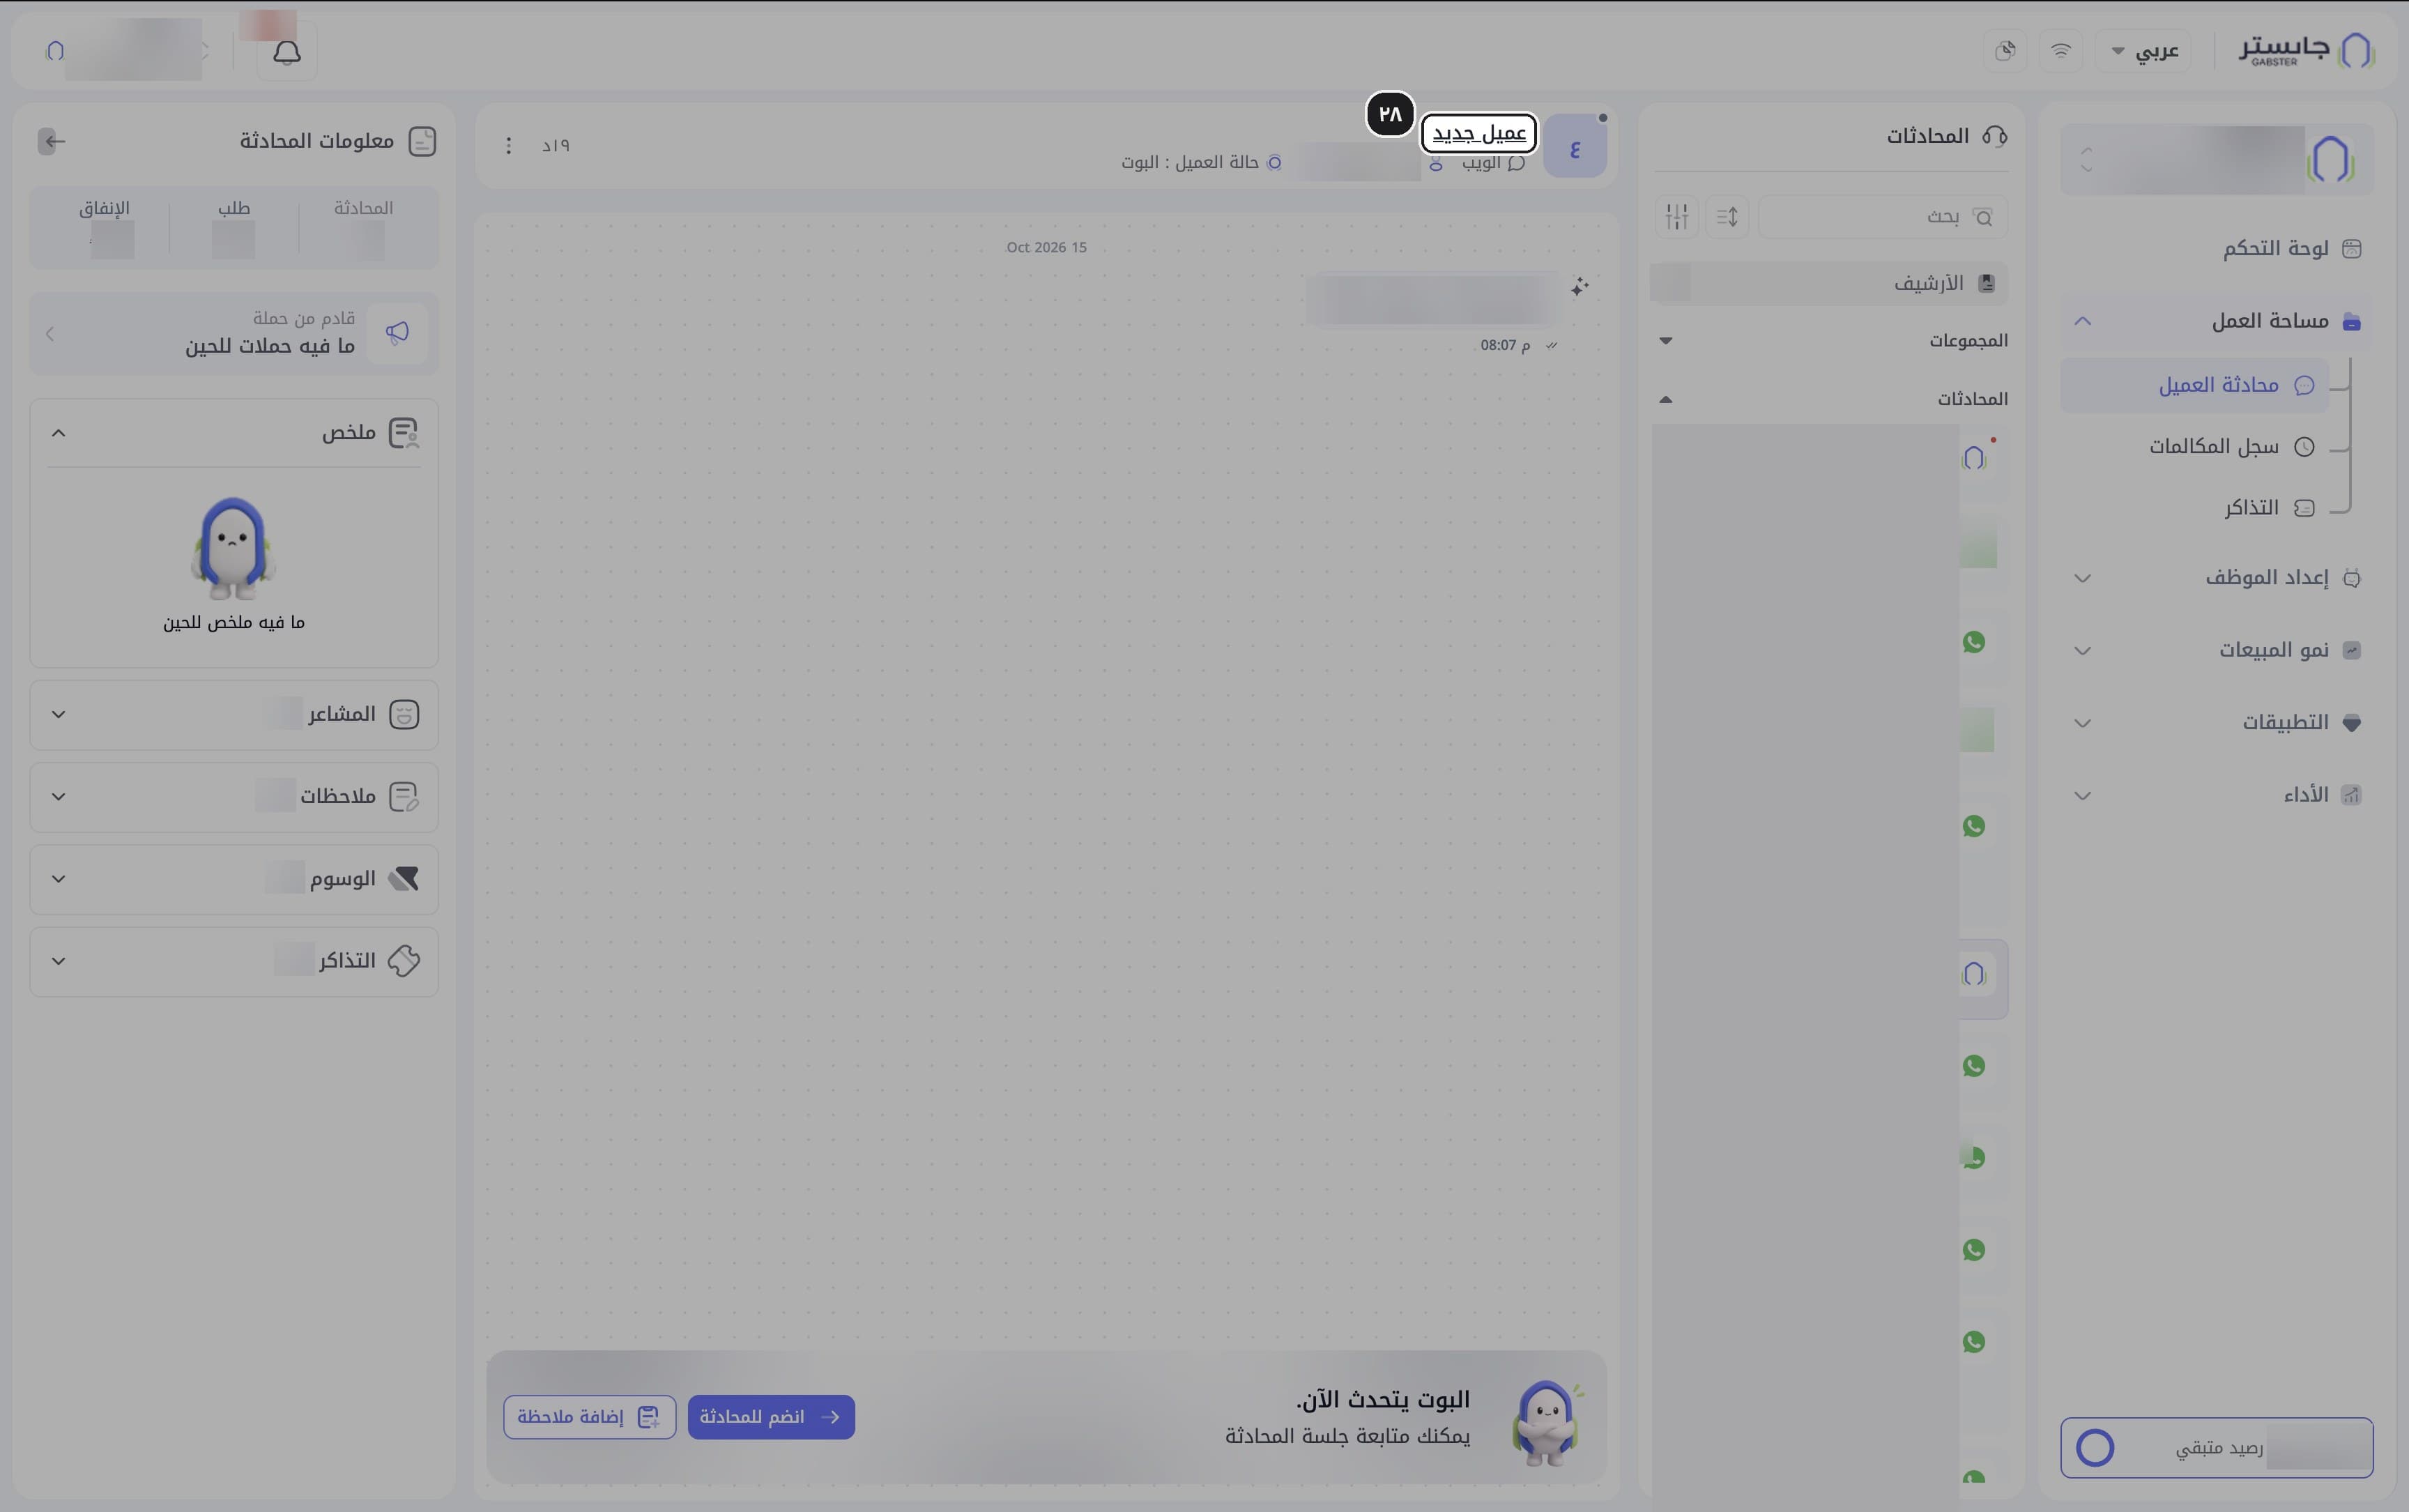
Type a customer's name in Search (بحث) to find their conversation. Website chats from visitors with no saved name are titled New customer (عميل جديد).
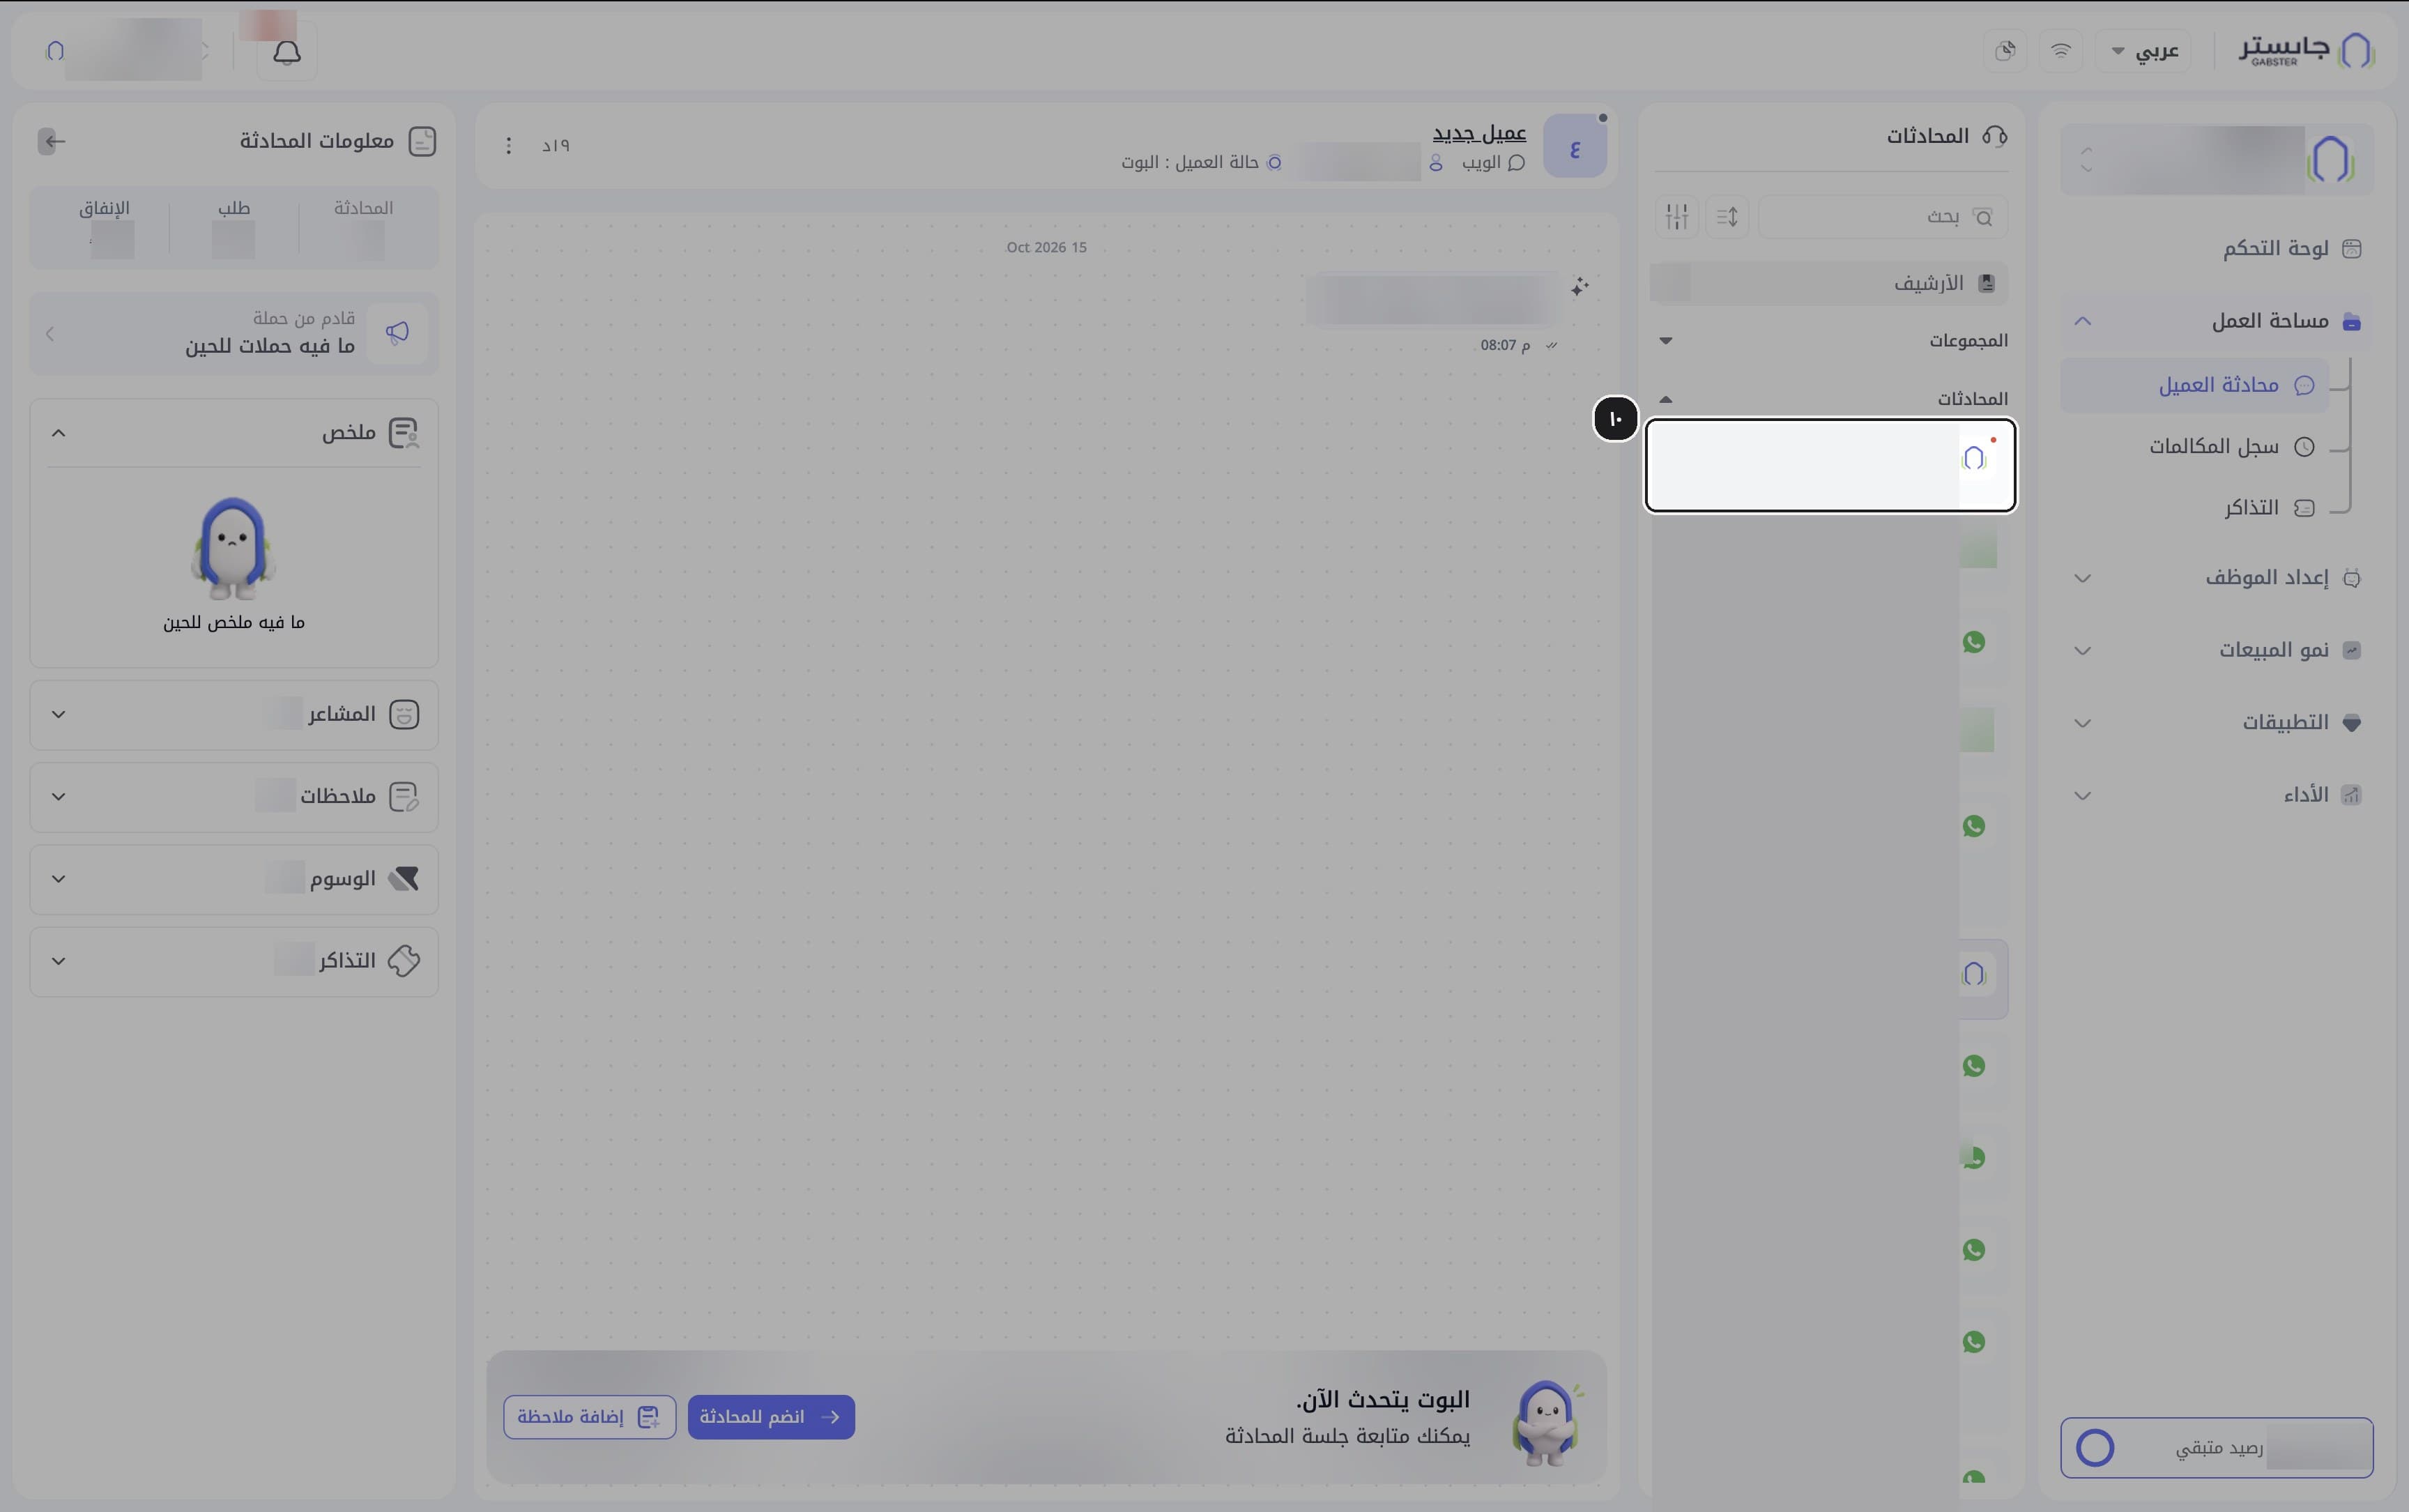
Open a conversation
Click a conversation in the list.
Result: the row is highlighted, and the messages and the Conversation info panel appear.
B. Read, take over and add notes
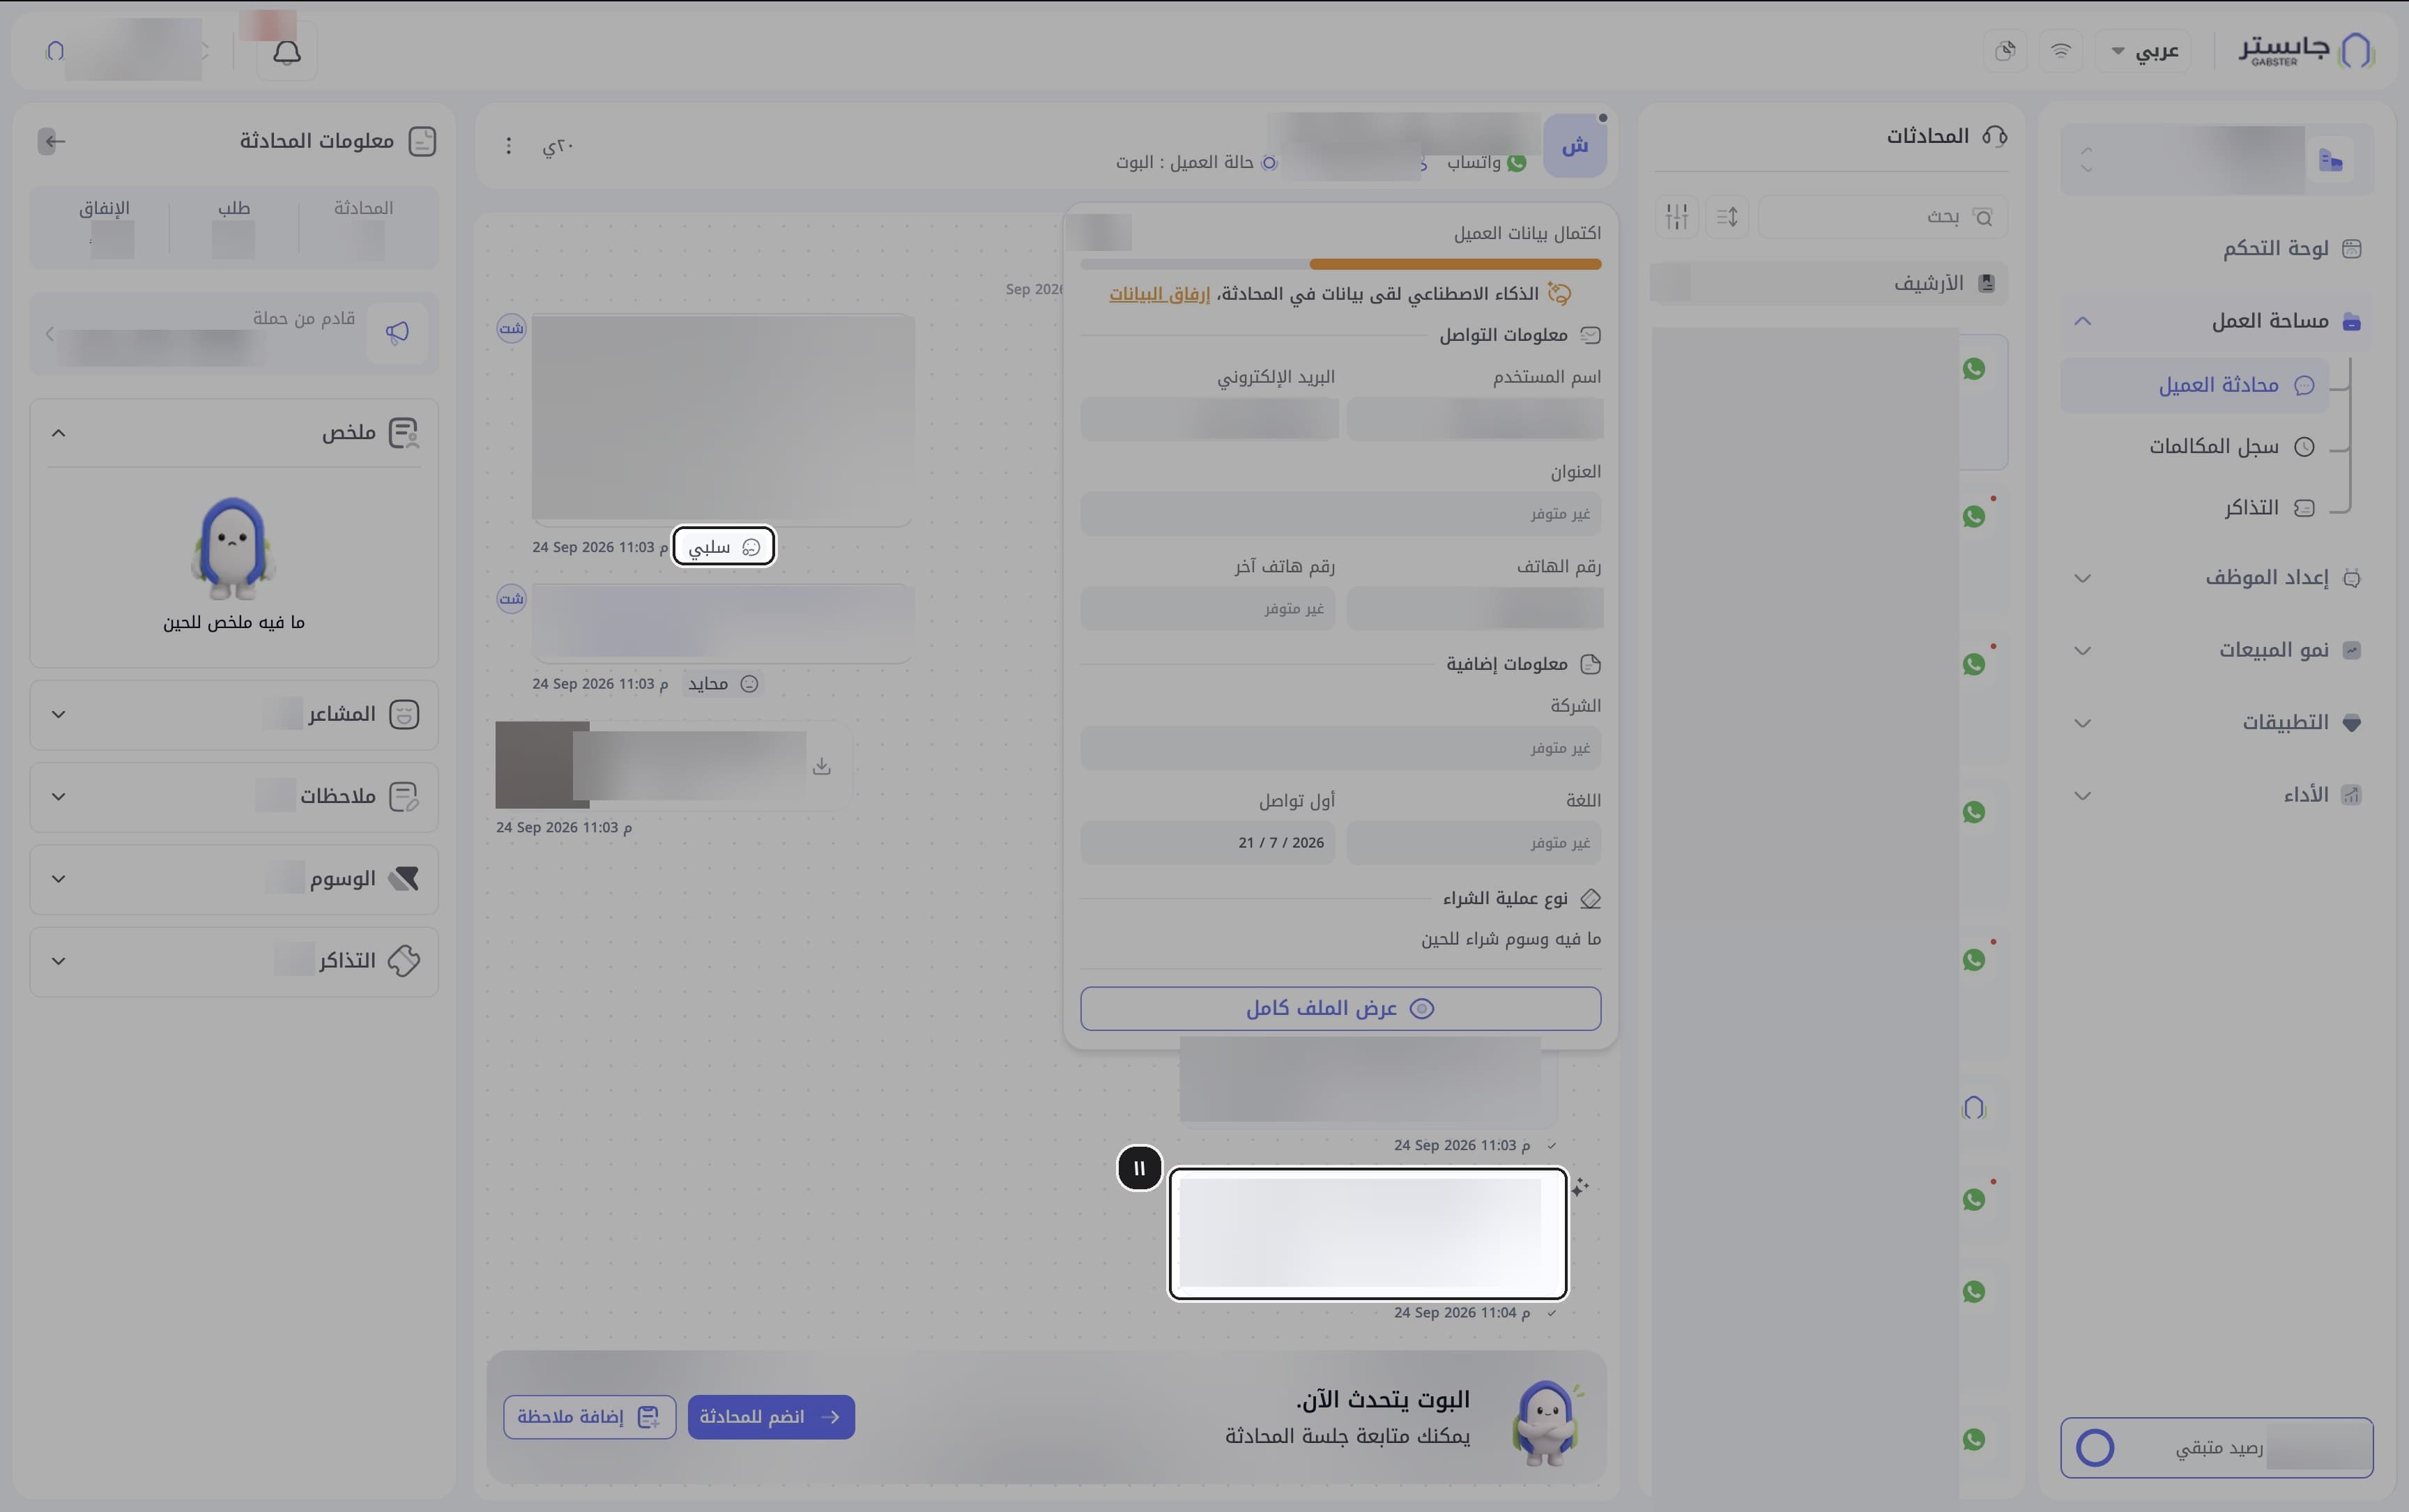
Read the conversation
Read the messages: your AI Agent's messages are on the right with a ✦ mark; the customer's messages are on the left with a sentiment chip below them (such as Neutral (محايد), Negative (سلبي) or Very negative (سلبي جداً)).
Check the customer status
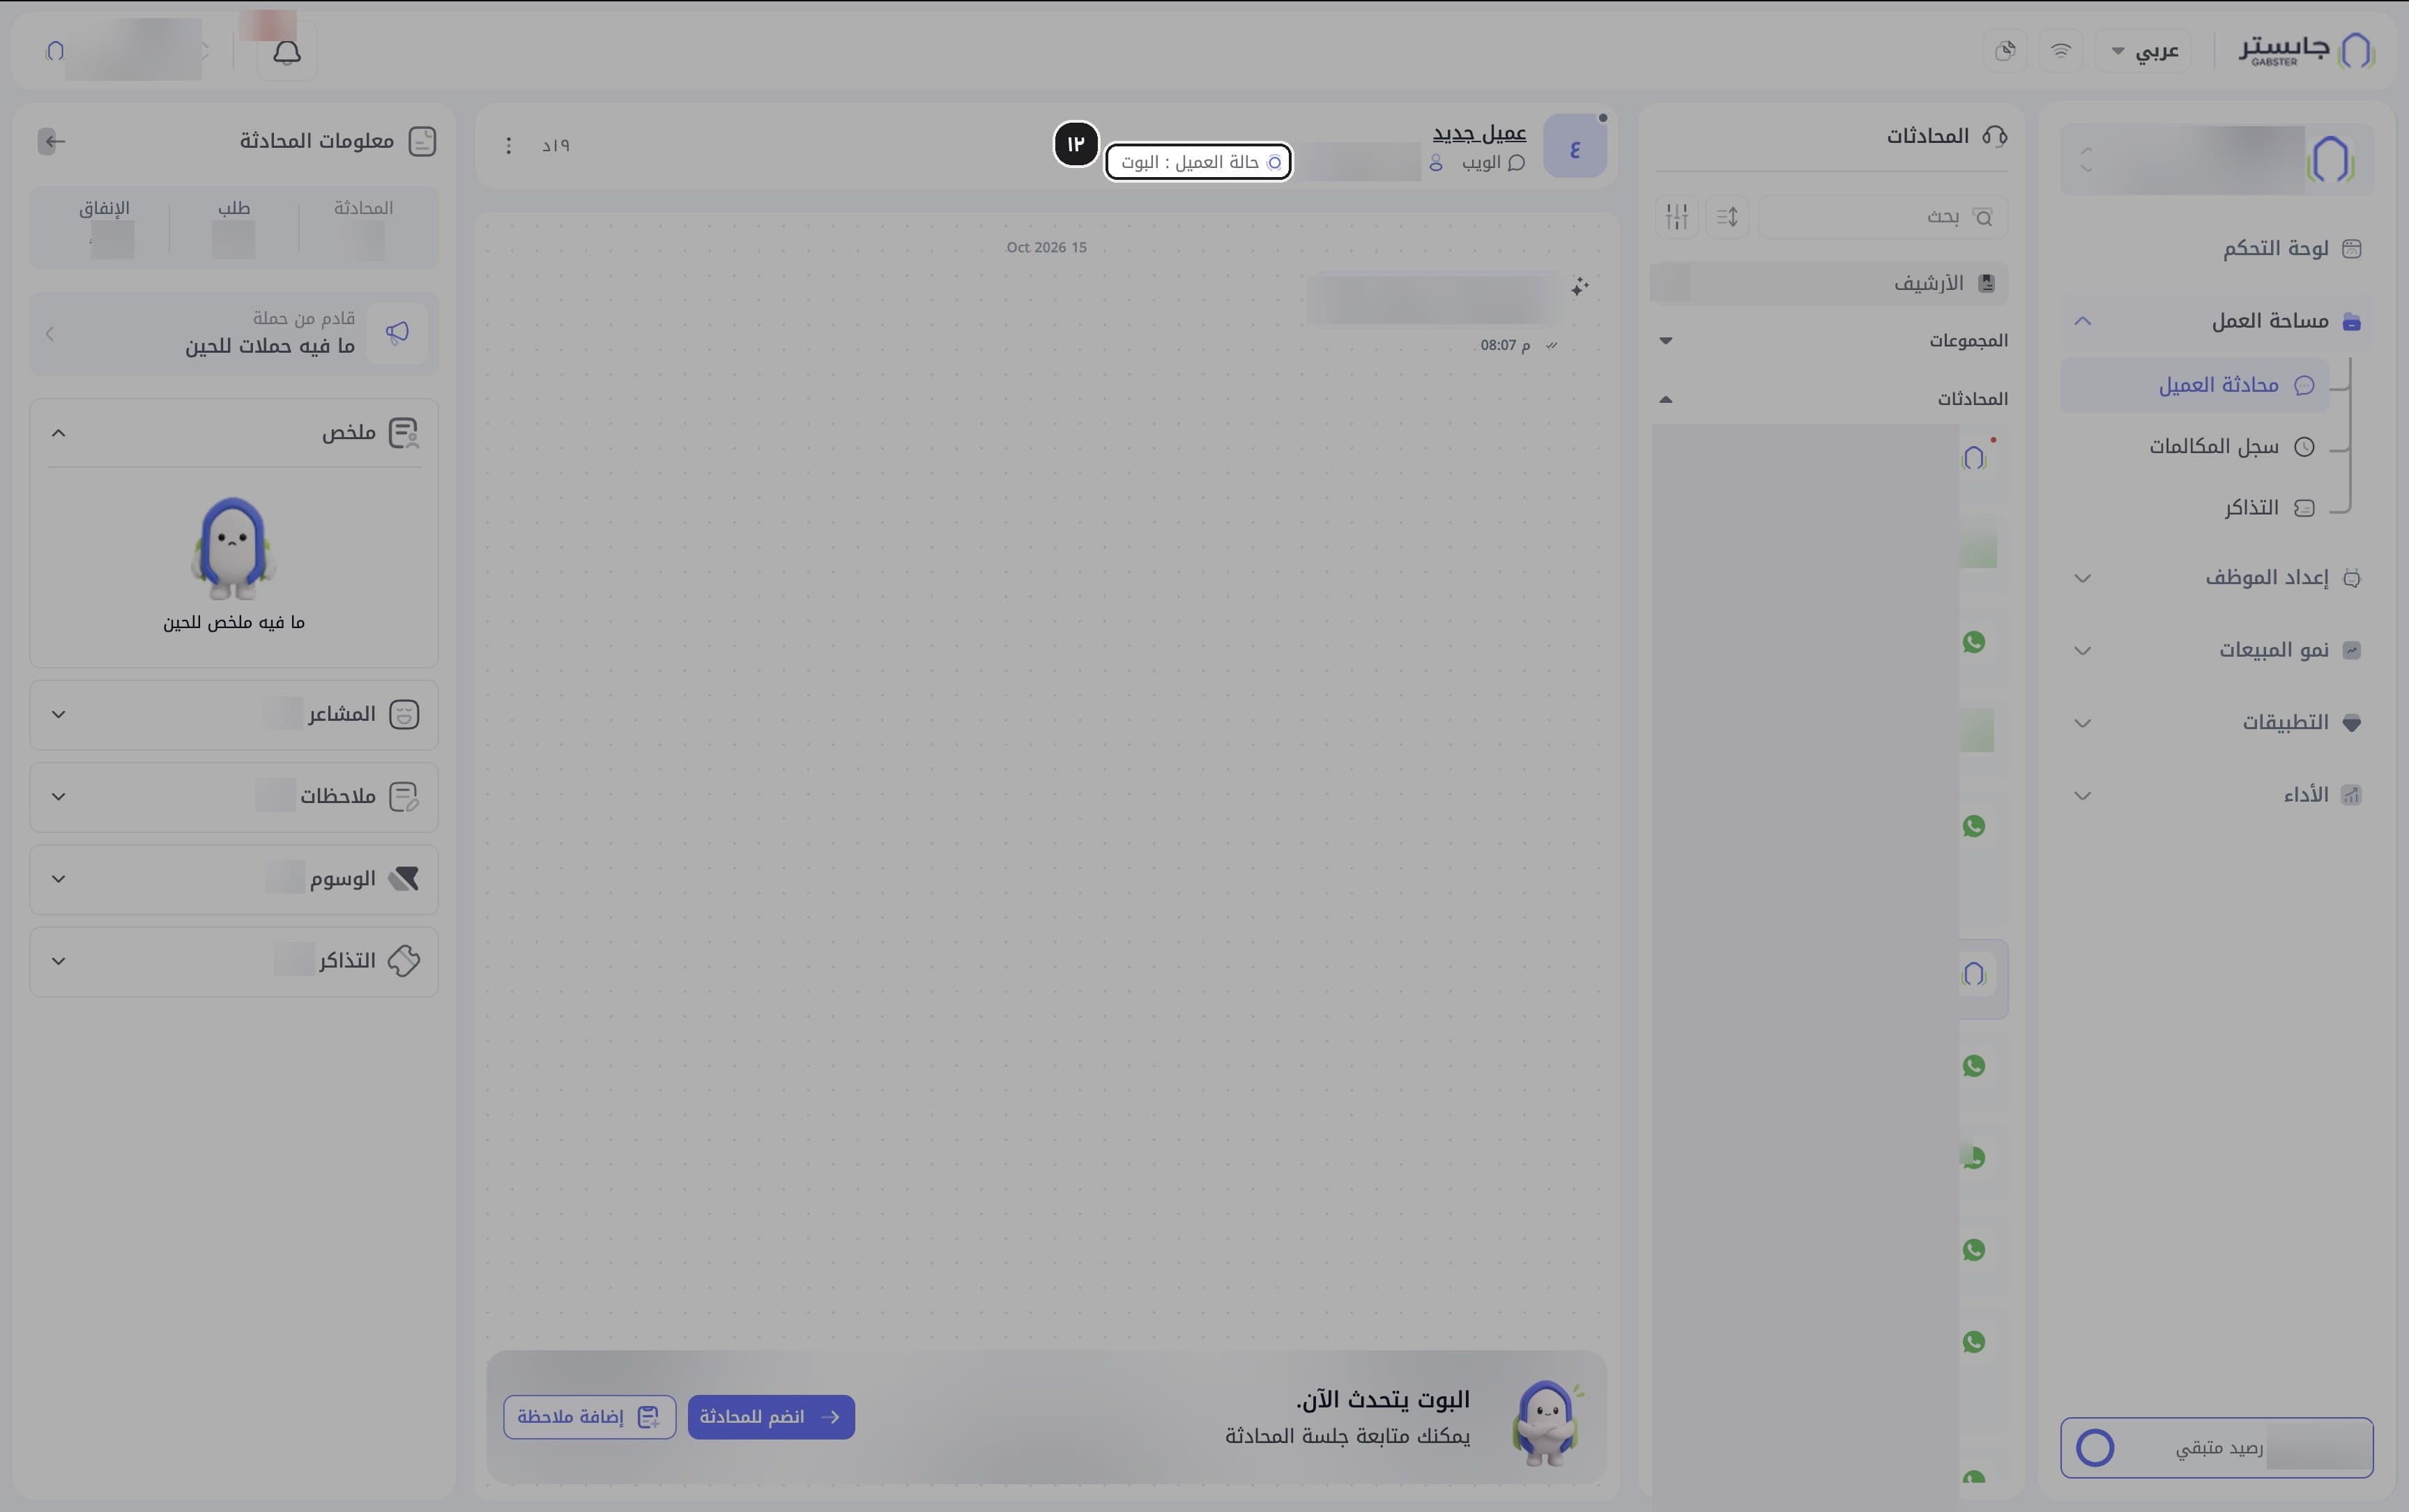
Check Customer status (حالة العميل) in the conversation header. It shows, for example, AI Agent (البوت) when your AI Agent is replying, or Waiting for staff (بانتظار موظف) when the conversation is waiting for a staff member.
Take over the conversation
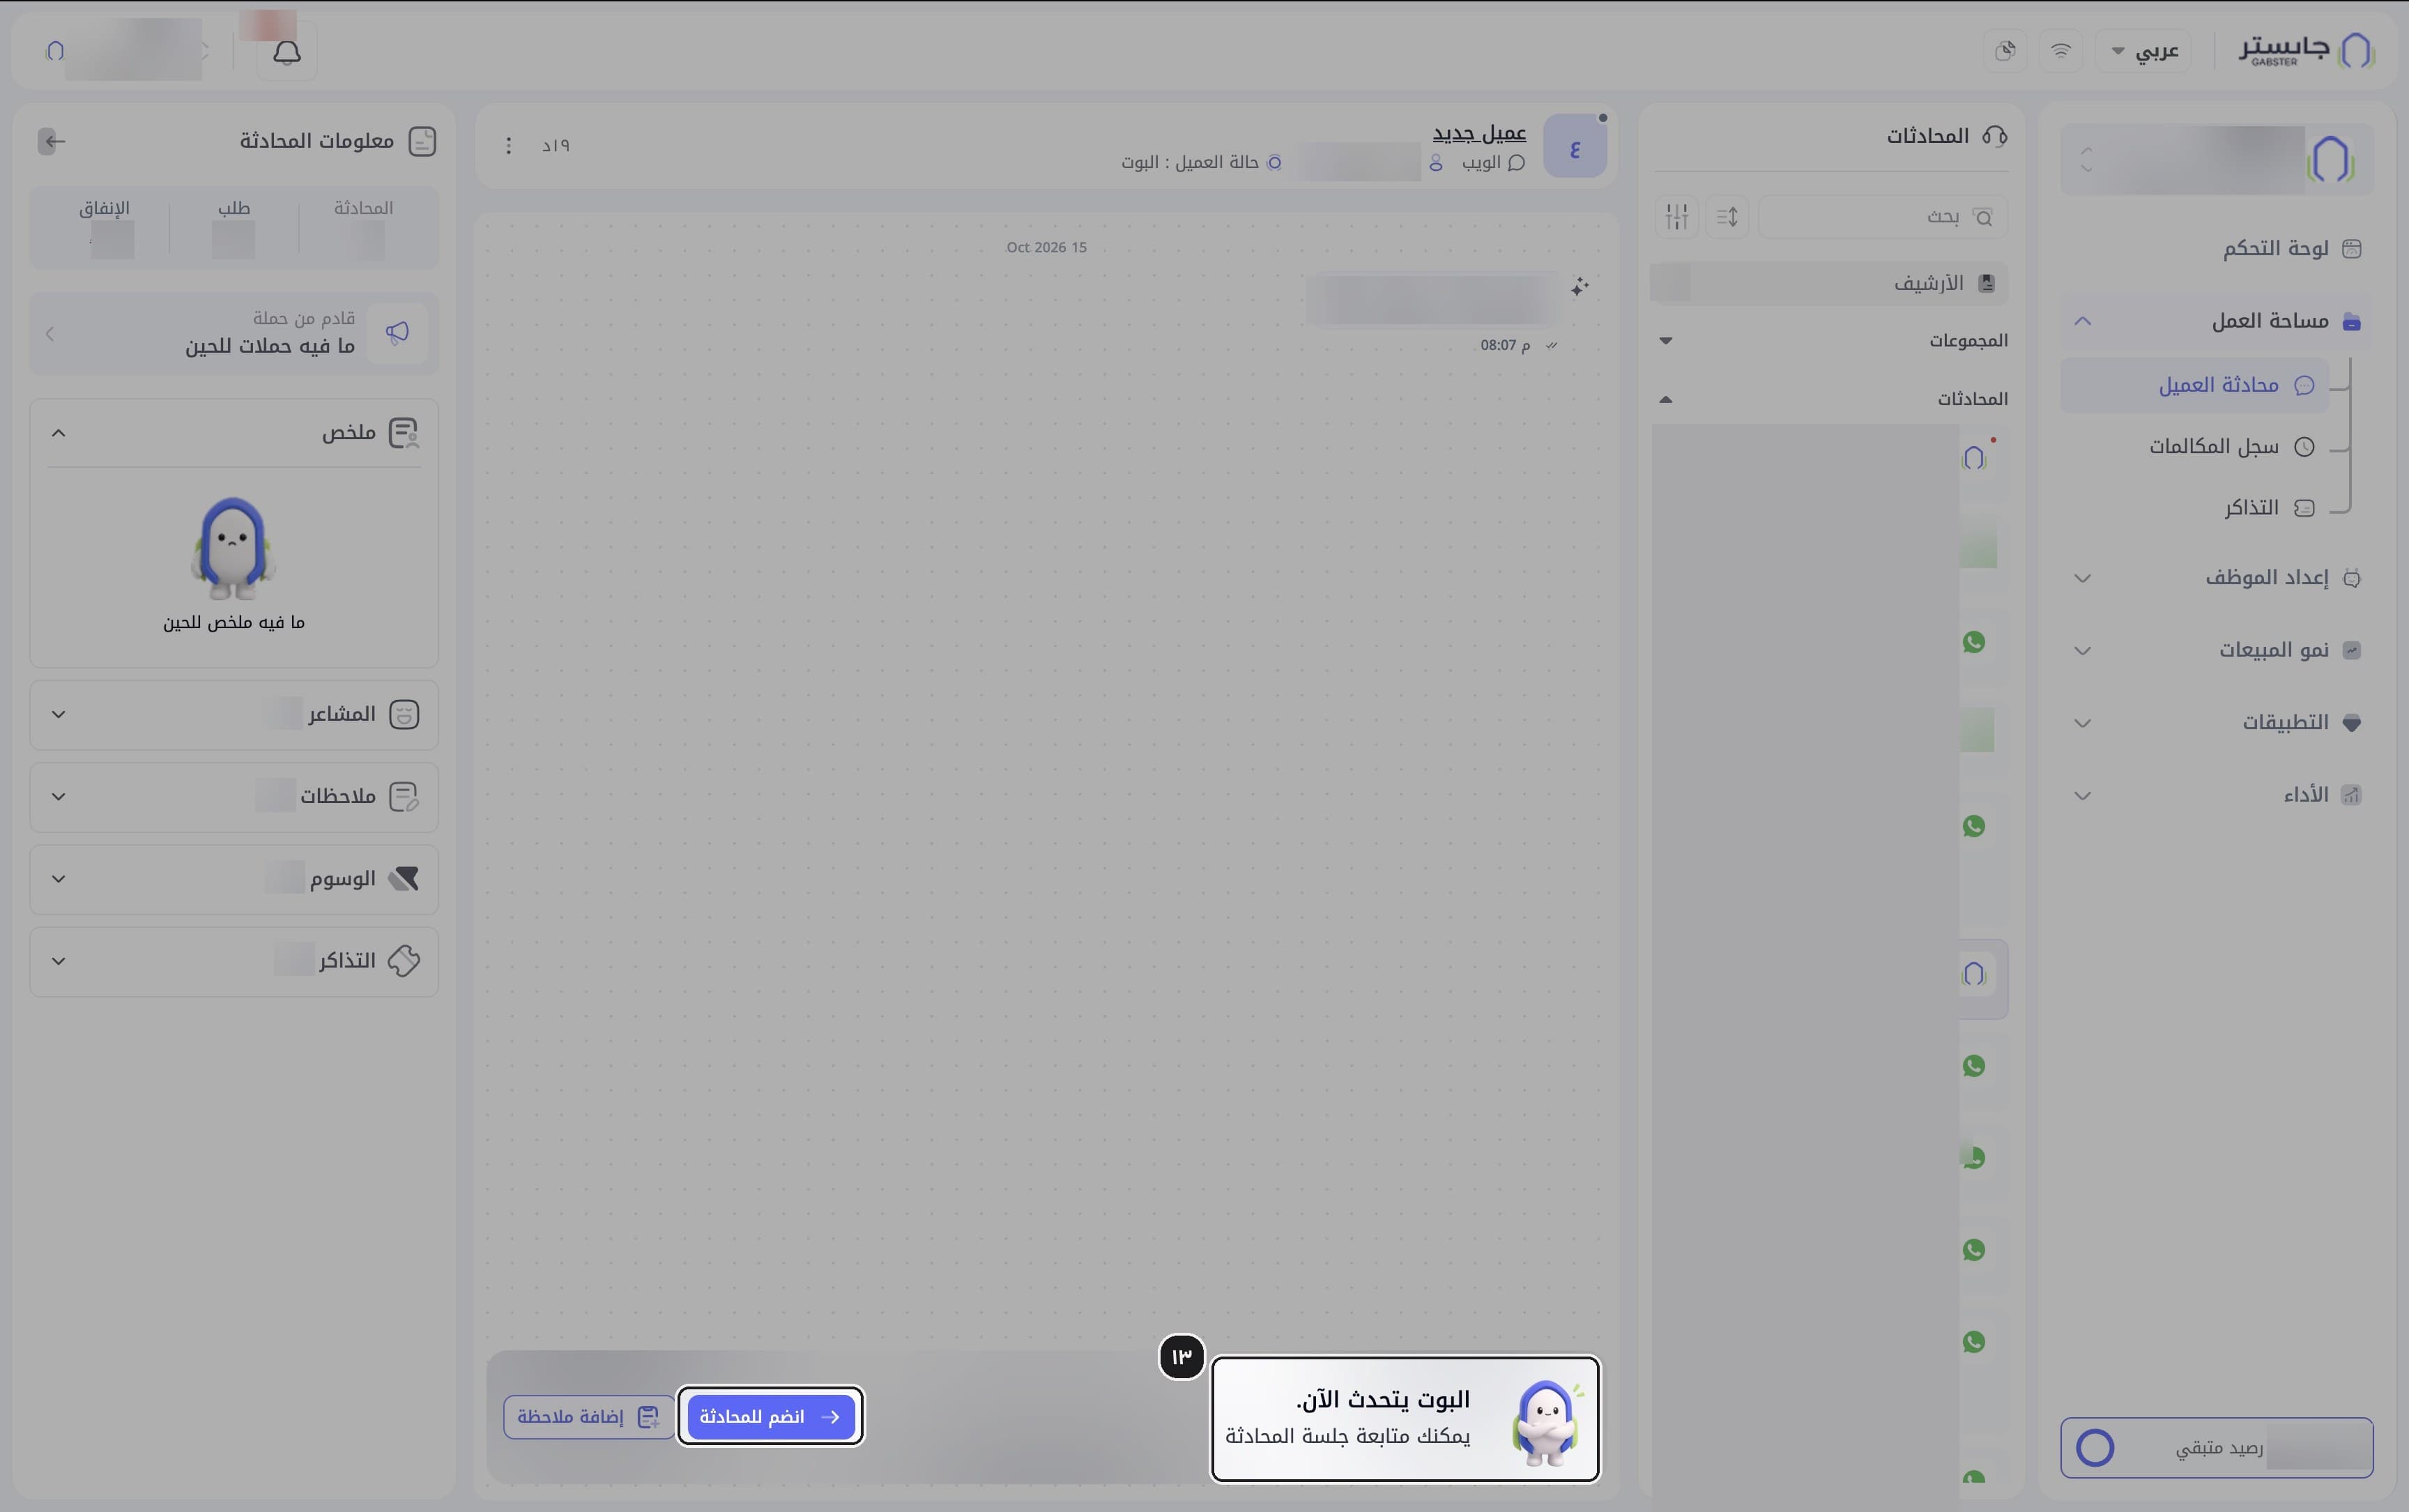
While your AI Agent is replying, the messages AI Agent is talking now. (البوت يتحدث الآن.) and You can follow the conversation session (يمكنك متابعة جلسة المحادثة) replace the reply box. To reply yourself, click Join conversation (انضم للمحادثة).
Once you join, your AI Agent stops replying in this conversation. When the last staff member leaves with Leave conversation (مغادرة المحادثة) or ends the conversation, it goes back to your AI Agent.
Result: the header shows Customer status: Staff joined (حالة العميل : انضم موظف), the thread shows Staff member … joined the conversation (انضم الموظف … إلى المحادثة), and a reply box opens with Quick replies (ردود سريعة), Suggest a reply (اقتراح رد), Language and dialect (اللغة واللهجة) and Record (تسجيل), which becomes Send (إرسال) once you type.
To leave, choose Leave conversation from the ⋮ menu and confirm with Leave (مغادرة).
You cannot write a reply while your AI Agent is handling the conversation; join it first. You can set when your AI Agent hands conversations to your team on its own in Functions and handoff.
Add an internal note
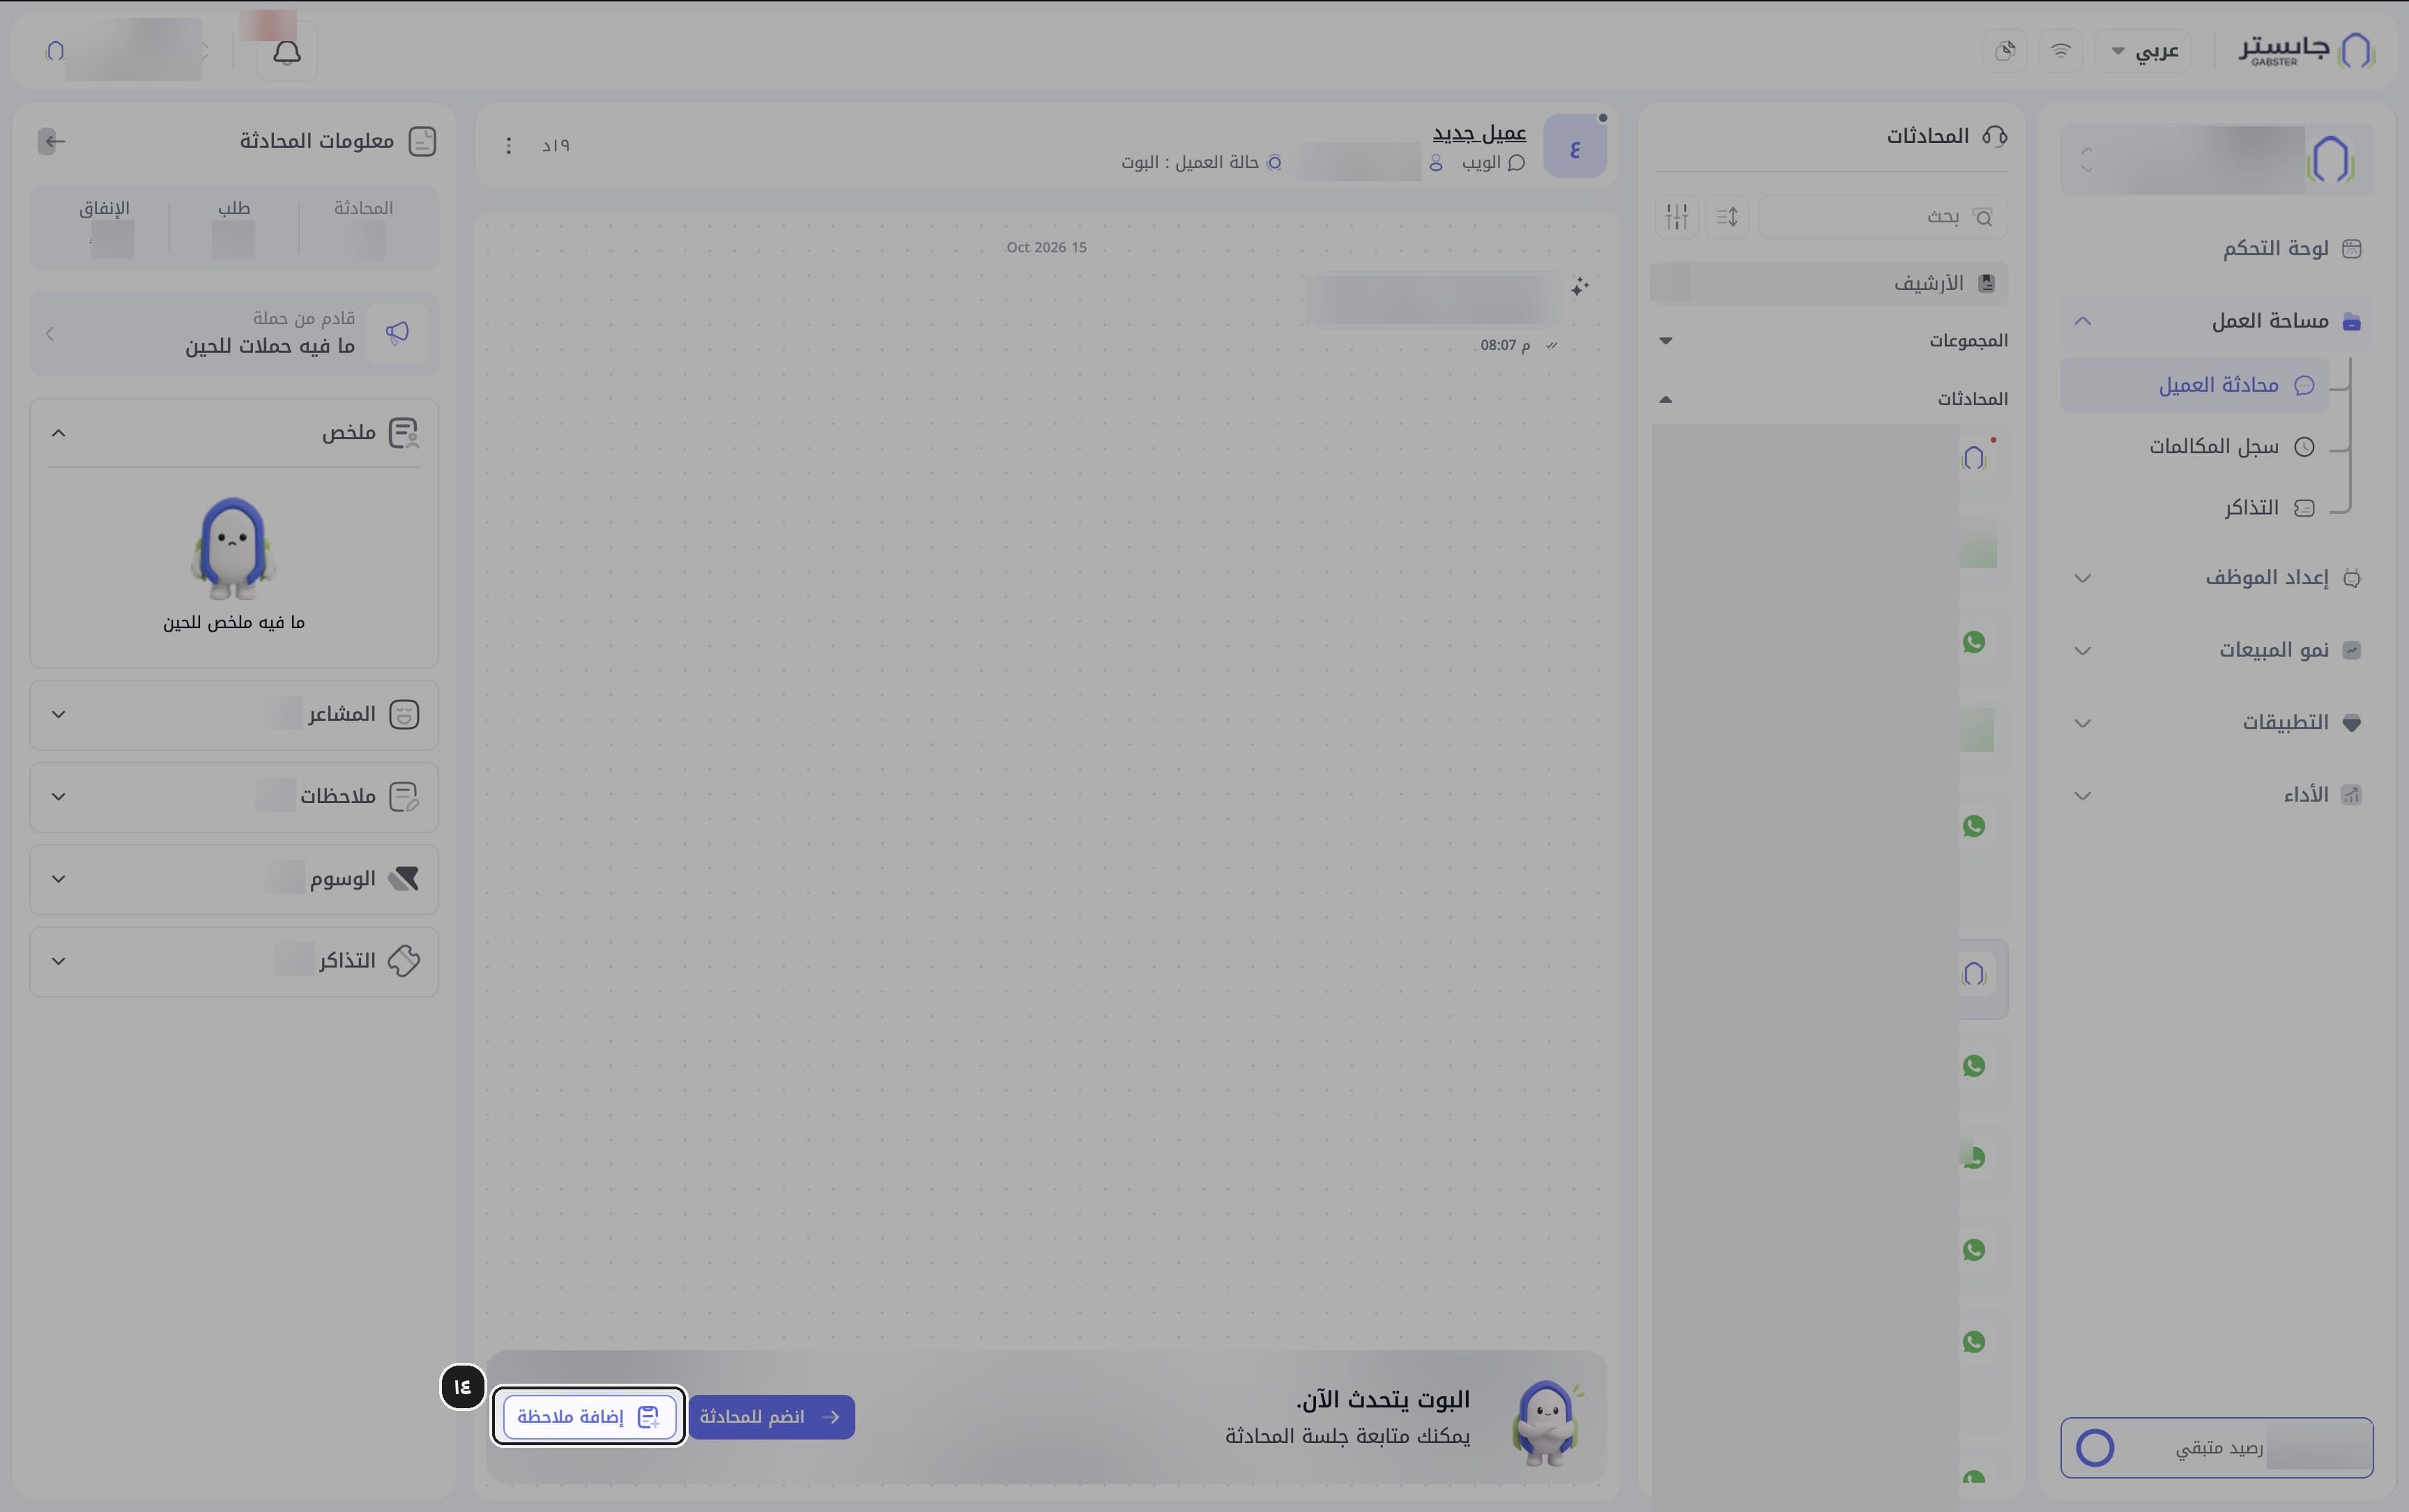
Click Add note (إضافة ملاحظة).
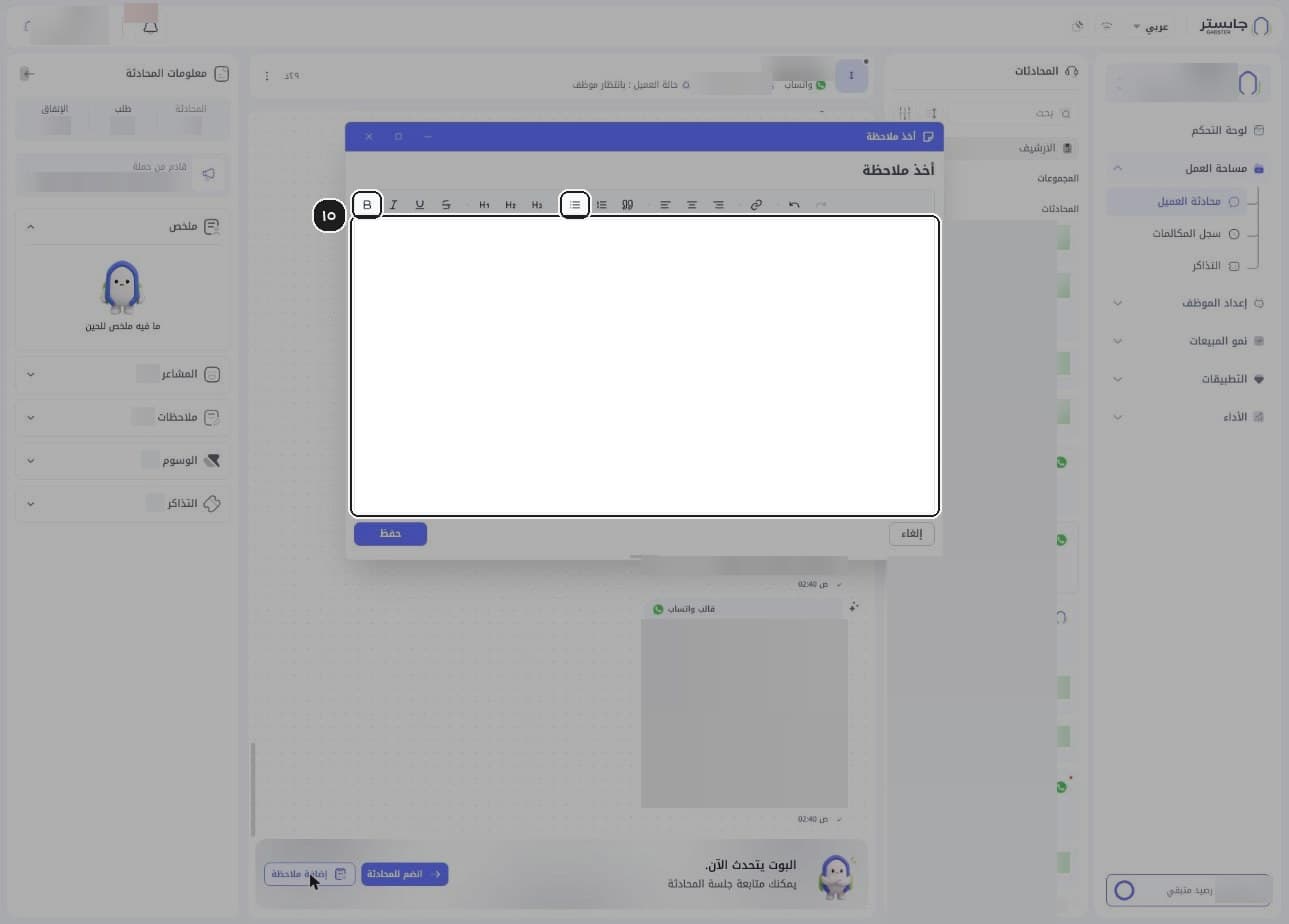
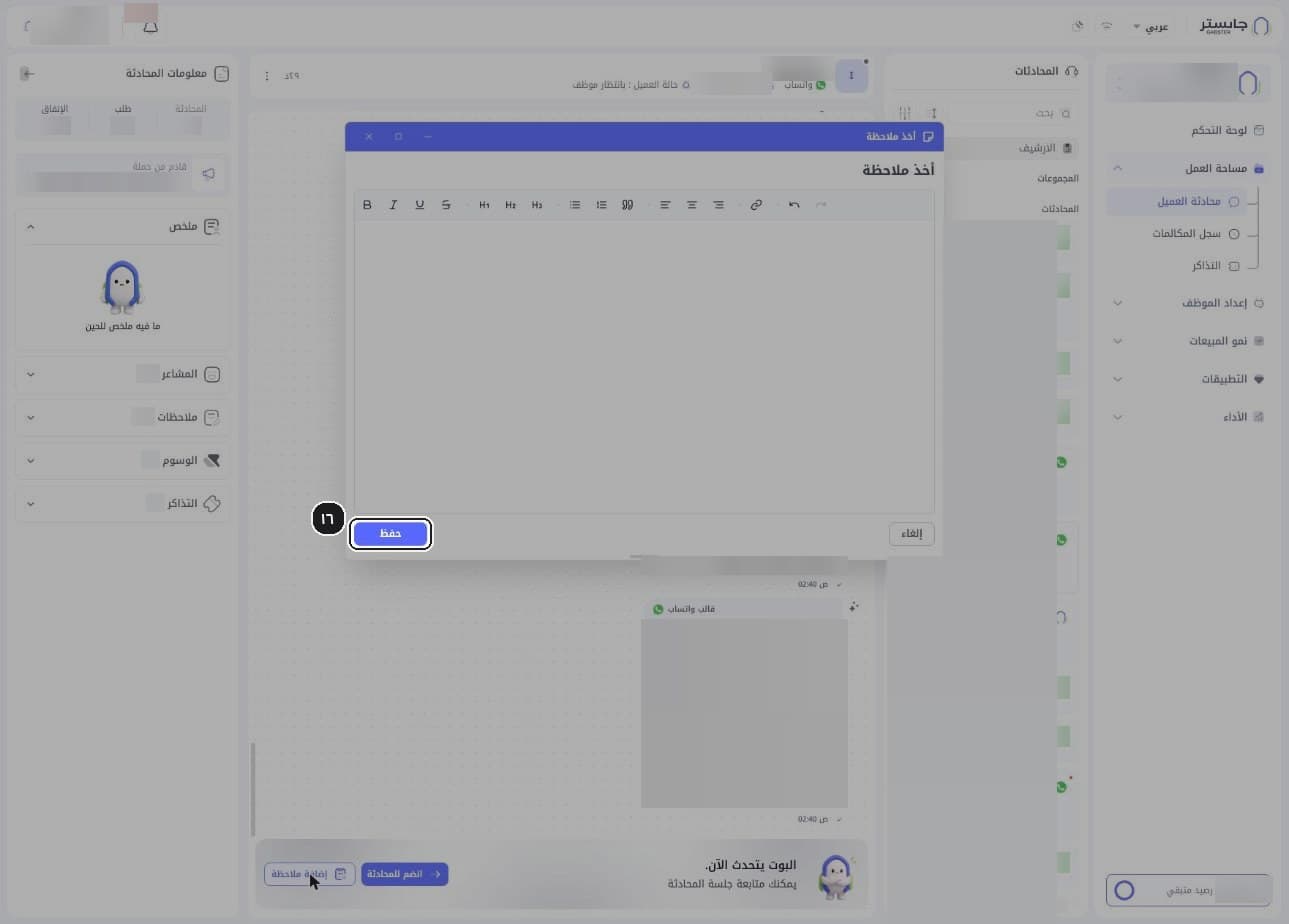
Result: the note window (أخذ ملاحظة) opens over the conversation.
Write the note
Write the note, using the toolbar for bold, headings, lists and links.
Save the note
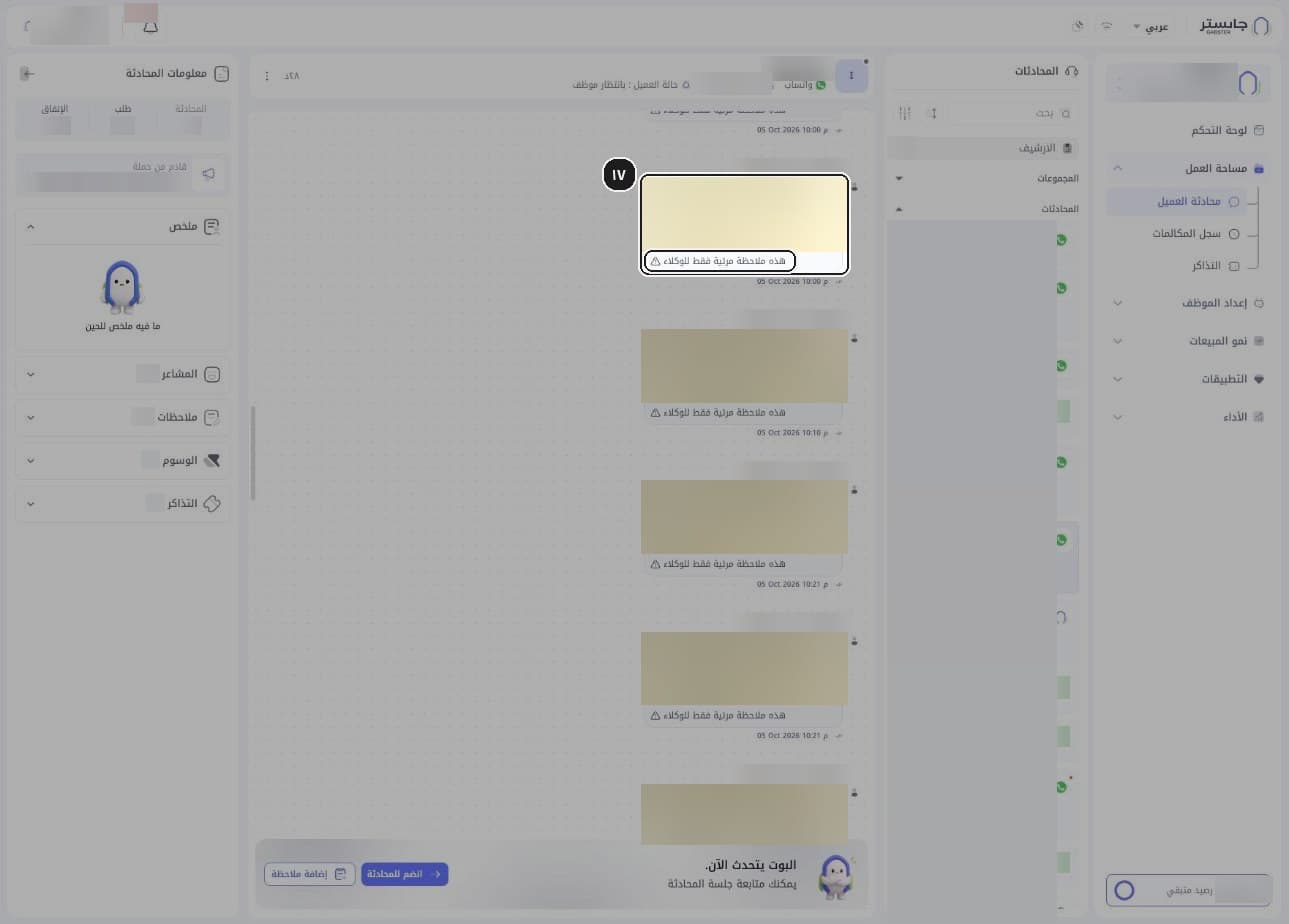
Click Save (حفظ). Result: the note appears in the thread as a yellow bubble, and the Notes (ملاحظات) count goes up.
Read internal notes
Internal notes appear in the conversation as yellow bubbles, each marked This note is visible to staff only (هذه ملاحظة مرئية فقط للوكلاء). A note can @mention a staff member or refer to a ticket.
Customers never see internal notes; they are for your team only.
C. Conversation actions
Open the actions menu
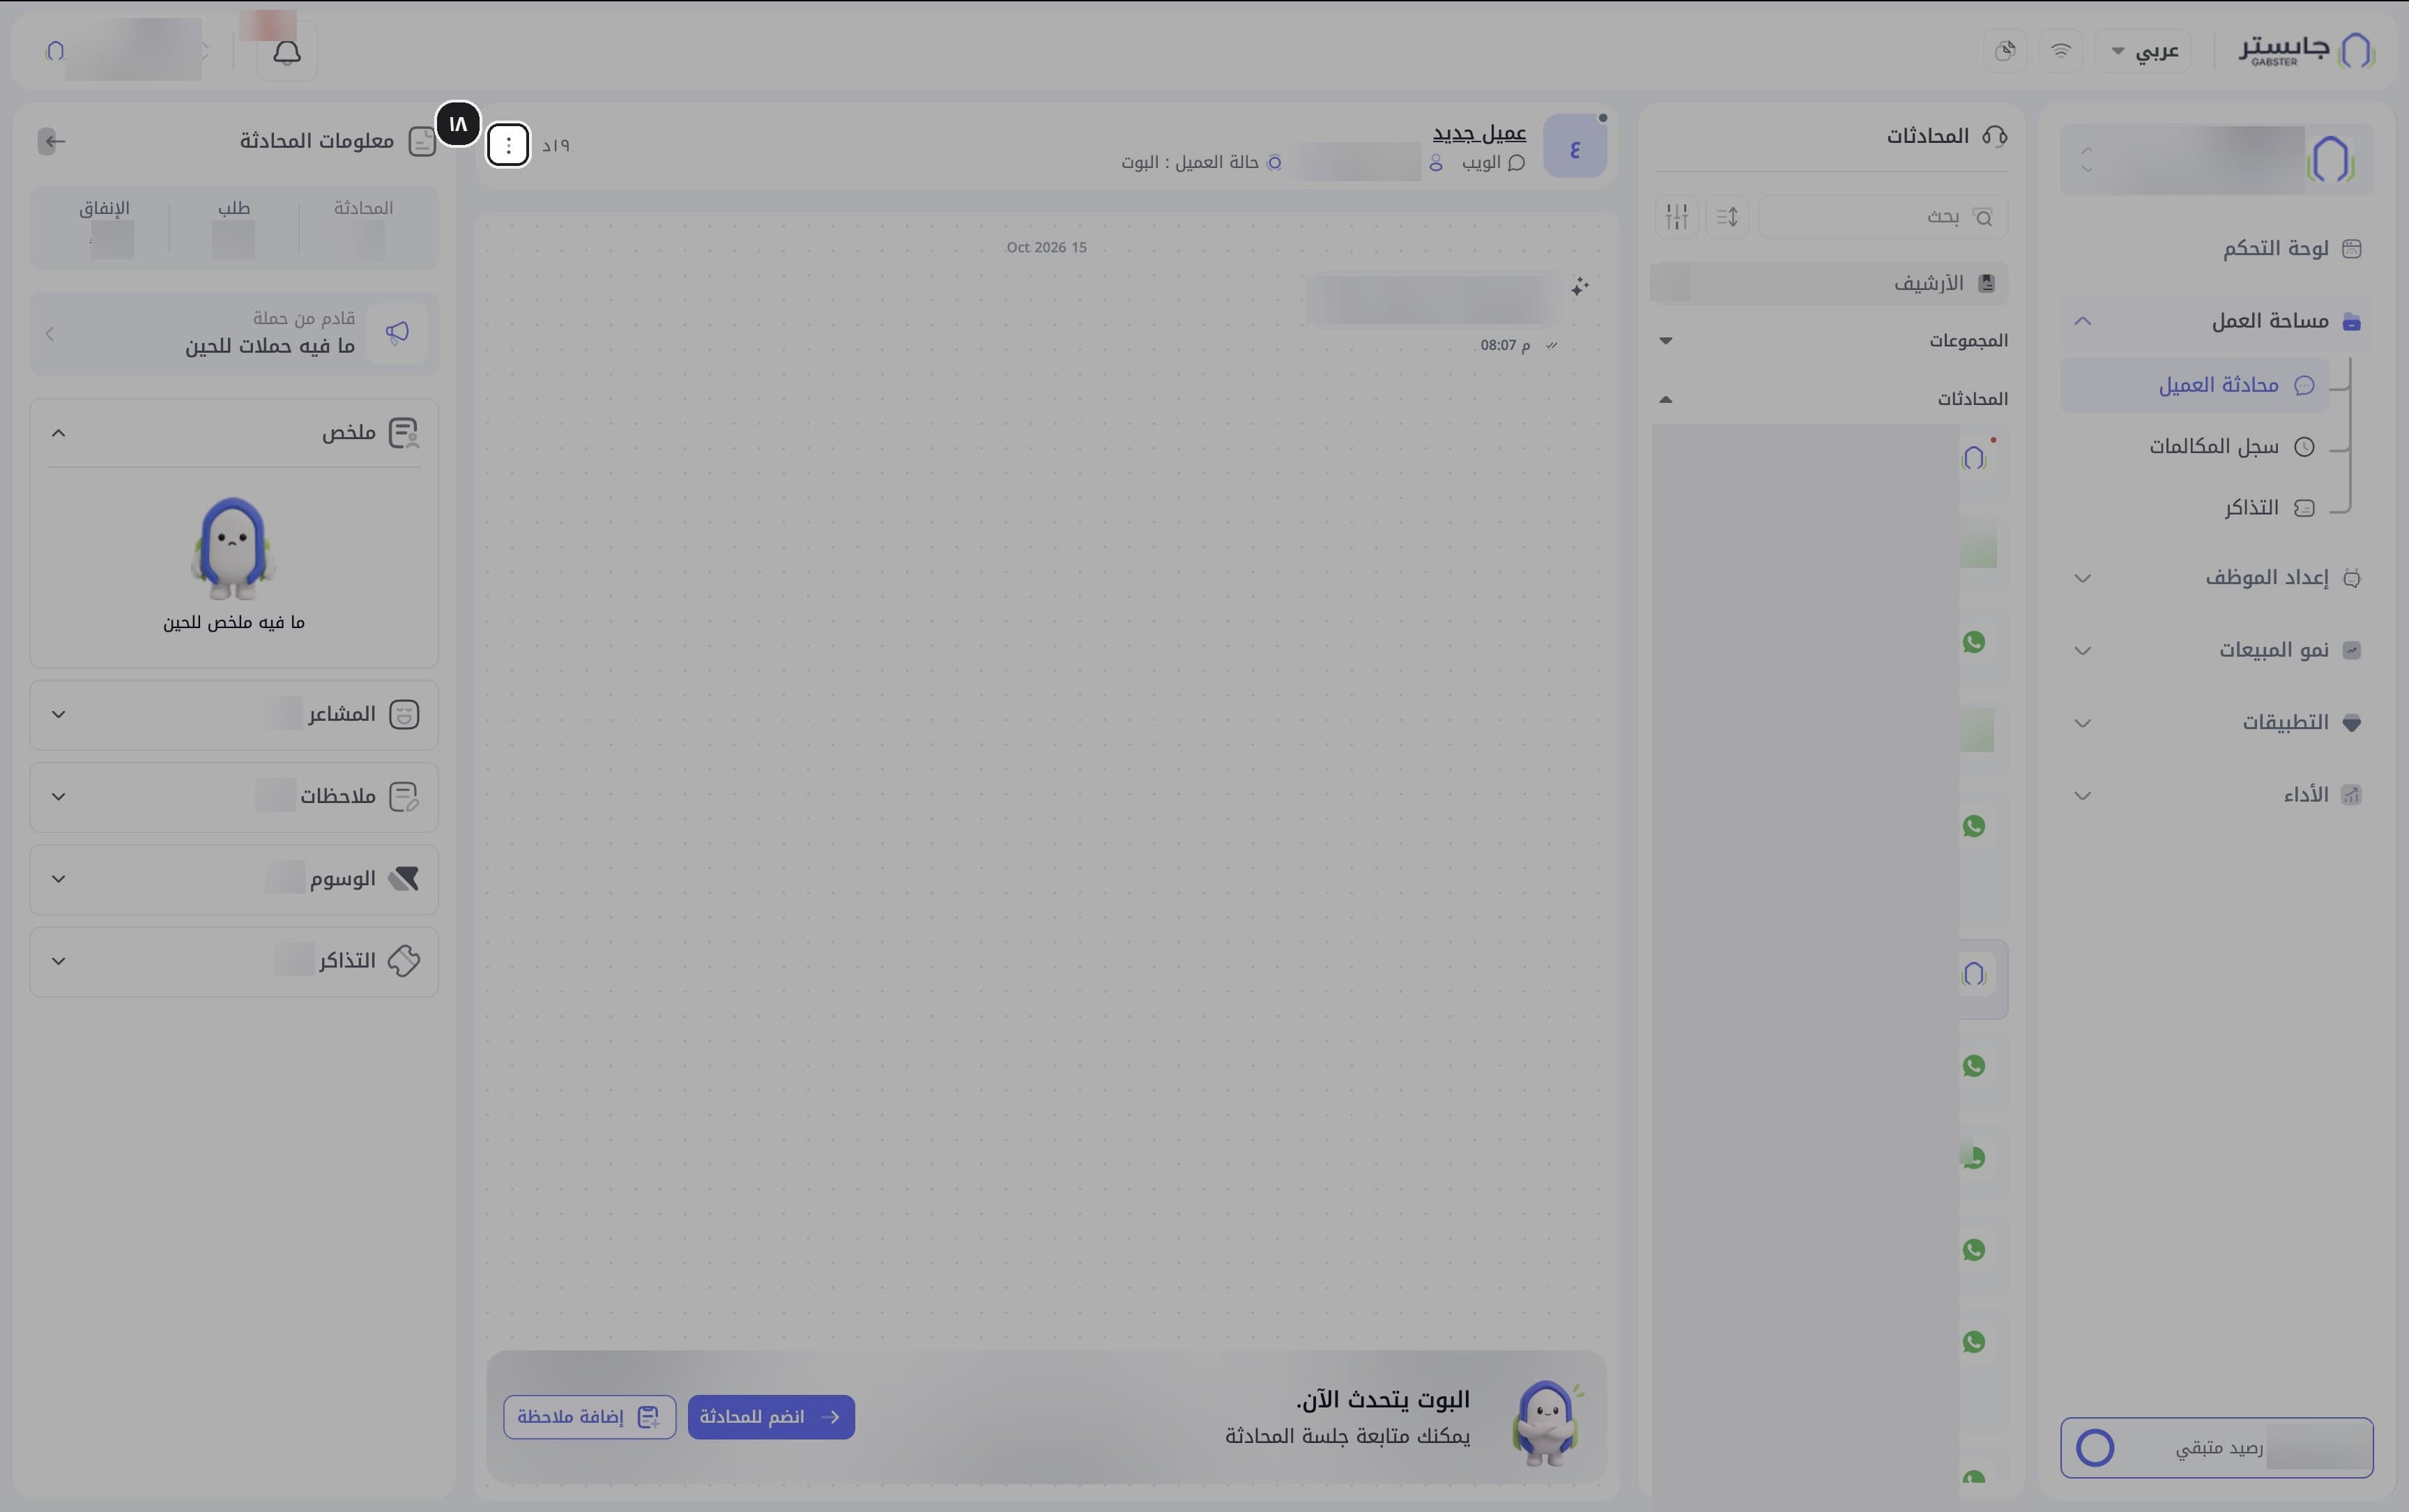
Click the ⋮ icon in the conversation header.
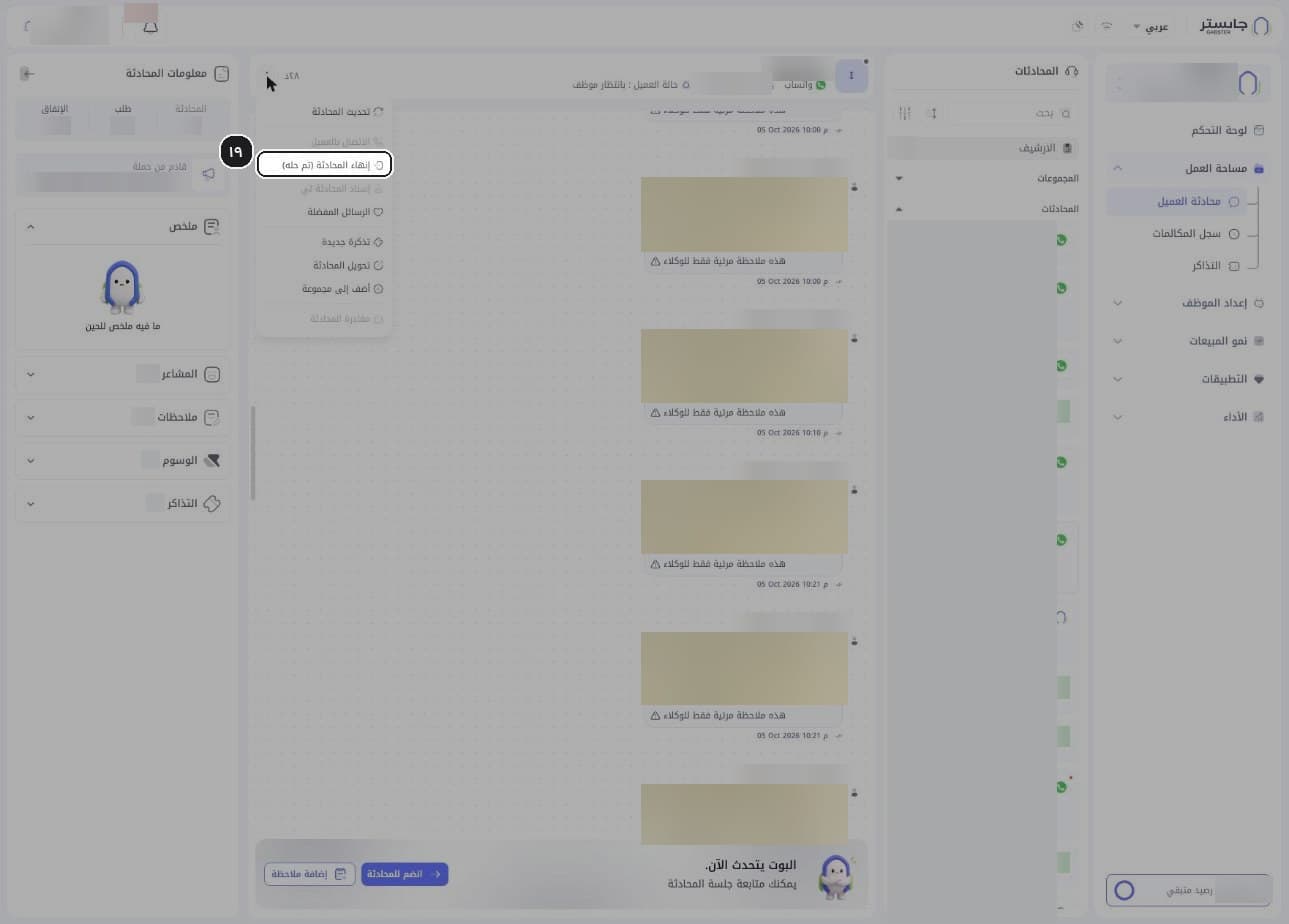
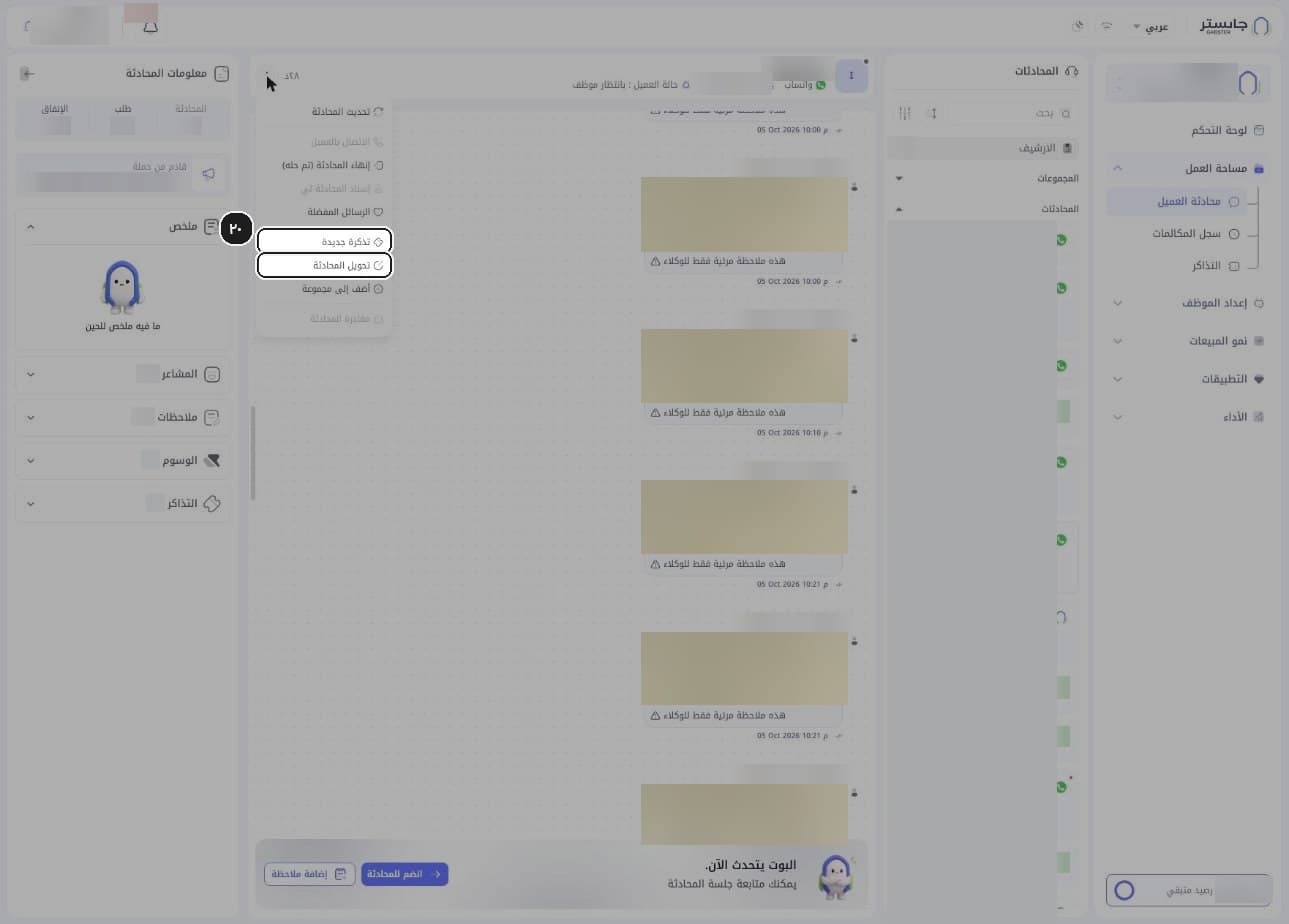
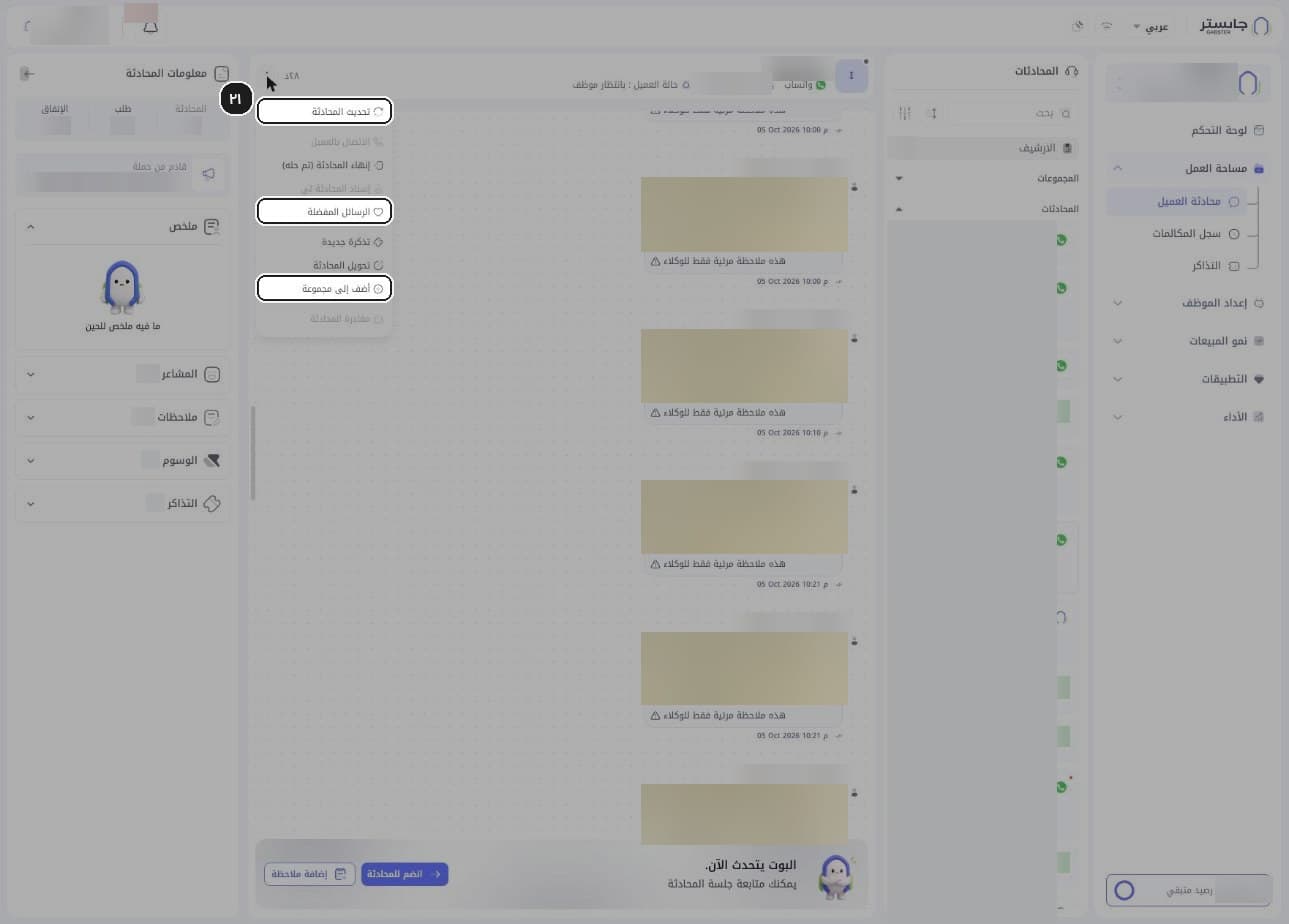
Result: a menu opens with nine actions: Refresh conversation (تحديث المحادثة), Call customer (الاتصال بالعميل), End conversation (resolved) (إنهاء المحادثة (تم حله)), Assign conversation to me (إسناد المحادثة لي), Favorite messages (الرسائل المفضلة), New ticket (تذكرة جديدة), Transfer conversation (تحويل المحادثة), Add to group (أضف إلى مجموعة) and Leave conversation (مغادرة المحادثة). Leave conversation stays grayed out until you join. On website chat conversations, Call customer and Assign conversation to me are grayed out too.
End the conversation as resolved
Choose End conversation (resolved). In the form, describe the fix in Solution description (وصف الحل), add photos if you like, and click Resolved (تم الحل).
Result: a Great work! … (شغل رهيب! …) window offers Next conversation (المحادثة التالية) or Undo (تراجع عن الخطوة), and the conversation leaves the All (الكل) list.
Create a ticket or transfer the conversation
Choose New ticket to open a ticket from this conversation, or Transfer conversation to hand it on.
Use the other actions
The same menu also holds Refresh conversation, Favorite messages and Add to group.
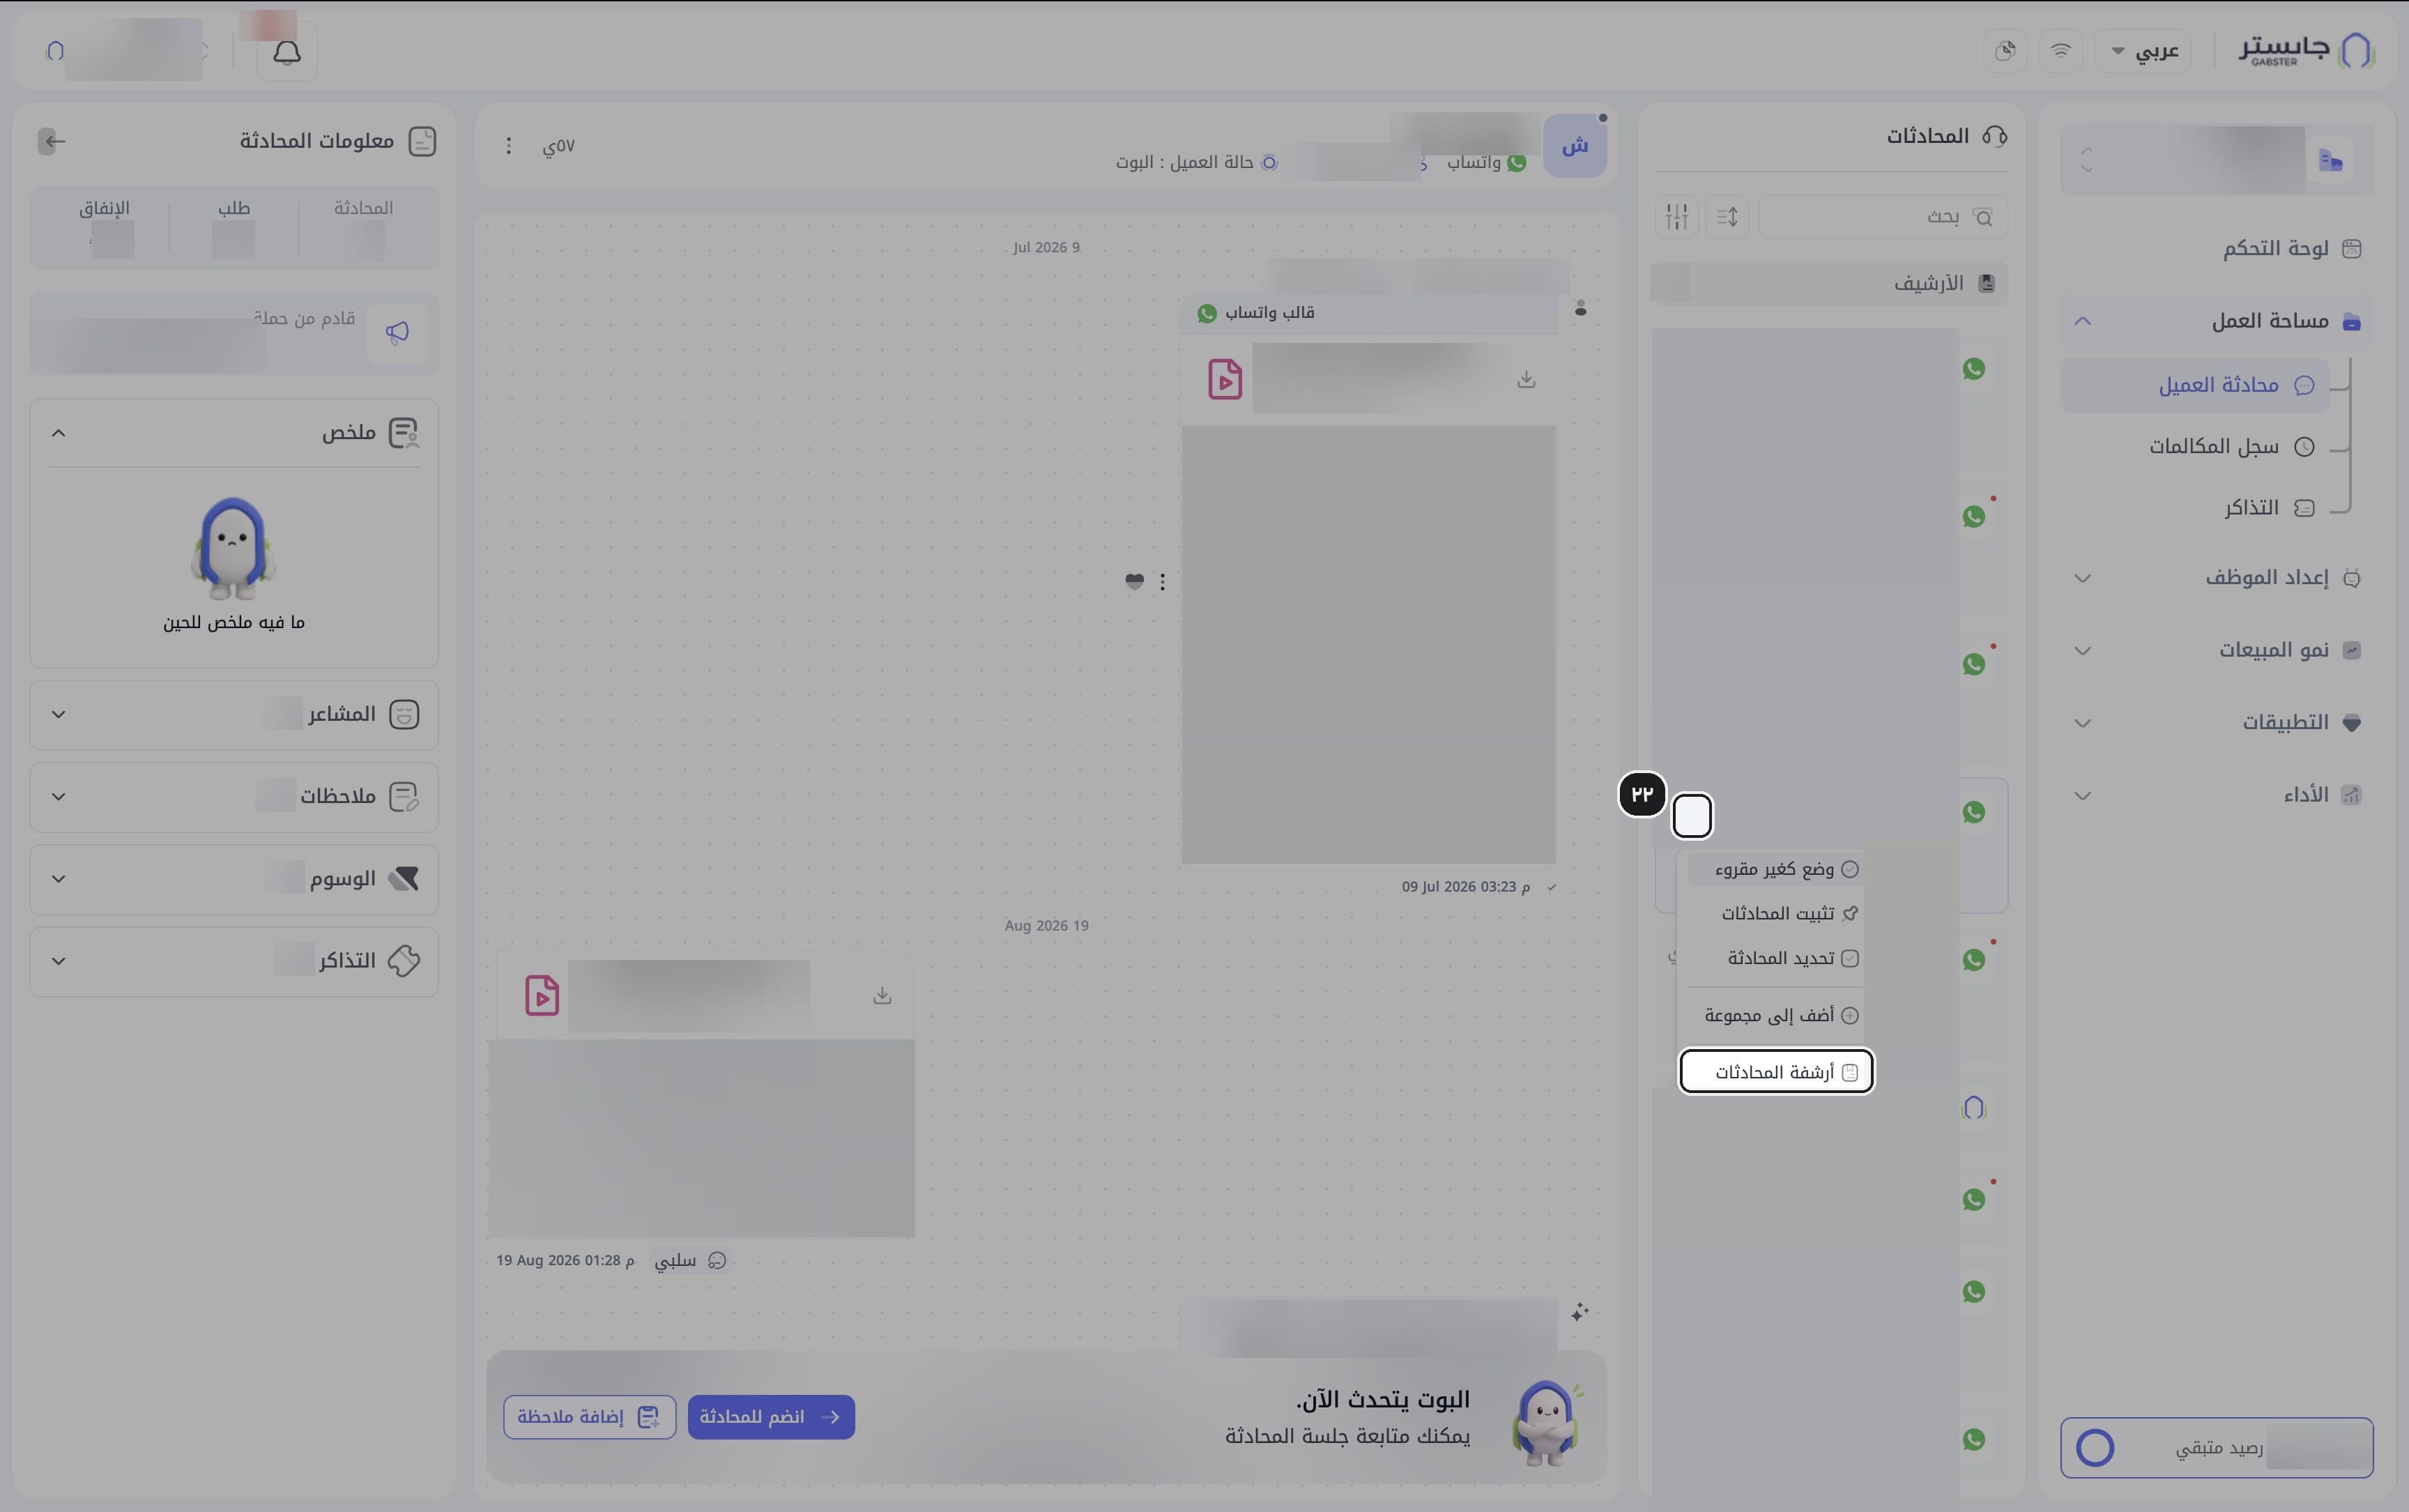
Use the row menu
In the conversation list, hover over a row and click the ⋮ that appears. The menu holds Mark as unread (وضع كغير مقروء), Pin conversation (تثبيت المحادثات), Select conversation (تحديد المحادثة), Add to group (أضف إلى مجموعة) and Archive conversation (أرشفة المحادثات).
D. Conversation info panel
Review the top of the panel
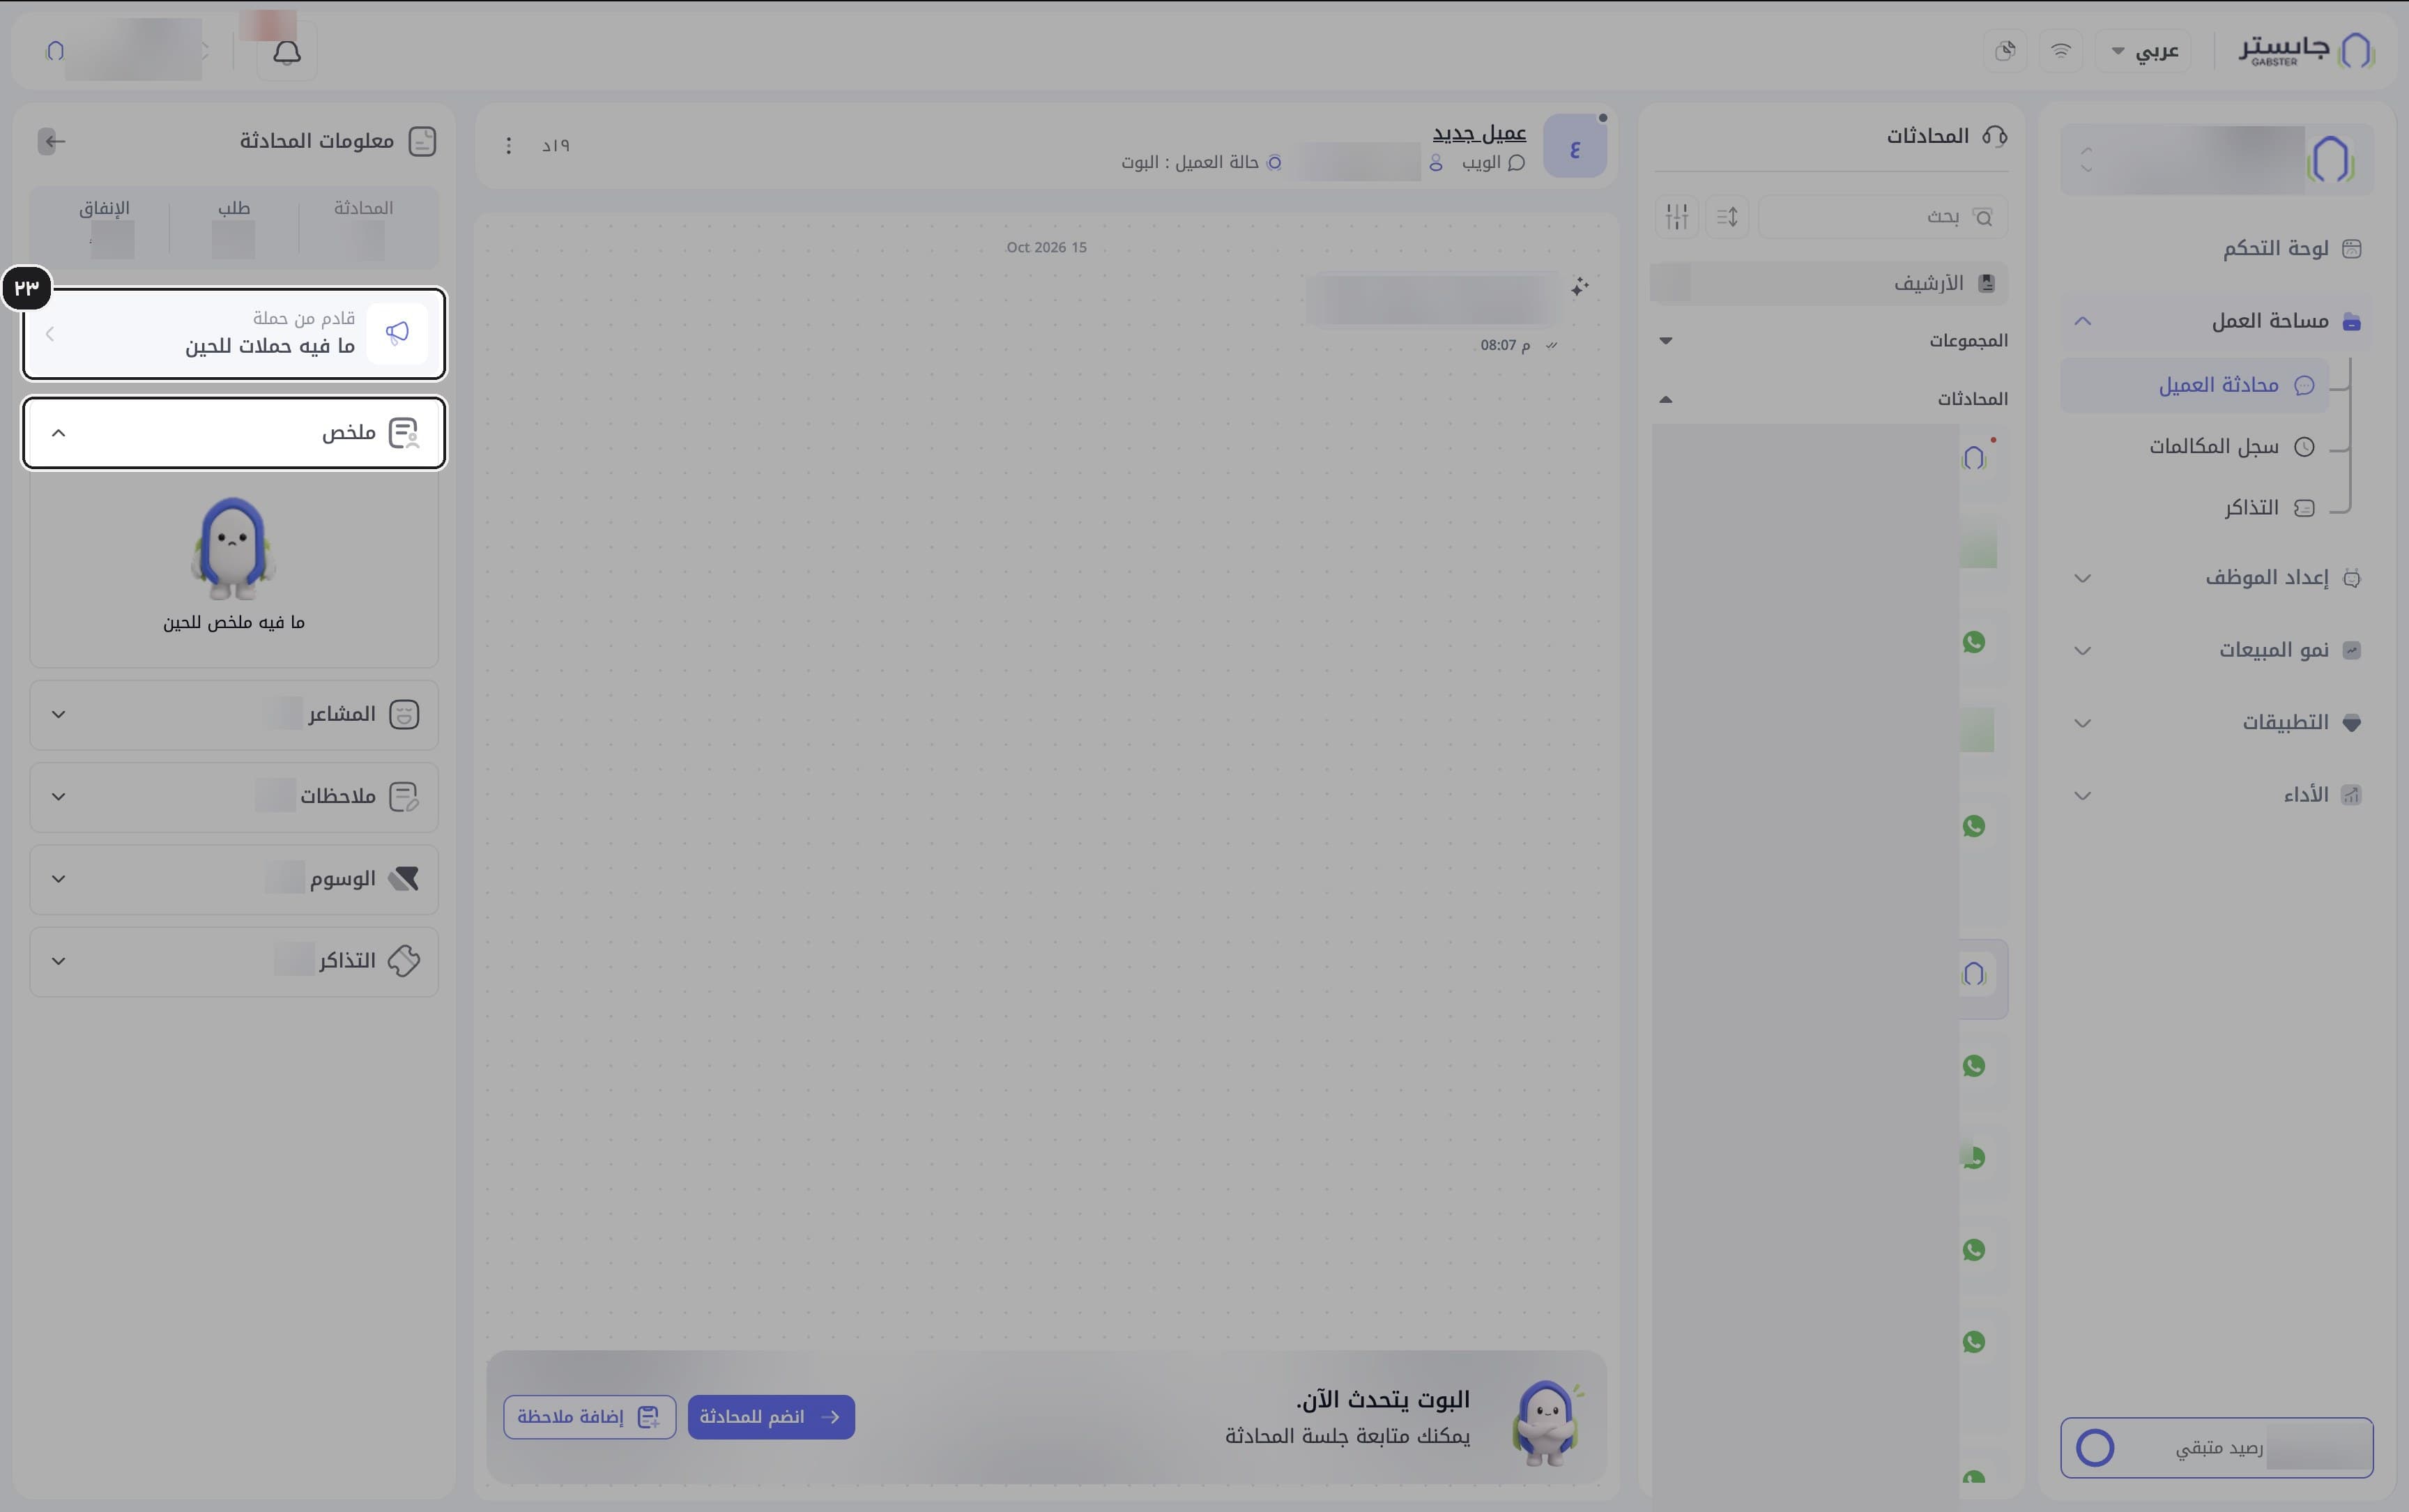
Review the top of the Conversation info (معلومات المحادثة) panel: the numbers (Conversations (المحادثة), Orders (طلب) and Spend (الإنفاق)), the Came from campaign (قادم من حملة) card, and the Summary (ملخص) section, which is open by default. After a handoff to your team it holds an AI-written summary of the conversation; before that it reads No summary yet (ما فيه ملخص للحين).
Review sentiment
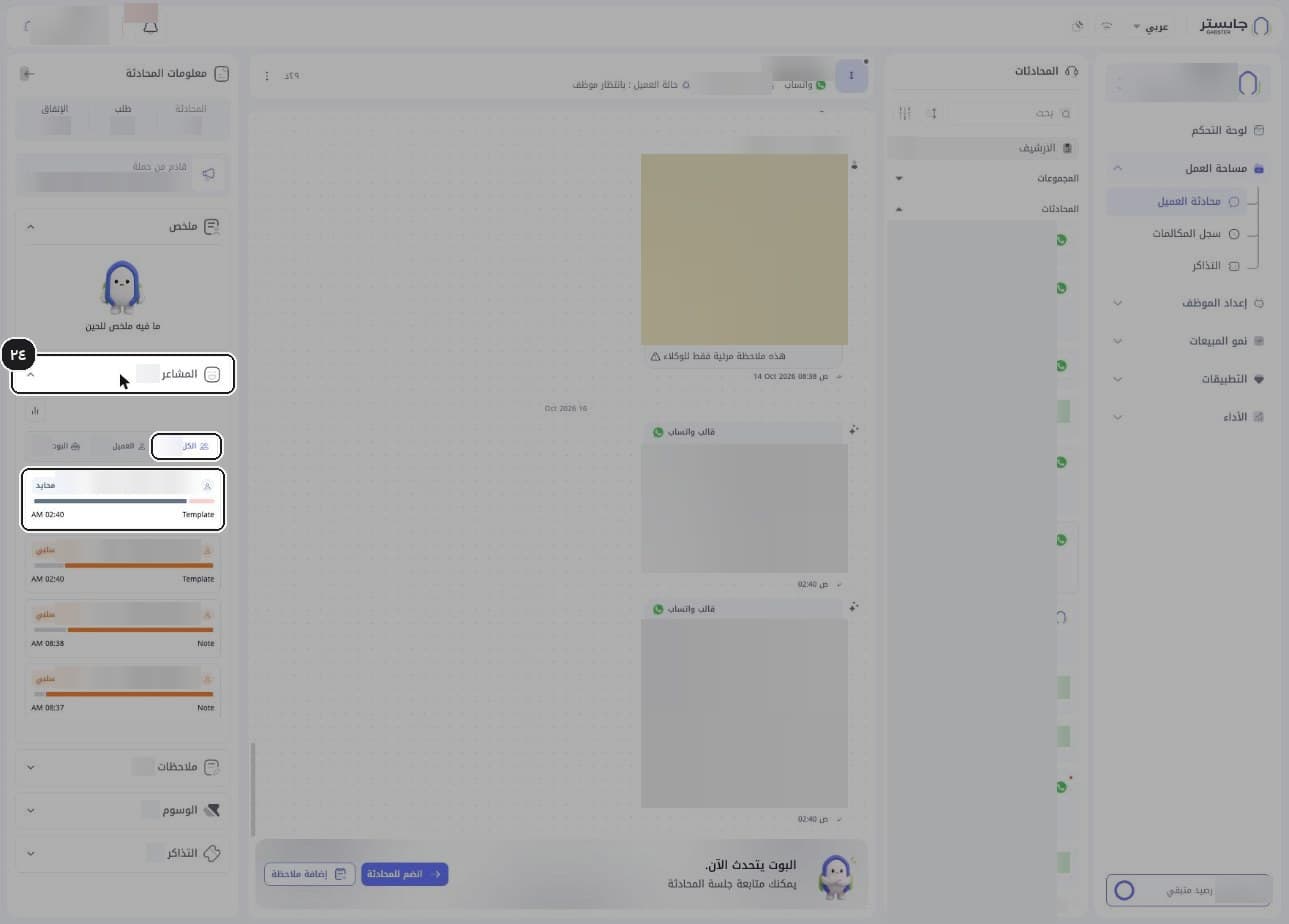
Expand Sentiment (المشاعر) and switch between All (الكل), Customer (العميل) and AI Agent (البوت).
Result: a list of scored messages appears, each with a score, a label (such as Neutral or Negative) and a bar. You can have several sections open at once.
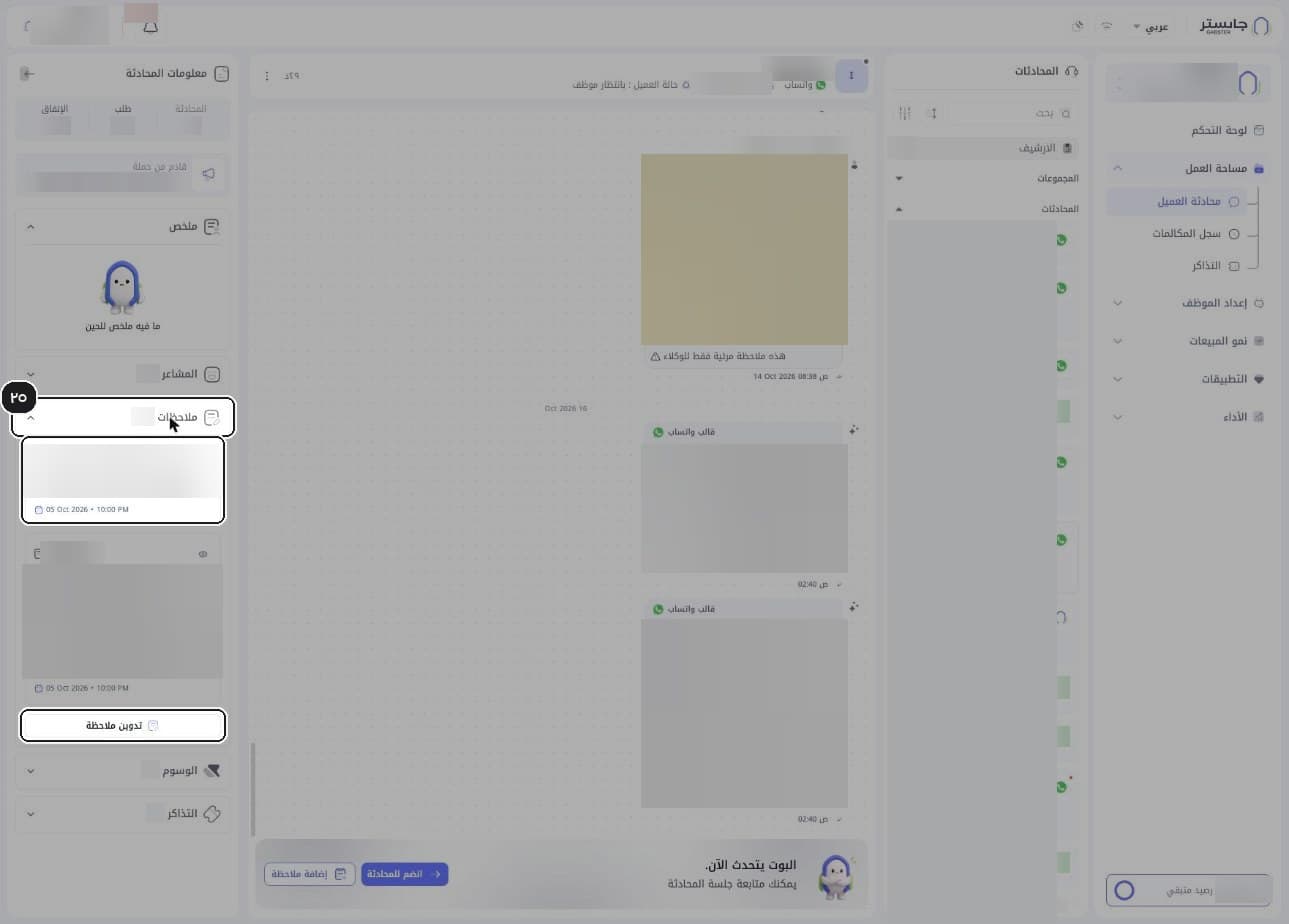
Review notes
Expand Notes (ملاحظات) to list this conversation's internal notes with their date and time. Use Write a note (تدوين ملاحظة) to add a new one.
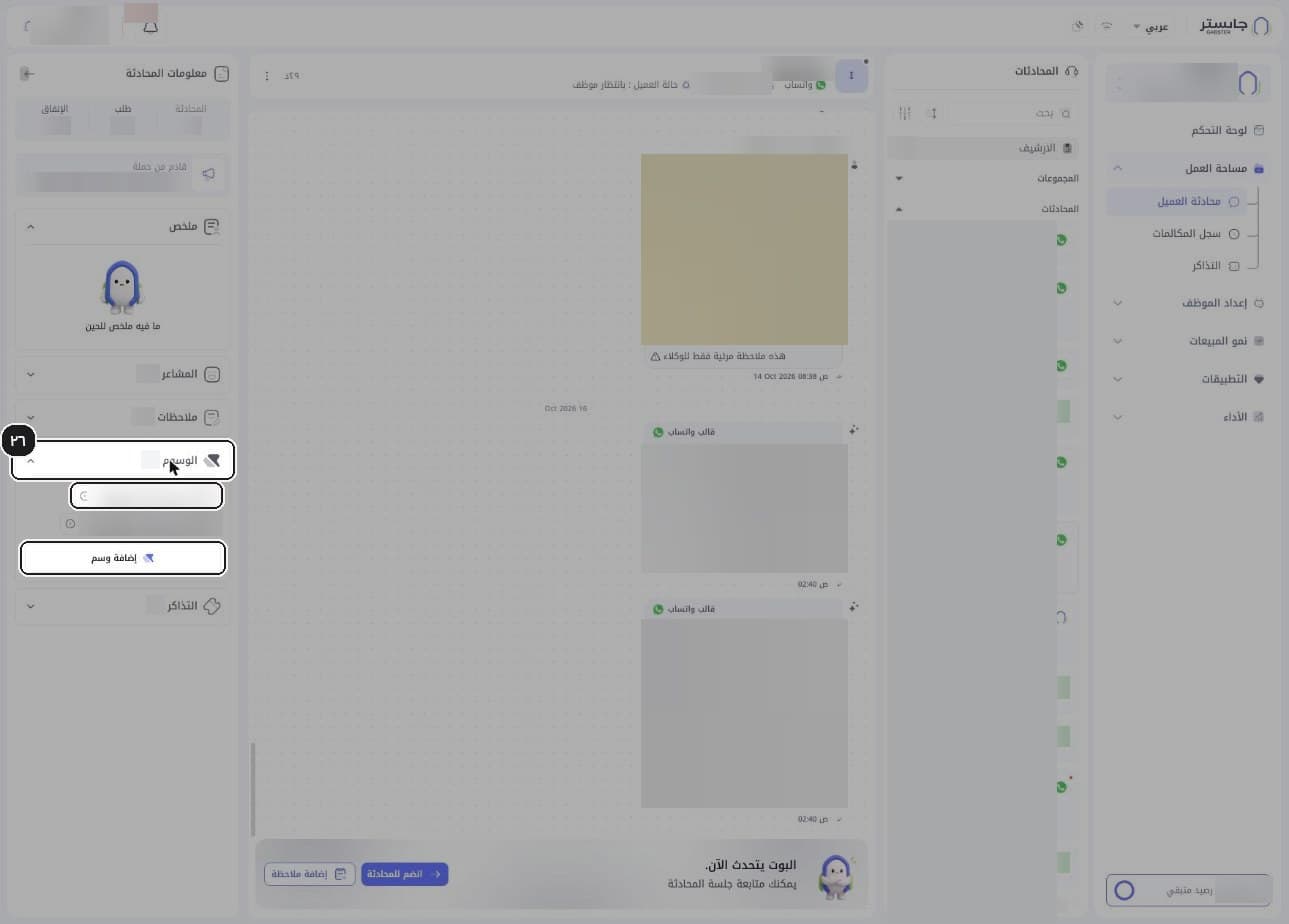
Review tags
Expand Tags (الوسوم) to see the conversation's tags, and use Add tag (إضافة وسم) to add one: tick tags in the Choose another tag (اختيار وسم آخر) picker and click Add tag (N) (إضافة وسم (N)). The tag shows as a chip in the panel and on the conversation's row in the list.
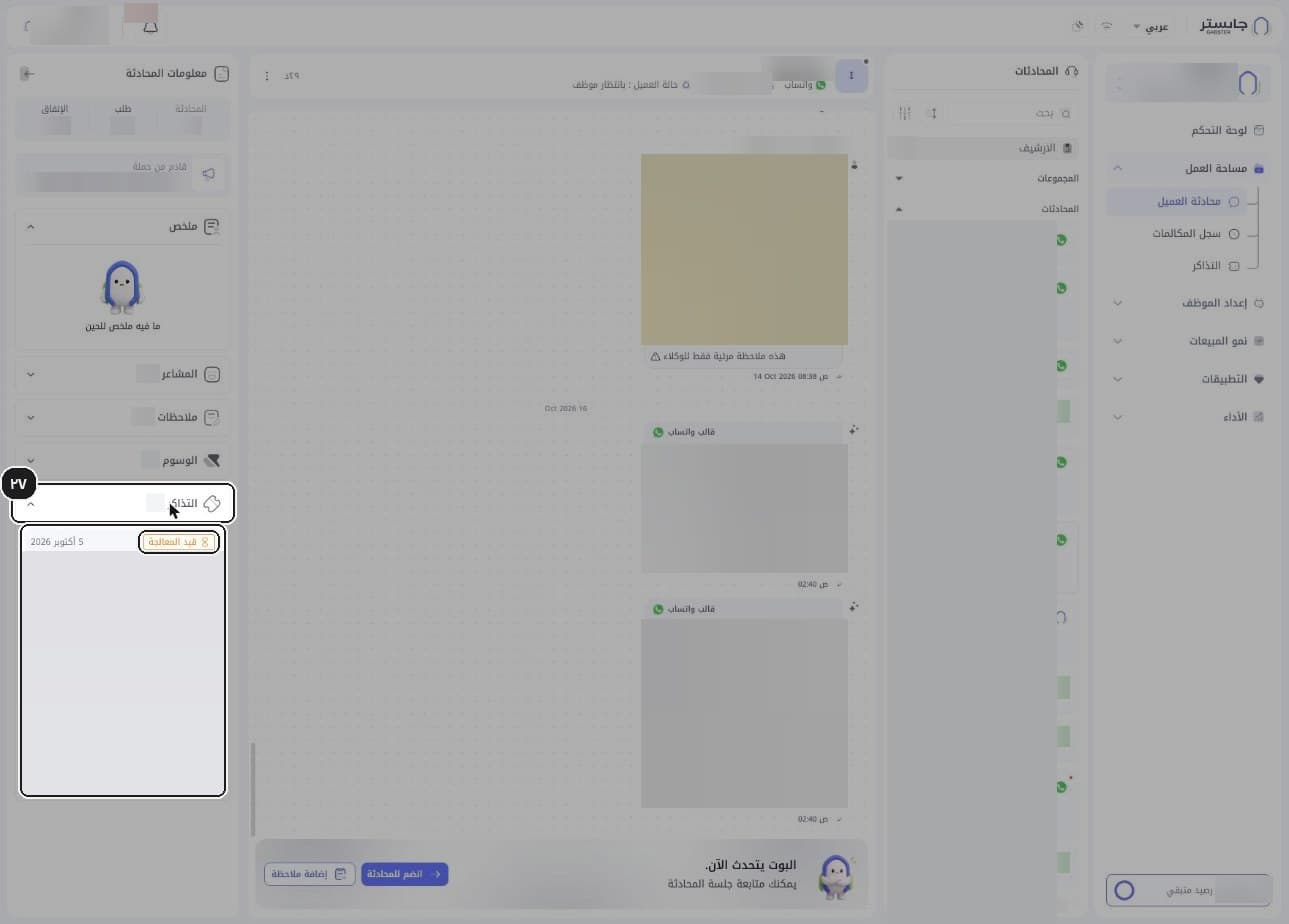
Review tickets
Expand Tickets (التذاكر) to see tickets opened from this conversation.
Result: each card shows the ticket status (such as In progress (قيد المعالجة)), its date, and a summary starting with "Problem:" (المشكلة:).
E. Customer card and full profile
Open the customer card
Click the customer's name in the conversation header.
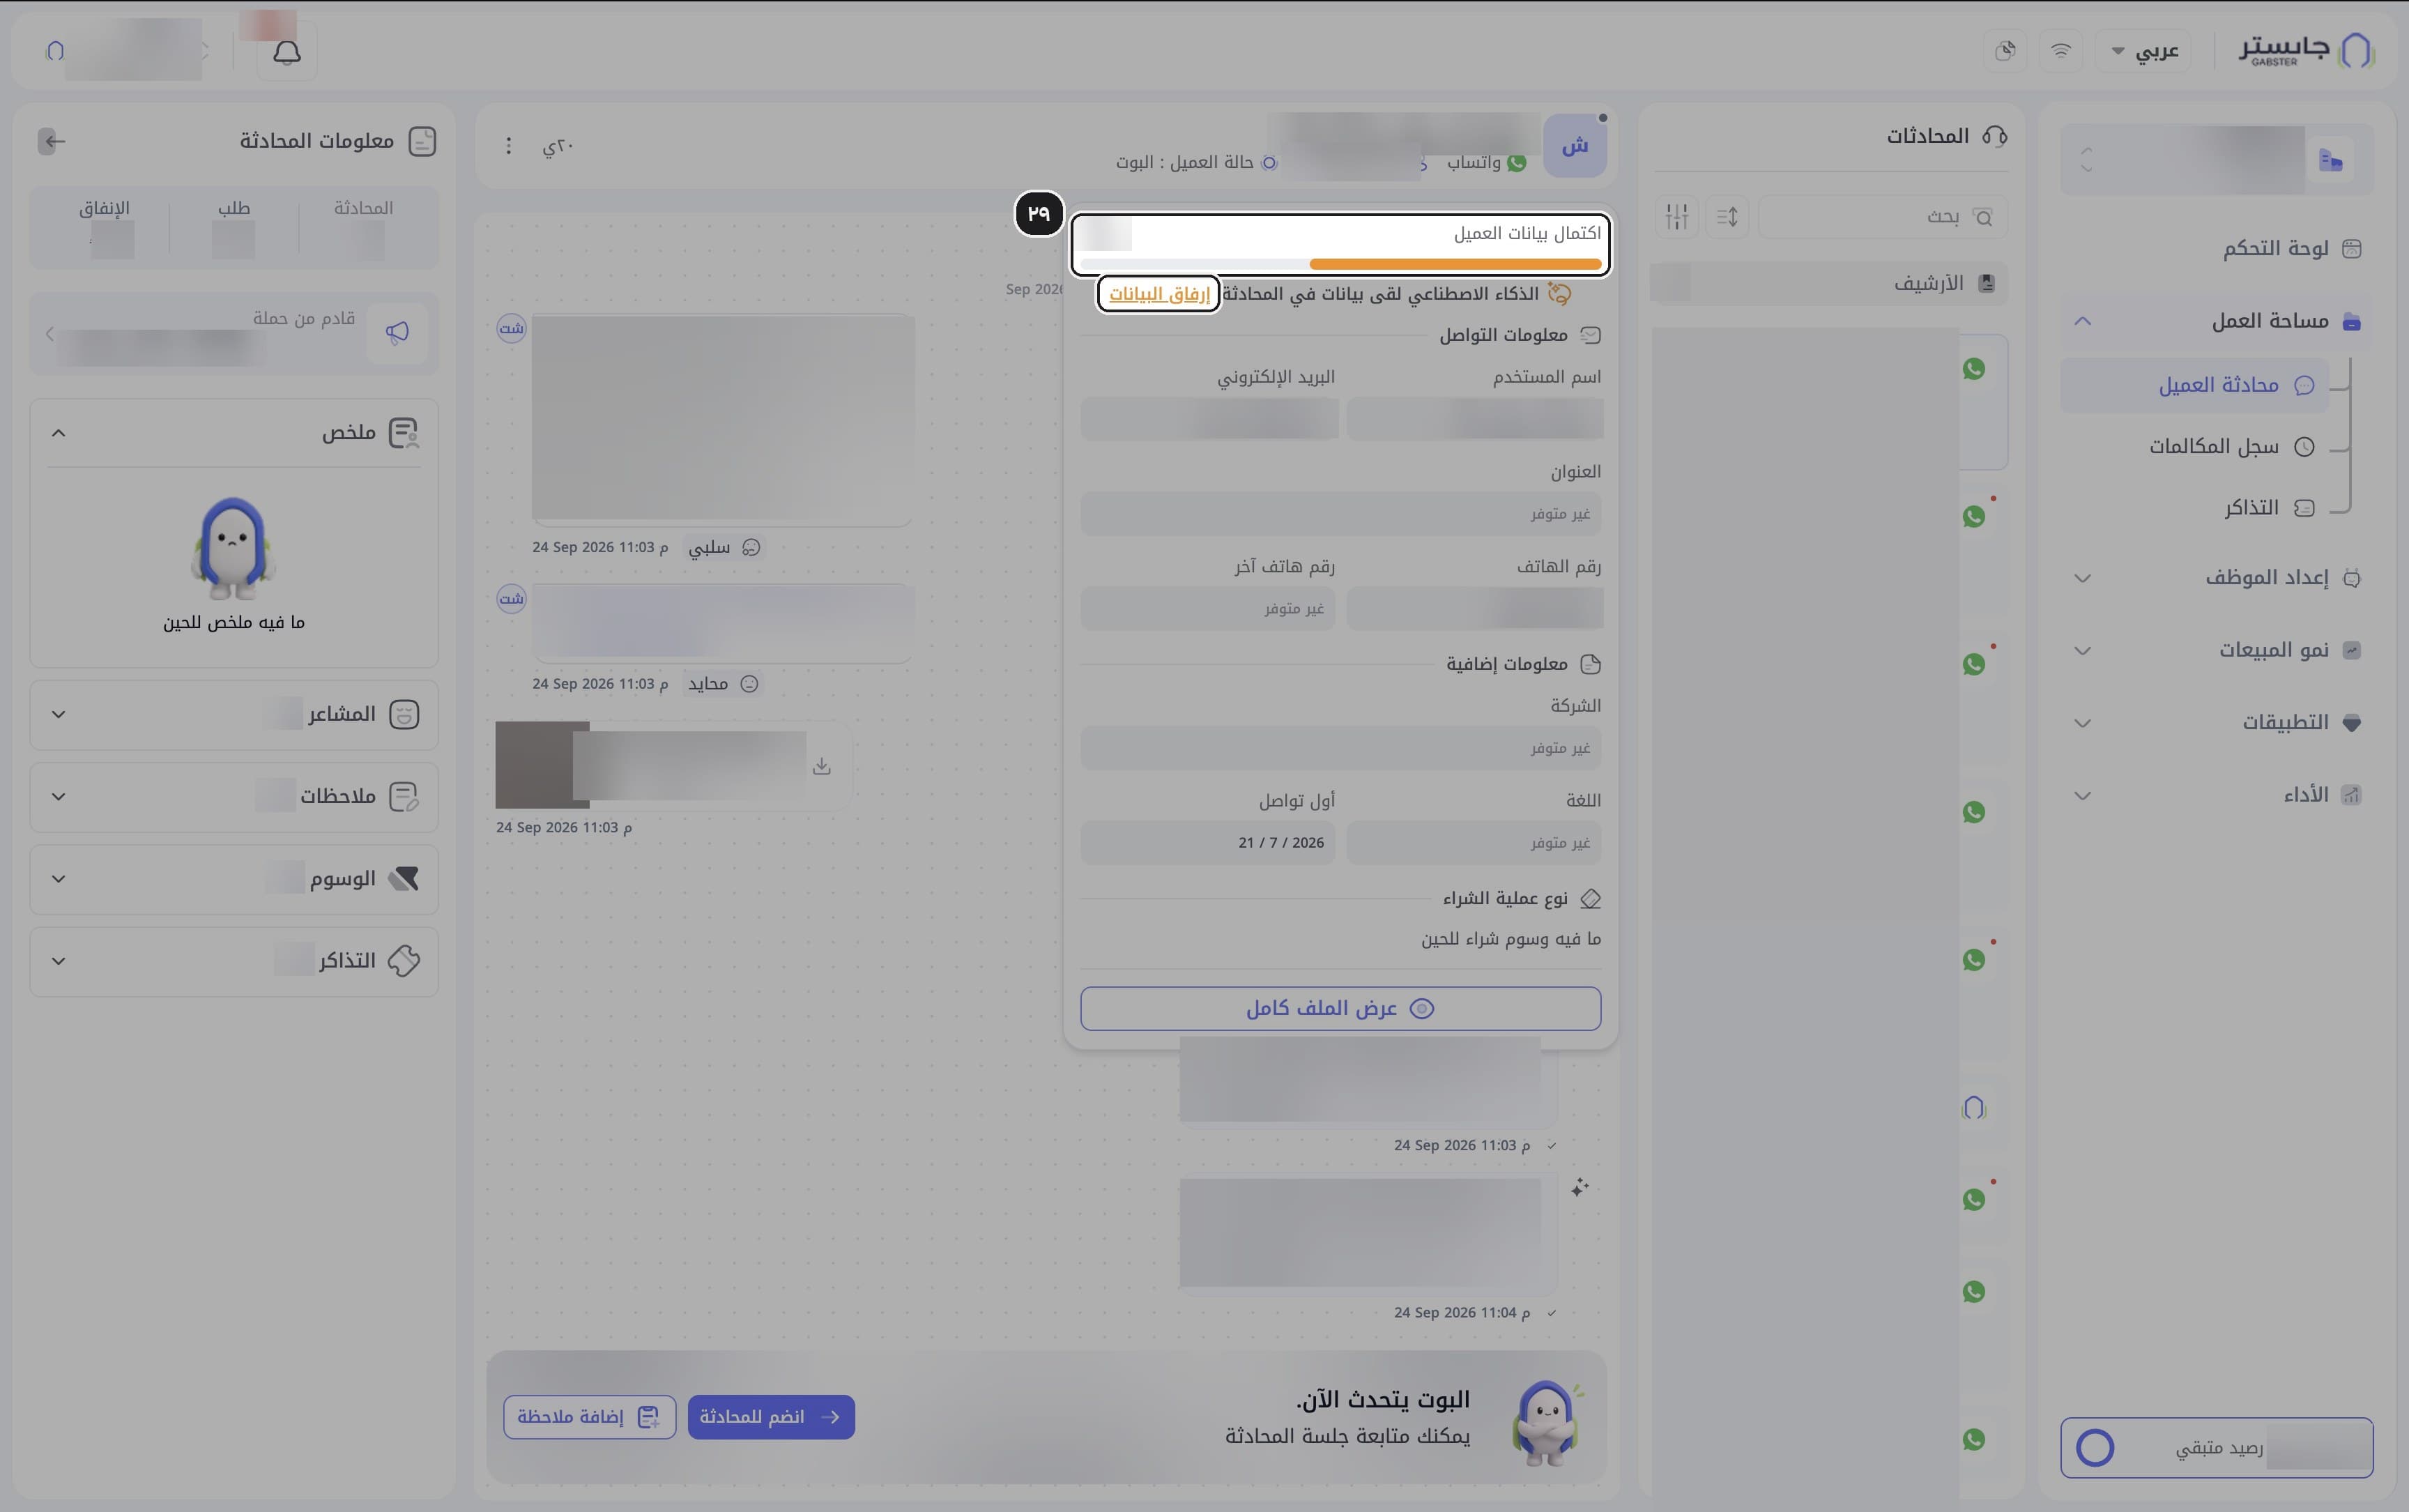
Result: the customer card opens under the name.
Check profile completeness
Check the Customer data completeness (اكتمال بيانات العميل) percentage. If the card says the AI found data in the conversation (الذكاء الاصطناعي لقى بيانات في المحادثة), click Attach data (إرفاق البيانات) next to it. The card also shows Contact info (معلومات التواصل), Extra info (معلومات إضافية) and Purchase type (نوع عملية الشراء).
Open the full profile
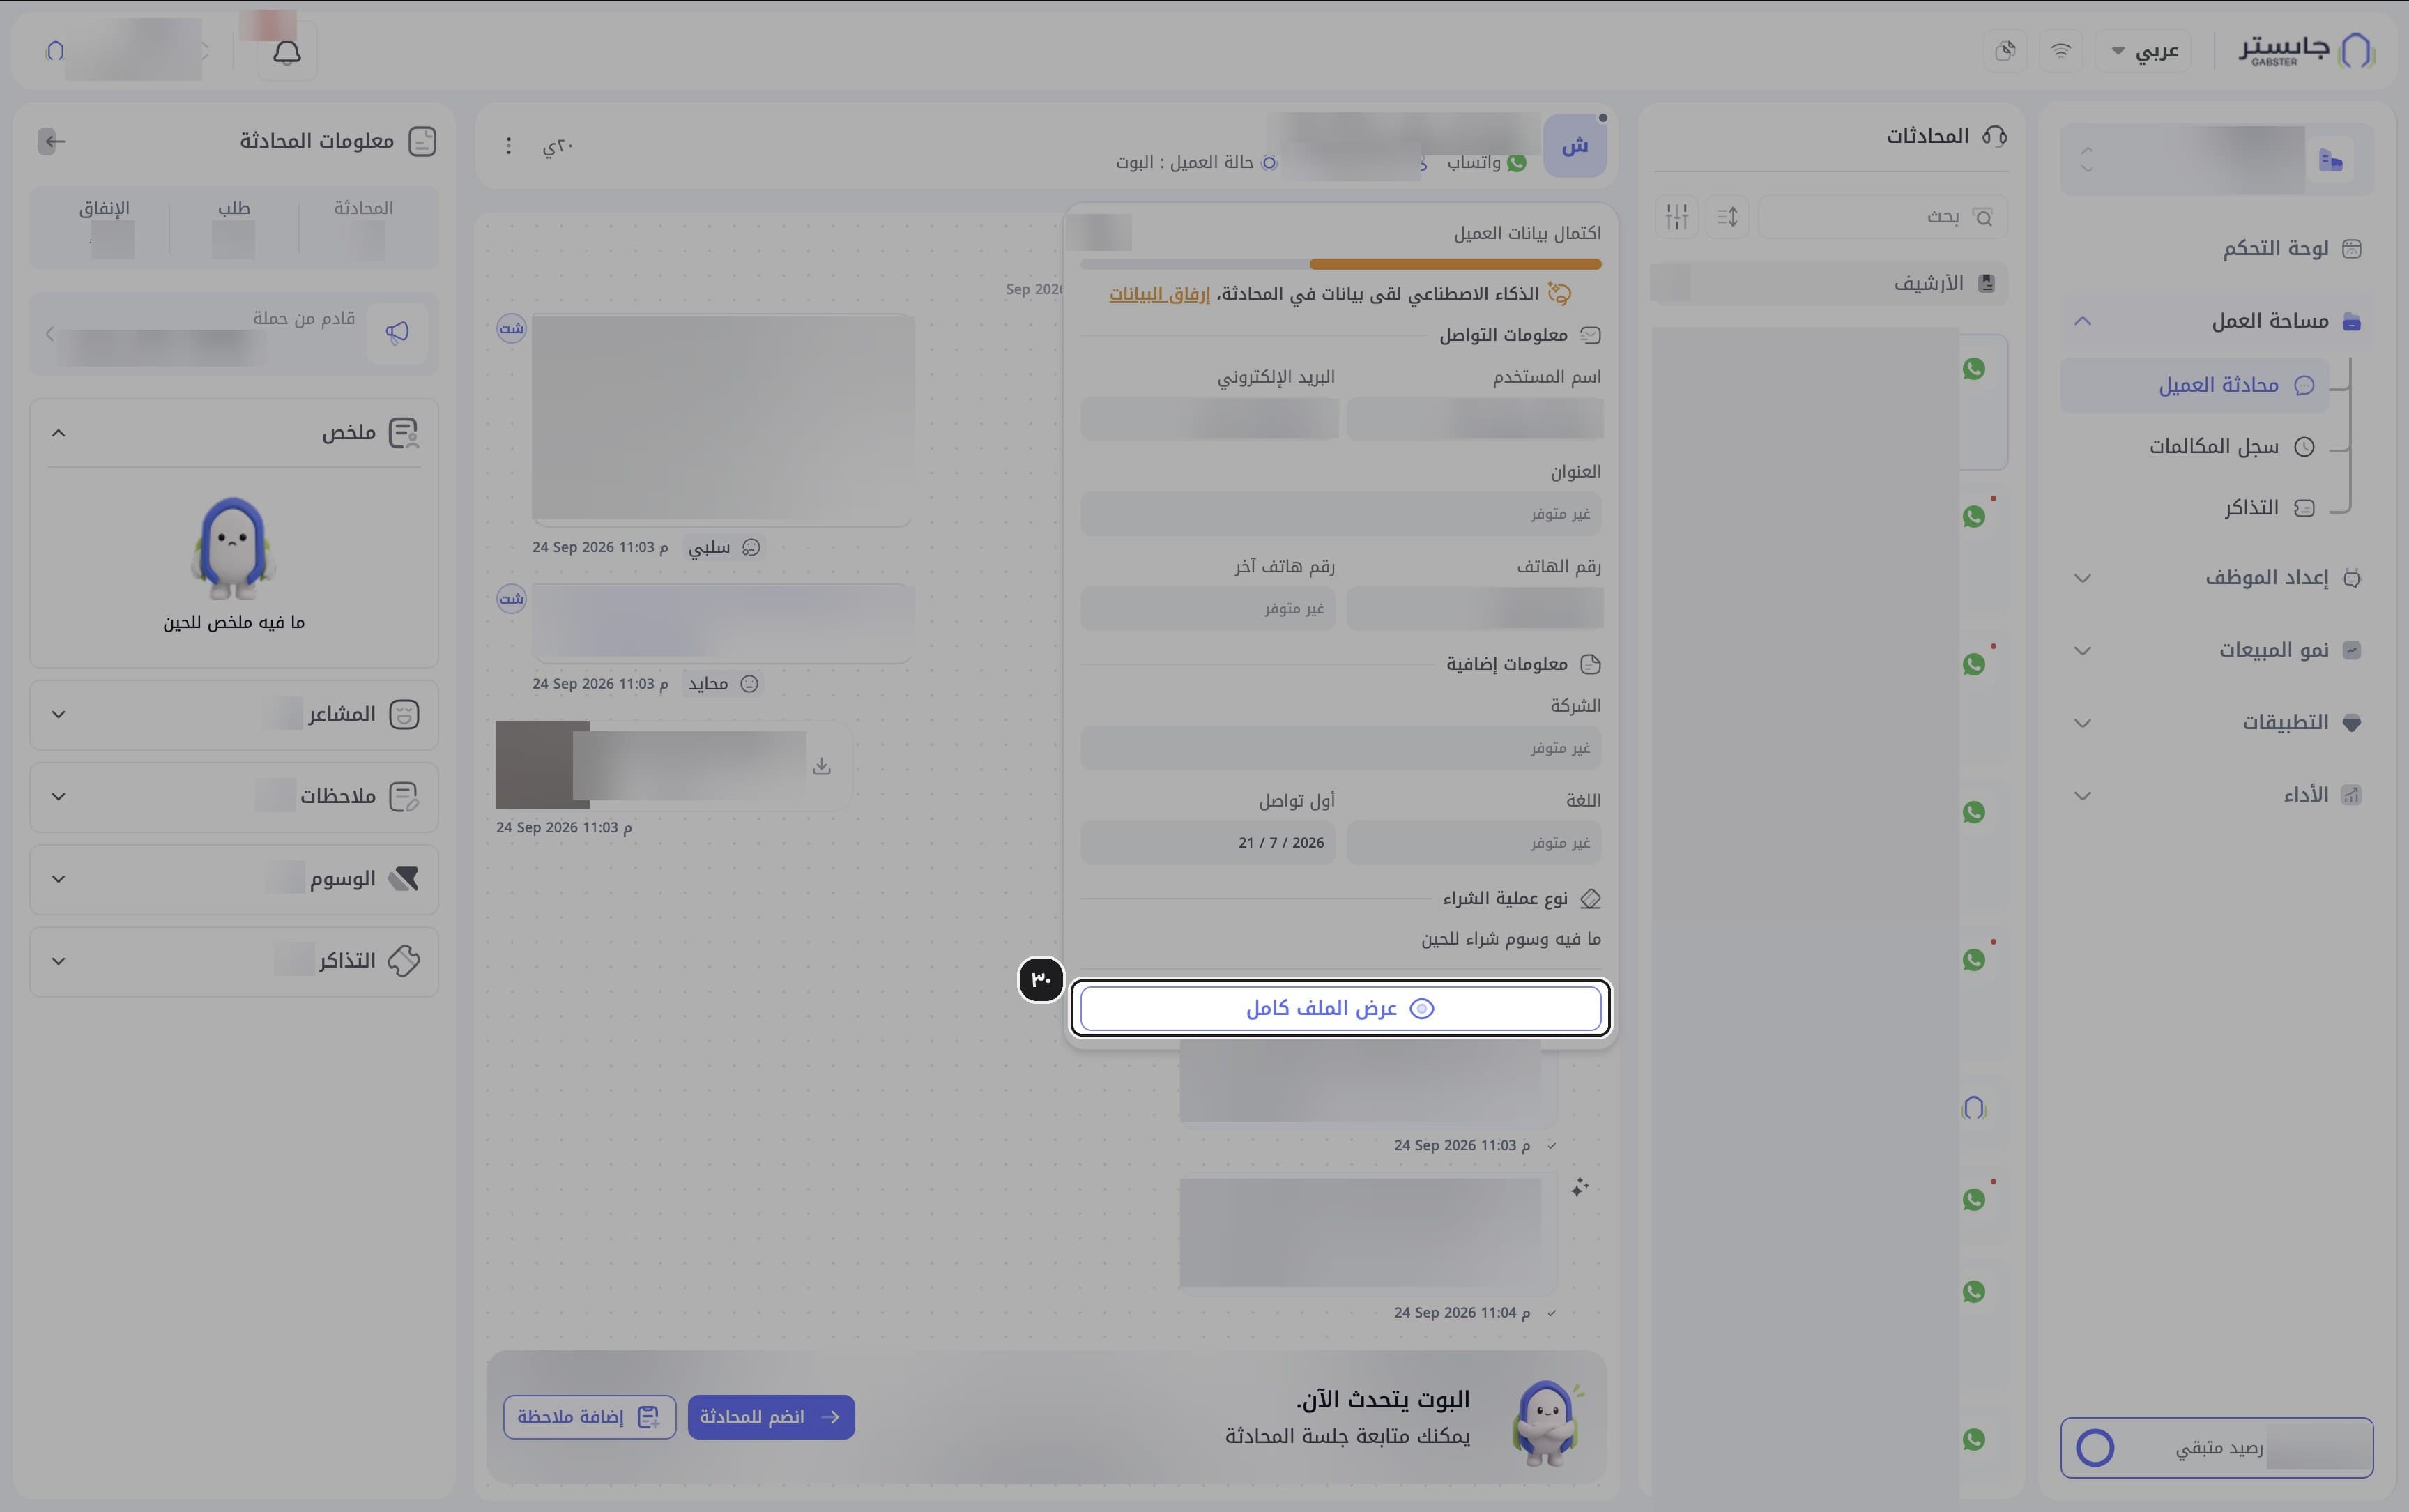
Click View full profile (عرض الملف كامل).
Result: the Customer data (بيانات العميل) window opens.
Review the profile
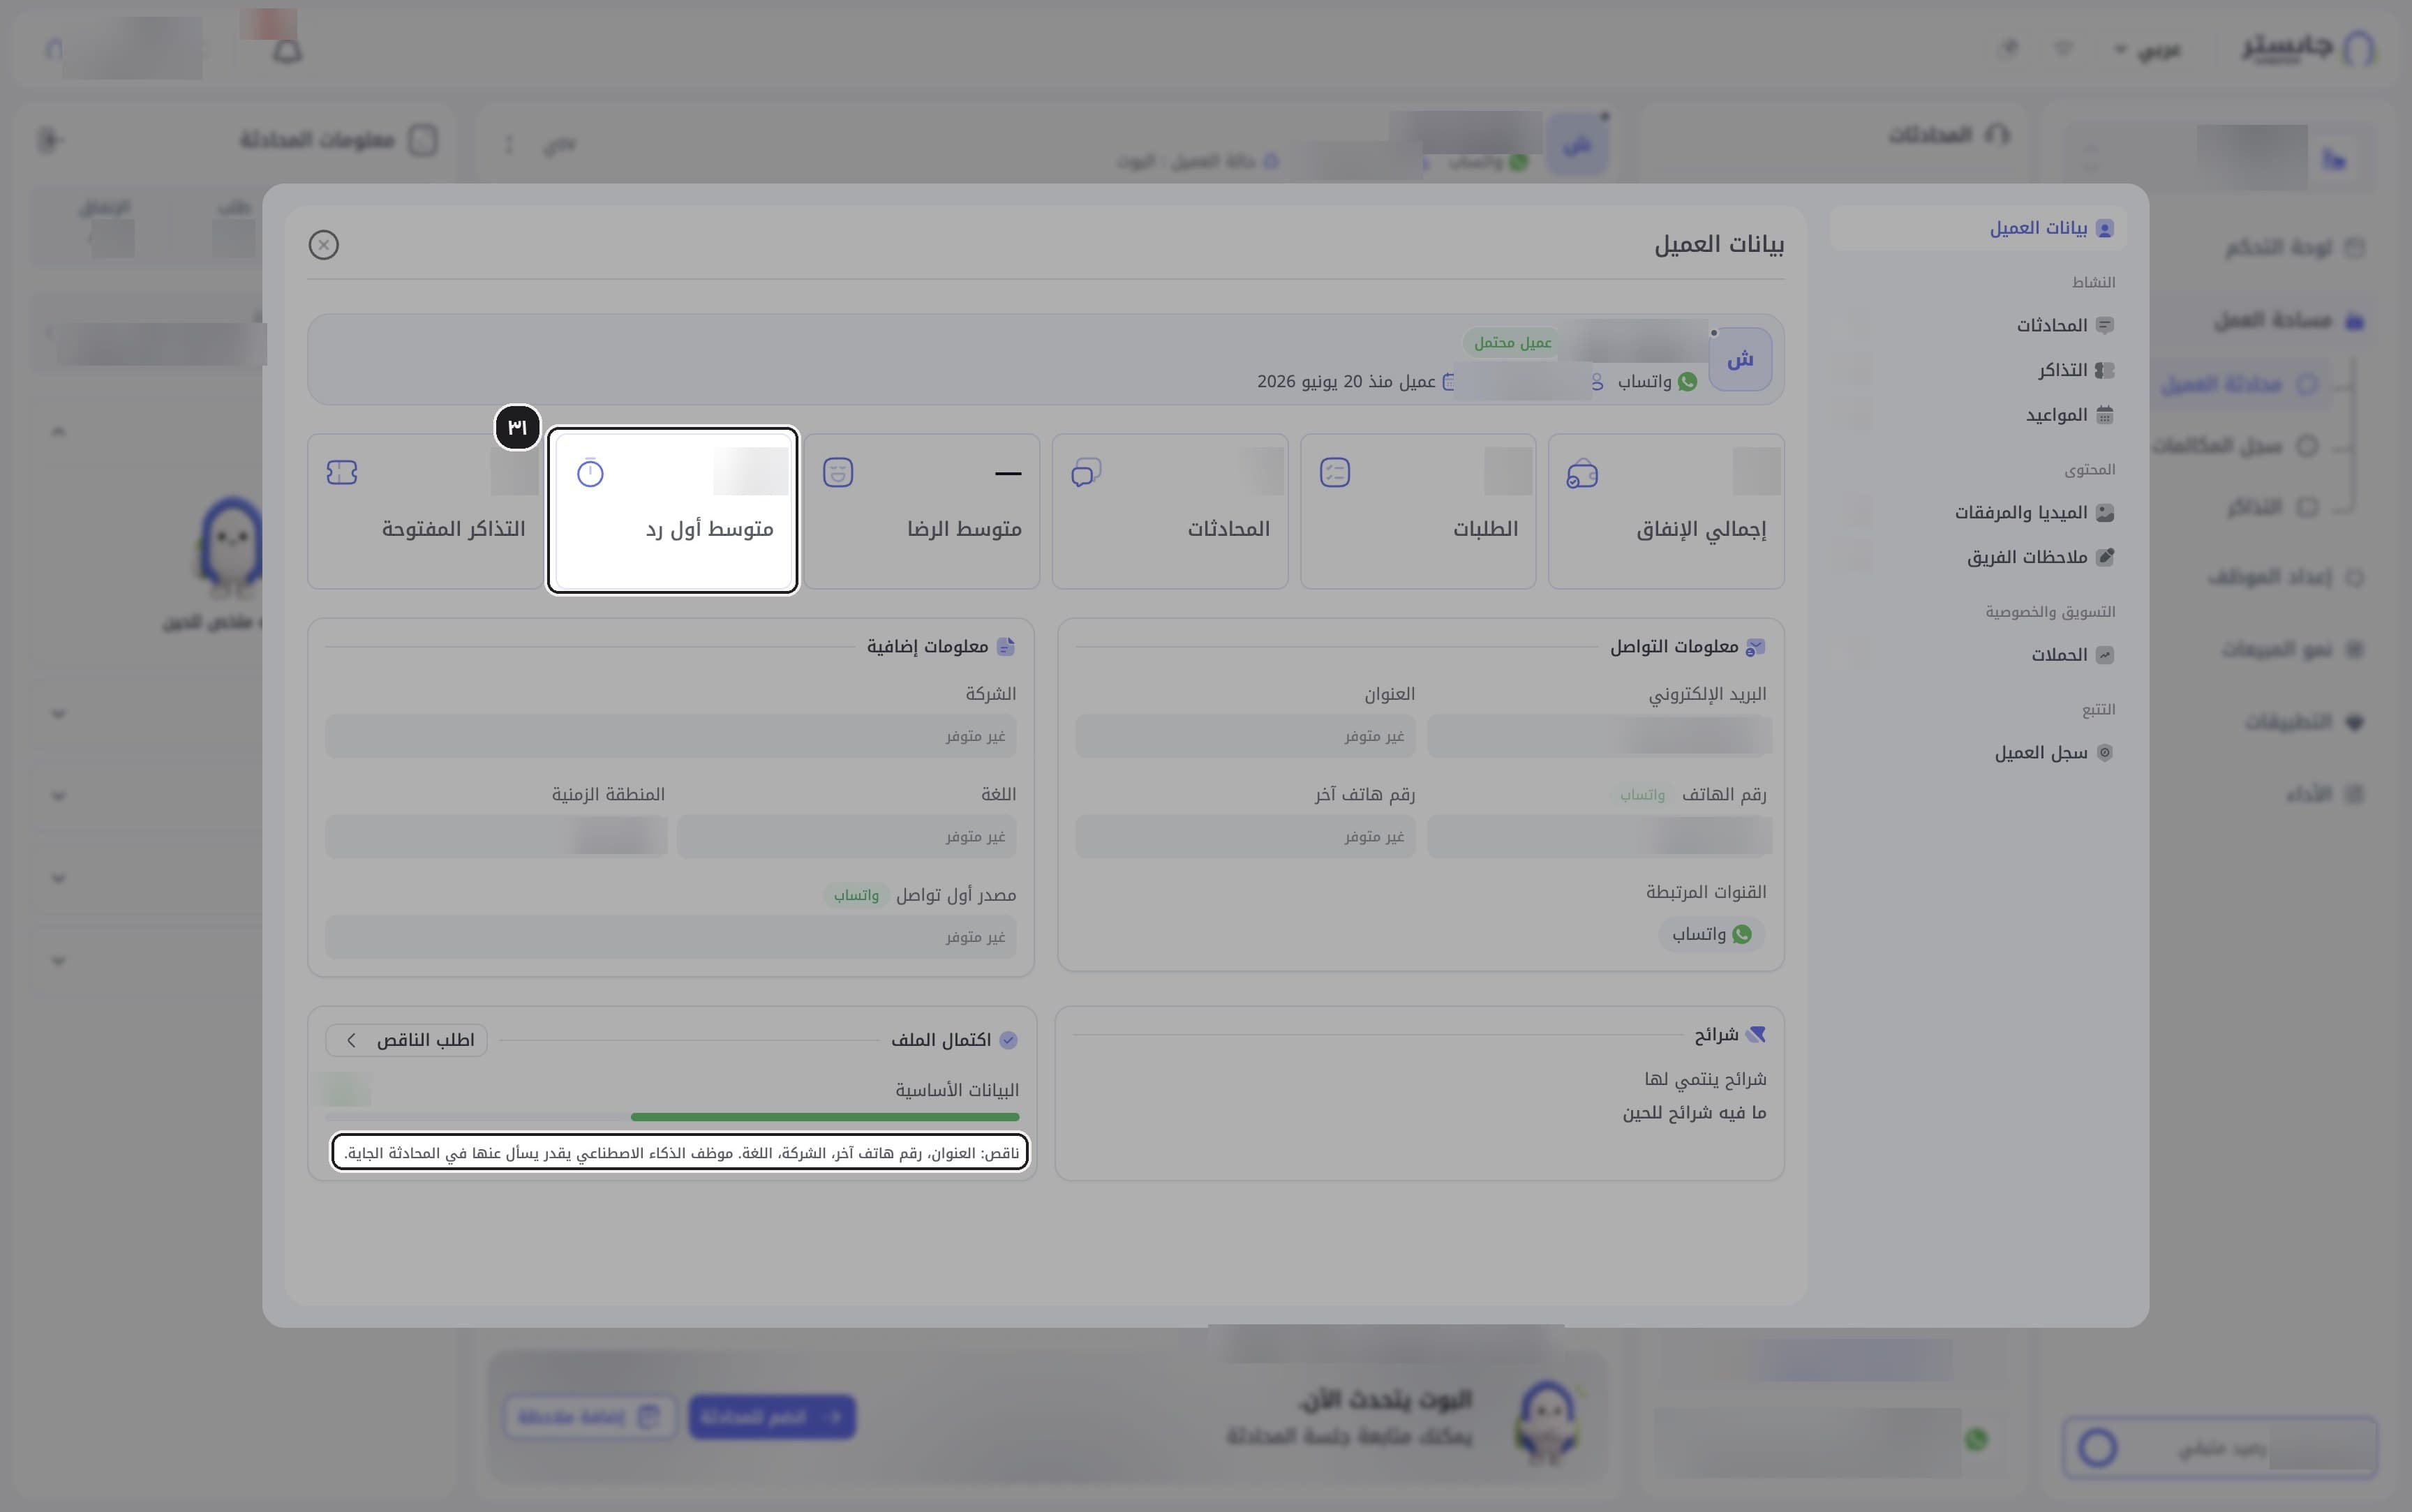
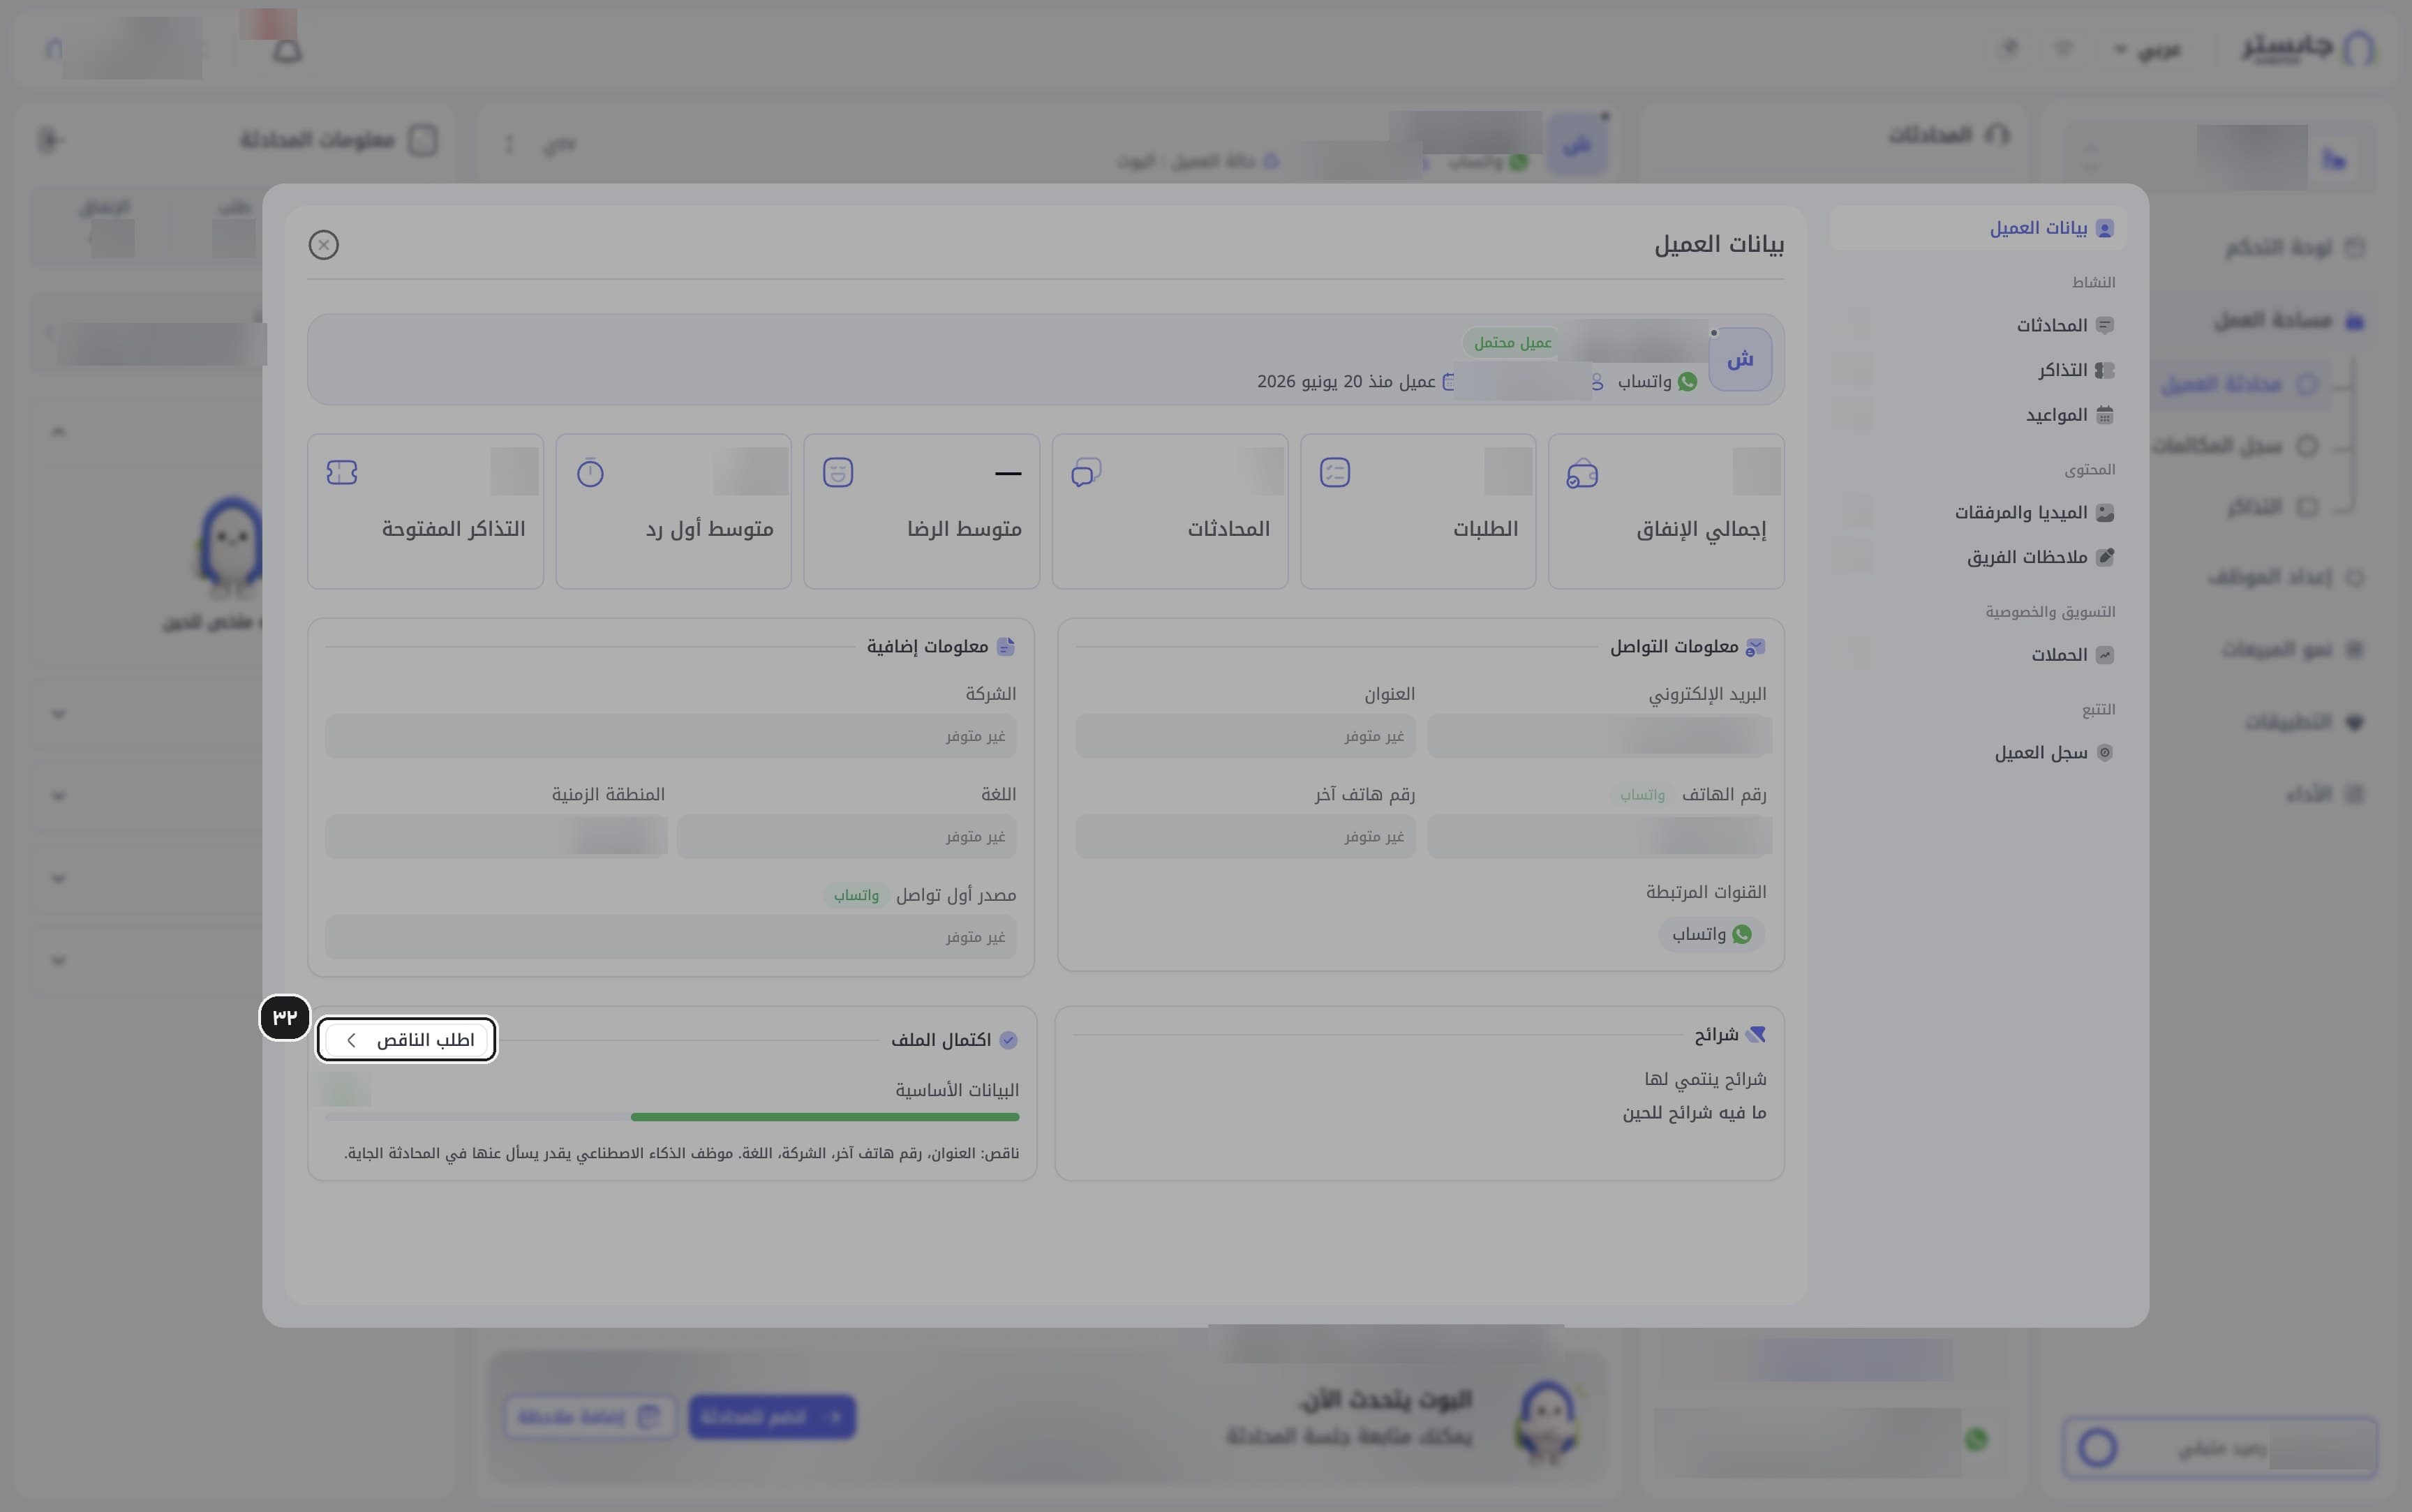
Review the numbers (such as Total spend (إجمالي الإنفاق), Average first reply (متوسط أول رد) and Open tickets (التذاكر المفتوحة)), Contact info (معلومات التواصل), Segments (شرائح) and the Profile completeness (اكتمال الملف) card.
Result: missing fields are listed, and your AI Agent can ask for them in the next conversation.
Request missing data
Click Request missing (اطلب الناقص).
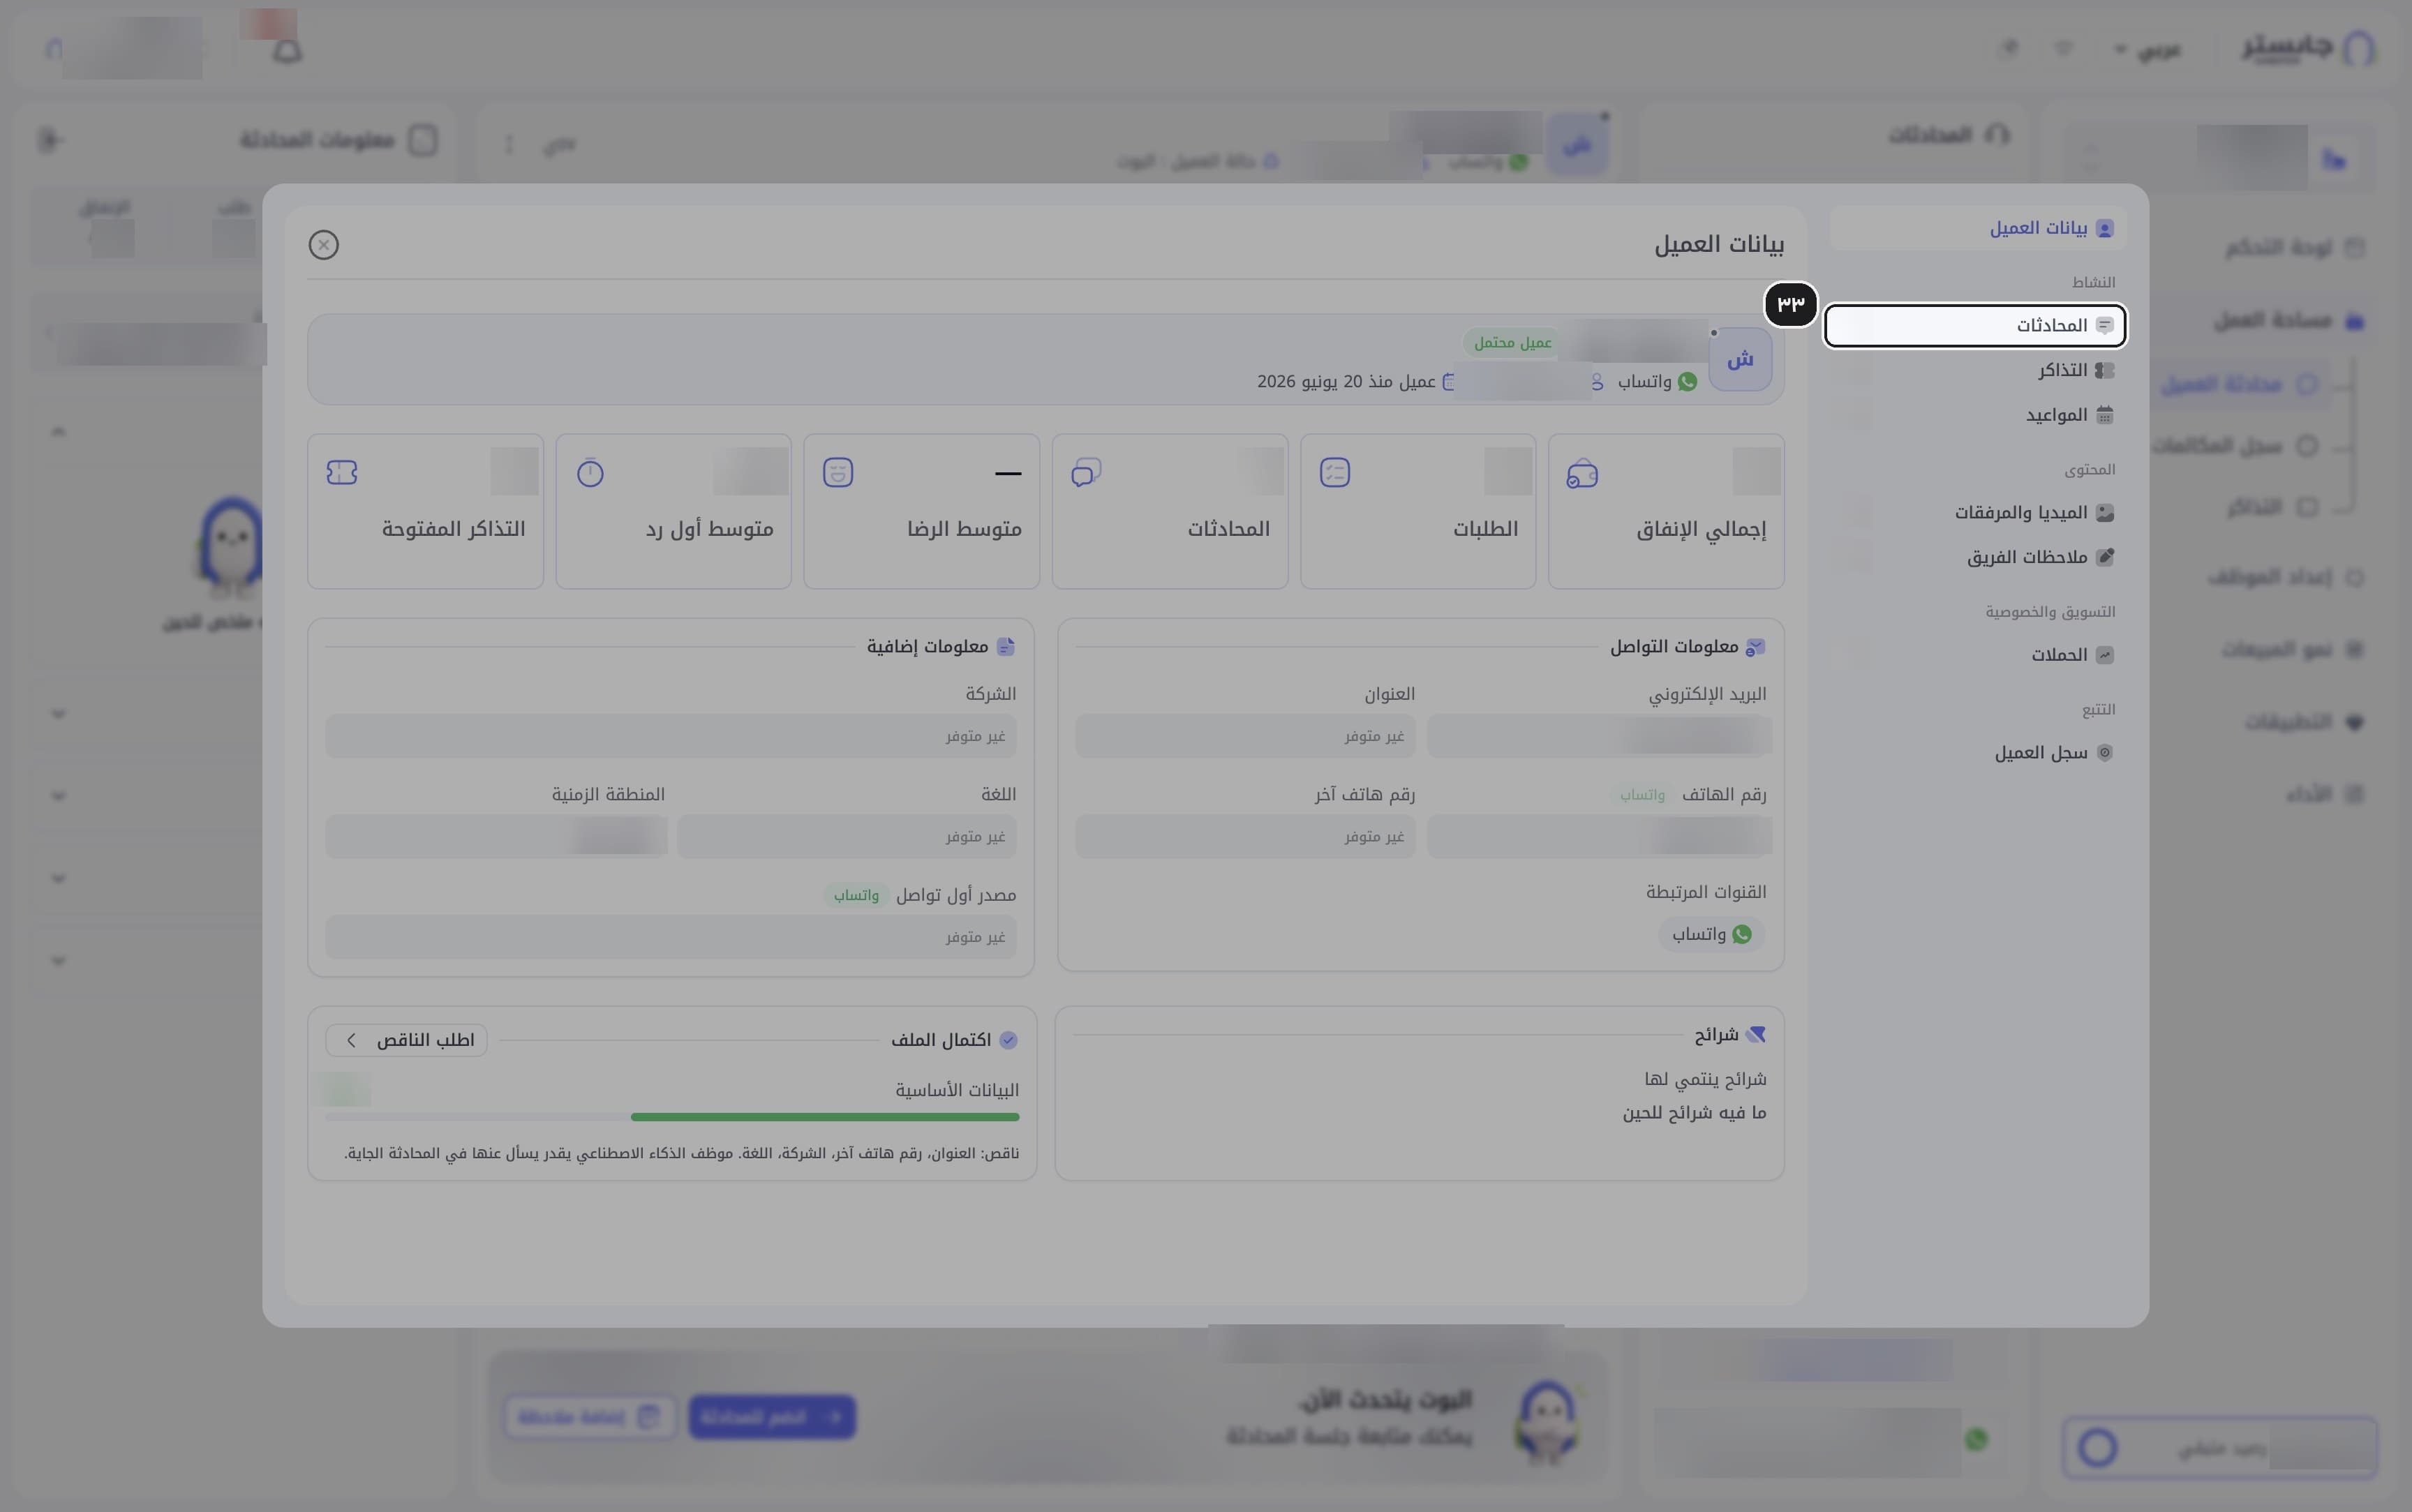
Browse the profile sections
Use the side menu in the window to move between Conversations (المحادثات), Tickets (التذاكر), Appointments (المواعيد), Media & attachments (الميديا والمرفقات), Team notes (ملاحظات الفريق), Campaigns (الحملات) and Customer log (سجل العميل).
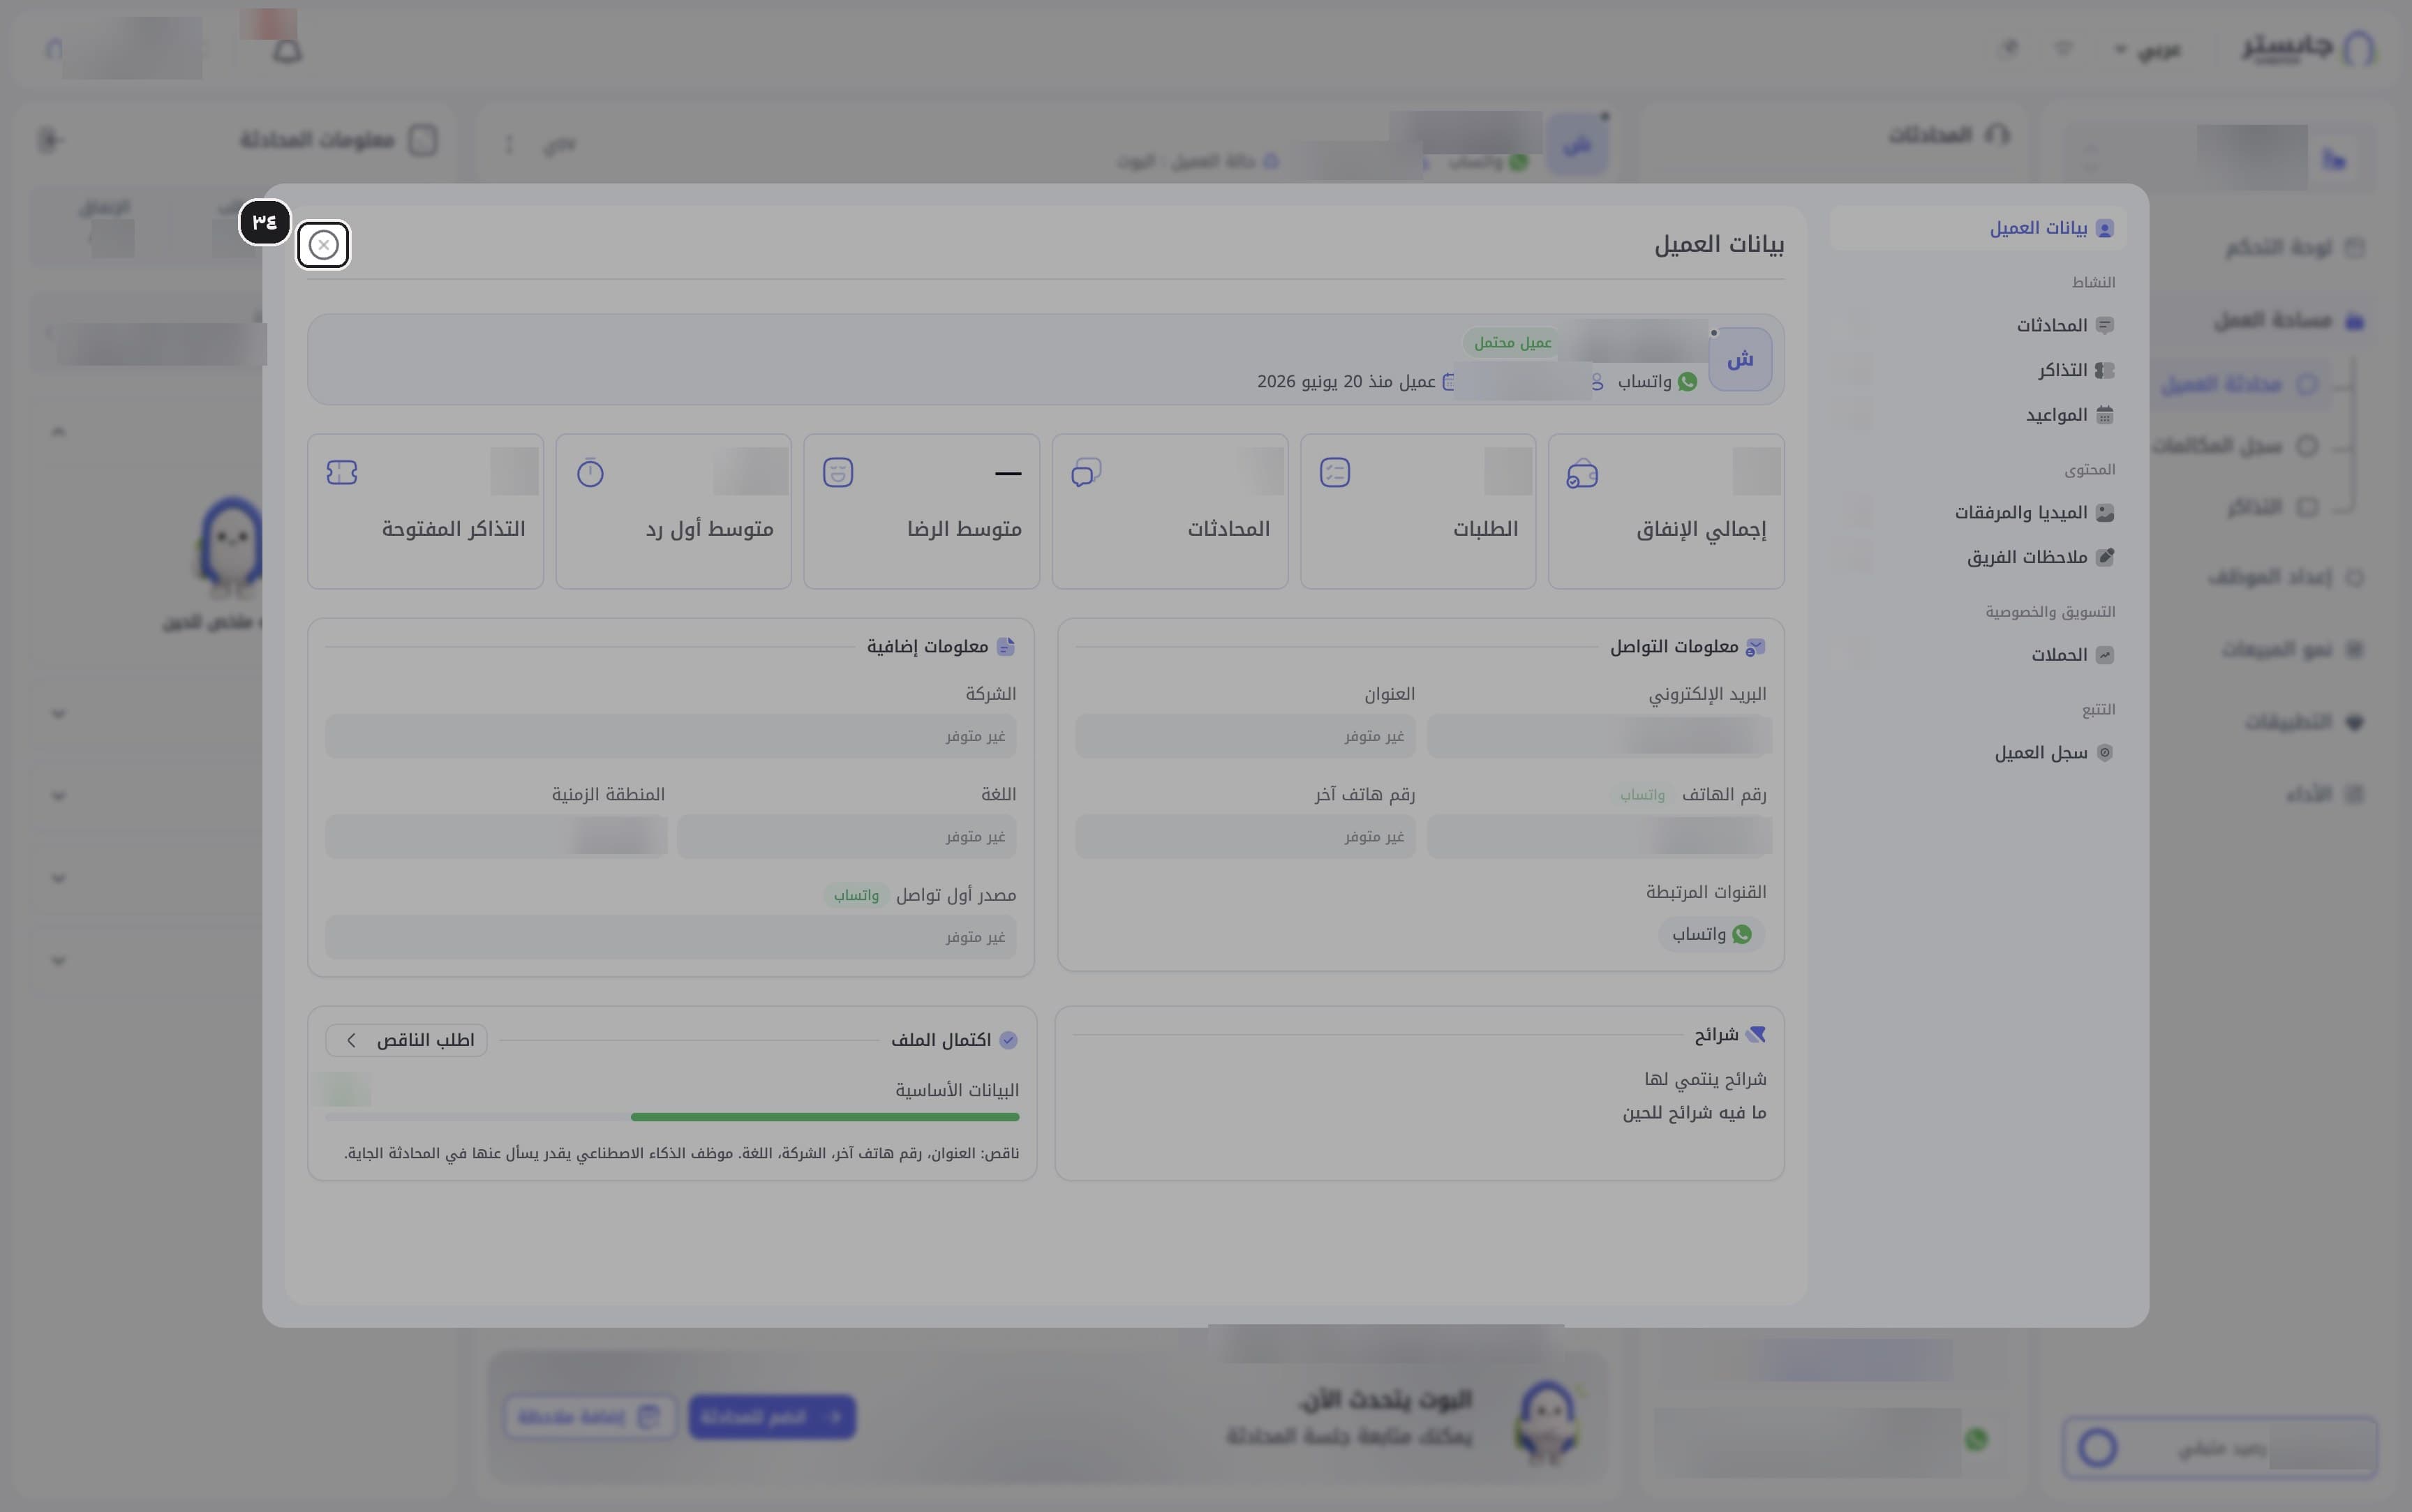
Close the profile
Click the close icon (×).
F. Dialect and banned words for improved replies
When a staff member improves a draft reply, the improve action rewrites it in your default dialect and applies your banned-word rules. Your AI Agent's own replies don't use these settings.
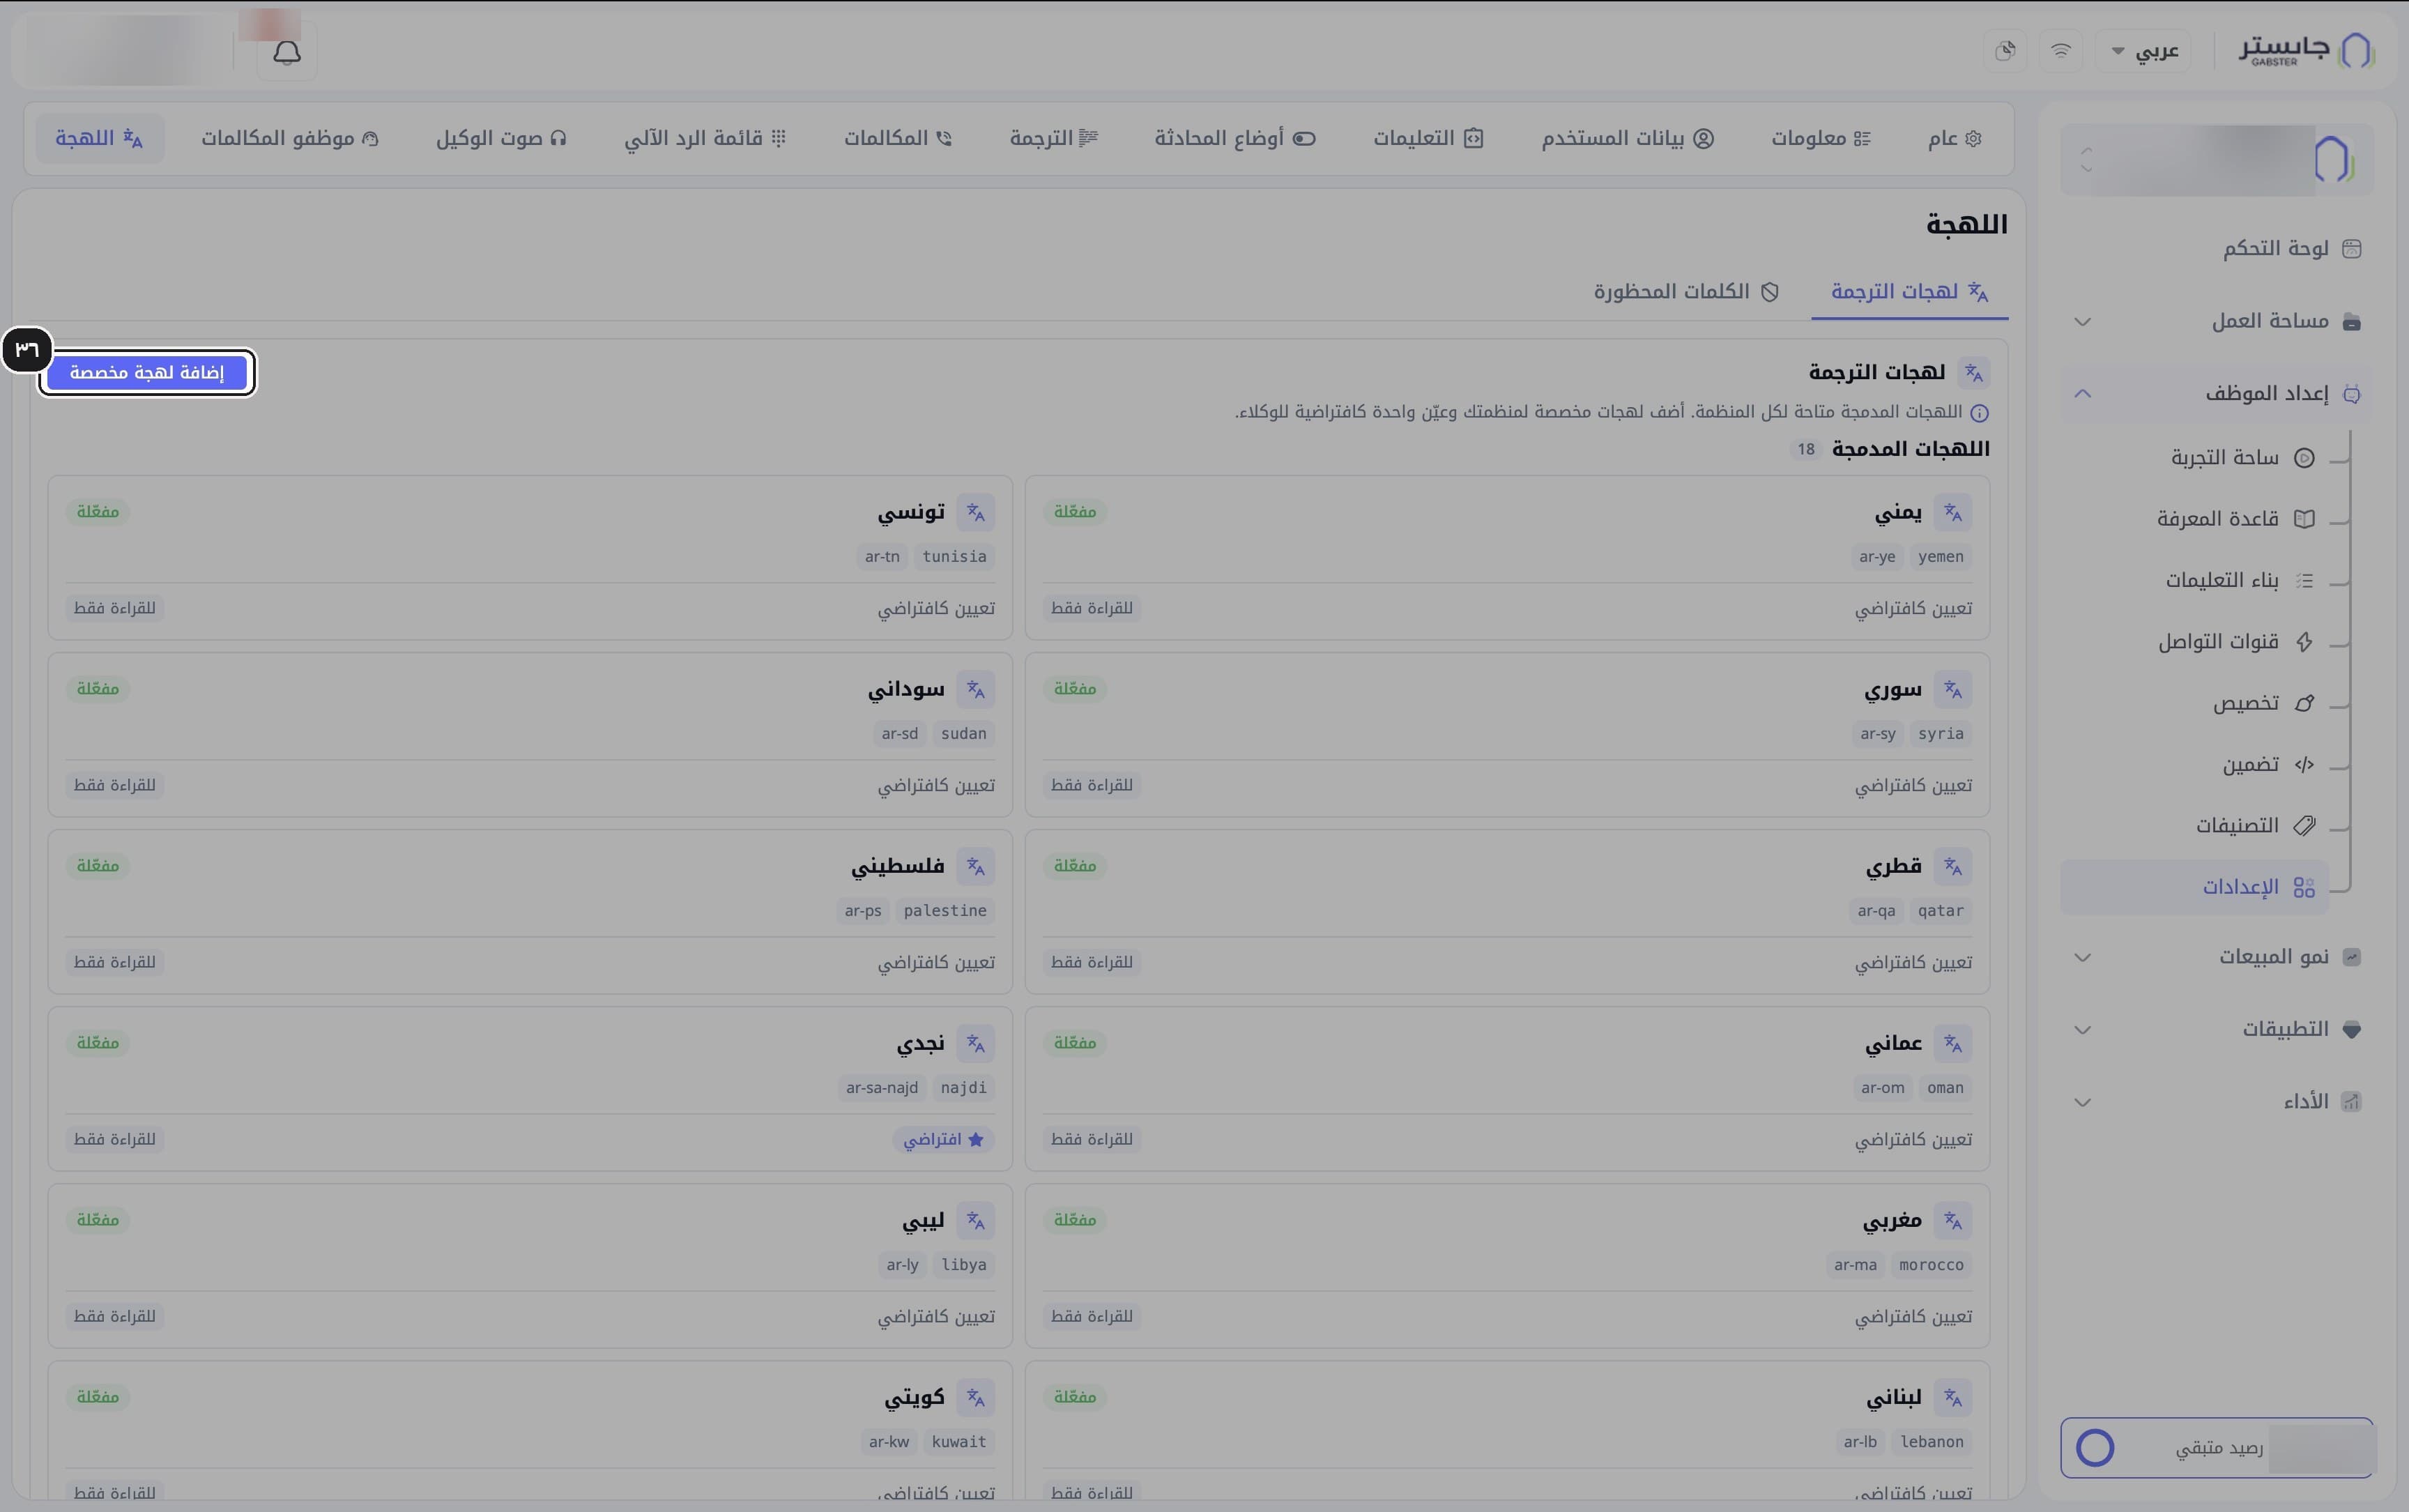
In the sidebar, open AI Agent Setup (إعداد الموظف), then Settings (الإعدادات), and open the Dialect (اللهجة) tab. The Translation dialects (لهجات الترجمة) sub-tab lists the built-in dialects, all read-only. Click Set as default (تعيين كافتراضي) on the dialect you want. The current default carries a ★ Default (★ افتراضي) badge.
The default dialect doesn't change your AI Agent's own replies or calls.
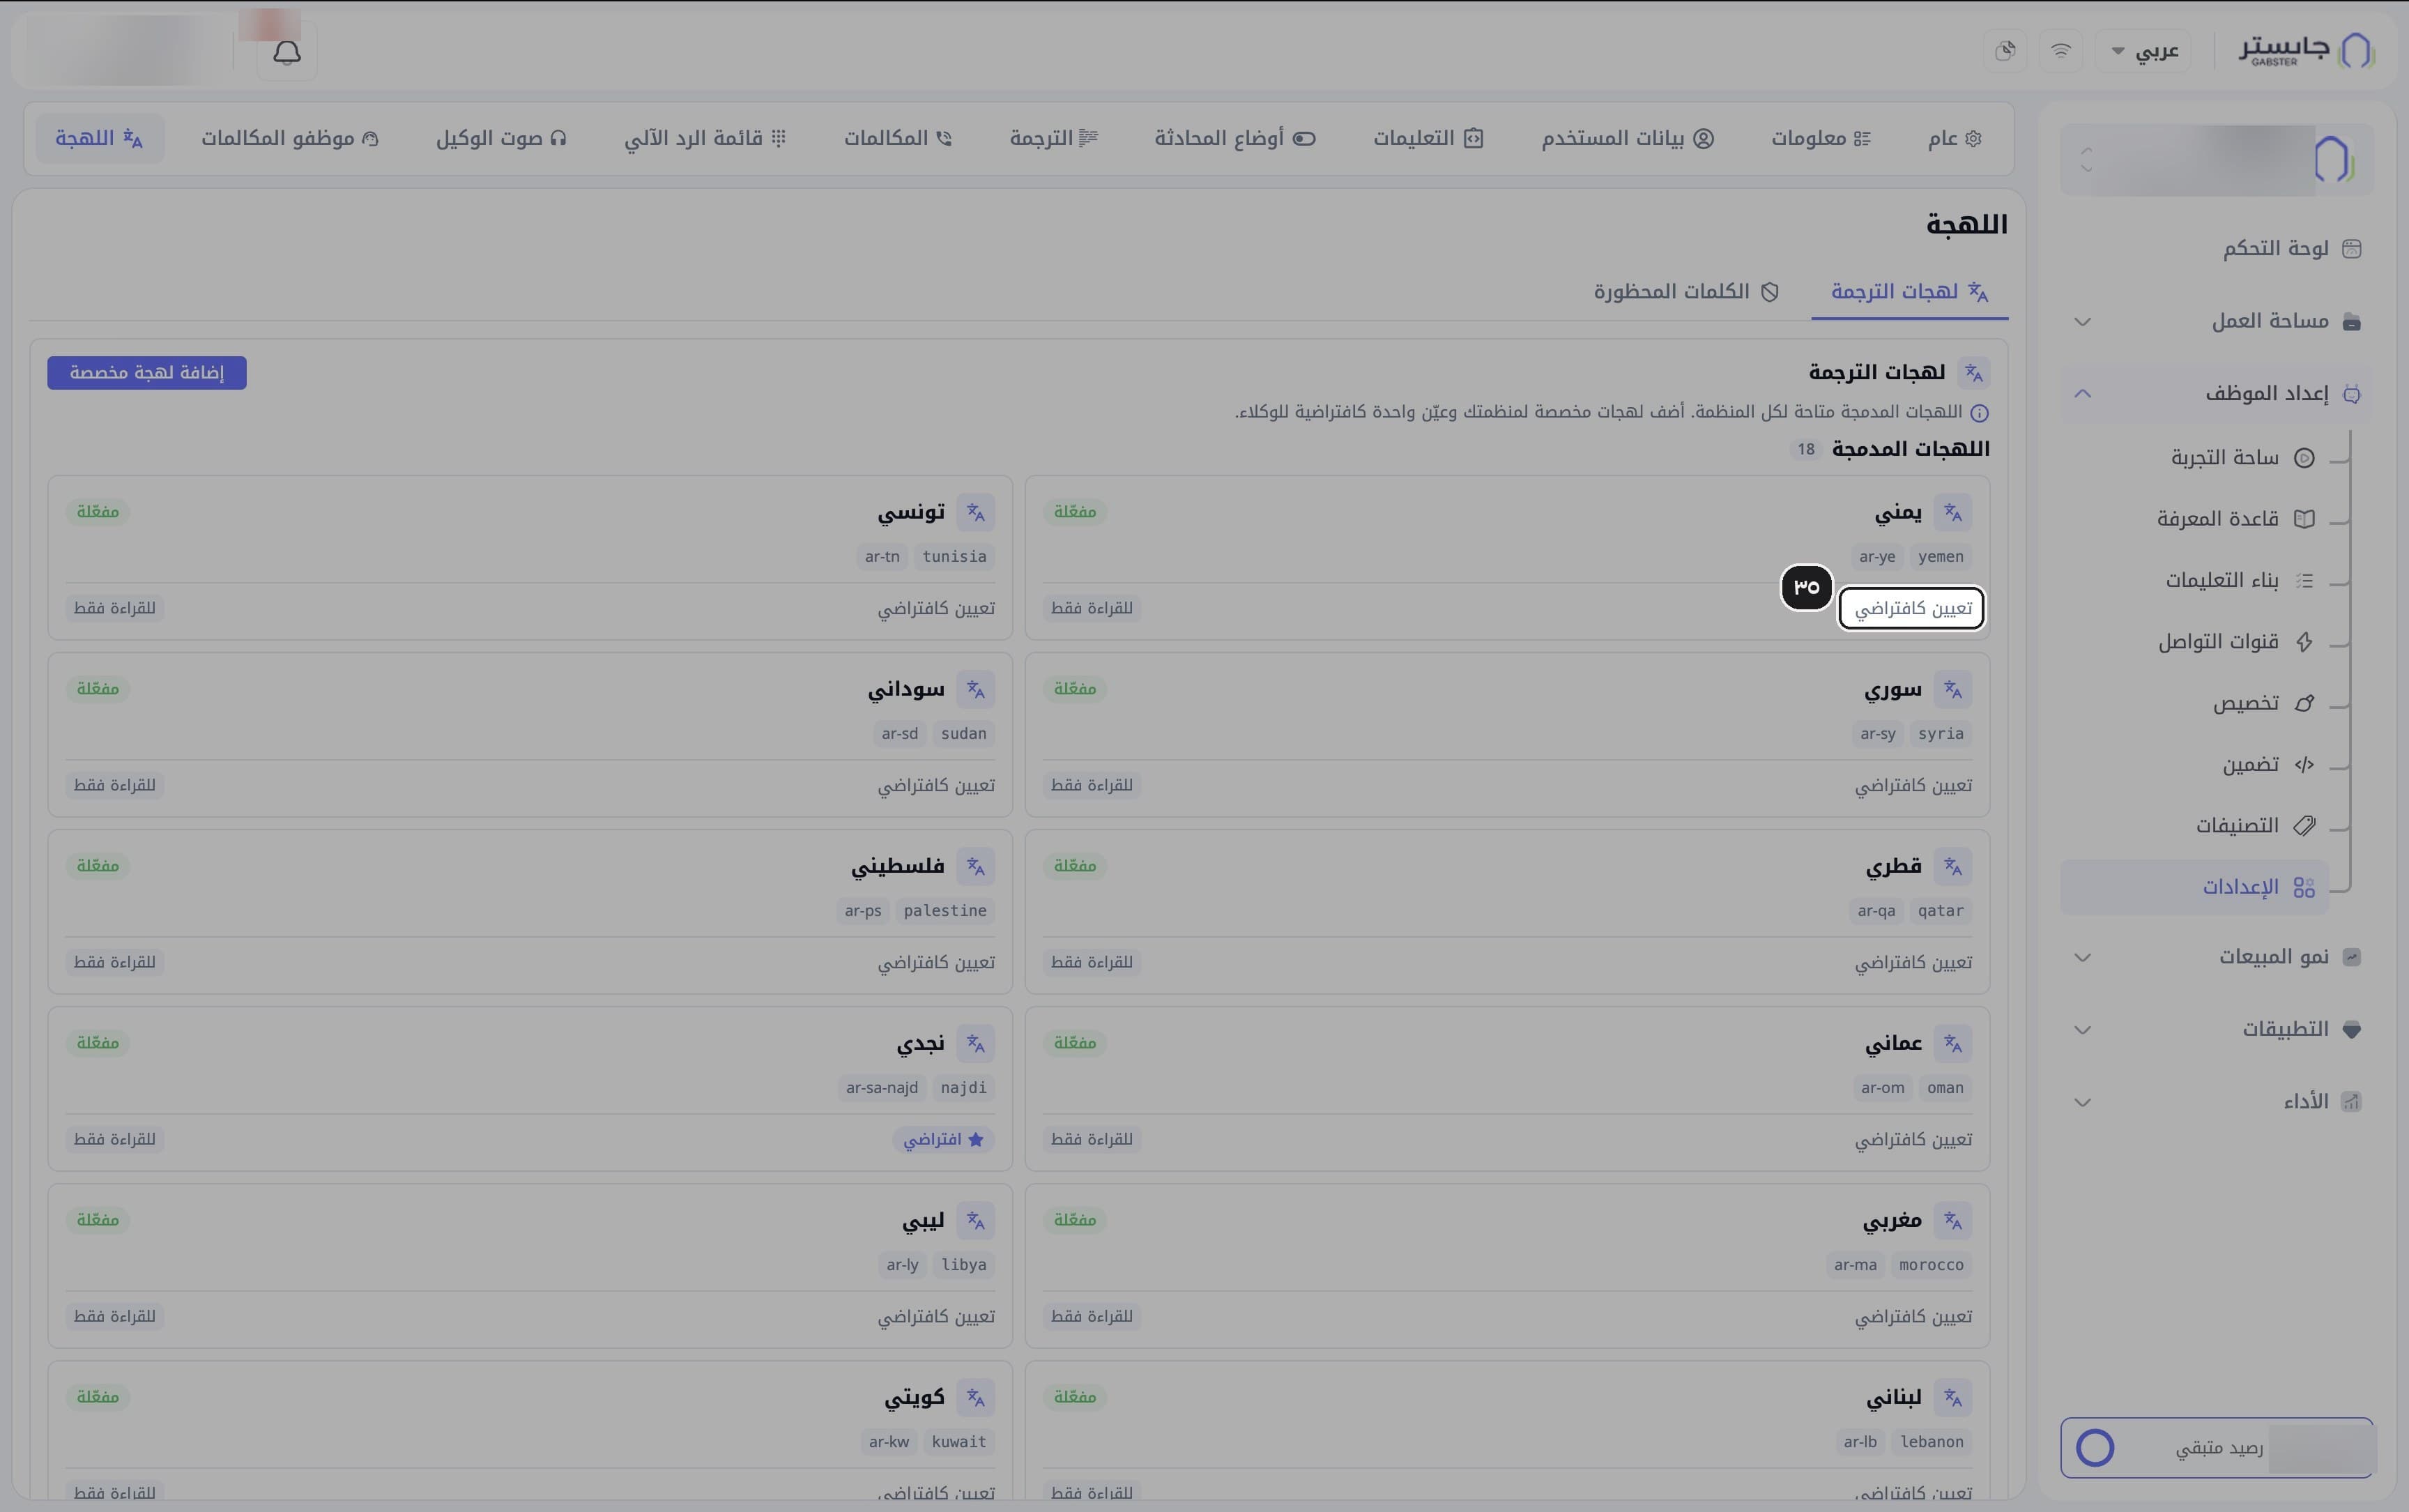
(Optional) Click Add custom dialect (إضافة لهجة مخصصة) to add a new dialect.
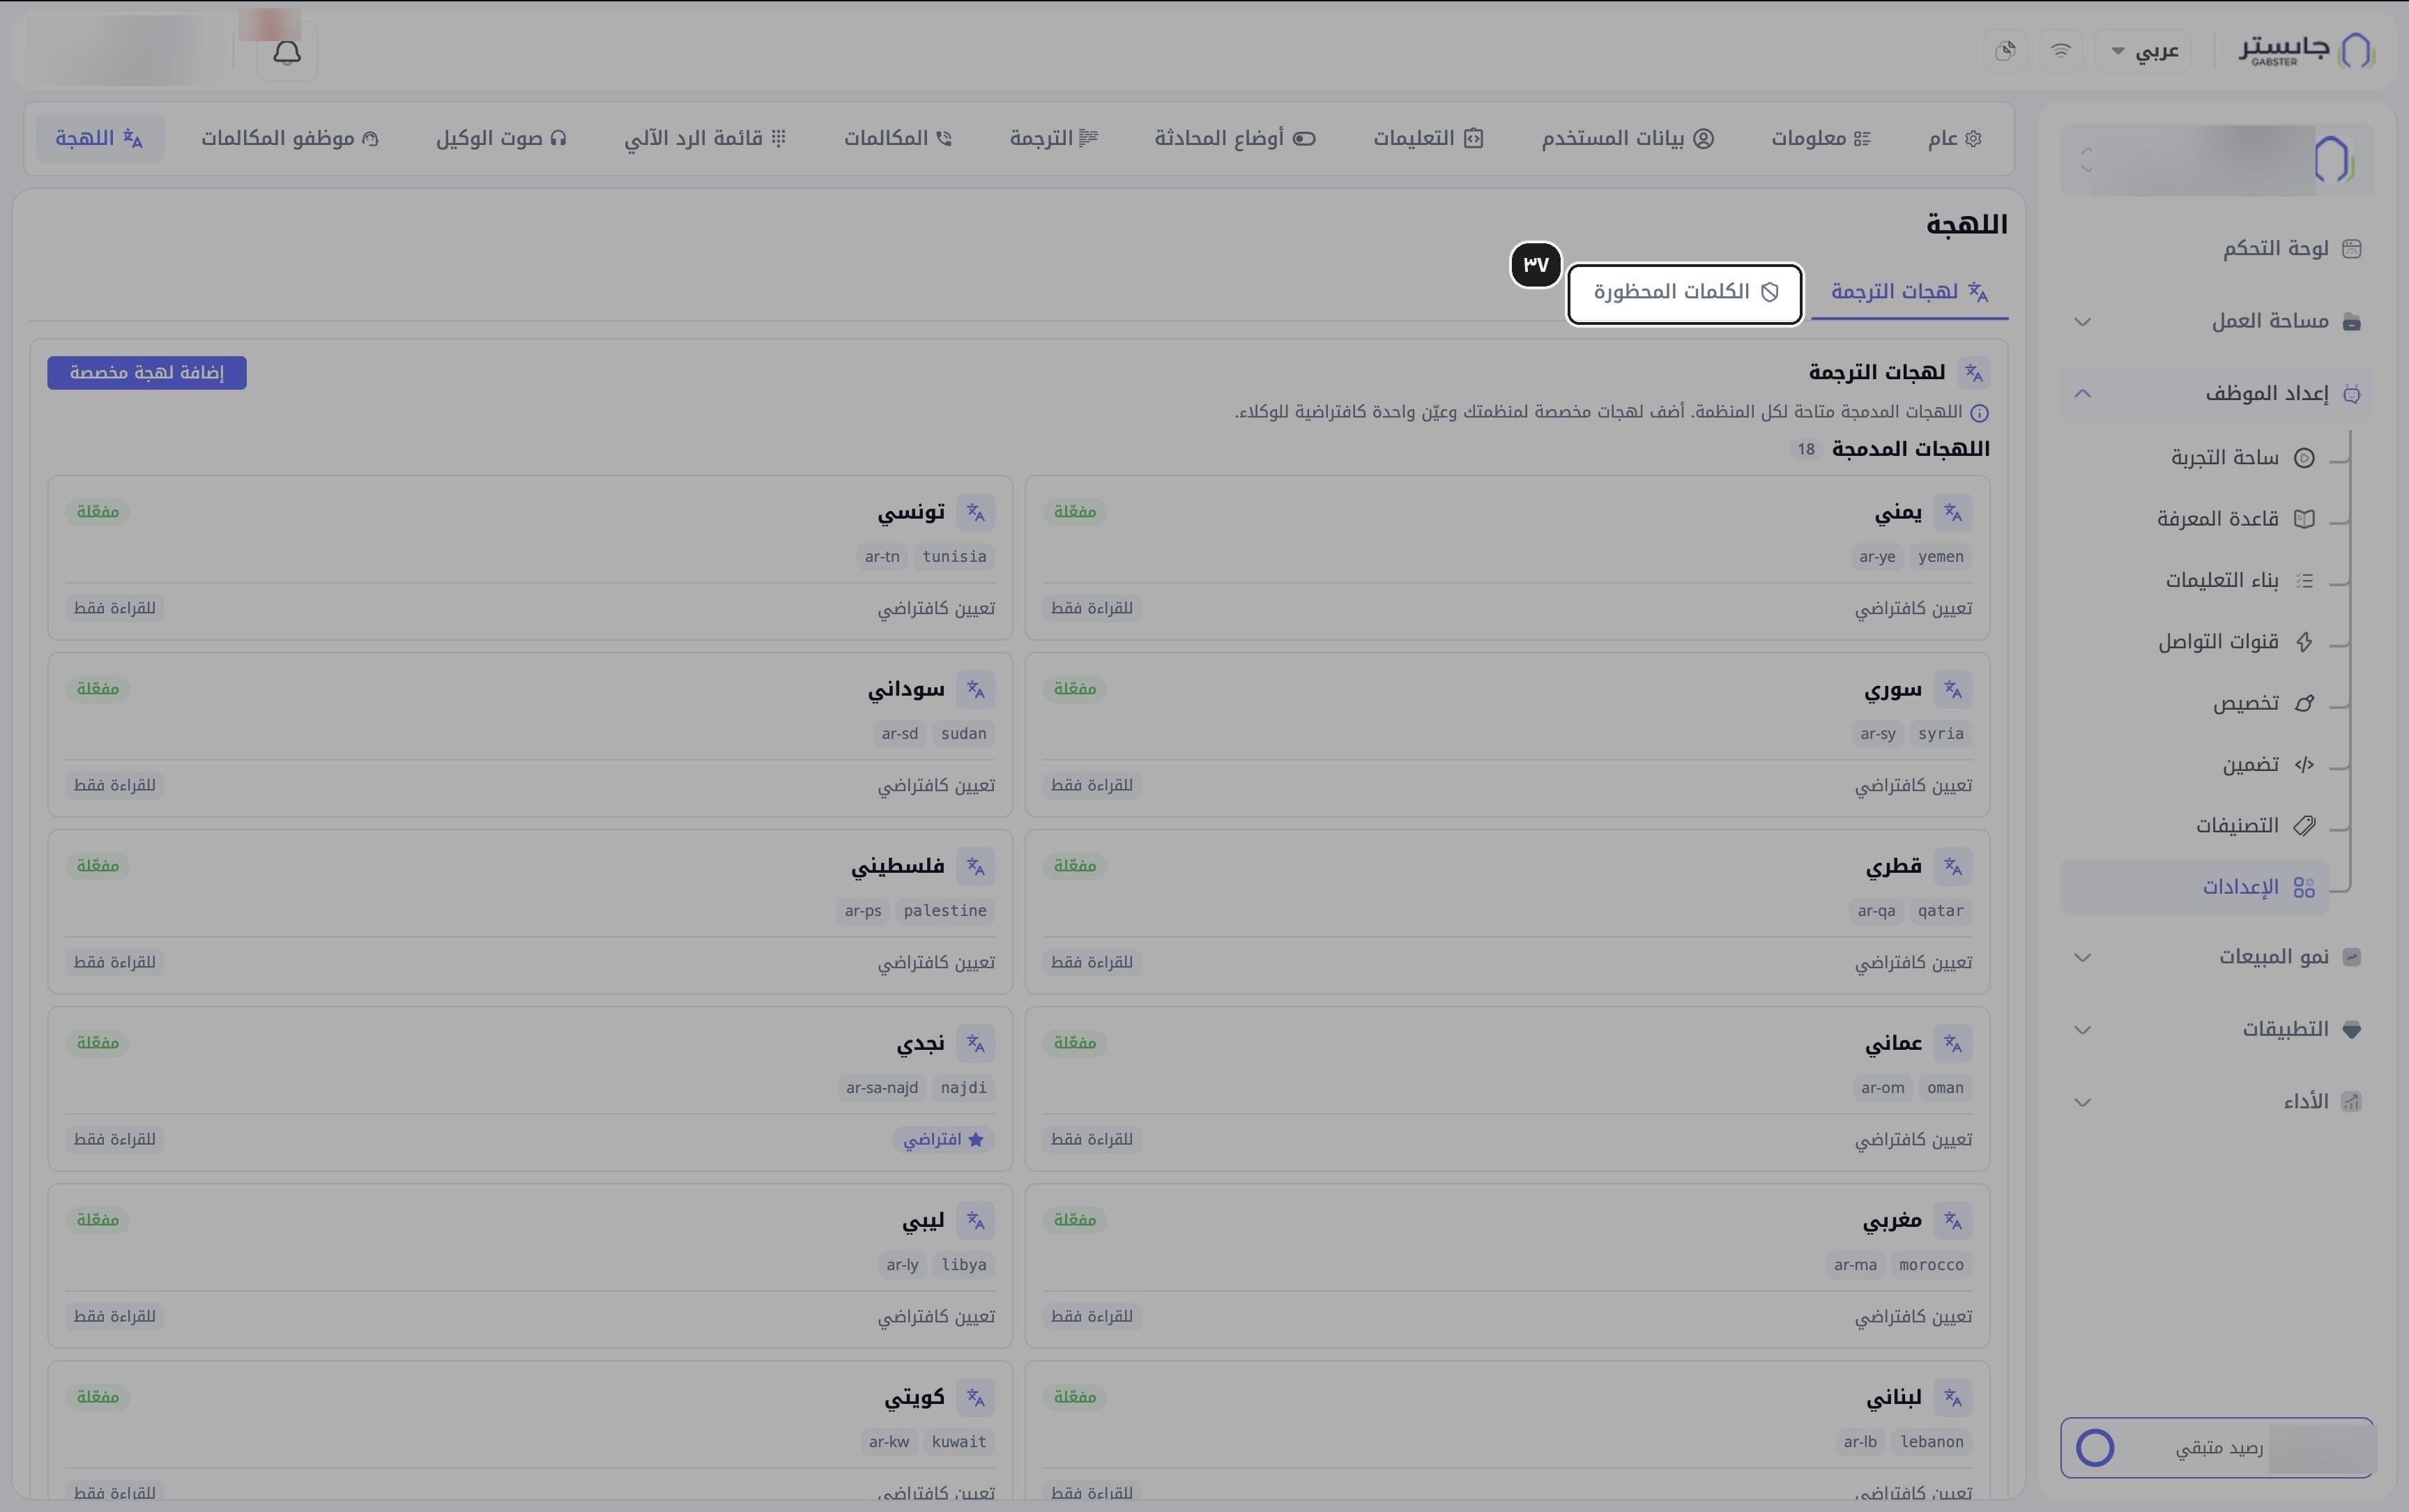
Open the Banned words (الكلمات المحظورة) sub-tab.
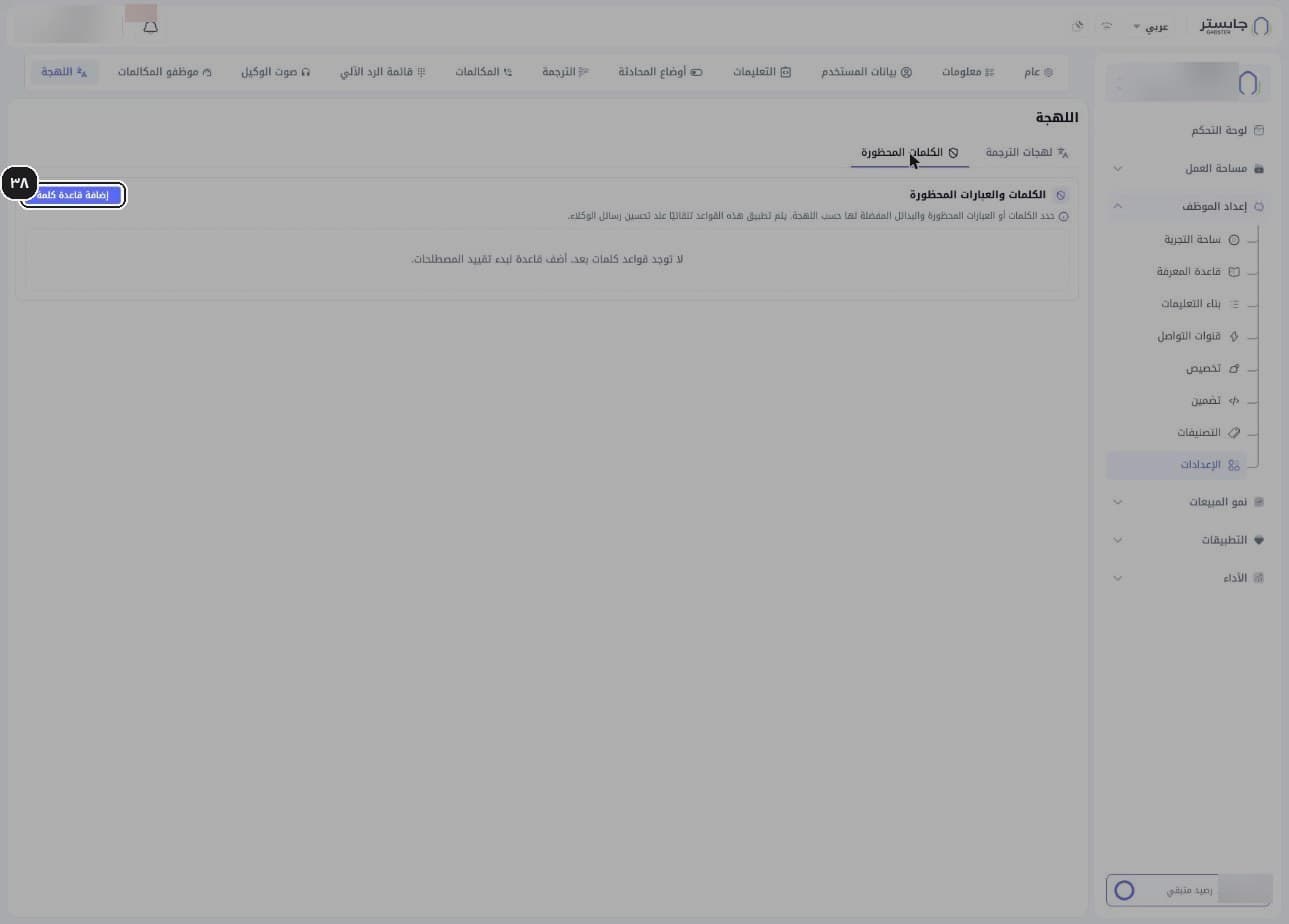
Here you set the words or phrases to replace in each dialect when staff improve a draft message, with preferred alternatives. With no rules yet, it shows No word rules yet. (لا توجد قواعد كلمات بعد.)
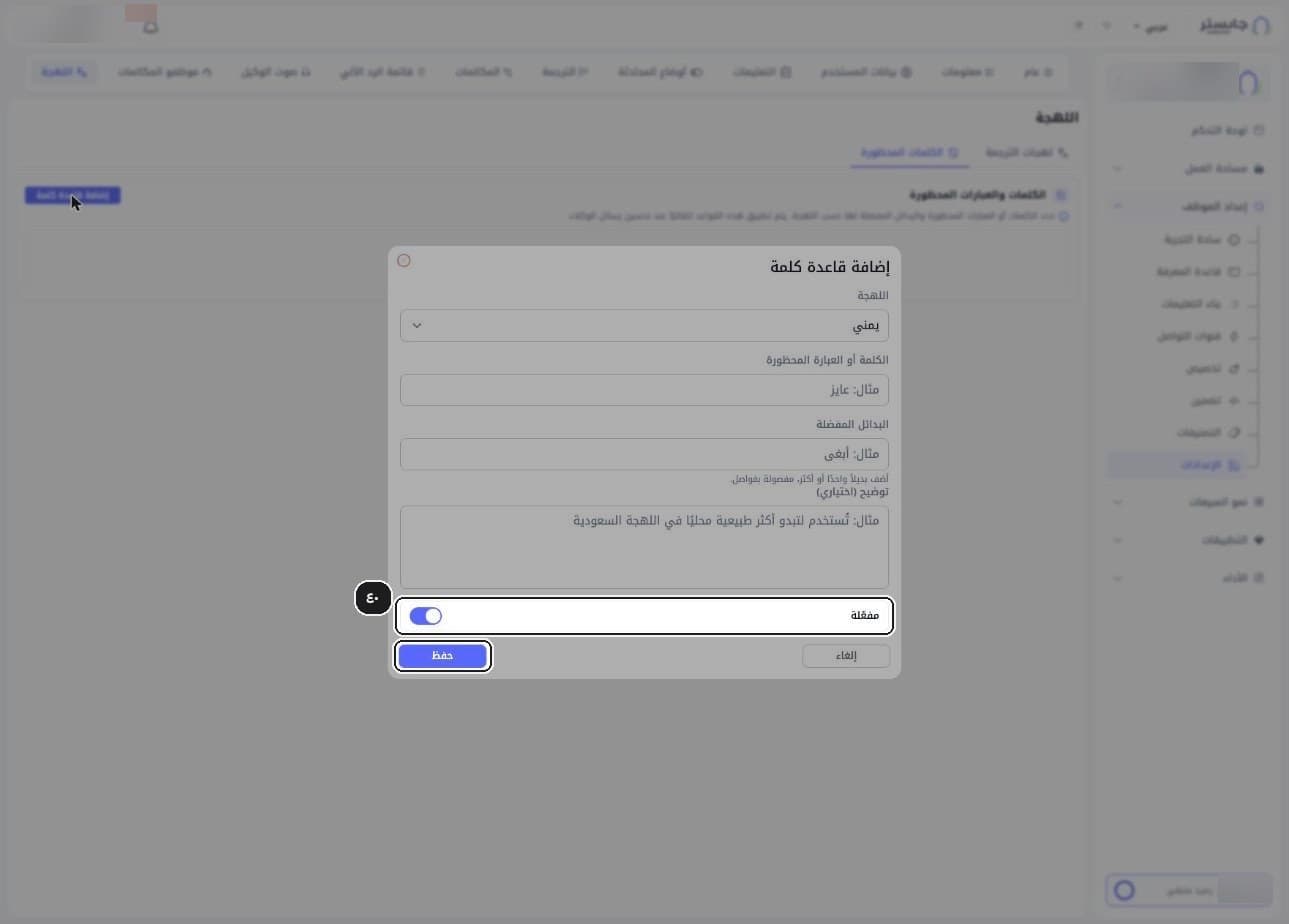
Click Add word rule (إضافة قاعدة كلمة).
The Add word rule window opens.
Choose the Dialect (اللهجة), then enter the Banned word or phrase (الكلمة أو العبارة المحظورة) and its Preferred alternatives (البدائل المفضلة) — one or more, separated by commas. Optionally add an Explanation (توضيح (اختياري)).
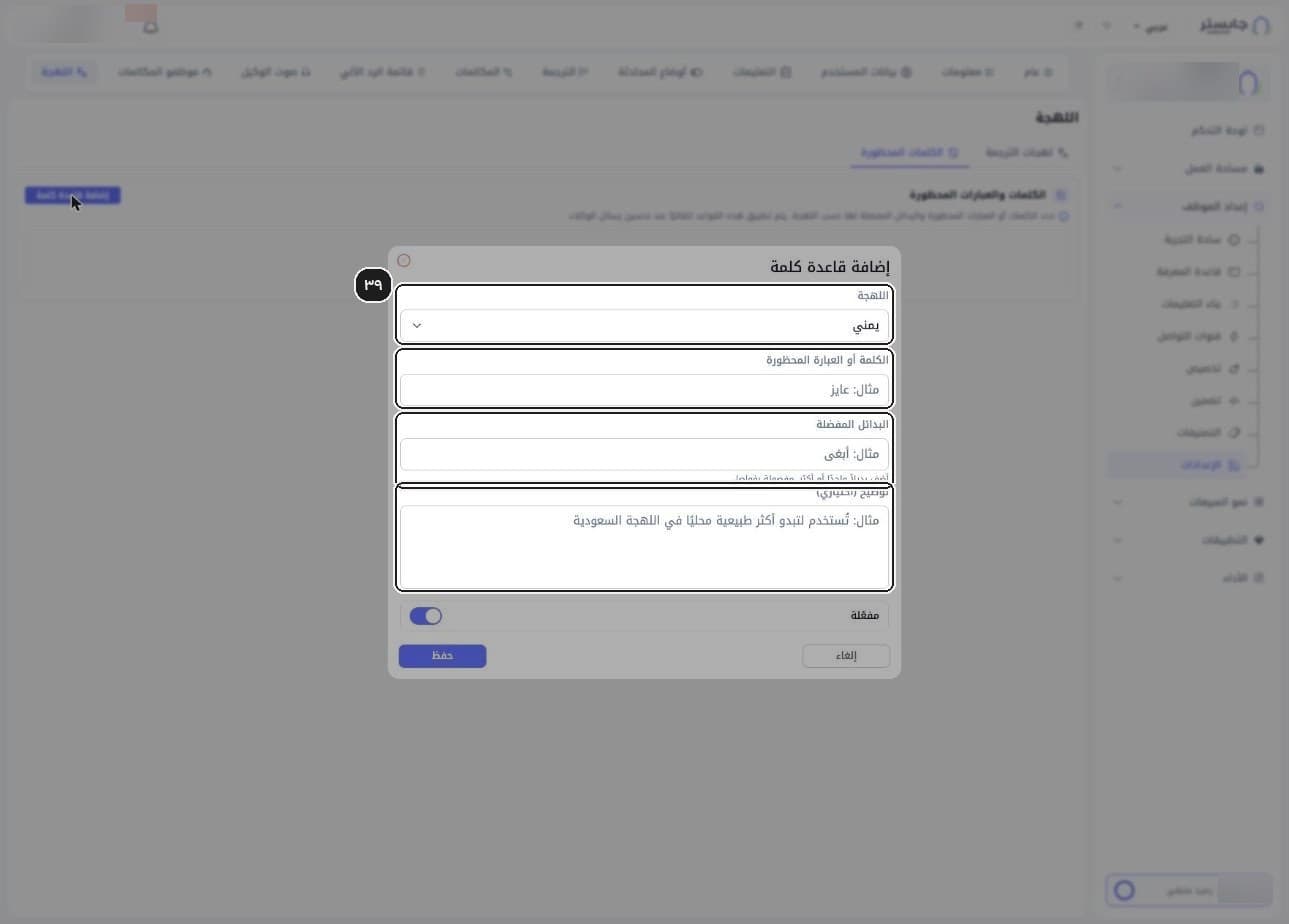
Keep Enabled (مفعّلة) on — it is on by default — and click Save (حفظ).
The rule applies only when staff improve a draft message in the same dialect; it doesn't change your AI Agent's automatic replies.