
Tutorials
Send a WhatsApp campaign and track it
Create a WhatsApp template, prepare and send a campaign from it, then follow each recipient's delivery status in the Campaign Log.
In this tutorial you create a WhatsApp template and prepare a campaign from it: fill the variables, pick the recipients, check account health, and send. Then you follow the template's statistics and each recipient's delivery status in the Campaign Log (سجل الحملات).
Before you start
- WhatsApp is connected to your project. See Connect channels.
- An approved WhatsApp template, or create one in step 4.
- Balance in the WhatsApp Wallet. See WhatsApp Wallet and top-up.
- Customers in the project — they are the campaign recipients. See Customers: add, import, export.
A. WhatsApp templates
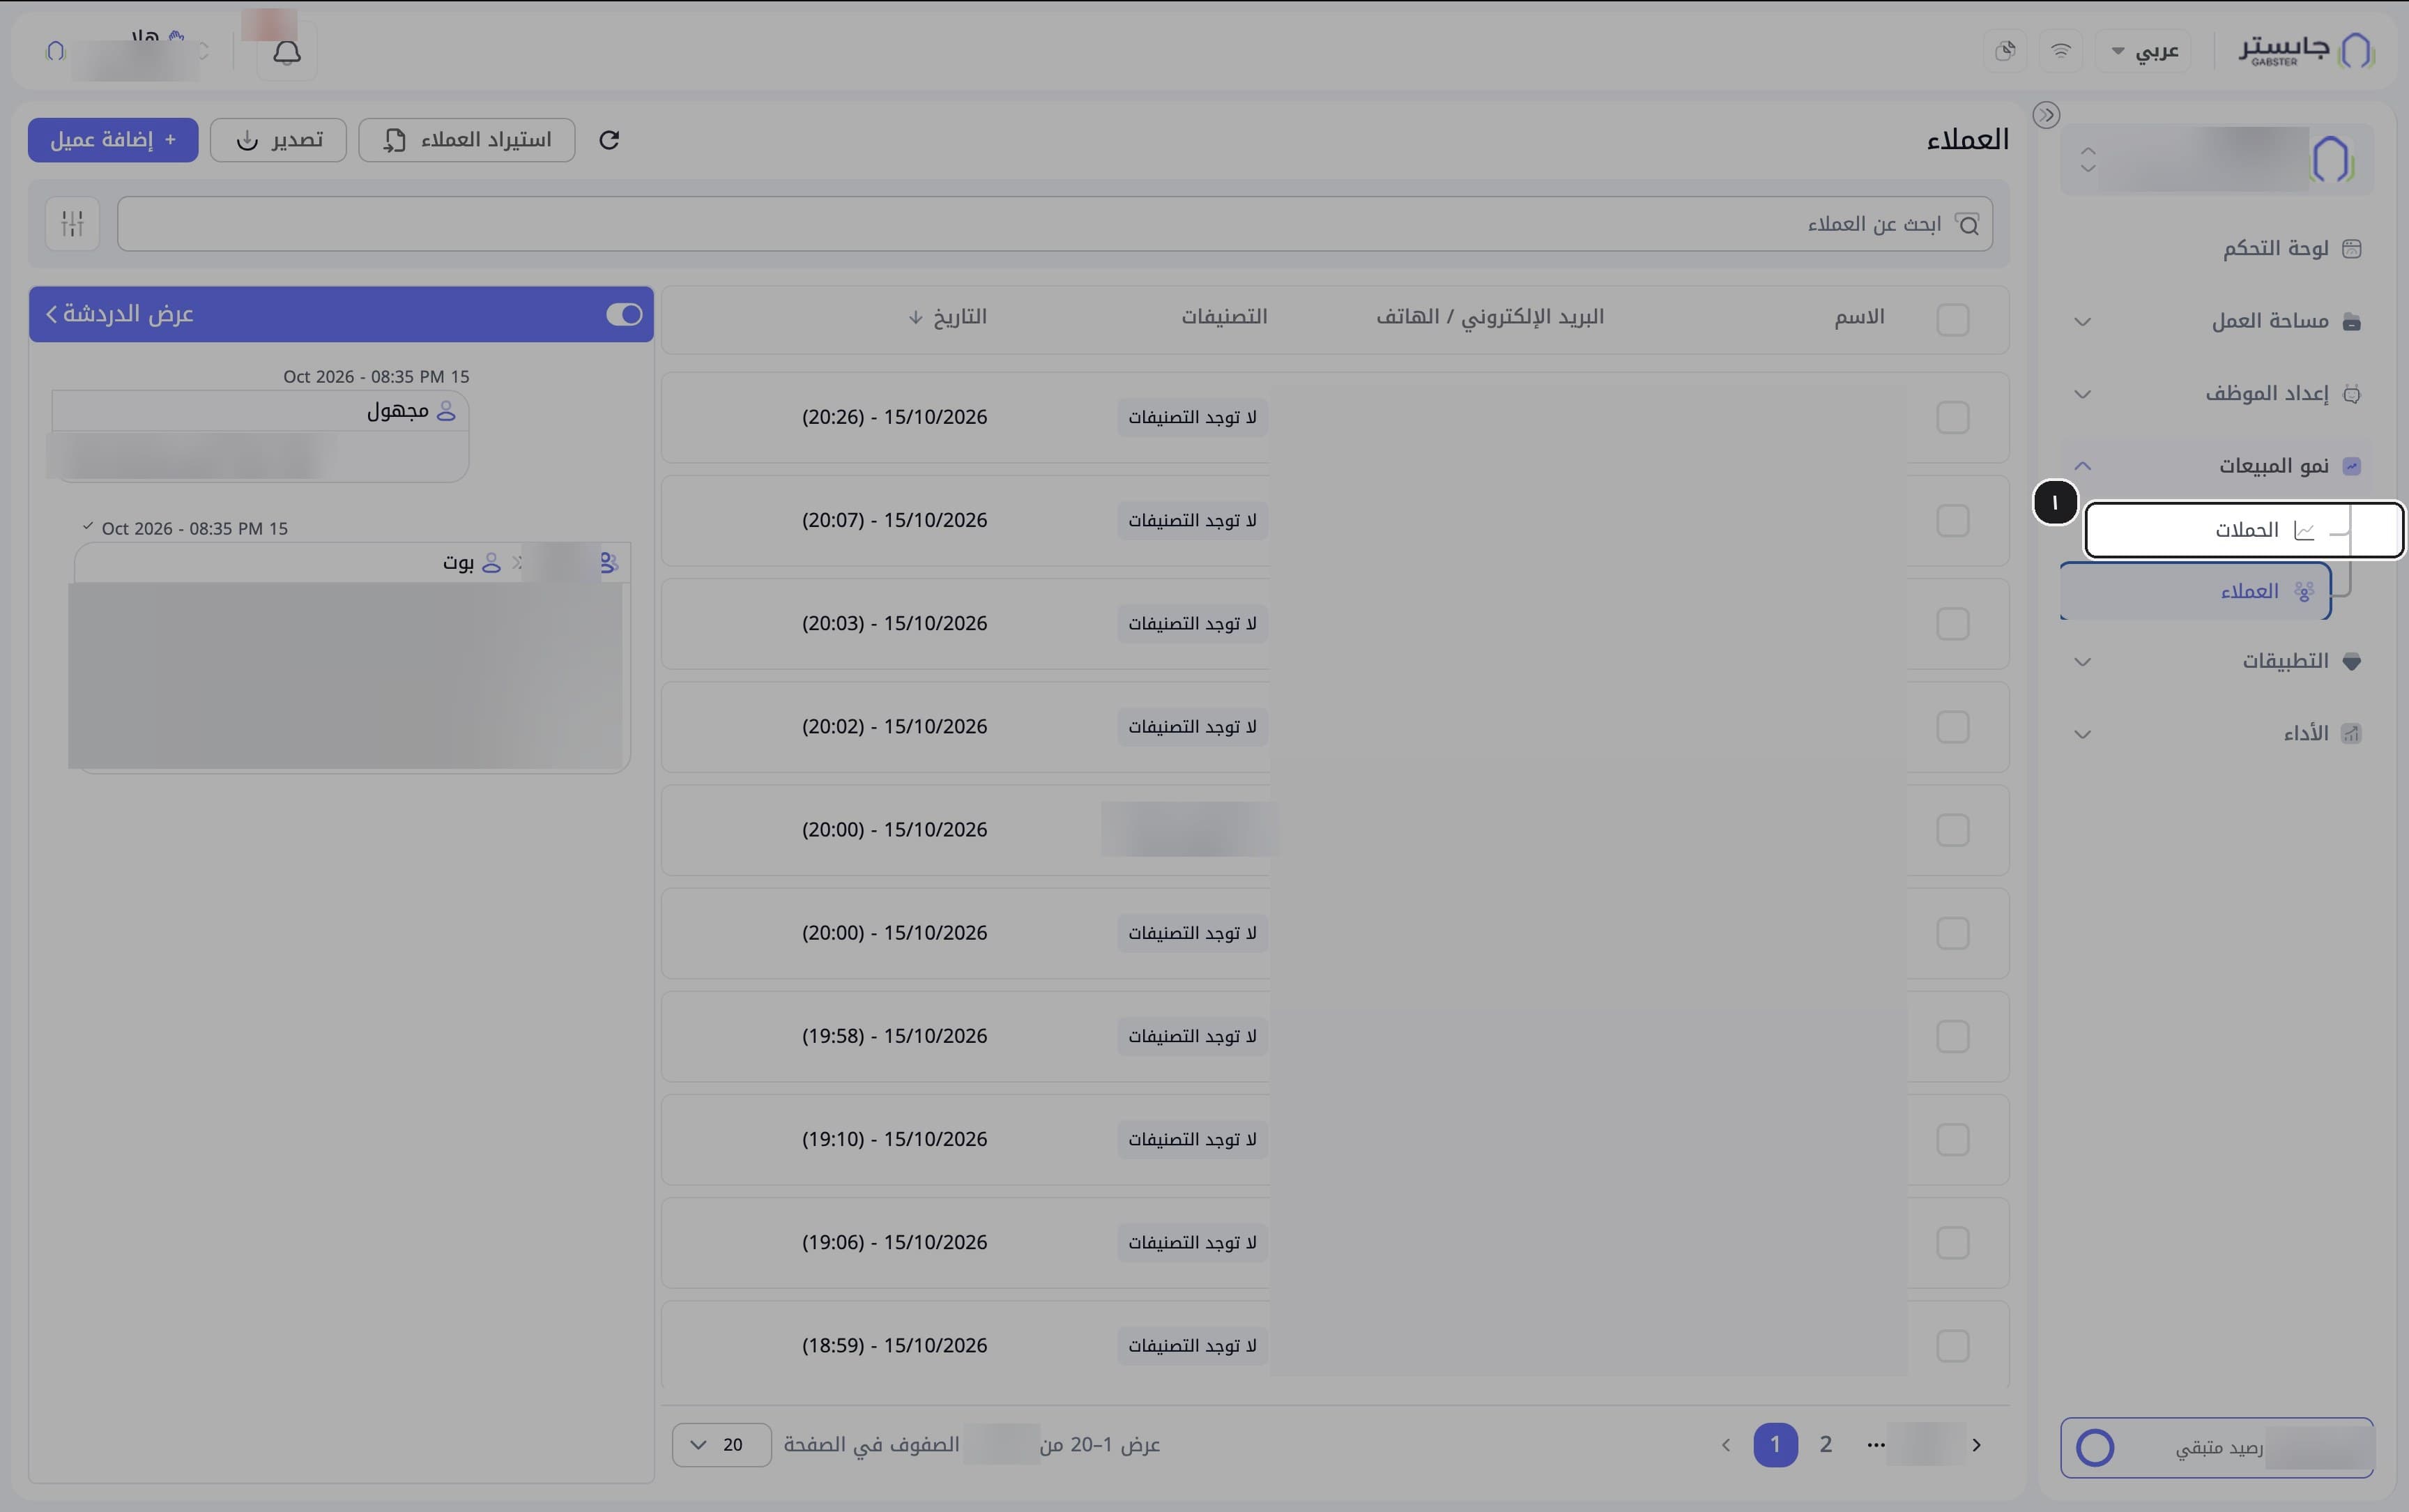
In the sidebar, open Sales Growth (نمو المبيعات) and choose Campaigns (الحملات).
The page opens on the Whatsapp tab: WhatsApp templates on the right, details of the selected template on the left.
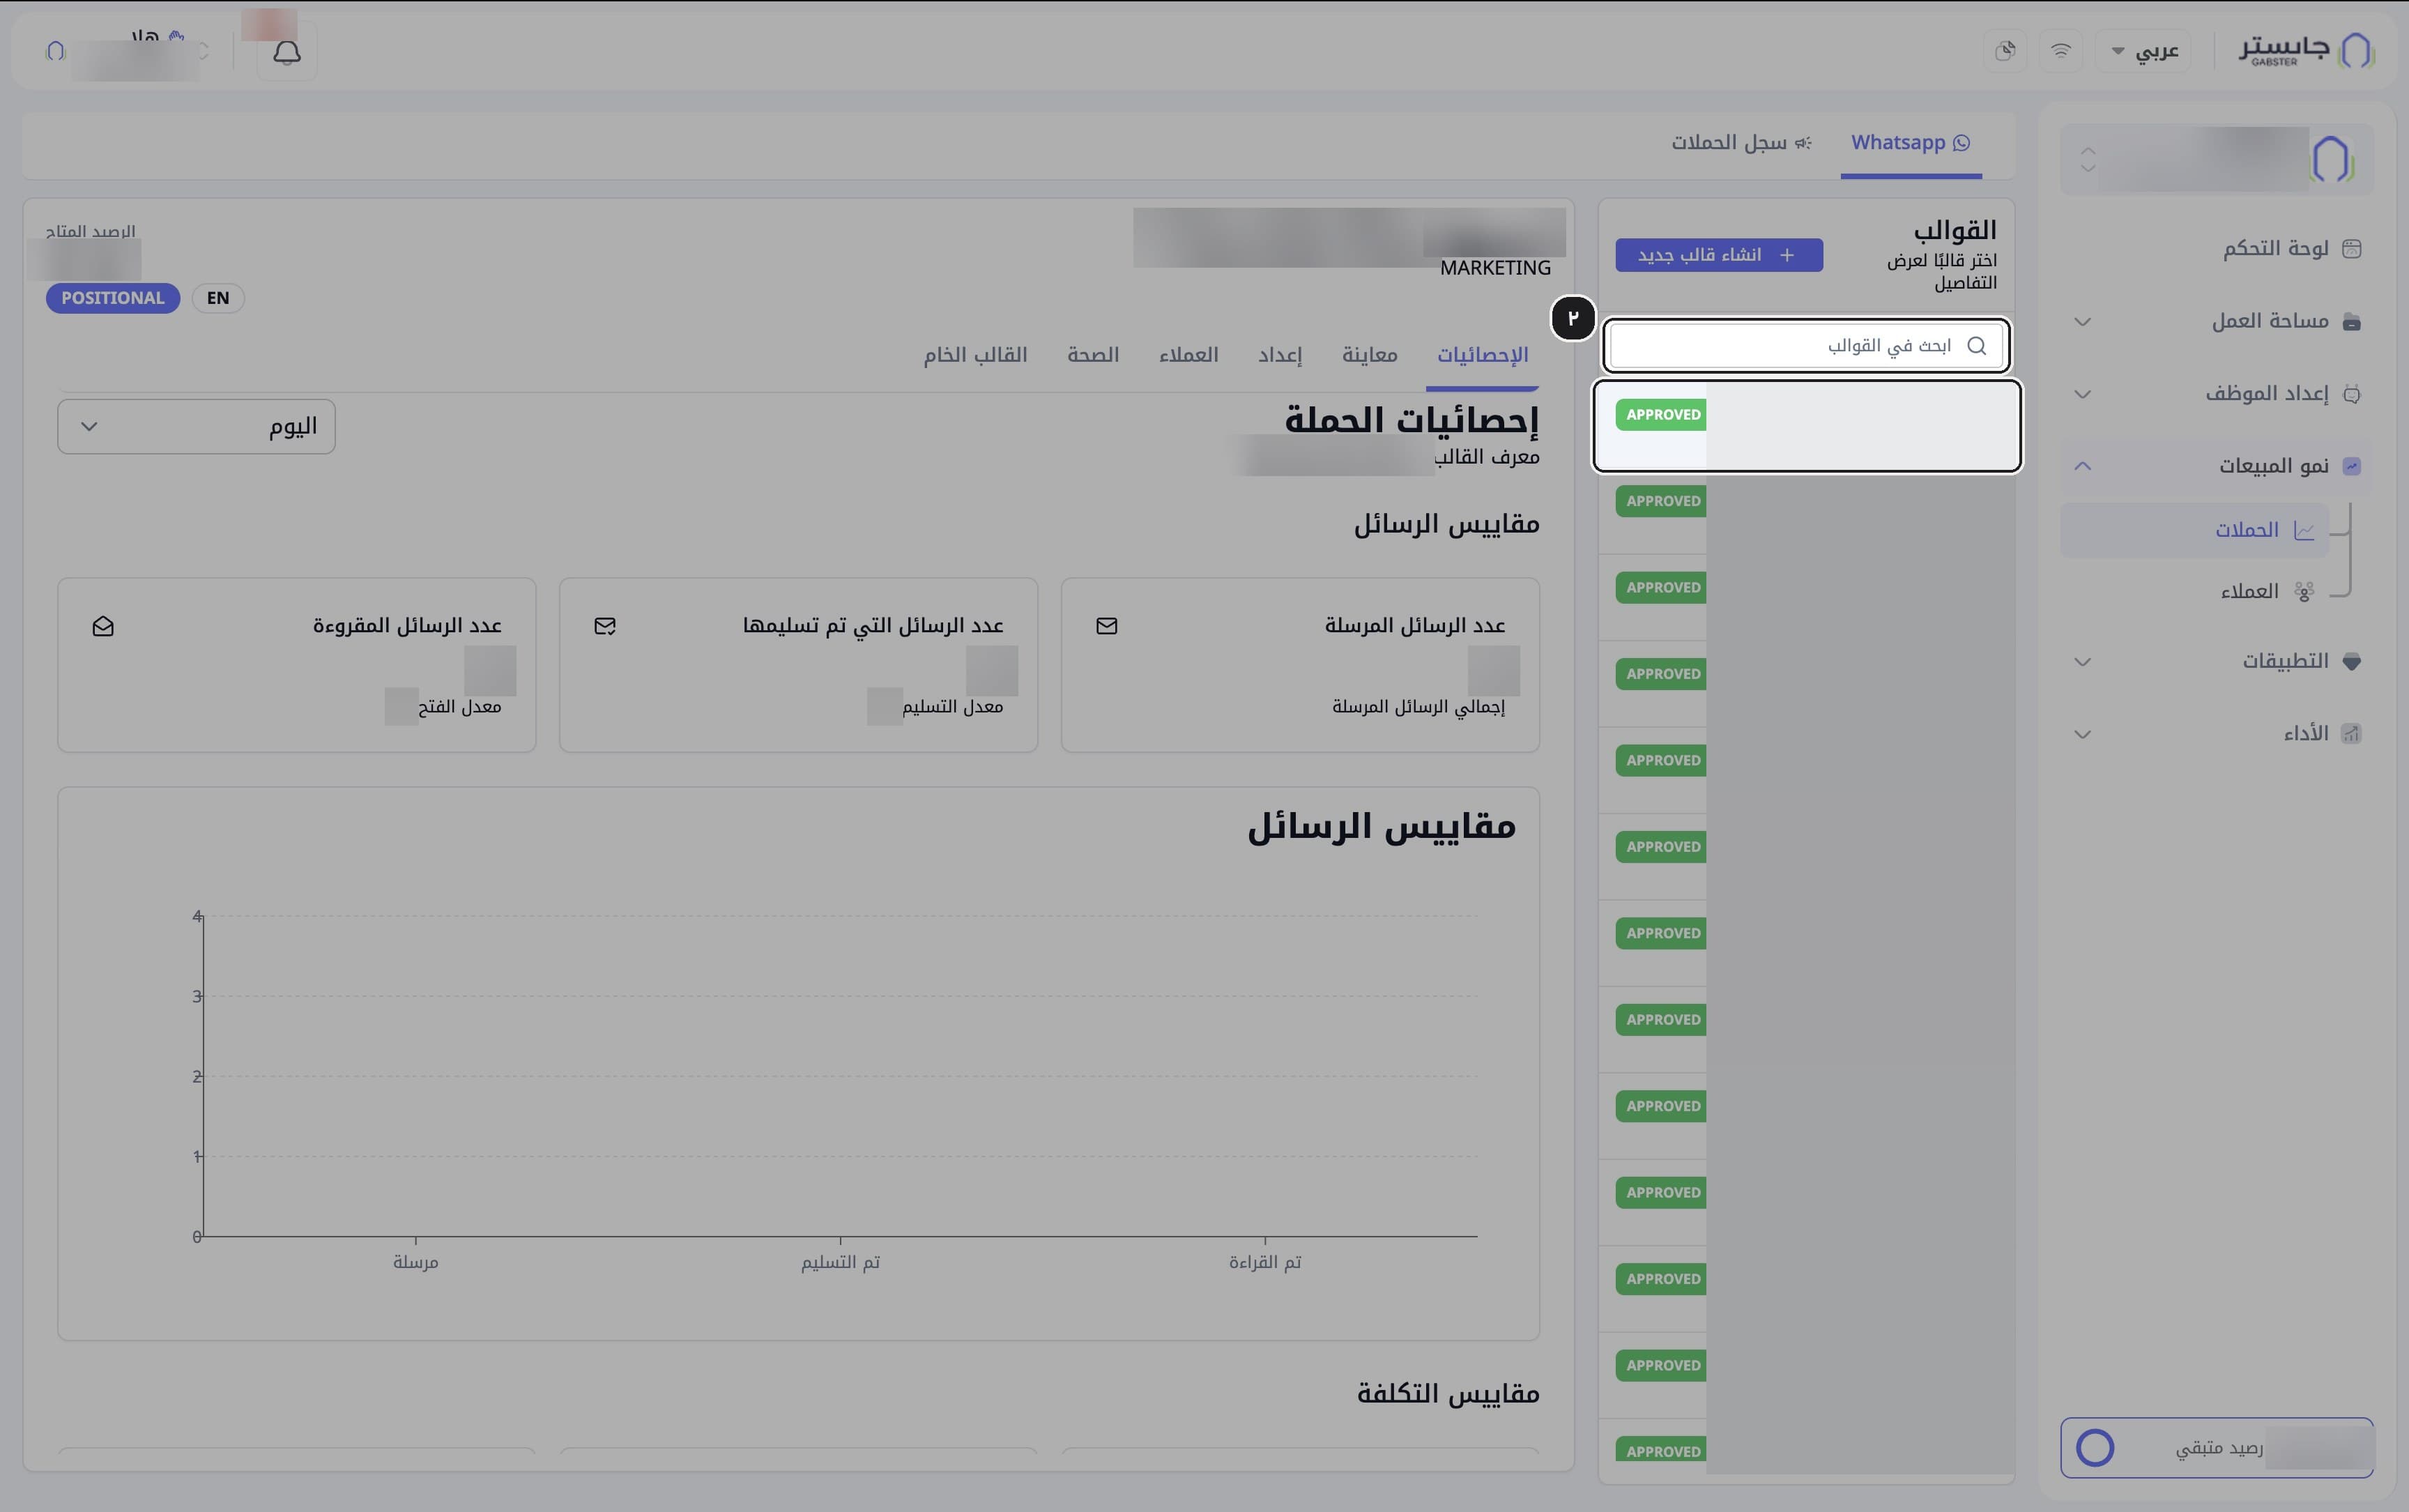
Search in Search WhatsApp templates (ابحث في القوالب) and select the template's row.
The selected template's details appear on the left. Template names can repeat, so identify a template by the ID (المعرف) shown under its name.
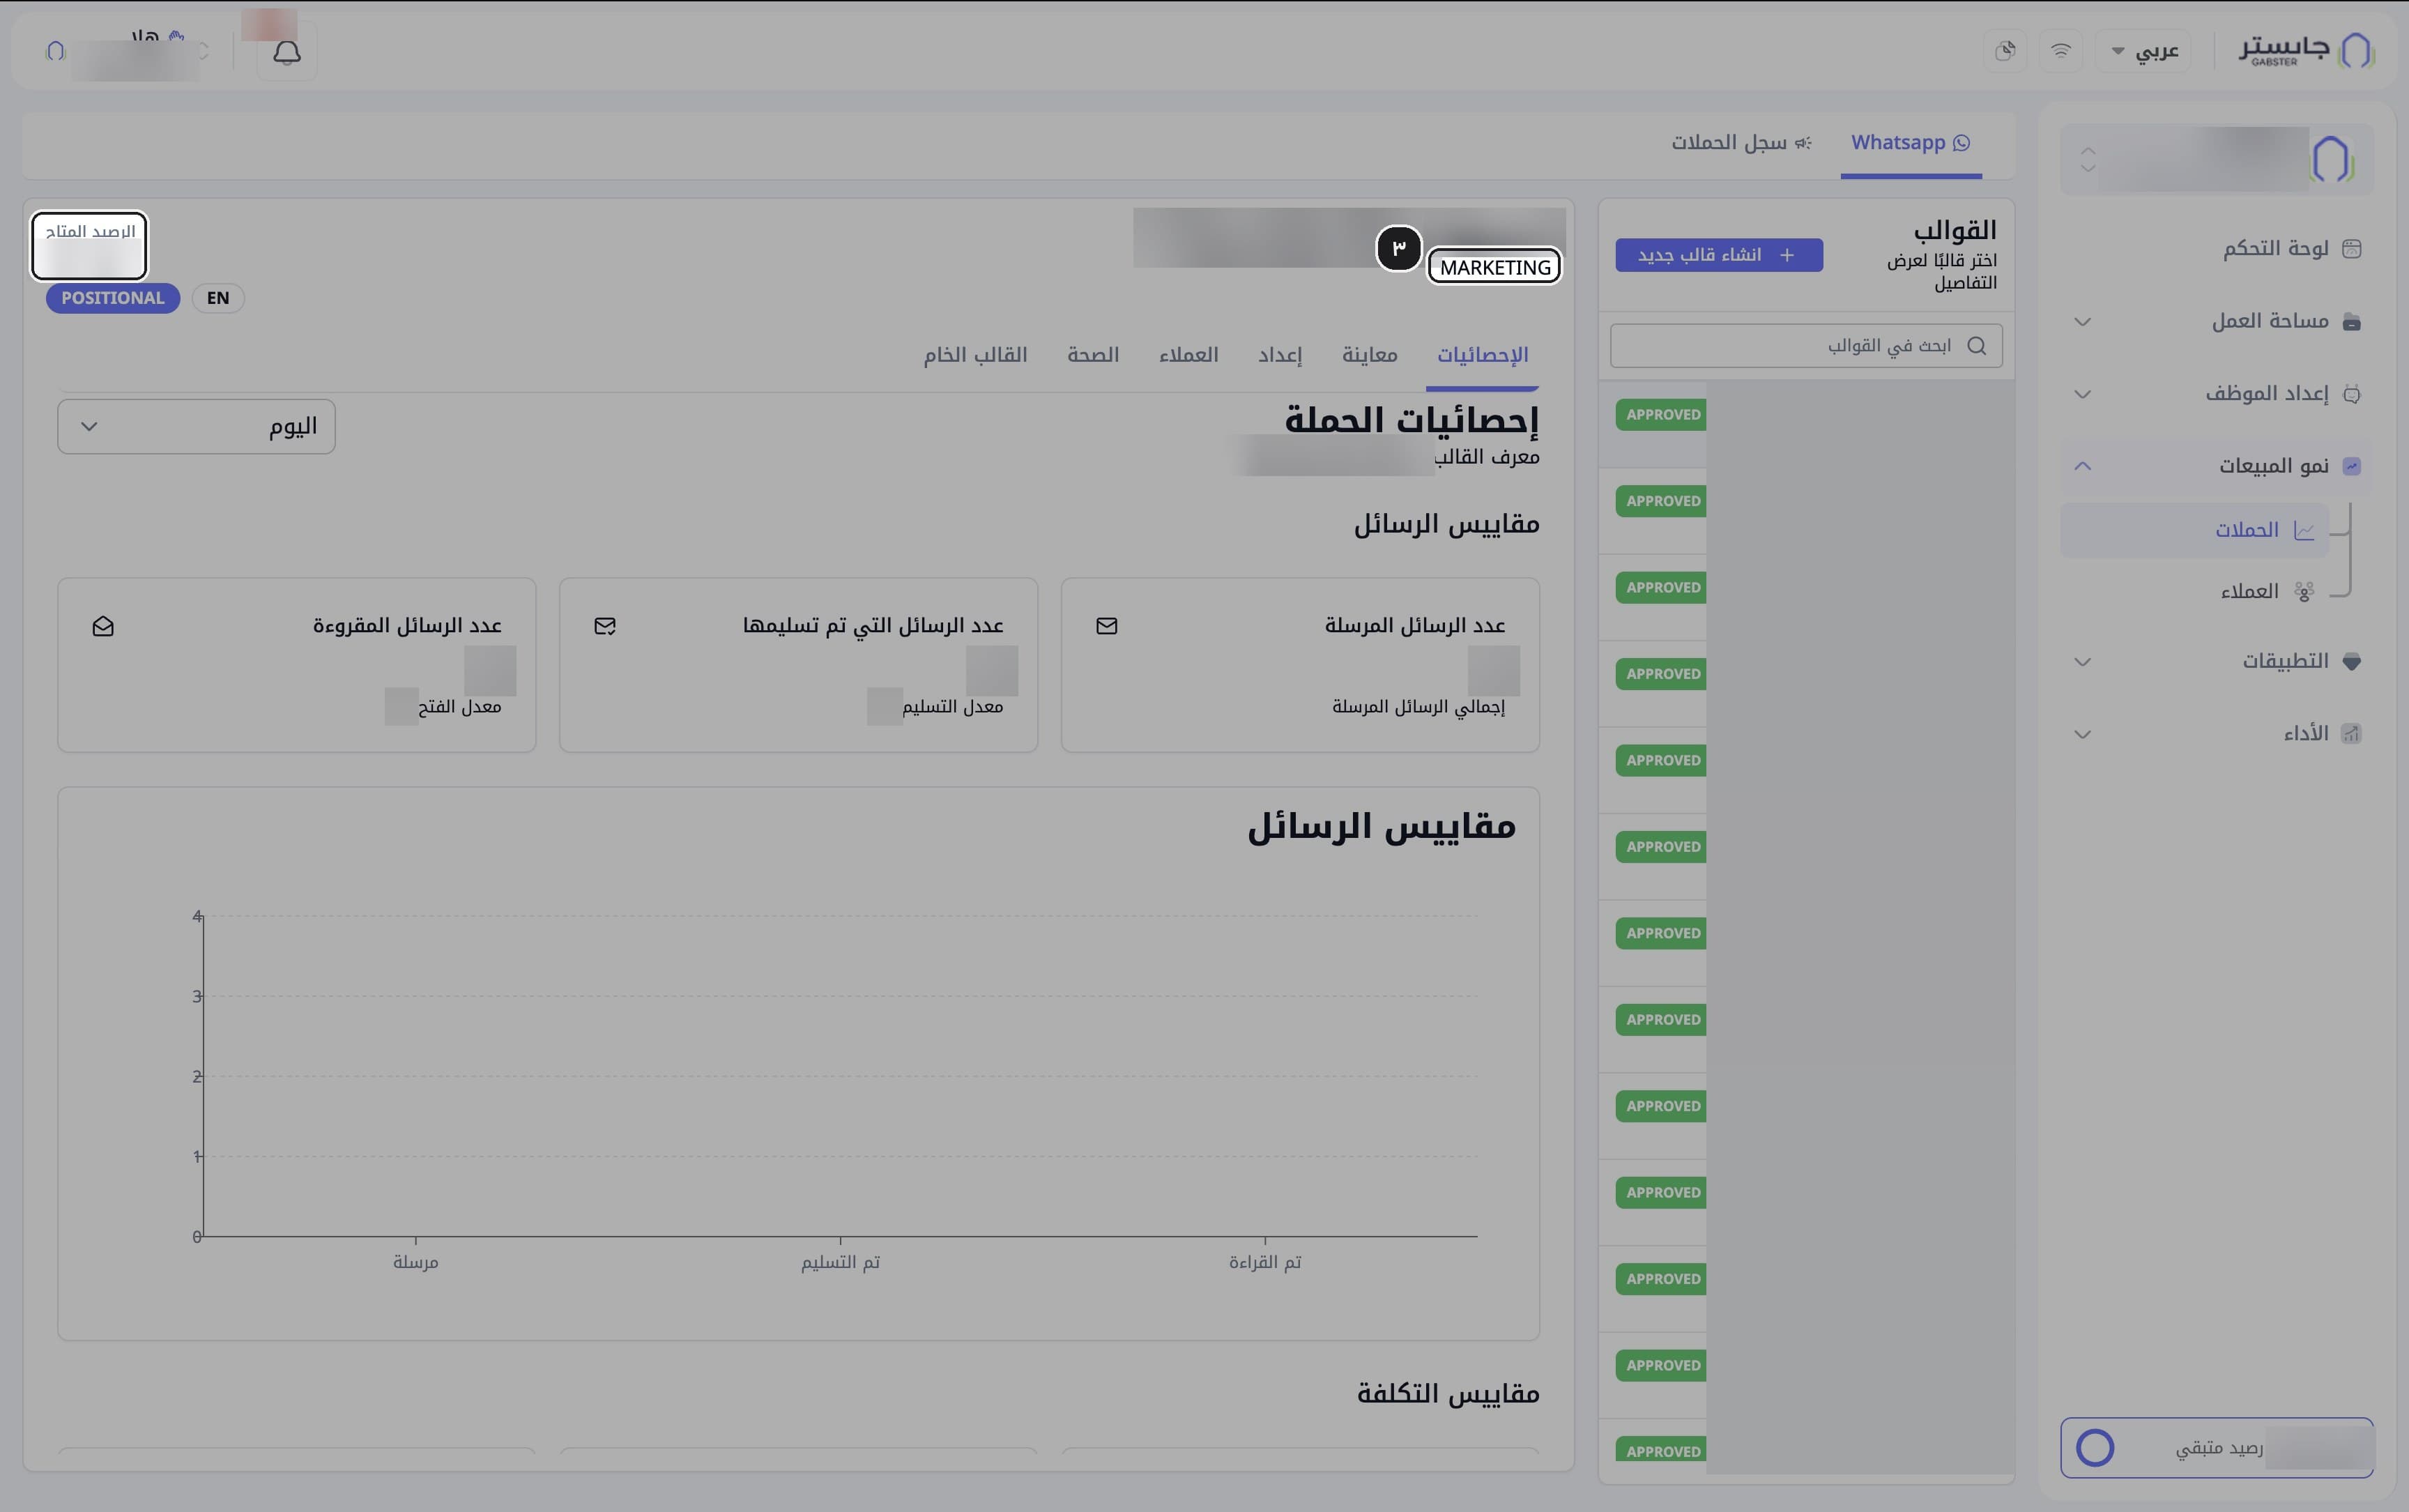
Check the template header: name, category (for example MARKETING), language, and the Available balance (الرصيد المتاح) in SAR.
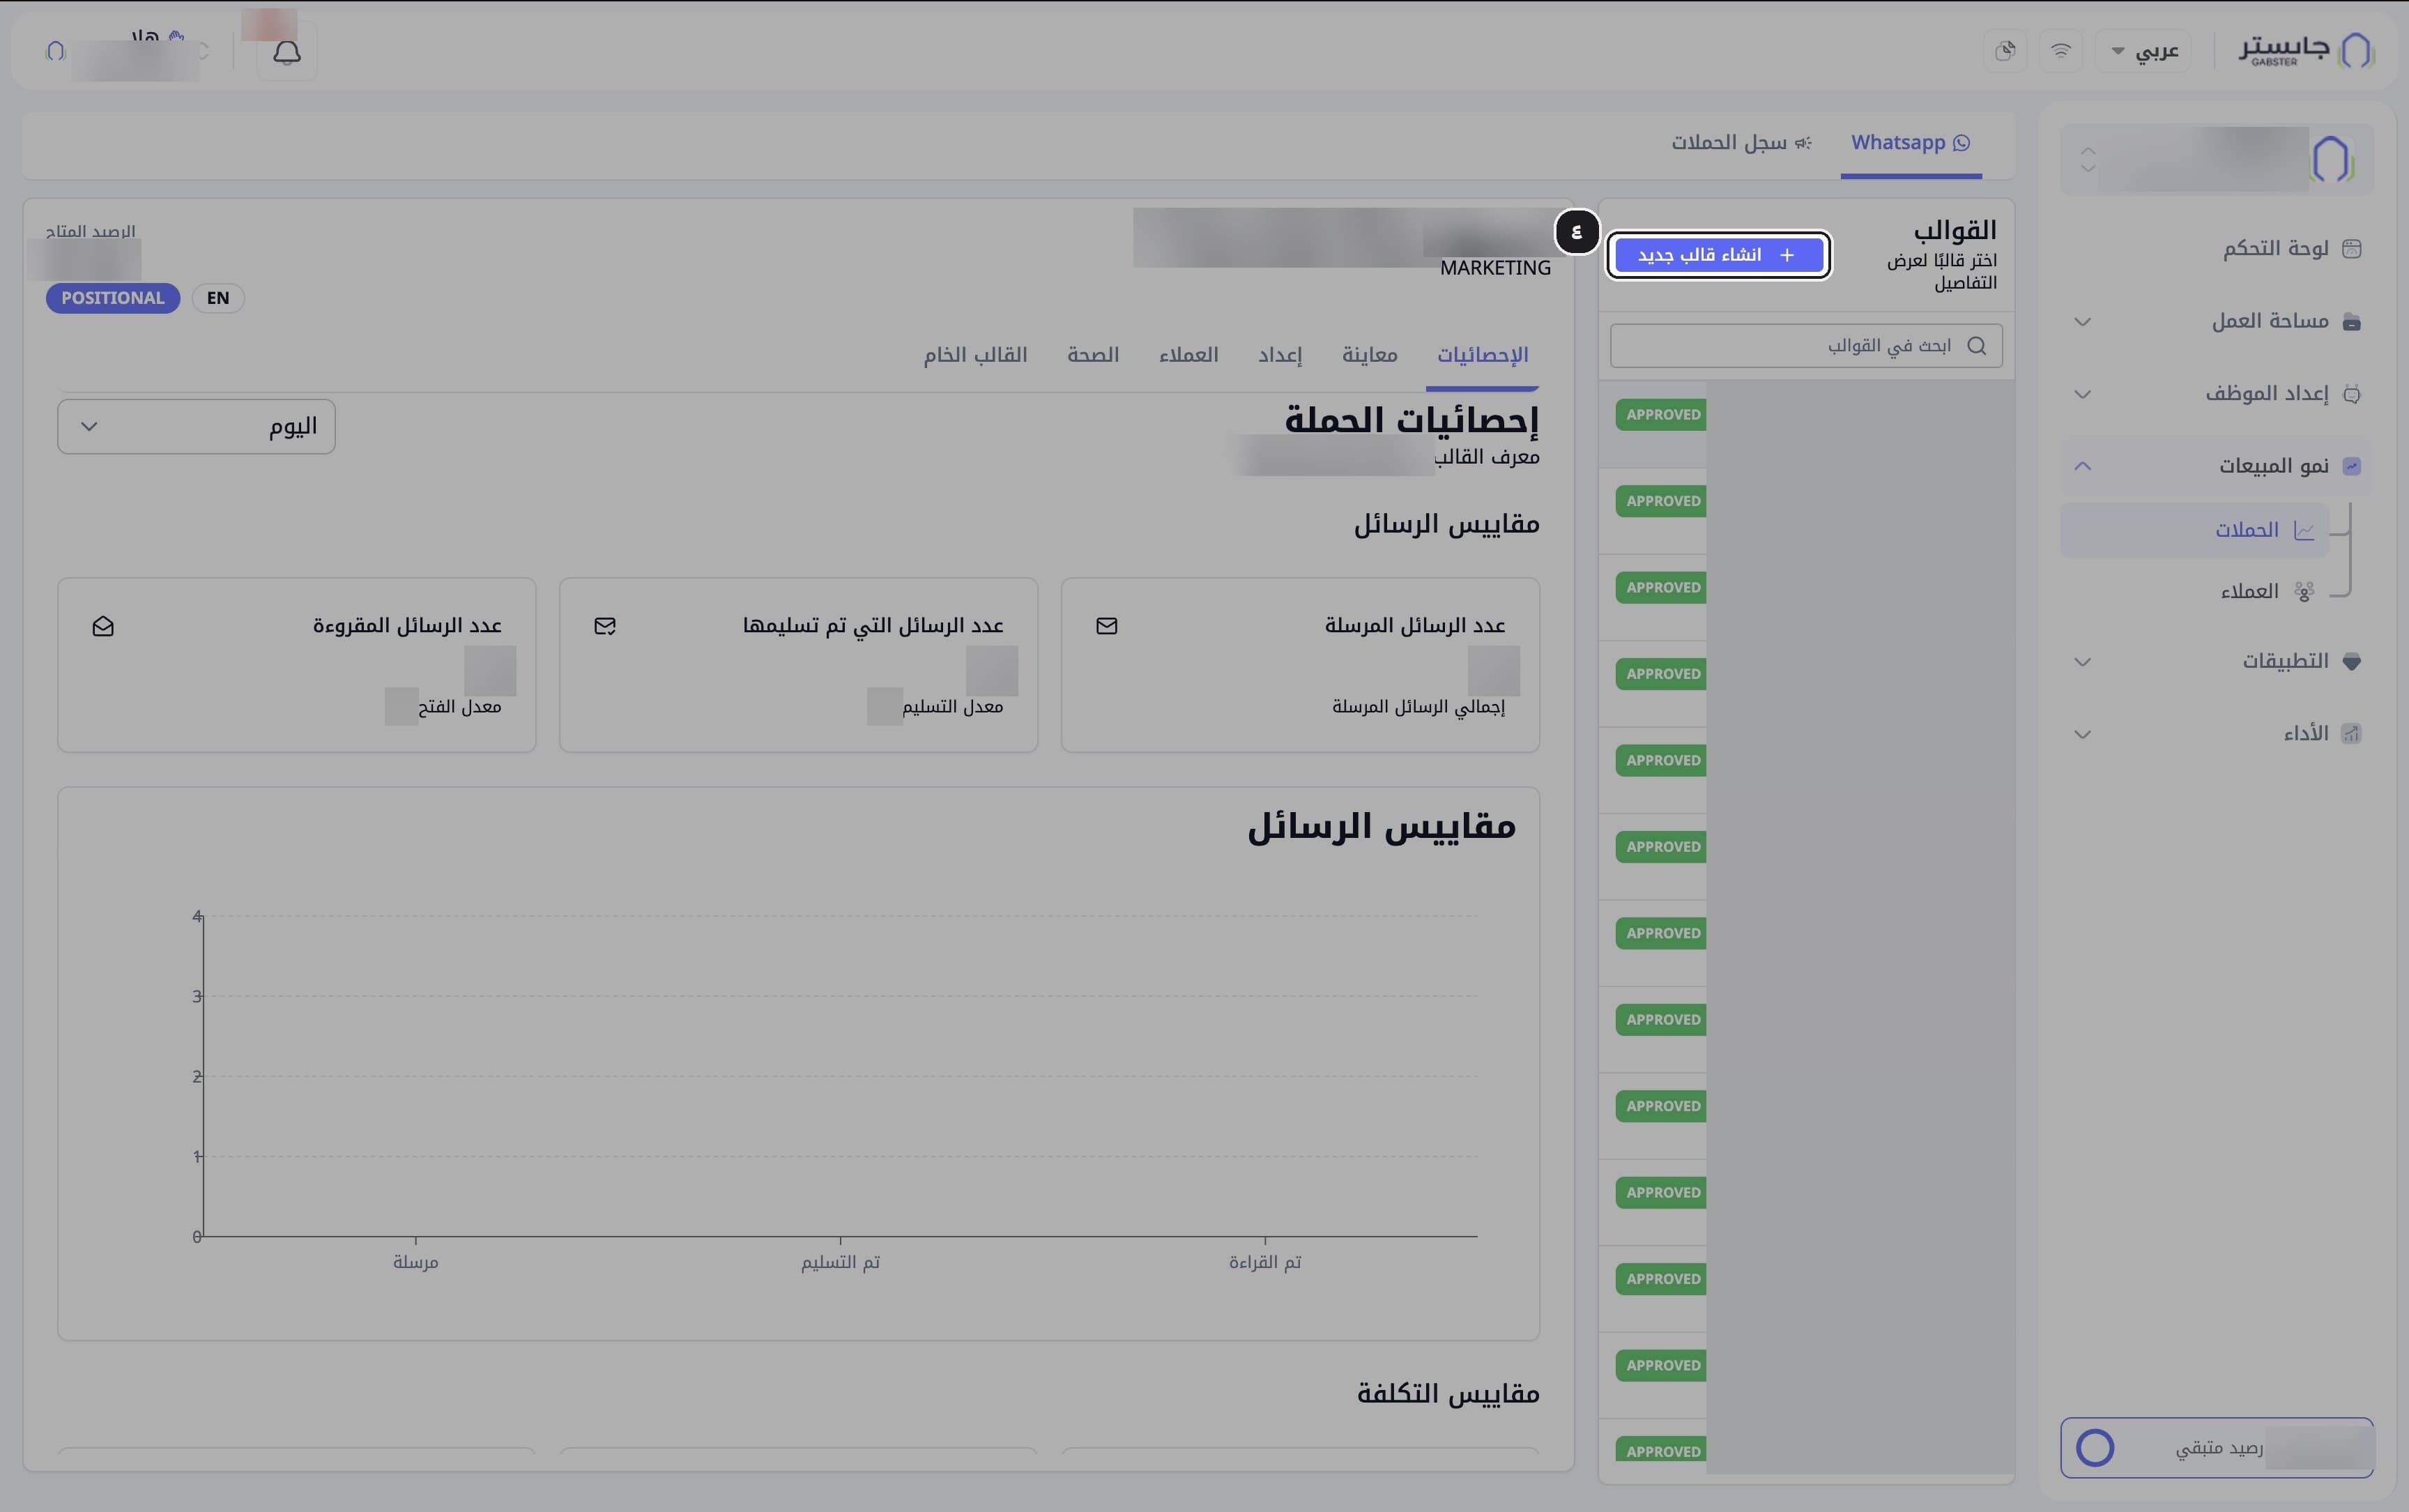
To create a new template, click Create new WhatsApp template (انشاء قالب جديد).
The Create WhatsApp template (إنشاء قالب واتساب) wizard opens at step 1 of 3.
In the Basics (الأساسيات) step, choose the template type, then enter the Template name (اسم القالب) and pick the Category (التصنيف) and language.
Standard (قياسي) is selected by default; the other type is Media carousel (كاروسيل وسائط). Name, category and language are required. Category here is the WhatsApp template category — Marketing (تسويقي) or Utility (خدمي) — not Tags.
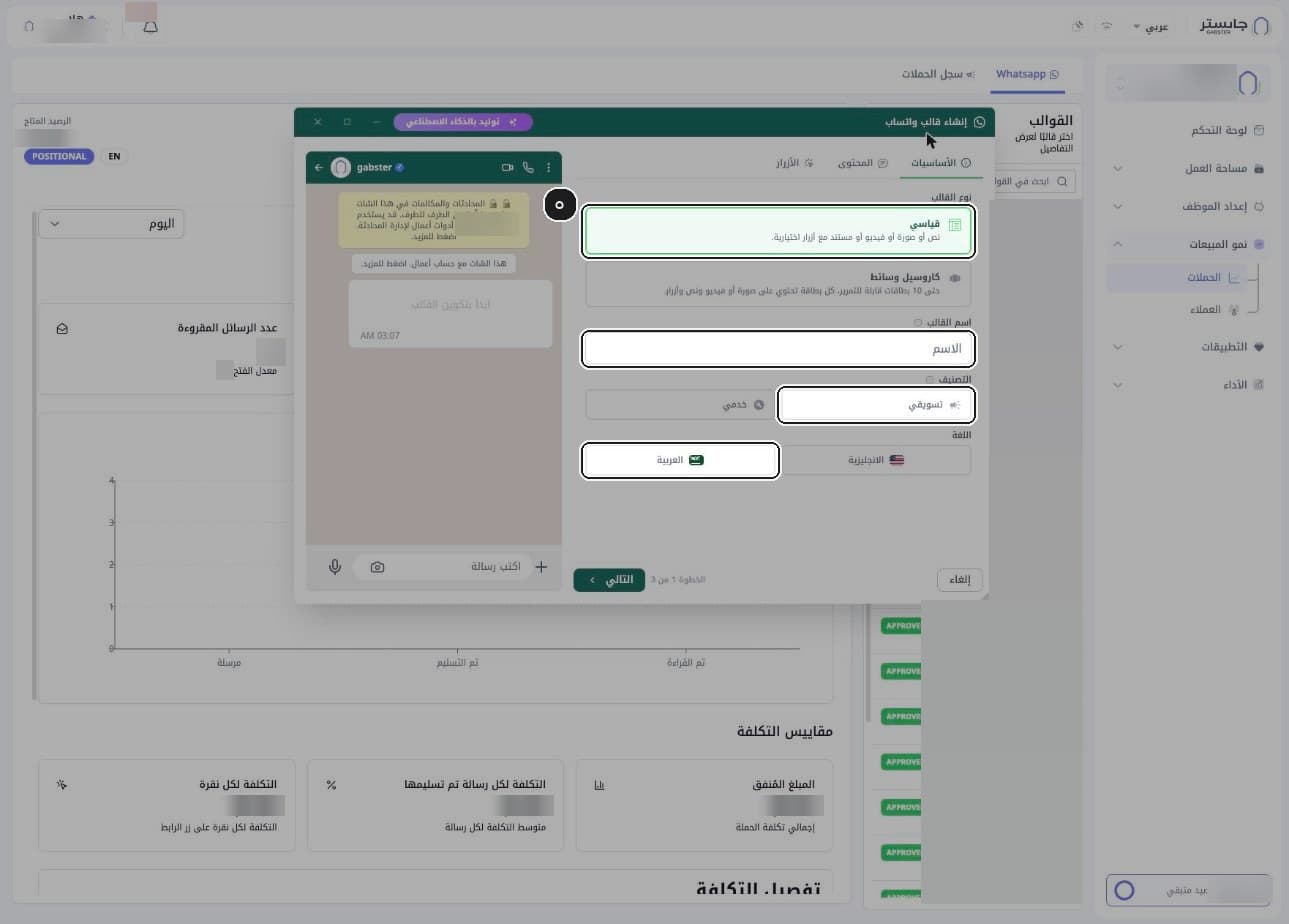
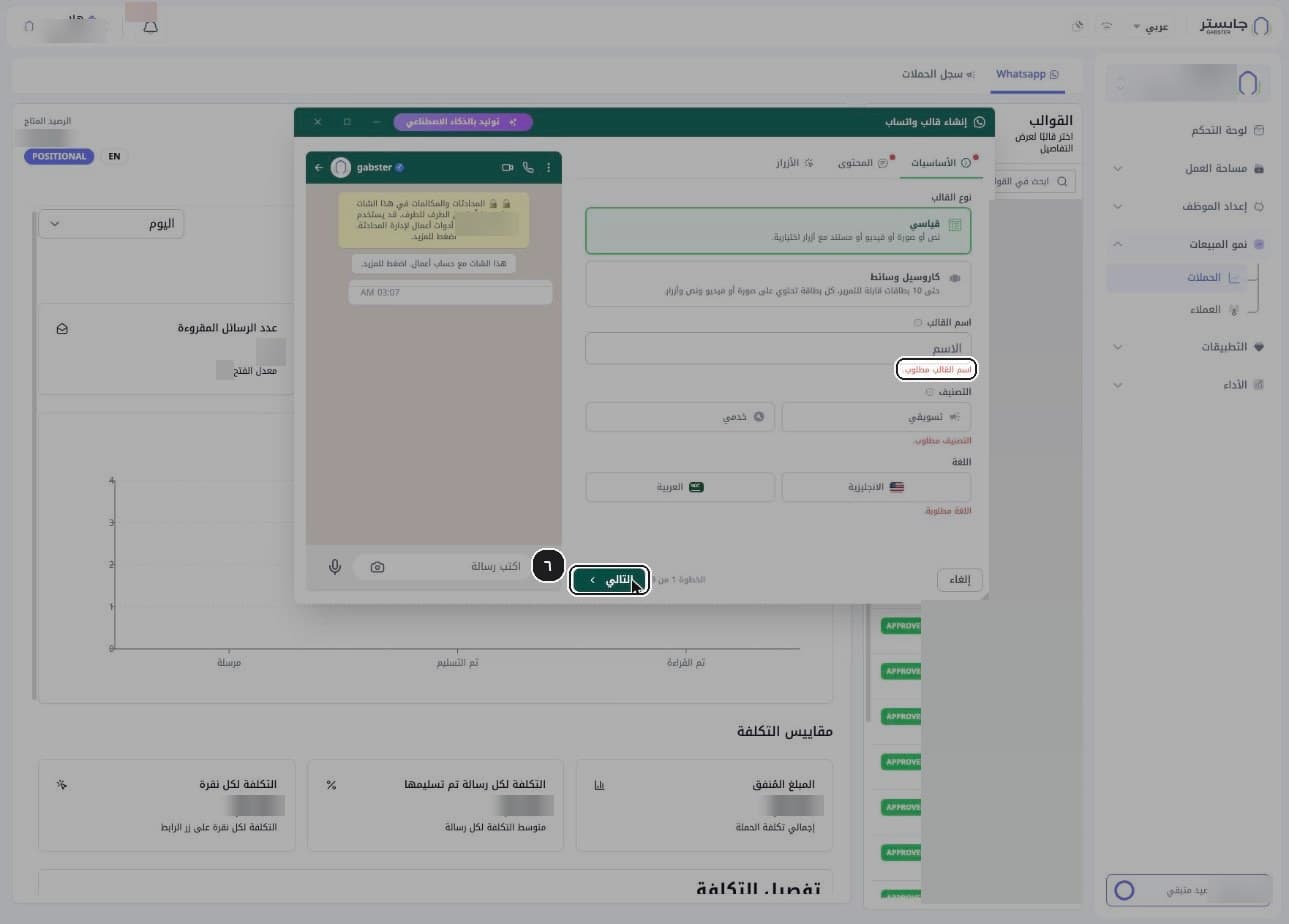
Click Next (التالي).
If a required field is empty, the wizard stays on step 1 and shows red errors under the fields (such as "Template name is required.") and a red dot on the step tab.
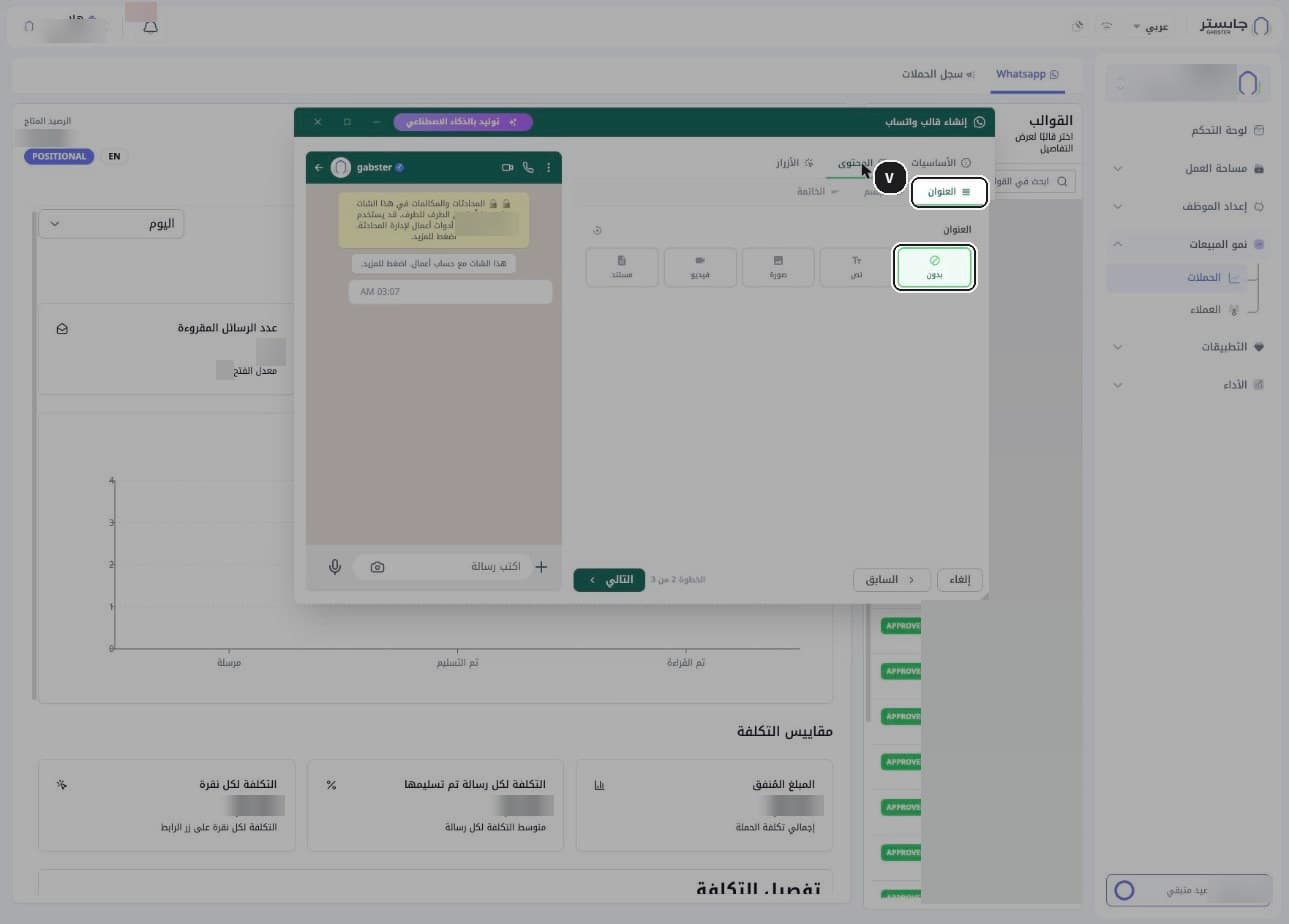
In the Content (المحتوى) step, open Header (العنوان) and pick its format: None (بدون), Text (نص), Image (صورة), Video (فيديو) or Document (مستند). None is selected by default.
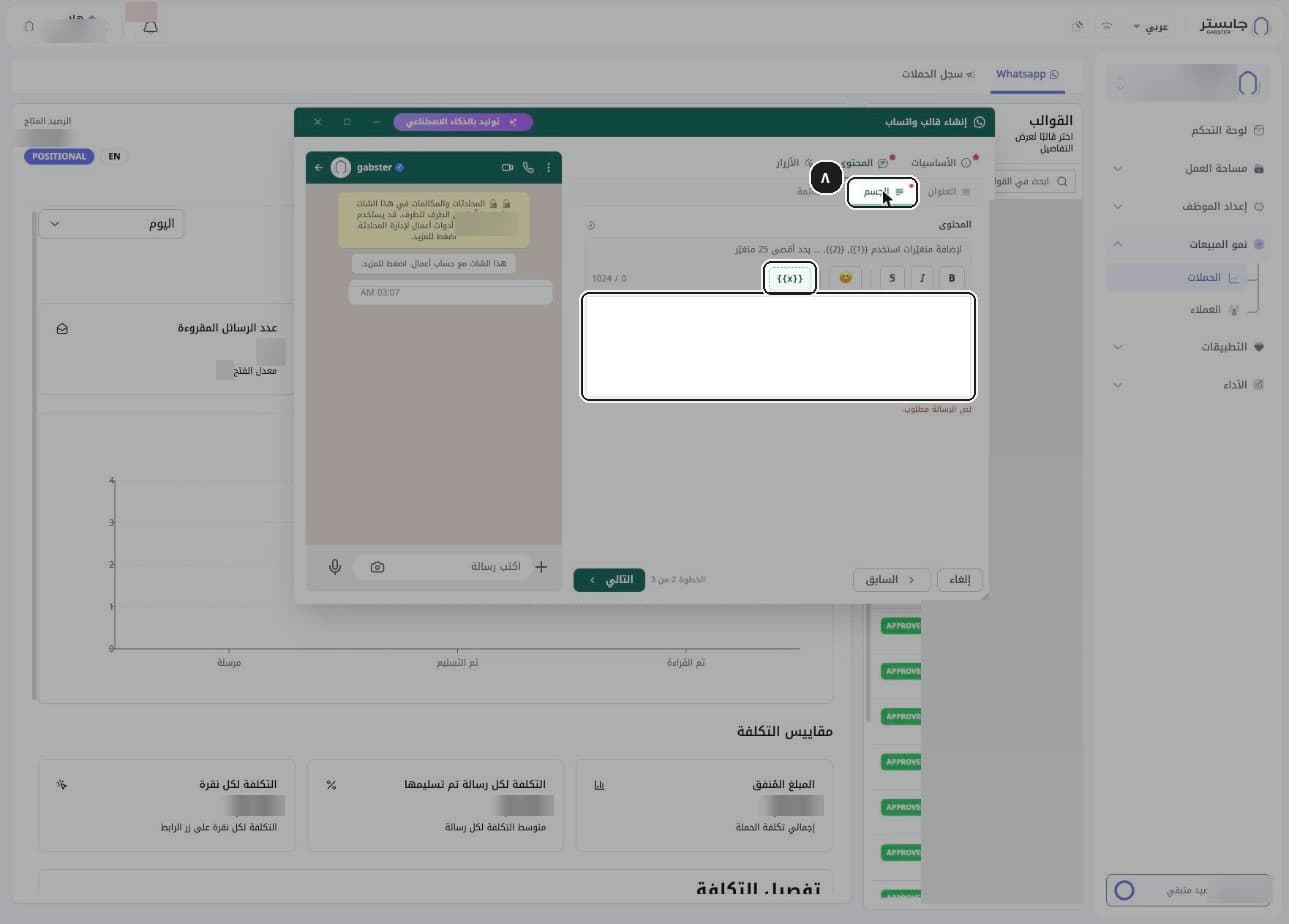
Open Body (الجسم) and write the message. For every value that changes per customer, type a variable such as {{1}} or {{2}}, as the hint above the editor explains. The editor toolbar also has a {{x}} button.
The body is required, up to 1,024 characters and 25 variables. The live preview on the left shows the message as you build it.
In the Buttons (الأزرار) step, choose No buttons (لا يوجد ازرار), Quick reply (رد سريع) or CTA button (زر CTA). No buttons is selected by default.
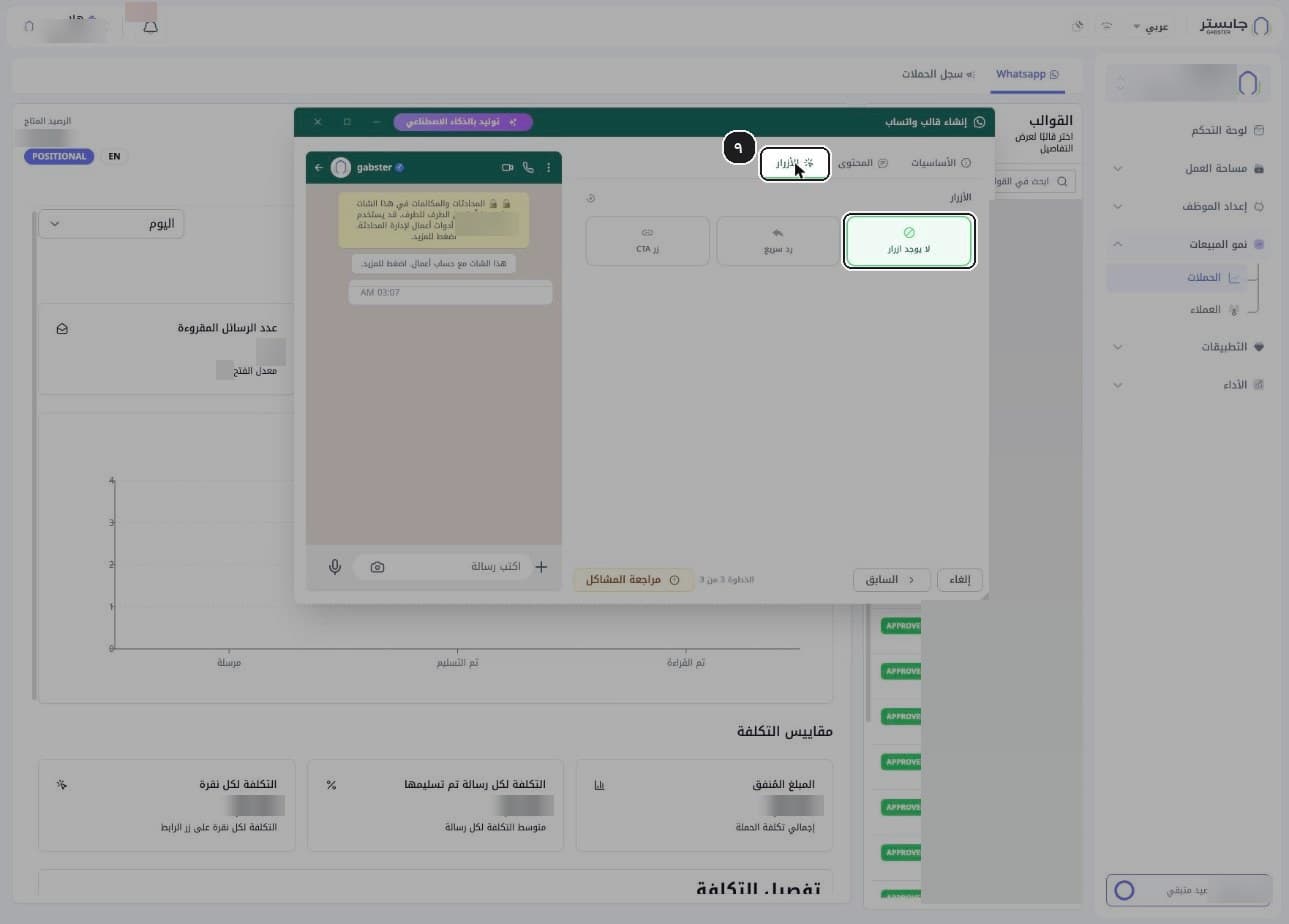
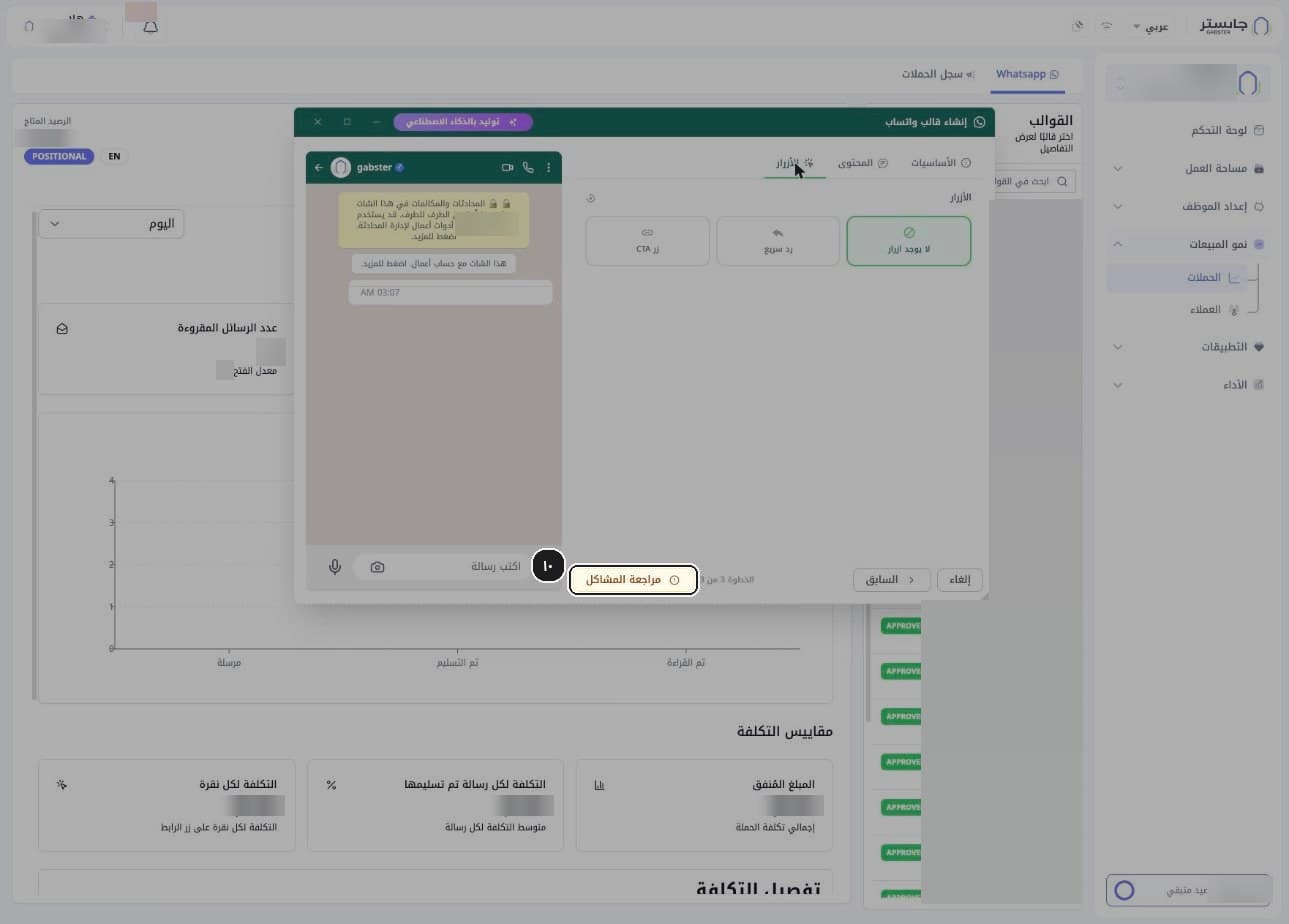
Fix any remaining problems, then submit the template. While fields are missing, step 3 shows Review issues (مراجعة المشاكل) instead of a final button.
When nothing is missing, the button becomes Create template (إنشاء القالب). The template goes to Meta for review and starts as PENDING; its approval shows only as the status badge in the template list.
B. Prepare and send a campaign
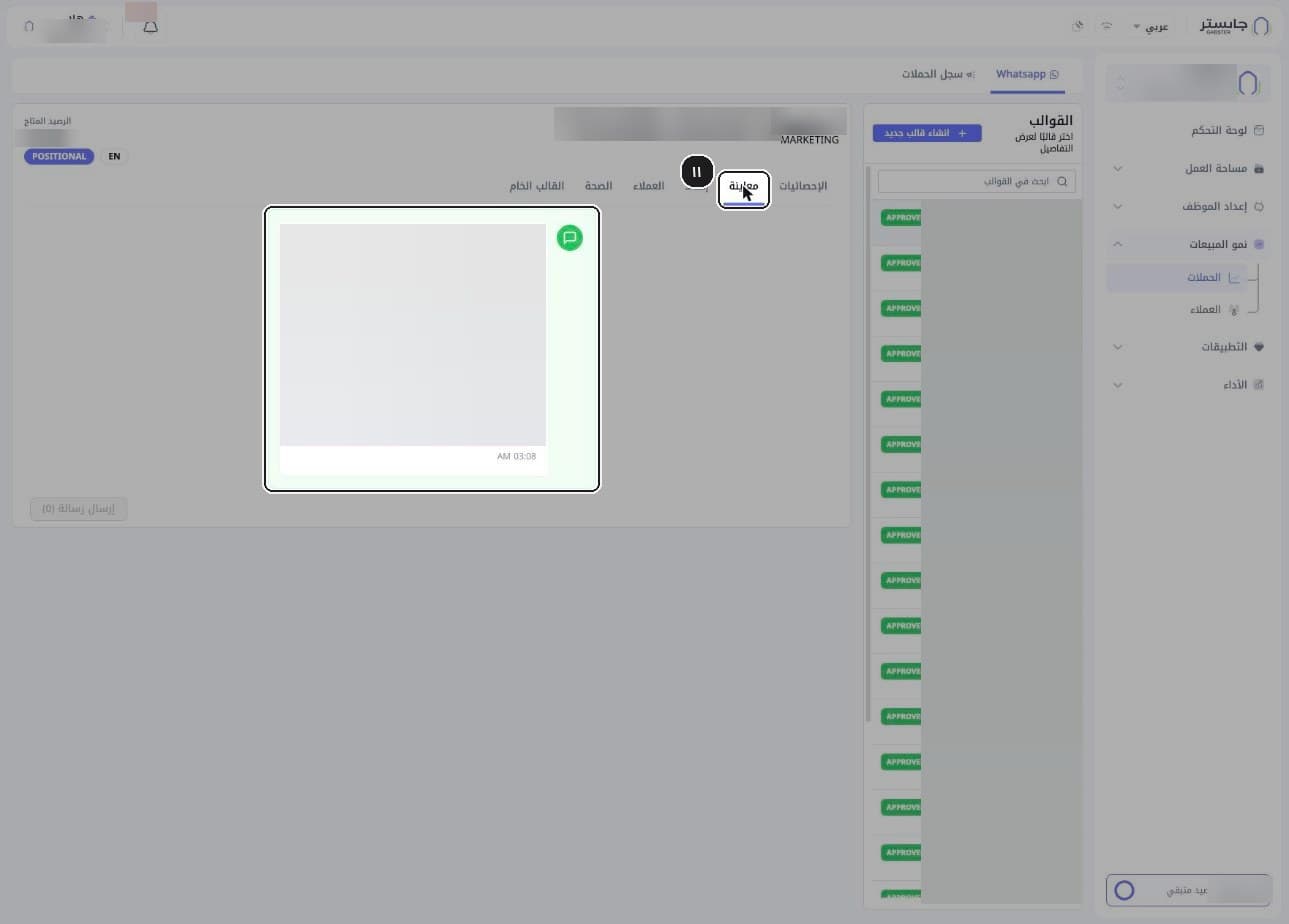
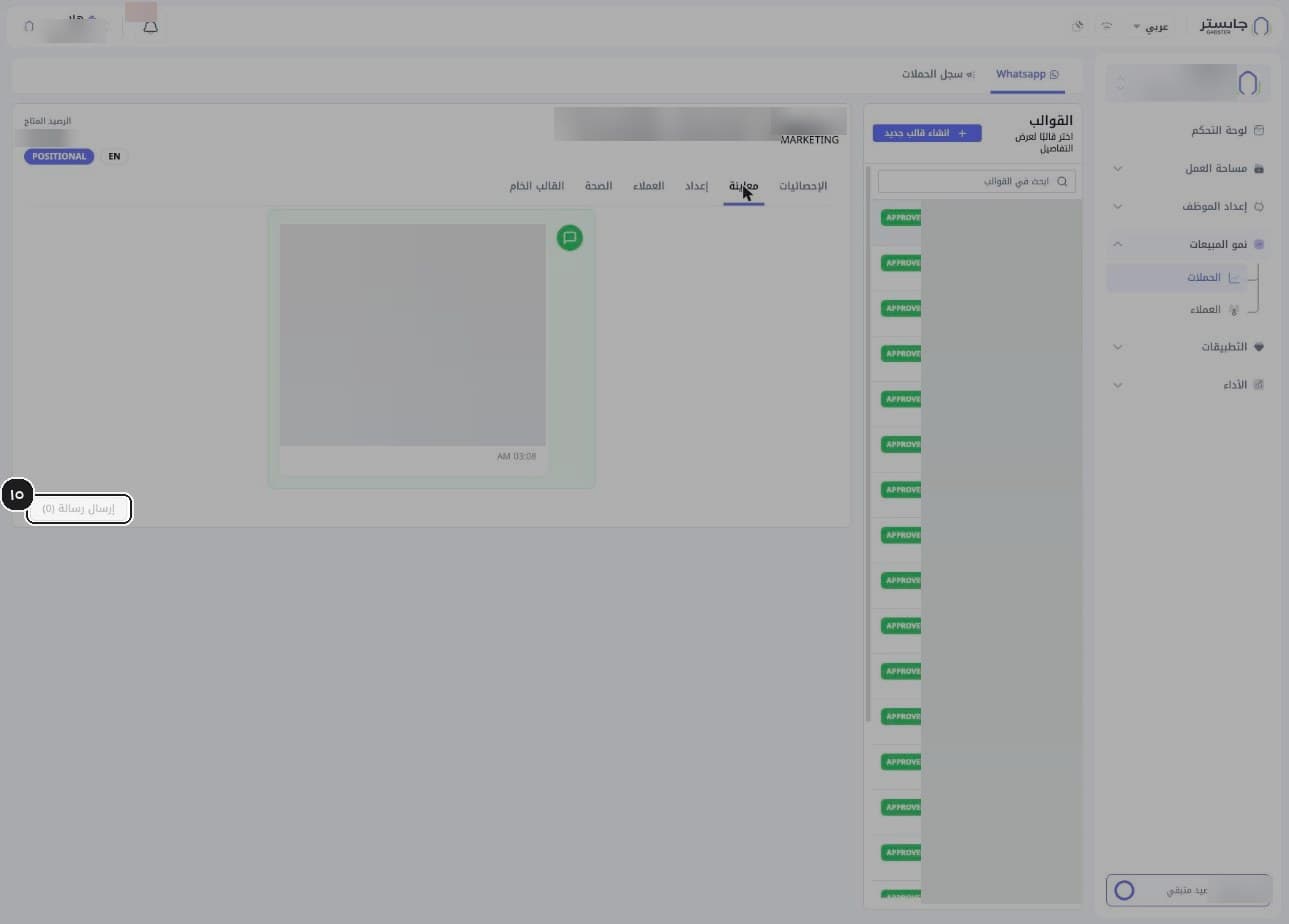
Select an approved template and open Preview (معاينة).
The template appears as a WhatsApp message bubble, with its variables shown as written ({{1}}…) and its buttons.
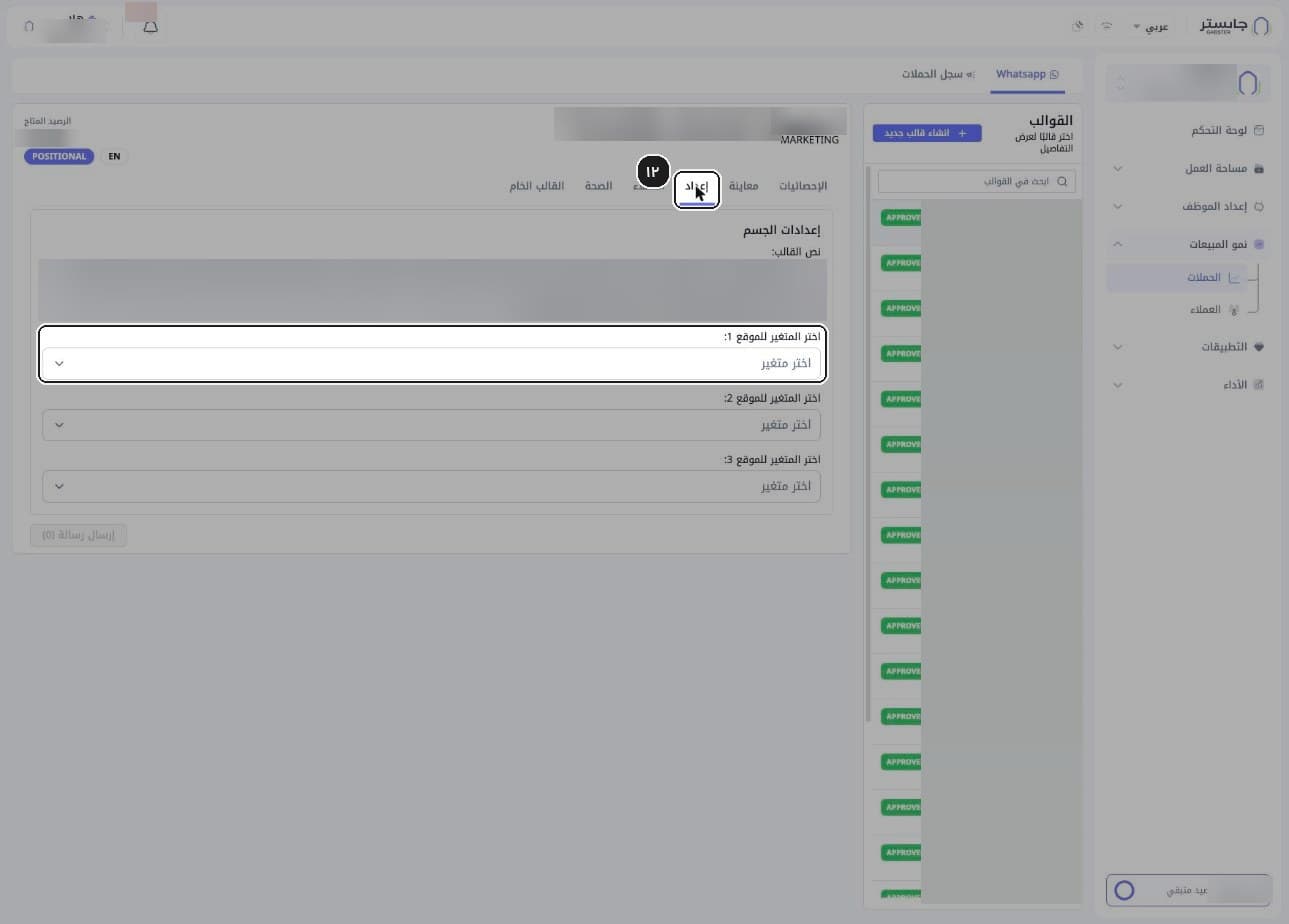
Open Setup (إعداد) and choose a value for each variable from its Choose a variable (اختر متغير) dropdown.
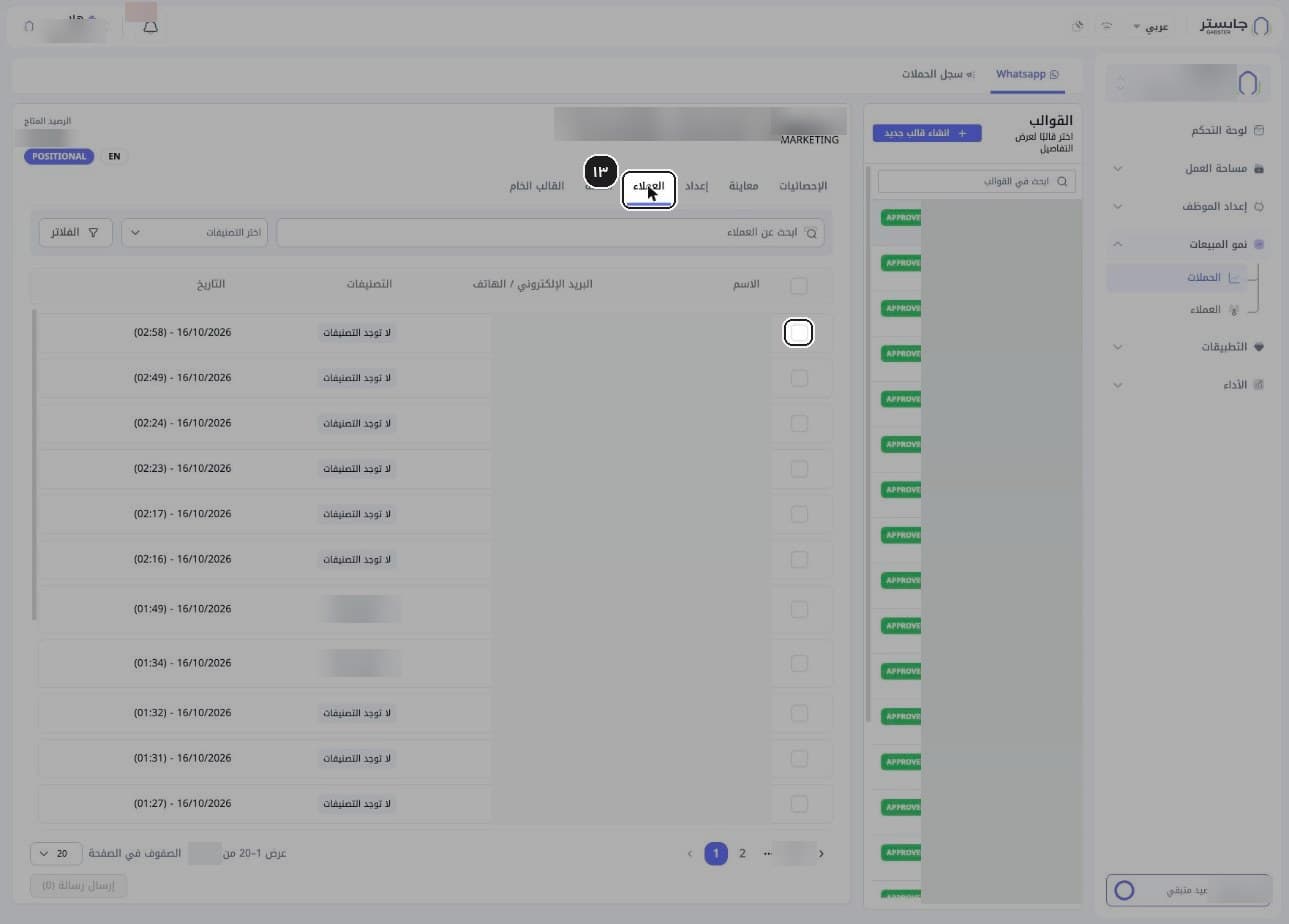
Open Customers (العملاء) and tick the recipients. To narrow the list, use Search customers (ابحث عن العملاء), Choose tags (اختر التصنيفات) or Filters (الفلاتر).
The list shows 20 customers per page, with the same columns as the Customers page.
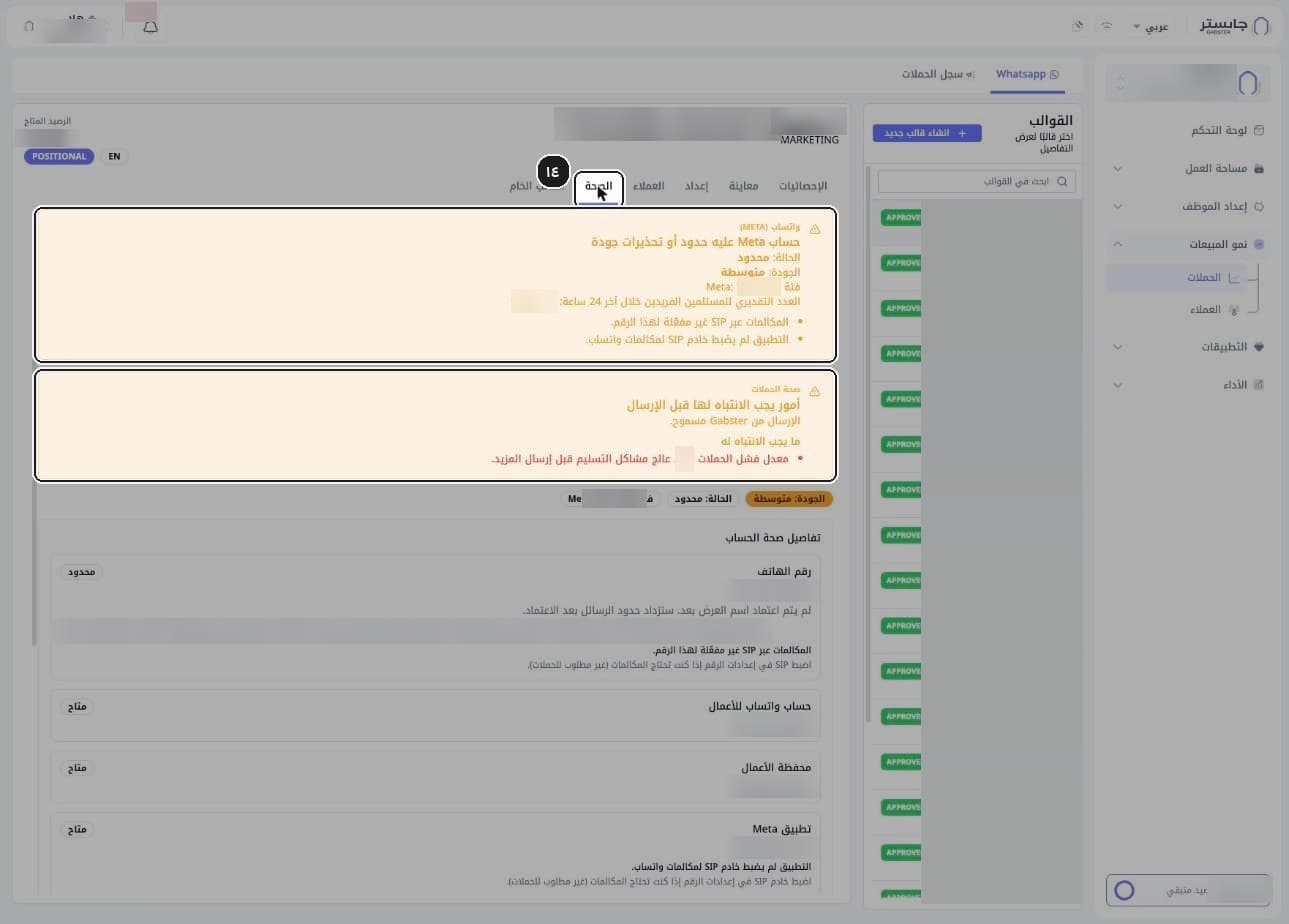
Before sending, open Health (الصحة) and check the Meta account status, quality, Meta tier and the Campaign health (صحة الحملات) warning.
Orange cards list limits and warnings, such as a Limited (محدود) status, the unique-recipient limit for the last 24 hours, or a high campaign failure rate.
Click Send message (N) (إرسال رسالة (N)) to send the campaign.
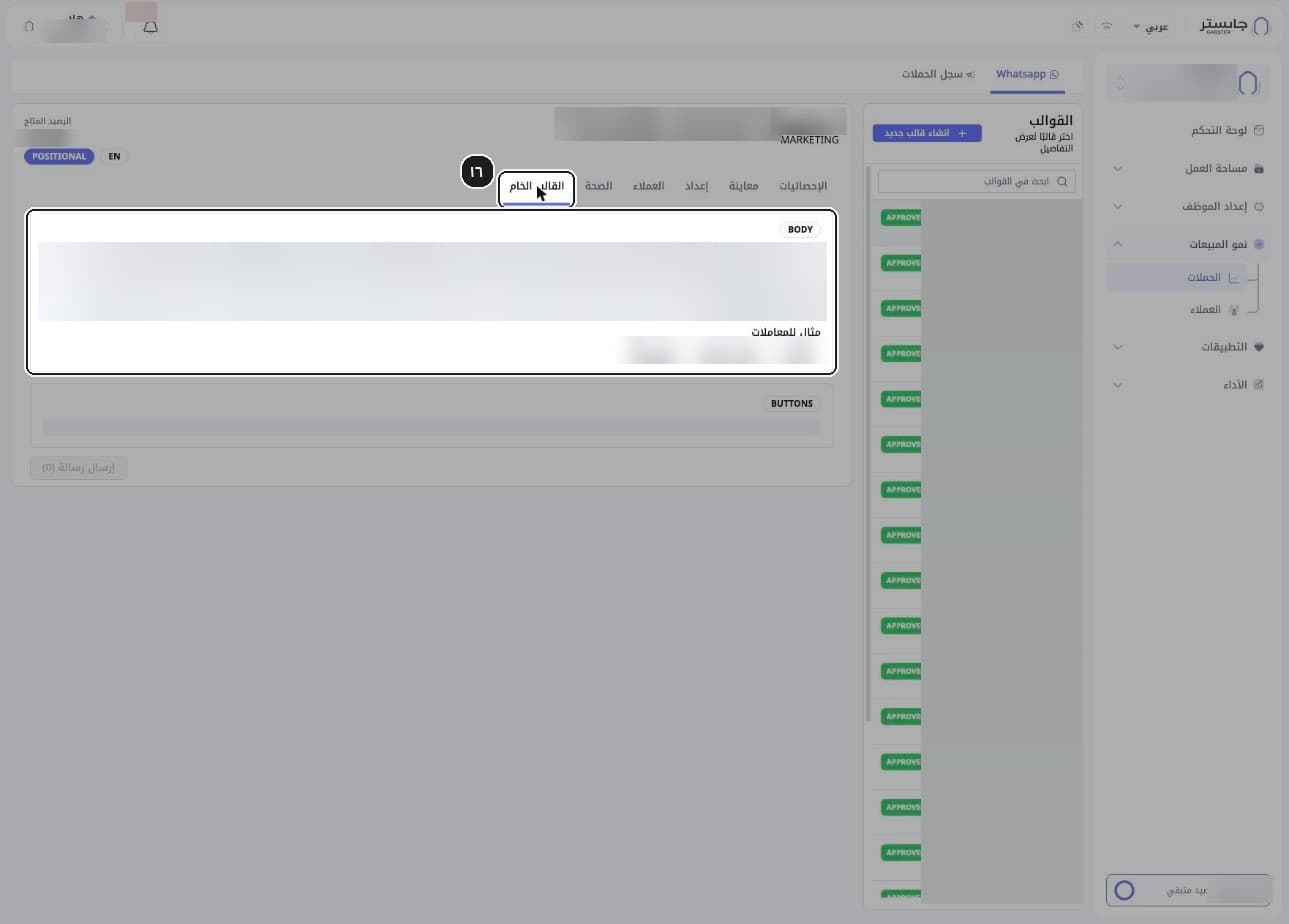
(Optional) Open Raw template (القالب الخام) to see the template's parts as stored: the BODY text with Parameter examples (مثال للمعاملات), and the BUTTONS card.
C. Statistics and Campaign Log
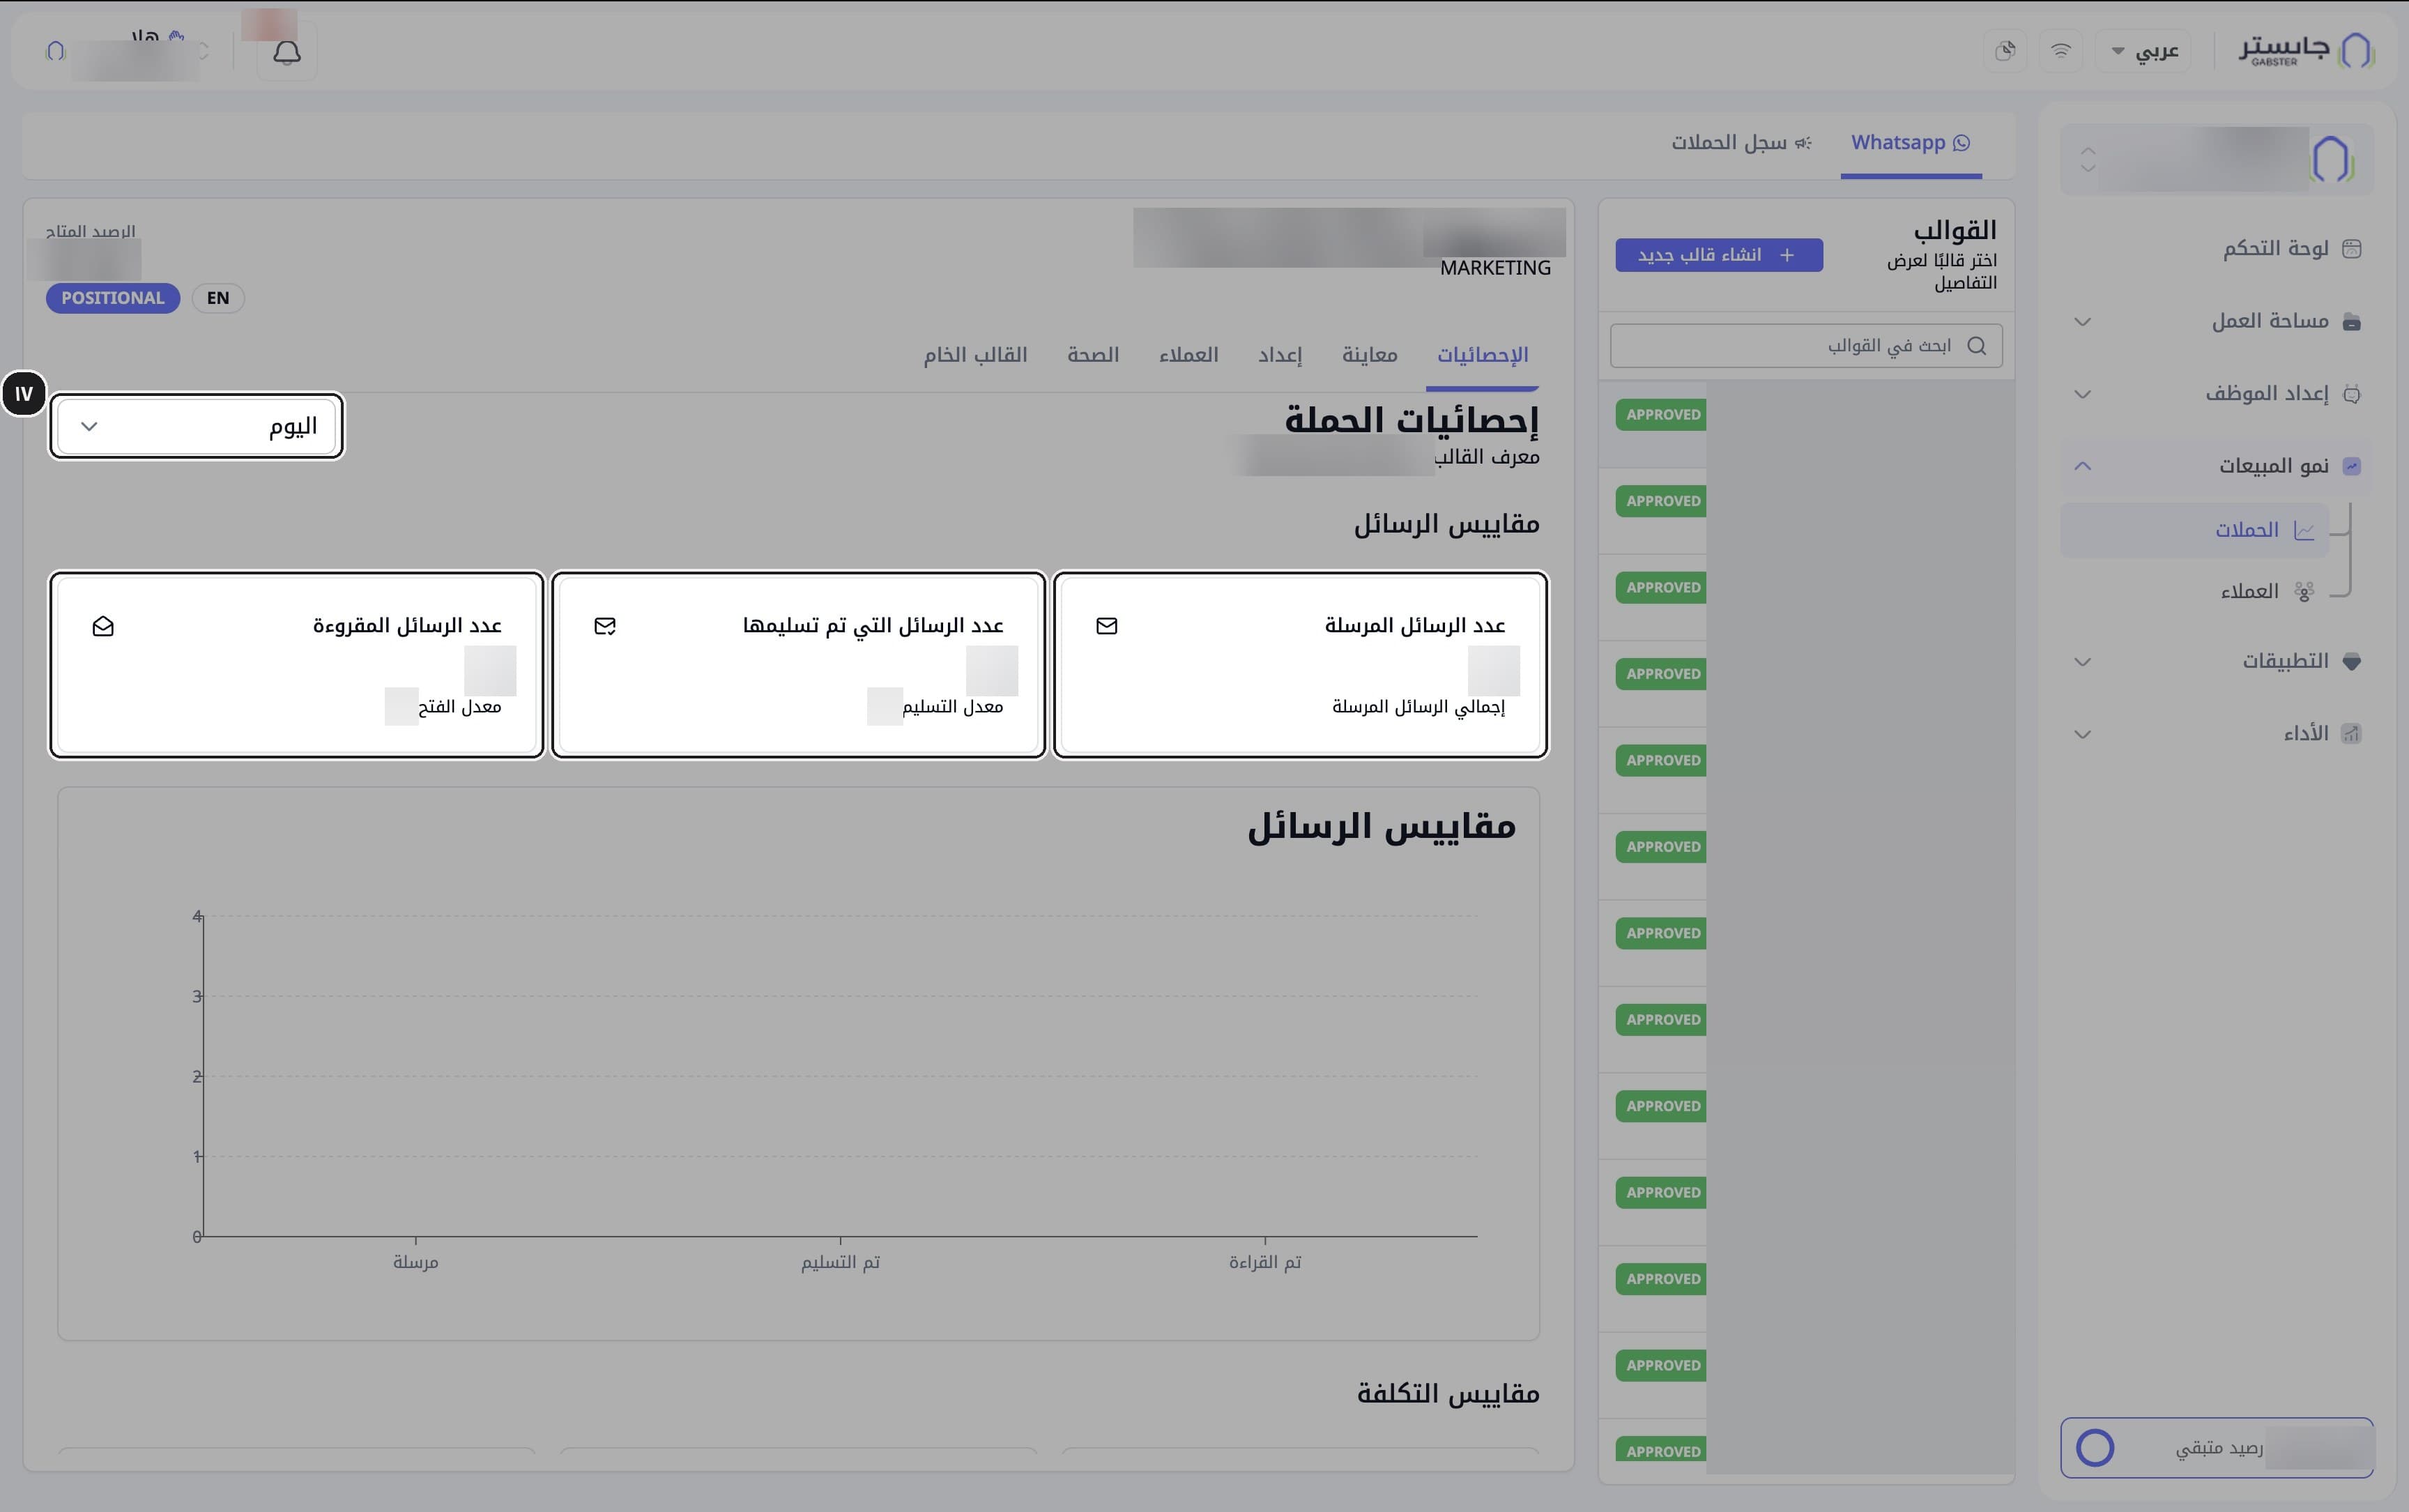
On Statistics (الإحصائيات), pick a period (default Today (اليوم)), then read messages sent, delivered with the Delivery rate (معدل التسليم), and read with the Open rate (معدل الفتح).
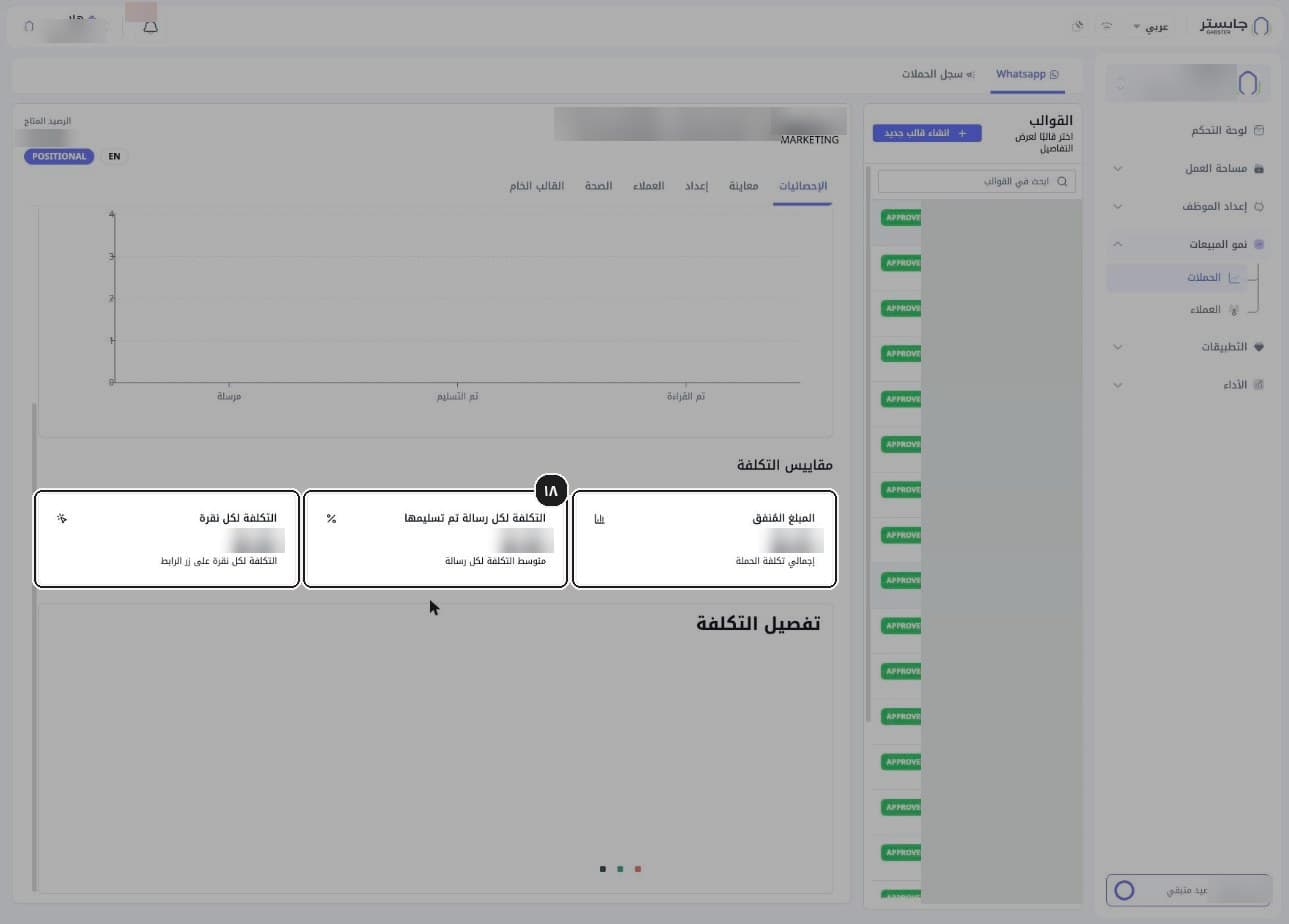
Scroll to the cost metrics: Amount spent (المبلغ المُنفق), Cost per delivered message (التكلفة لكل رسالة تم تسليمها) and Cost per click (التكلفة لكل نقرة).
These amounts are in US dollars, while the available balance in the template header is in SAR.
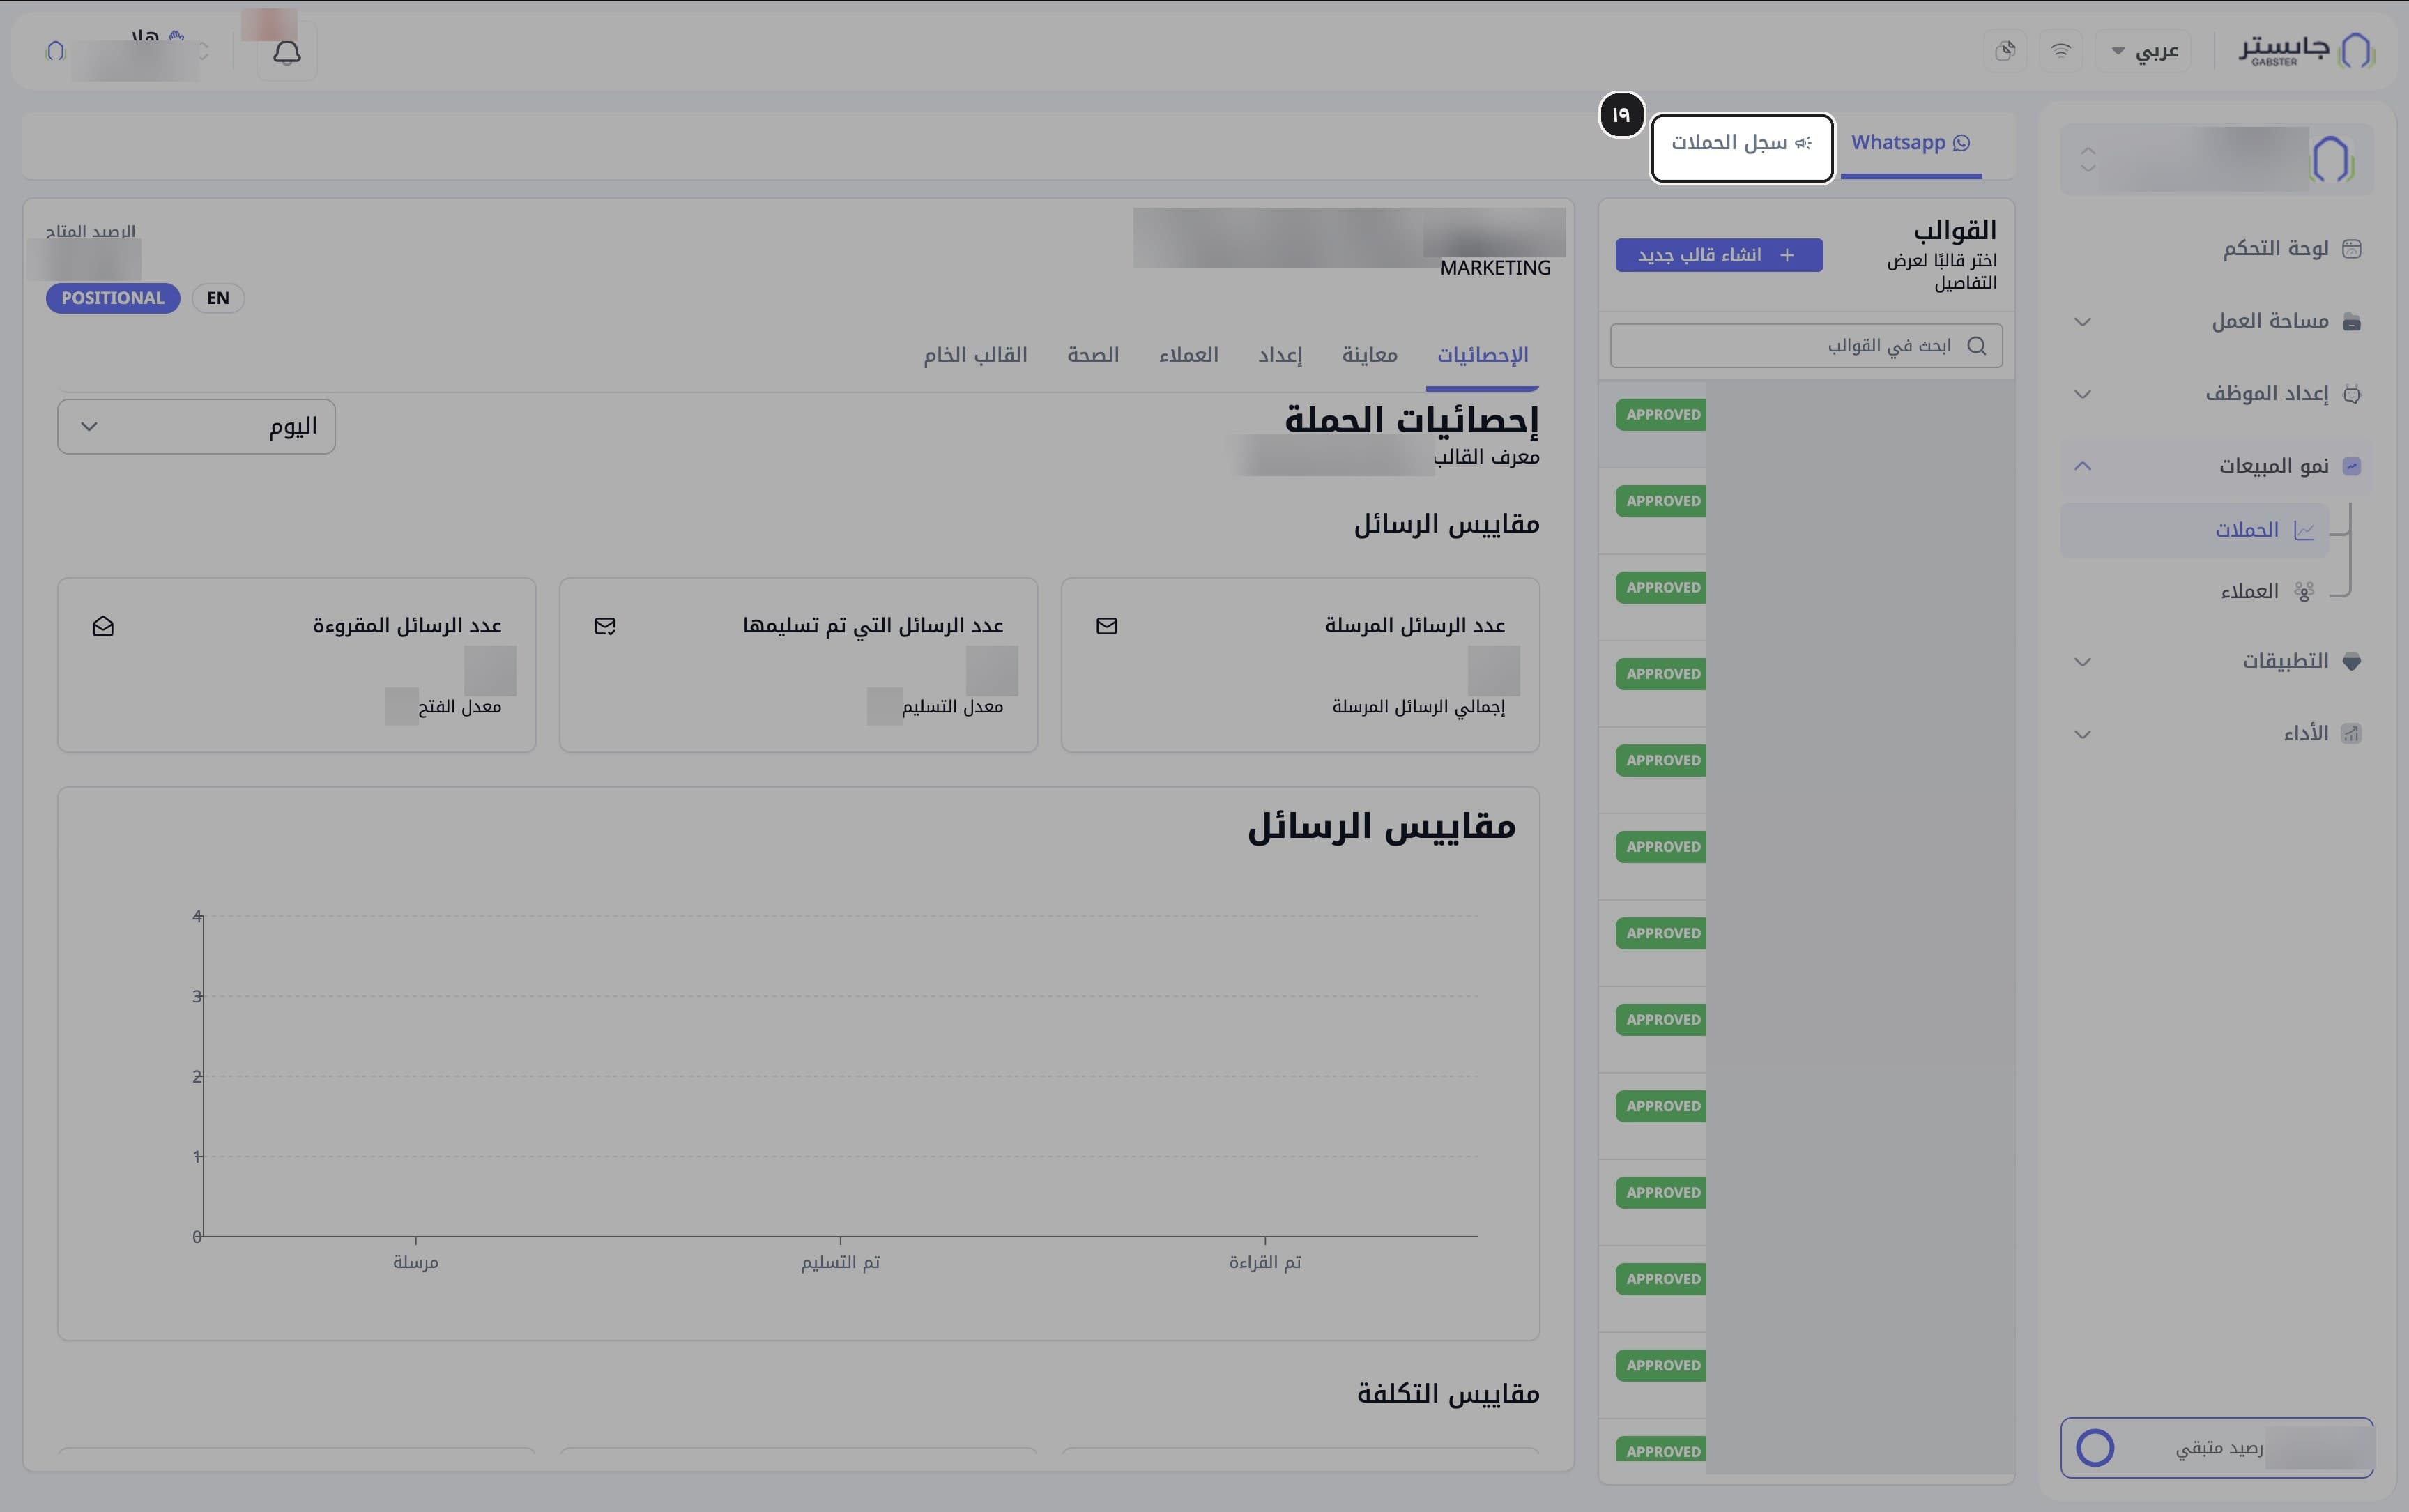
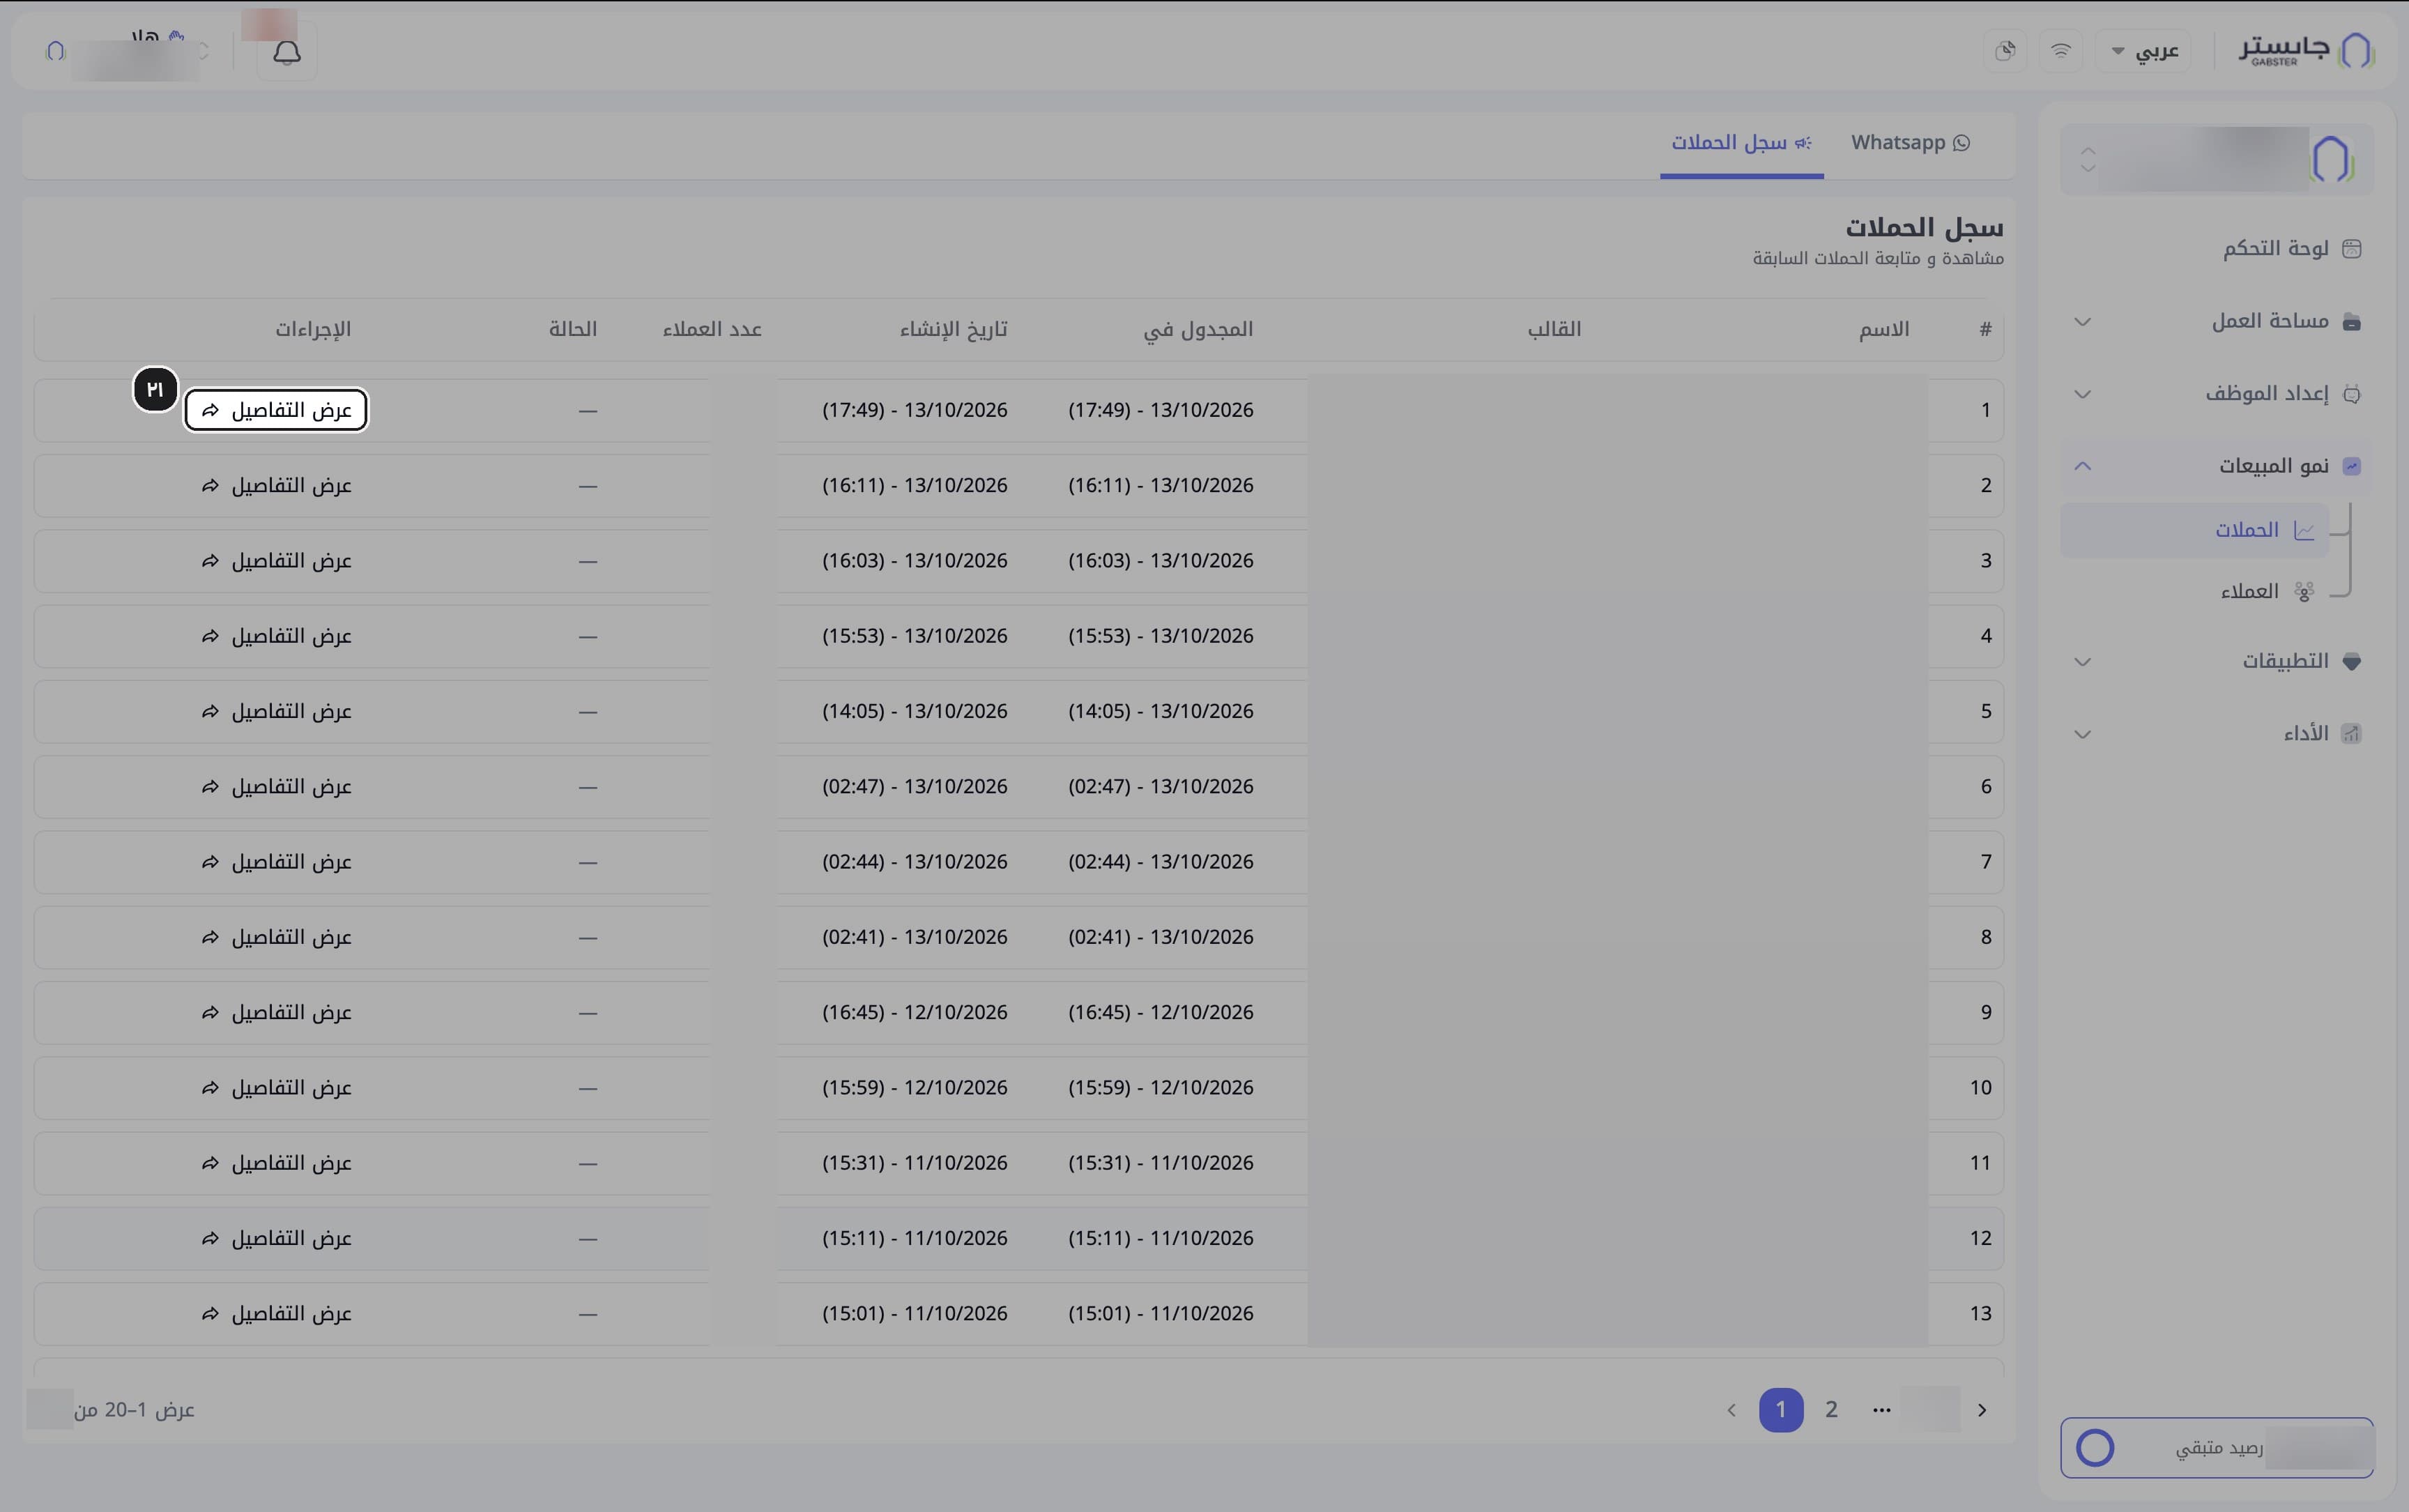
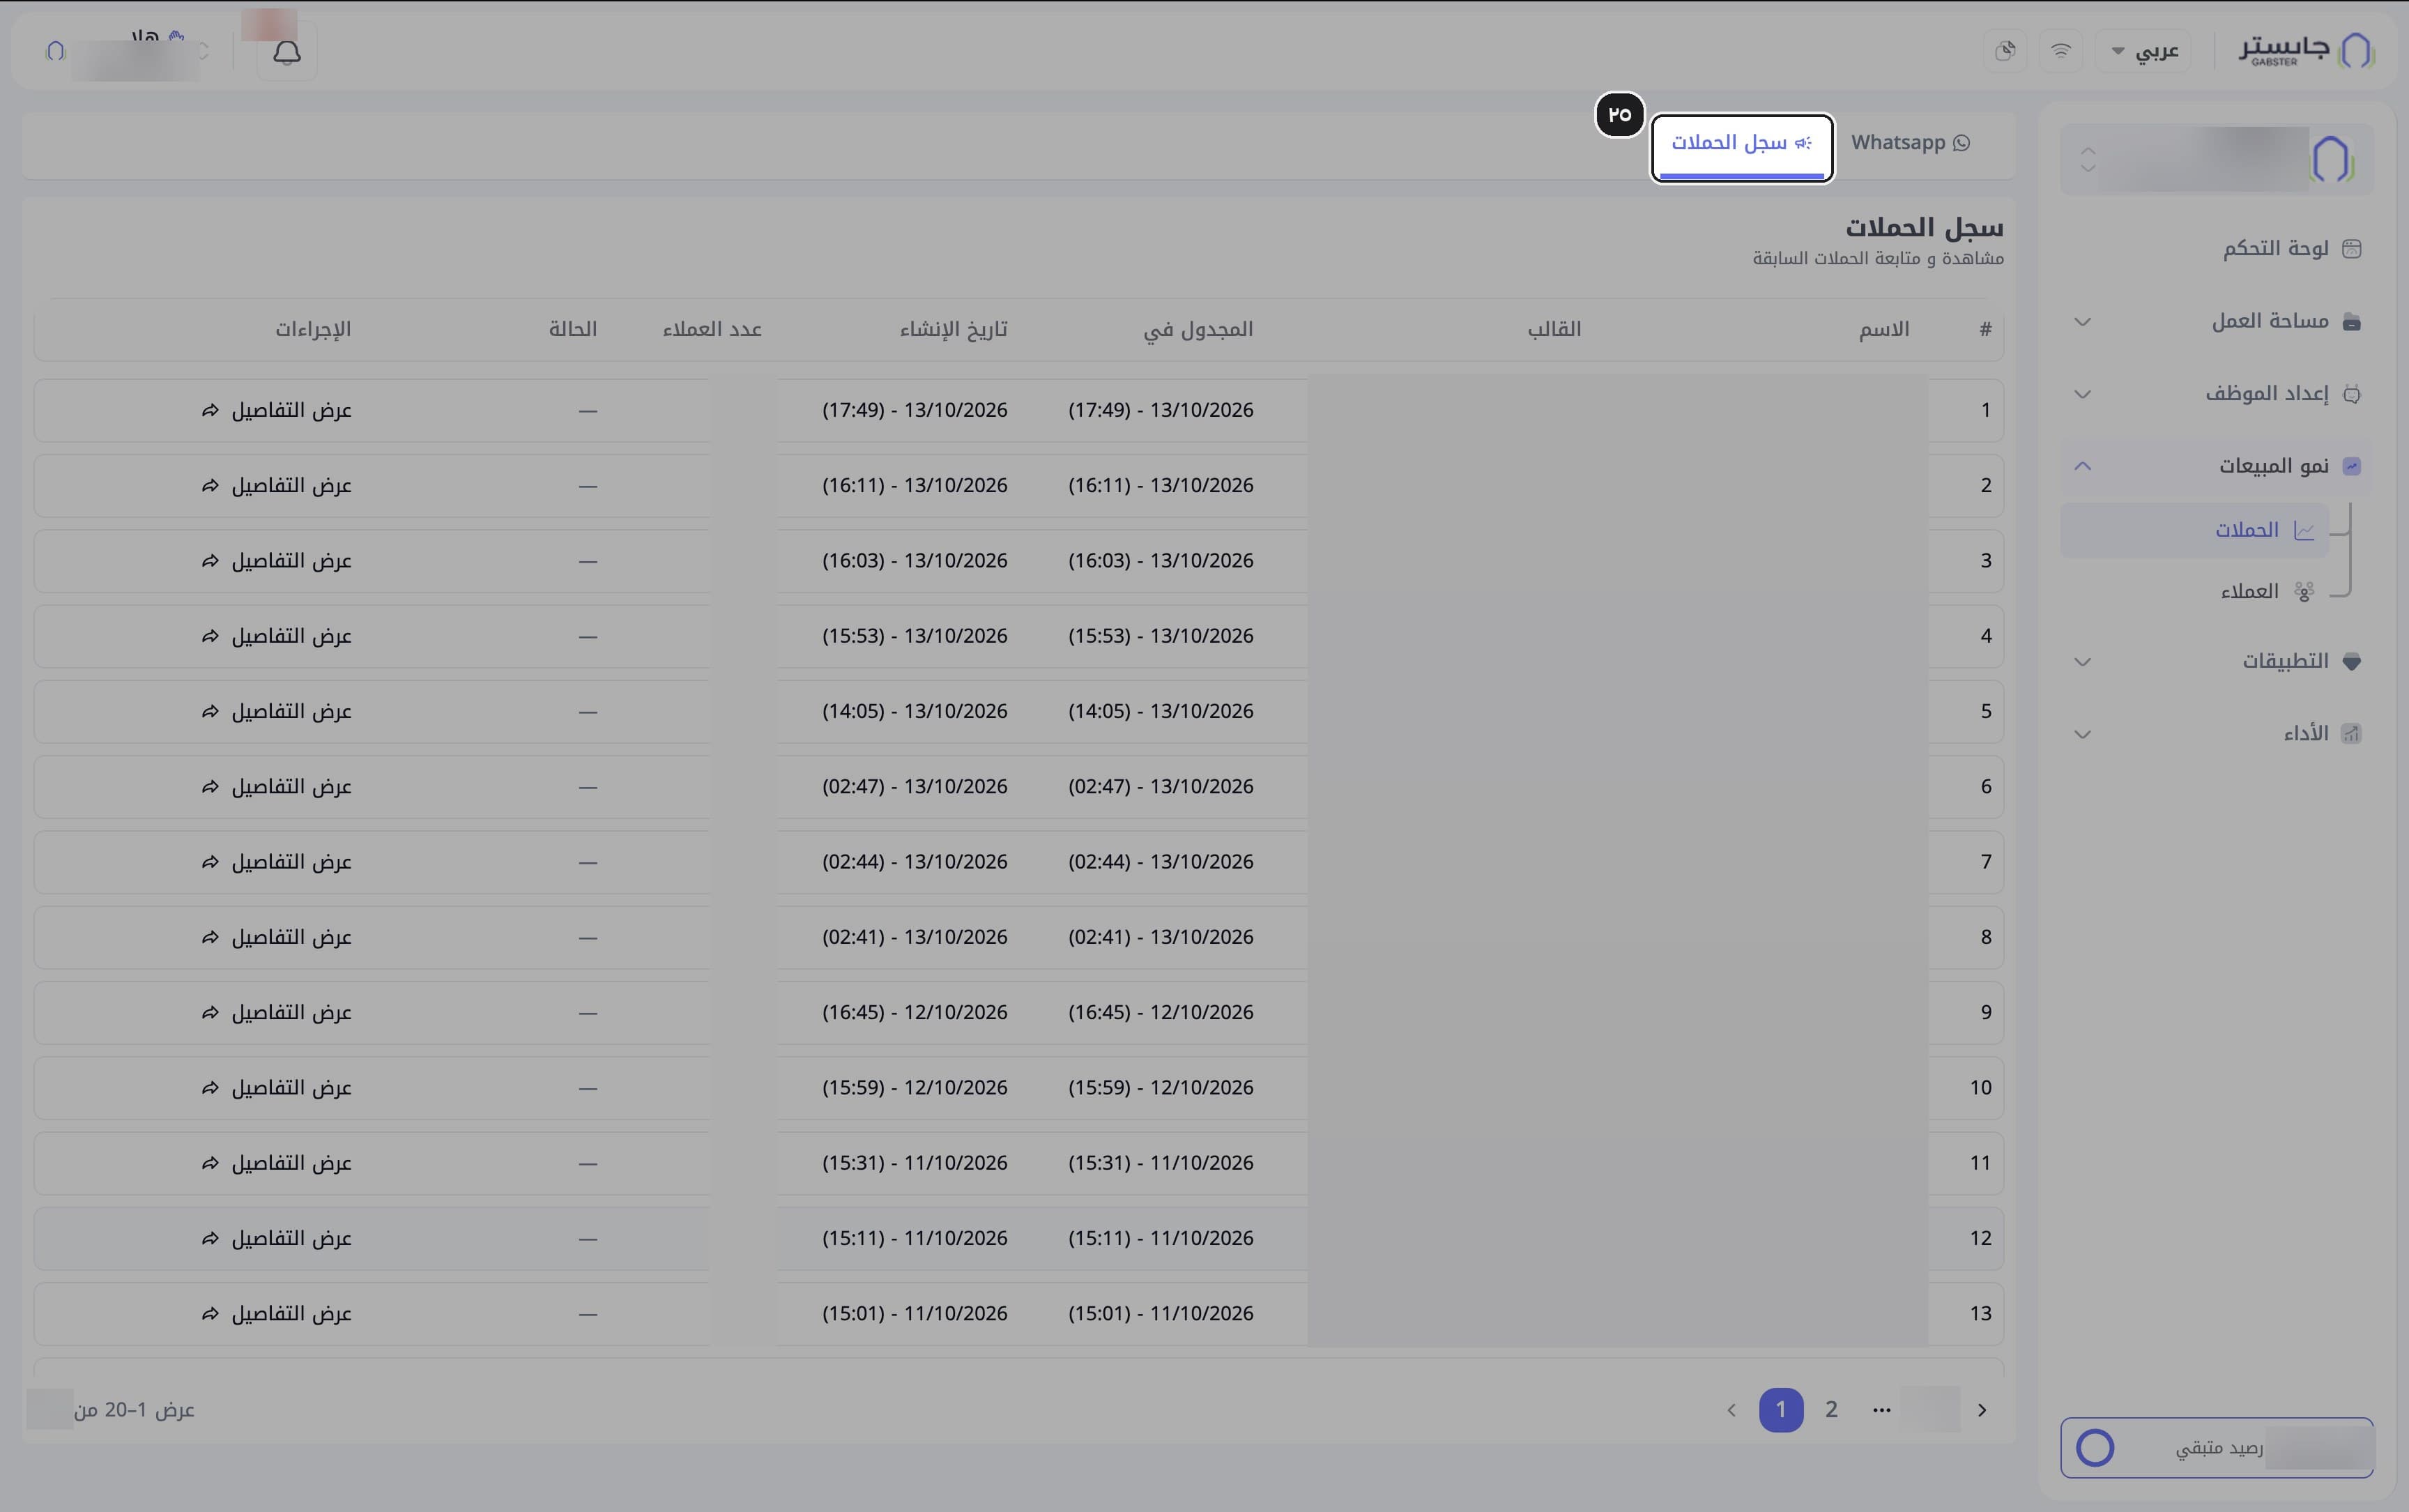
Switch to the Campaign Log (سجل الحملات) tab.
A table of past campaigns appears, newest first, 20 per page.
Read a campaign row: name, WhatsApp template (القالب), Scheduled at (المجدول في), created date, Number of customers (عدد العملاء) and status.
Campaigns sent from the dashboard go out straight away; there is no scheduling, so Scheduled at shows when the campaign was created.
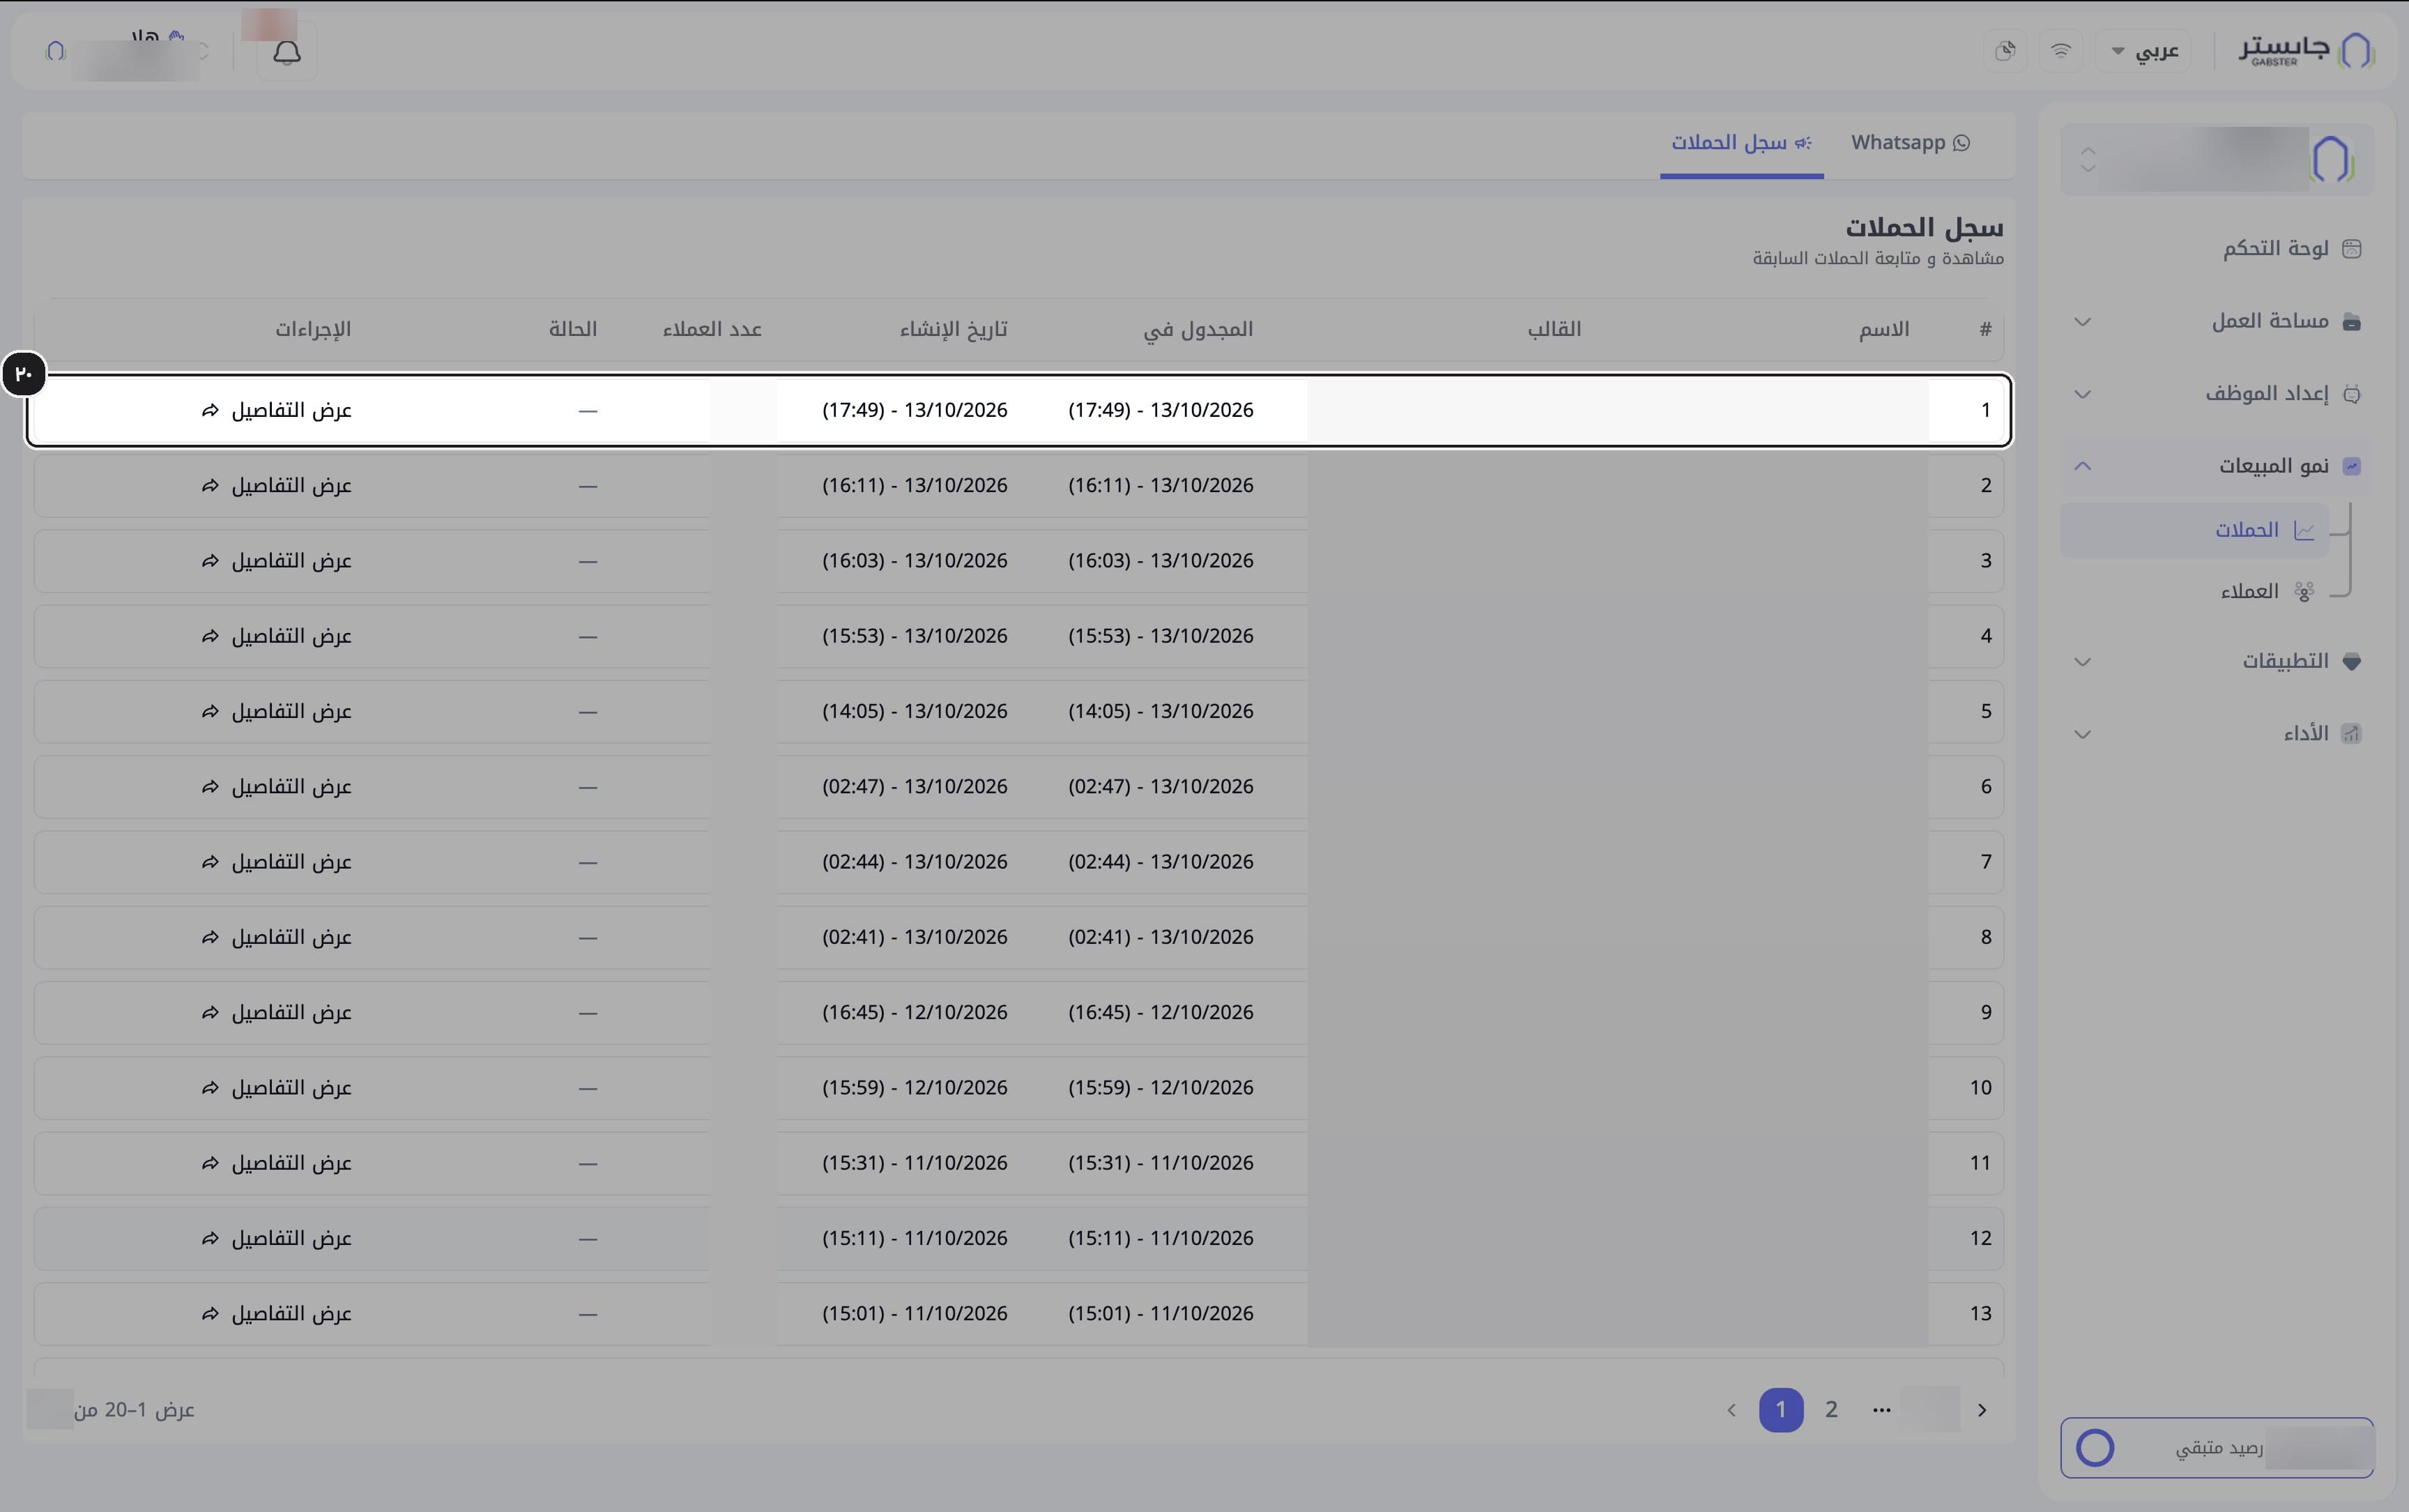
Click View details (عرض التفاصيل) on a campaign row.
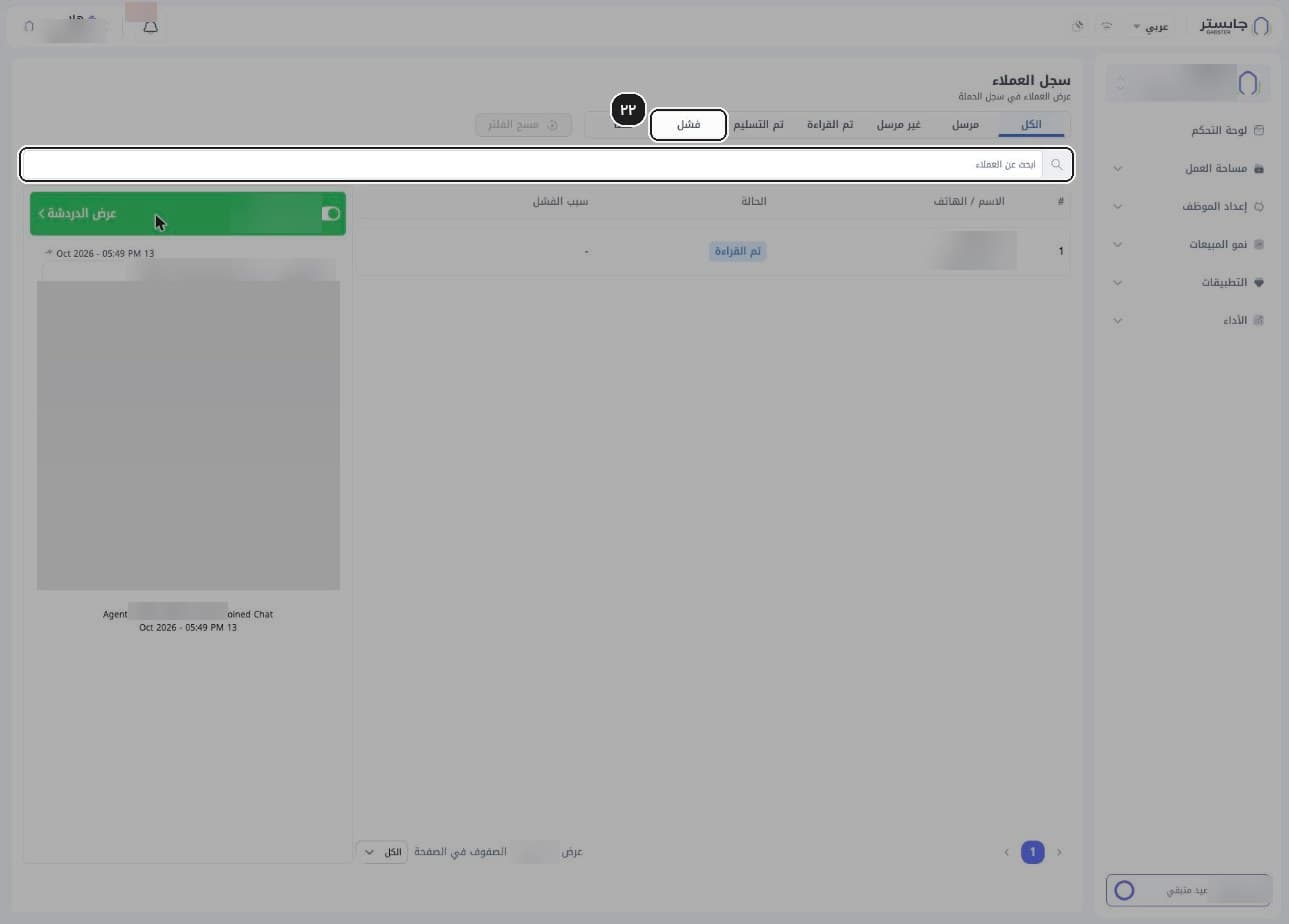
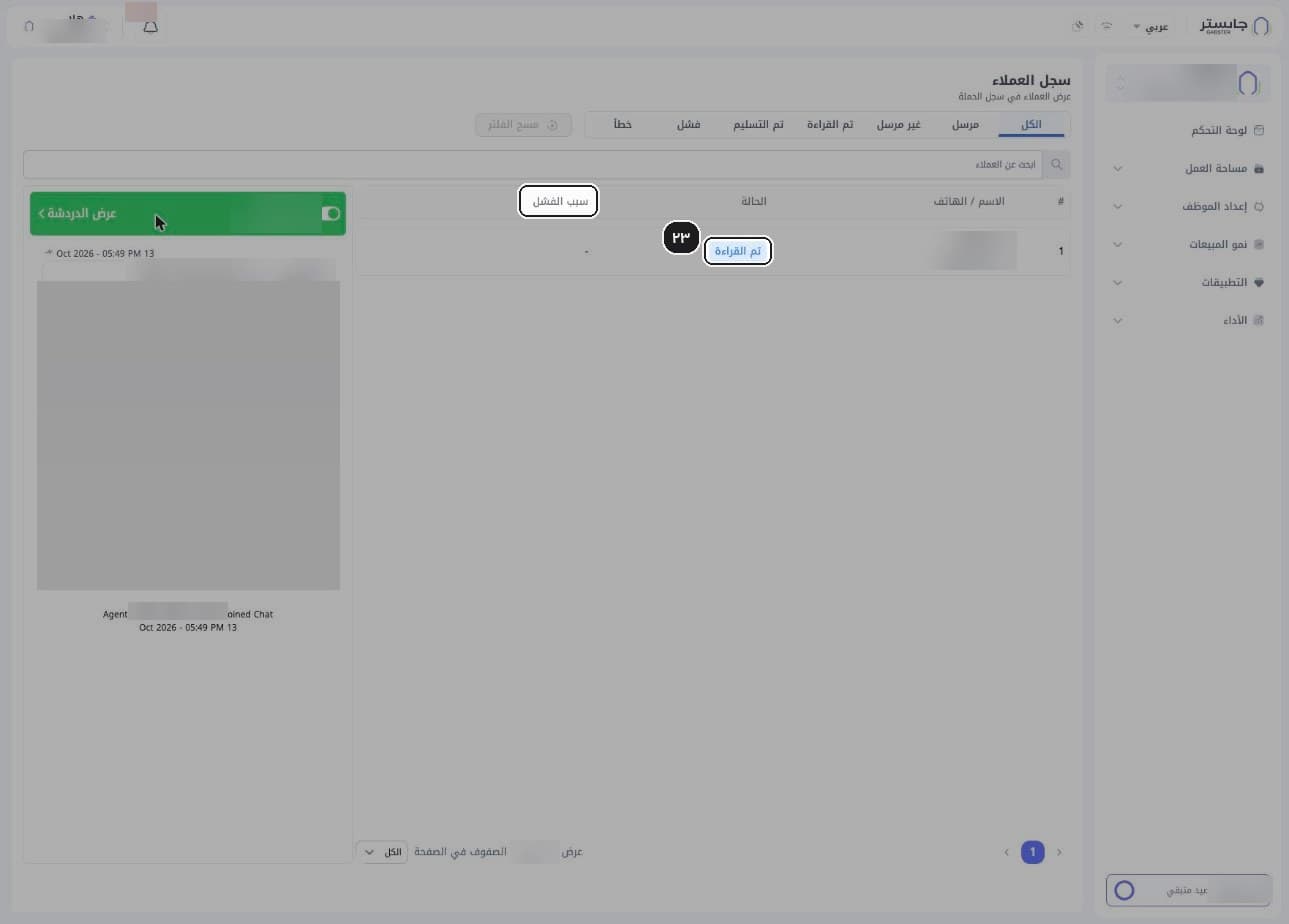
The campaign's Customer log (سجل العملاء) page opens: one row per recipient with the delivery status and Failure reason (سبب الفشل).
Filter recipients by status — All (الكل), Sent (مرسل), Not sent (غير مرسل), Read (تم القراءة), Delivered (تم التسليم), Failed (فشل) or Error (خطأ) — or search in Search customers (ابحث عن العملاء).
Failed means the message was not delivered; Error is an older status that appears only on older campaigns.
Read the recipient's status, for example Read (تم القراءة). If sending failed, the reason appears under Failure reason; otherwise it shows "-".
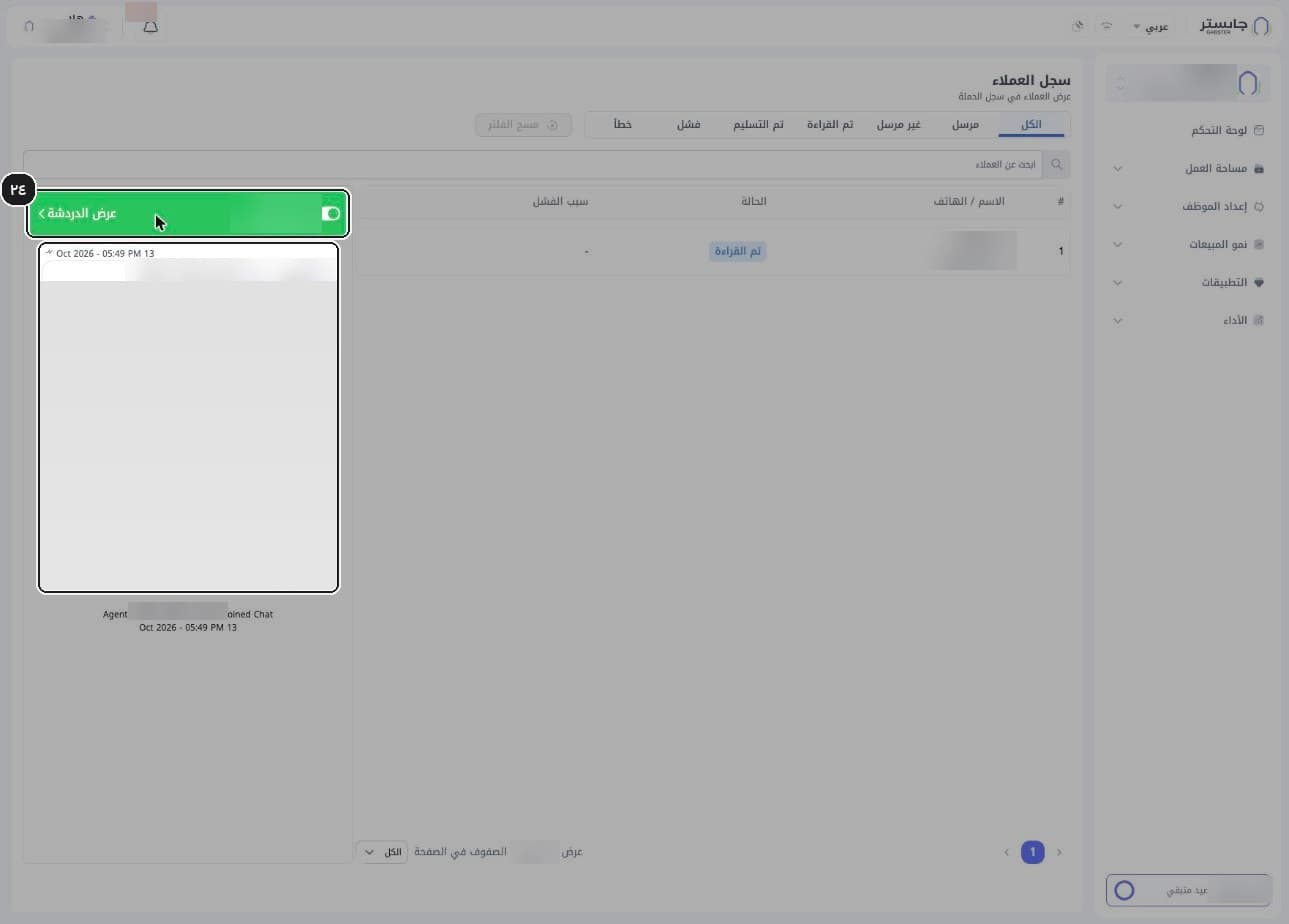
Read the recipient's messages in the side chat panel. The panel header shows the customer's name and number, next to Chat view (عرض الدردشة).
To return to the Campaign Log, use your browser's back button or the sidebar.
Related
Add, import and export your customers
Add a single customer, import up to 5,000 customers from a file, and export a filtered customer list.
Set up a calendar and take bookings
Create a calendar, build its booking form, set each member's working hours, then read the calendar and open a booking's details.