AI Agent setup
Knowledge Base
Add the information your AI Agent relies on to answer, and follow up on the questions it could not answer.
The Knowledge Base (قاعدة المعرفة) is the information your AI Agent draws on when it answers your customers. Add text you write yourself, files, pages from your website or your product catalogue. It also shows the questions the AI Agent could not answer and places where your sources disagree, so you can keep its knowledge complete and accurate.
How to open it
In the sidebar, open AI Agent Setup (إعداد الموظف) and choose Knowledge Base (قاعدة المعرفة).
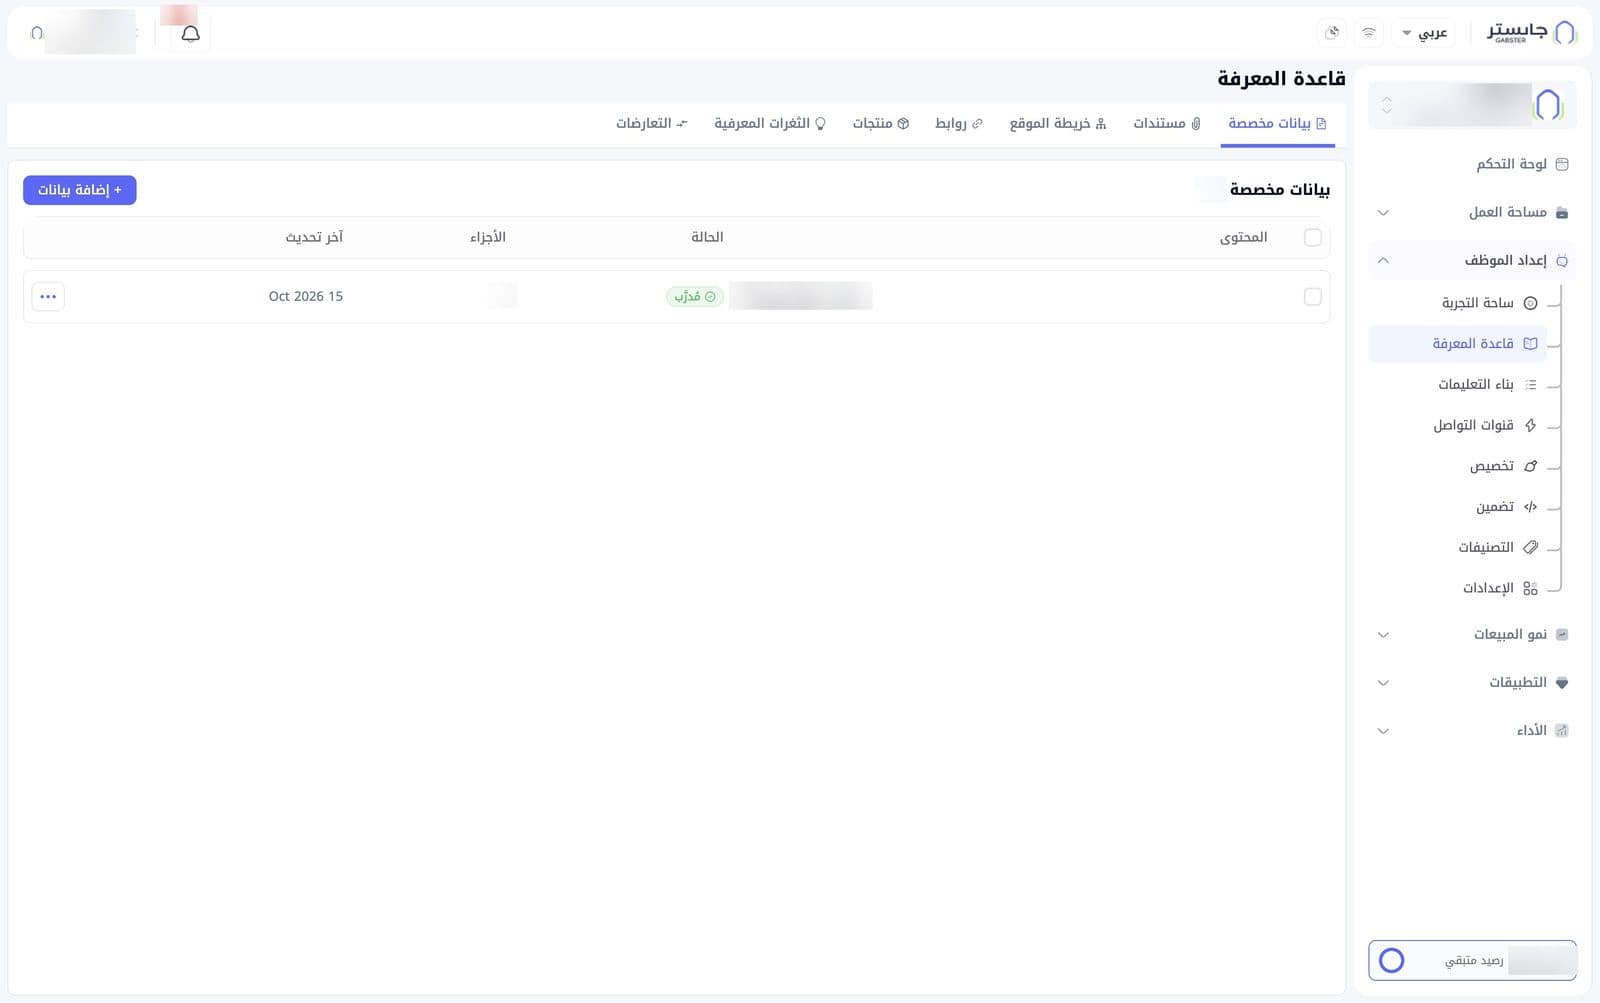
The page has seven tabs:
| Tab | What it holds |
|---|---|
| Custom Data (بيانات مخصصة) | Text you write directly into your AI Agent's knowledge |
| Documents (مستندات) | Files you upload |
| Sitemap (خريطة الموقع) | Sitemaps whose listed pages the AI Agent learns from |
| Links (روابط) | Individual web pages |
| Products (منتجات) | A product catalogue from a spreadsheet |
| Knowledge Gaps (الثغرات المعرفية) | Questions your AI Agent could not answer |
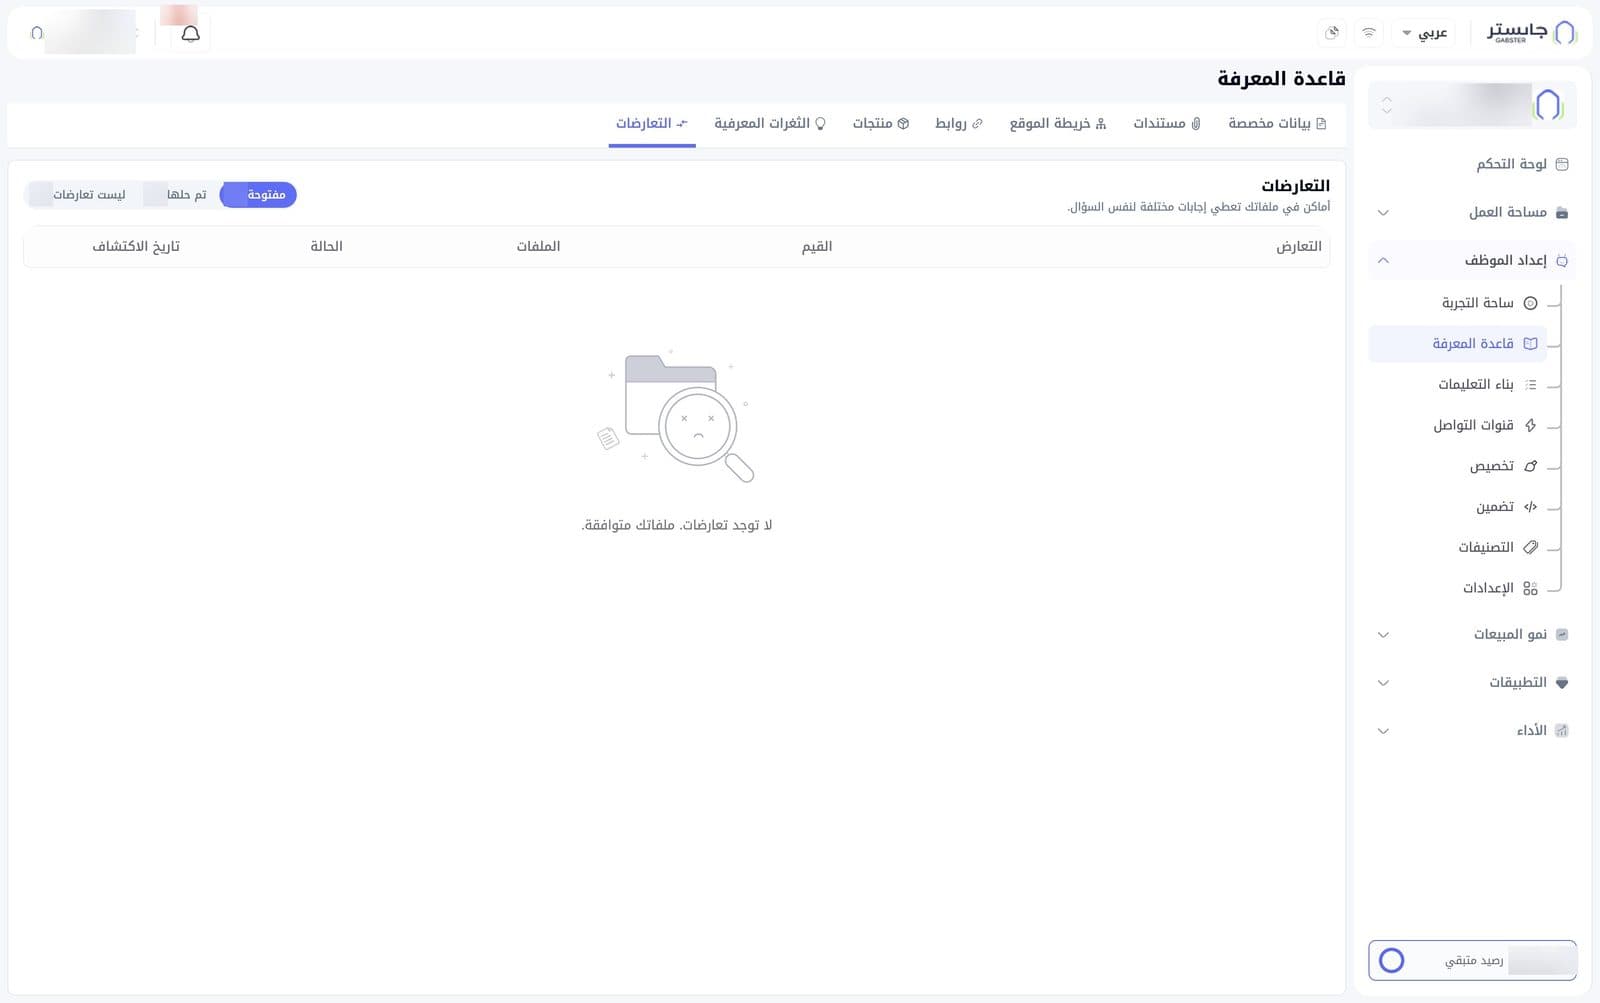
| Conflicts (التعارضات) | Places in your files that give different answers to the same question |
What the source tables share
The source tables (Custom Data, Documents, Sitemap and Links) have several things in common:
- Status (الحالة): the green Trained (مُدرَّب) badge means the item has been added to your AI Agent's knowledge.
- Chunks (الأجزاء): the number of chunks the item was split into.
- A checkbox in the table header and one on each row.
In the Custom Data, Documents and Links tabs, each row's ⋯ menu always includes:
- View chunks (عرض الأجزاء): shows the chunks the item was split into.
- Delete (حذف, in red).
Custom Data
Write information here in your own words, such as your policies or answers to frequent questions. The section header shows the number of entries, and the table shows for each entry its Content (المحتوى), Status (الحالة), Chunks (الأجزاء) and Last updated (آخر تحديث).
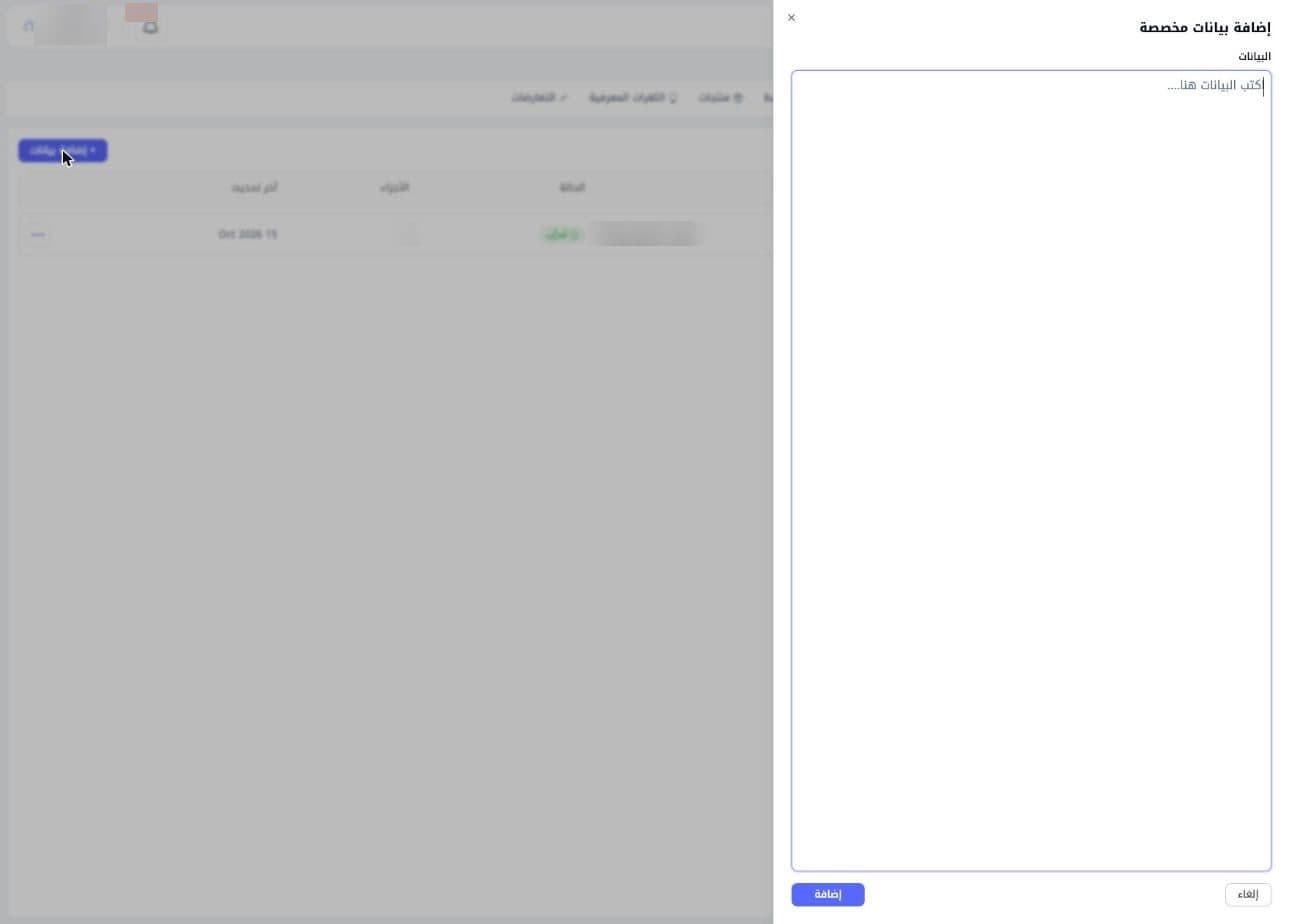
To add data: click + Add data (إضافة بيانات). The Add custom data (إضافة بيانات مخصصة) drawer opens with a single Data (البيانات) text box. Write the information and click Add (إضافة), or Cancel (إلغاء) to leave.
A Custom data created successfully (تم إنشاء البيانات المخصصة بنجاح) message confirms it. The entry is listed straight away with the status Processing (قيد المعالجة) while it trains in the background, then shows Trained.
There is no practical length limit, and you can use Markdown: headings (#) help your AI Agent split the text into topics.
Row ⋯ menu: View chunks (عرض الأجزاء), Edit (تعديل) and Delete (حذف).
Documents
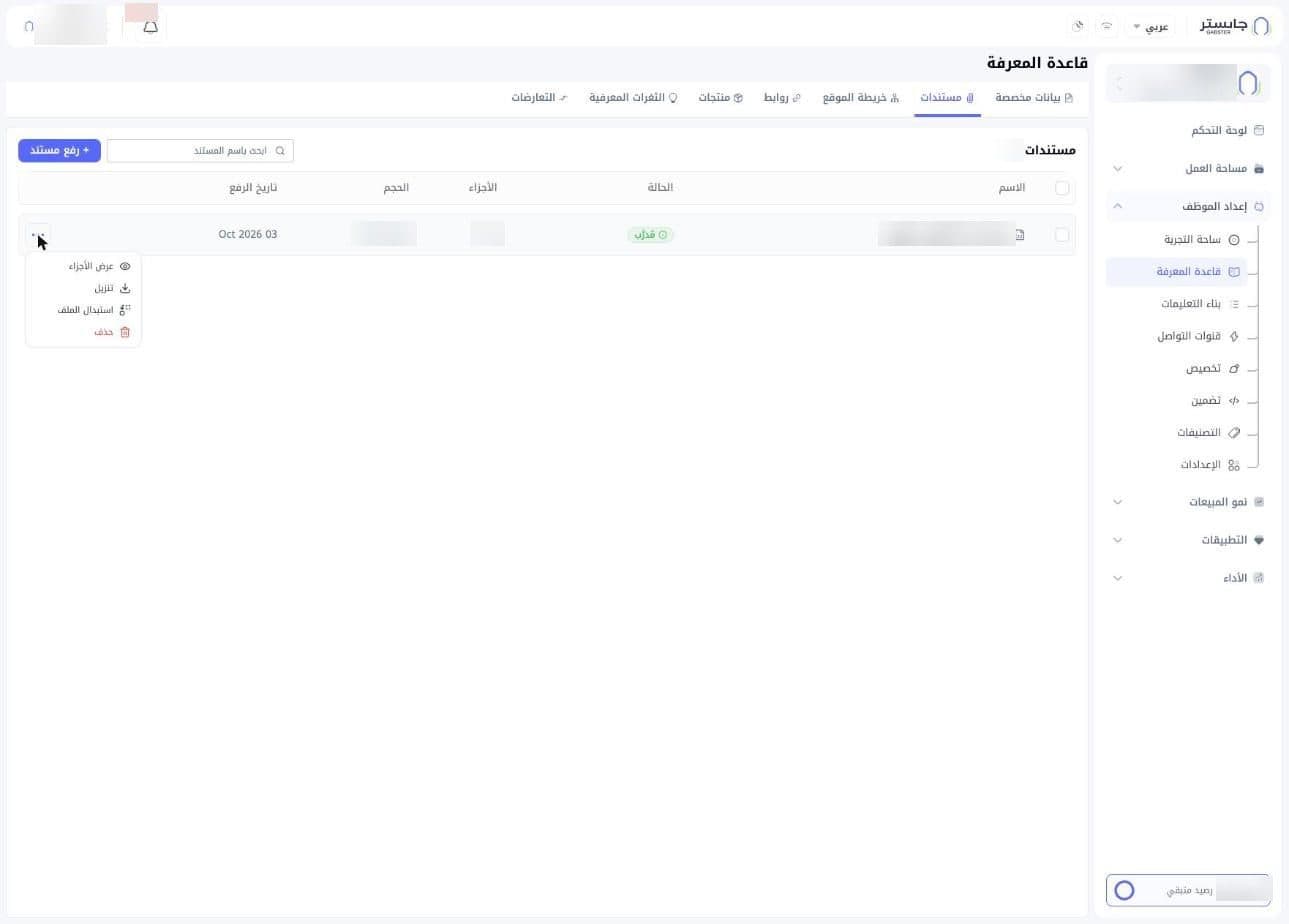
Upload files that contain information about your business. The table shows for each file its Name (الاسم) with a file-type icon, Status (الحالة), Chunks (الأجزاء), Size (الحجم) and Upload date (تاريخ الرفع). To find a file quickly, type its name in Search by document name (ابحث باسم المستند).
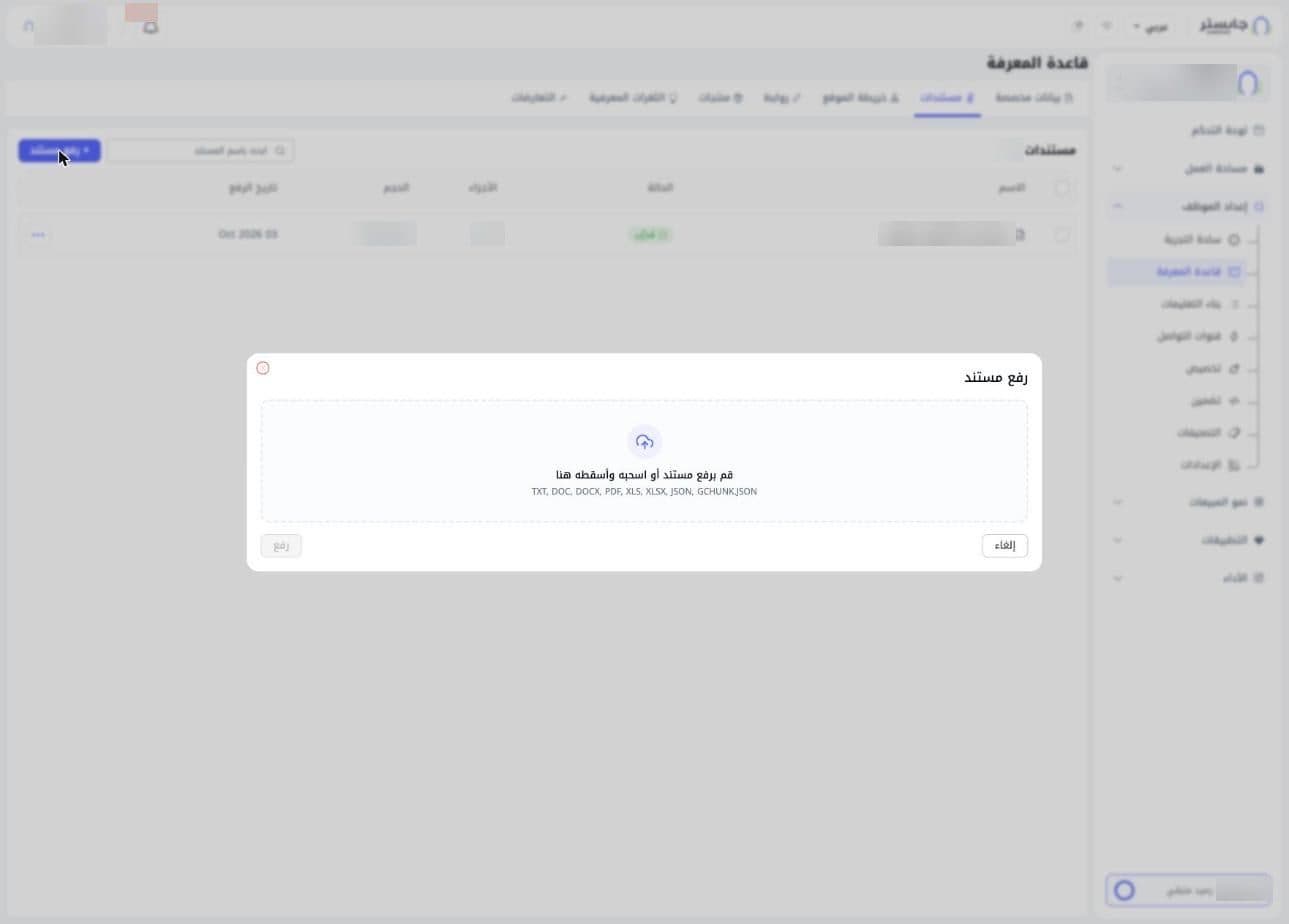
To upload a document: click + Upload document (رفع مستند). In the Upload document dialog, choose a file or drag and drop it onto the drop area, then click Upload (رفع). The button appears disabled while no file is chosen.
Accepted formats: TXT, DOC, DOCX, PDF, XLS, XLSX, JSON and GCHUNK.JSON.
You can upload up to 10 files at a time, each up to 10 MB. Each file, and each sheet of an Excel file, becomes its own entry and starts training automatically.
Row ⋯ menu: View chunks (عرض الأجزاء), Download (تنزيل), Replace file (استبدال الملف) and Delete (حذف). There is no Edit (تعديل) option; to update a document, replace its file with an updated version.
Sitemap
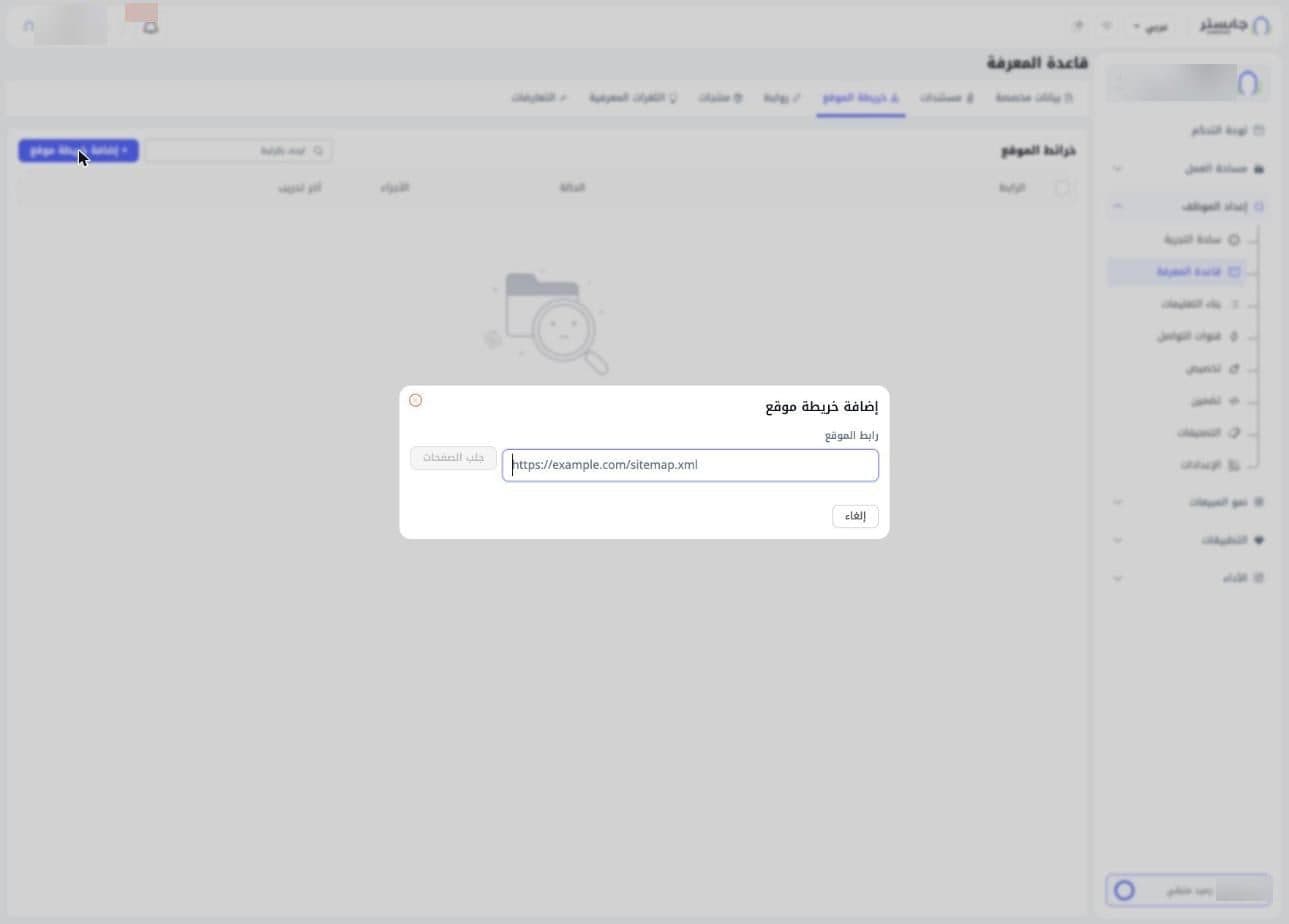
Add your website's sitemap so your AI Agent learns from the pages it lists. The table, headed Sitemaps (خرائط الموقع), shows URL (الرابط), Status (الحالة), Chunks (الأجزاء) and Last trained (آخر تدريب). Search with Search by URL (ابحث بالرابط). While there are no sitemaps, the tab shows "No pages yet." (لا توجد صفحات بعد.).
To add a sitemap: click + Add sitemap (إضافة خريطة موقع). In the dialog, paste the address of your sitemap file into Site URL (رابط الموقع), e.g. https://example.com/sitemap.xml, then click Fetch pages (جلب الصفحات). The button appears disabled while the field is empty.
Fetch pages reads the sitemap and lists the pages in it. Each page you add from it is trained as its own item, and the whole sitemap counts as one web page toward your plan's limit. If you enter an address that isn't a sitemap, only that one page is used.
Links
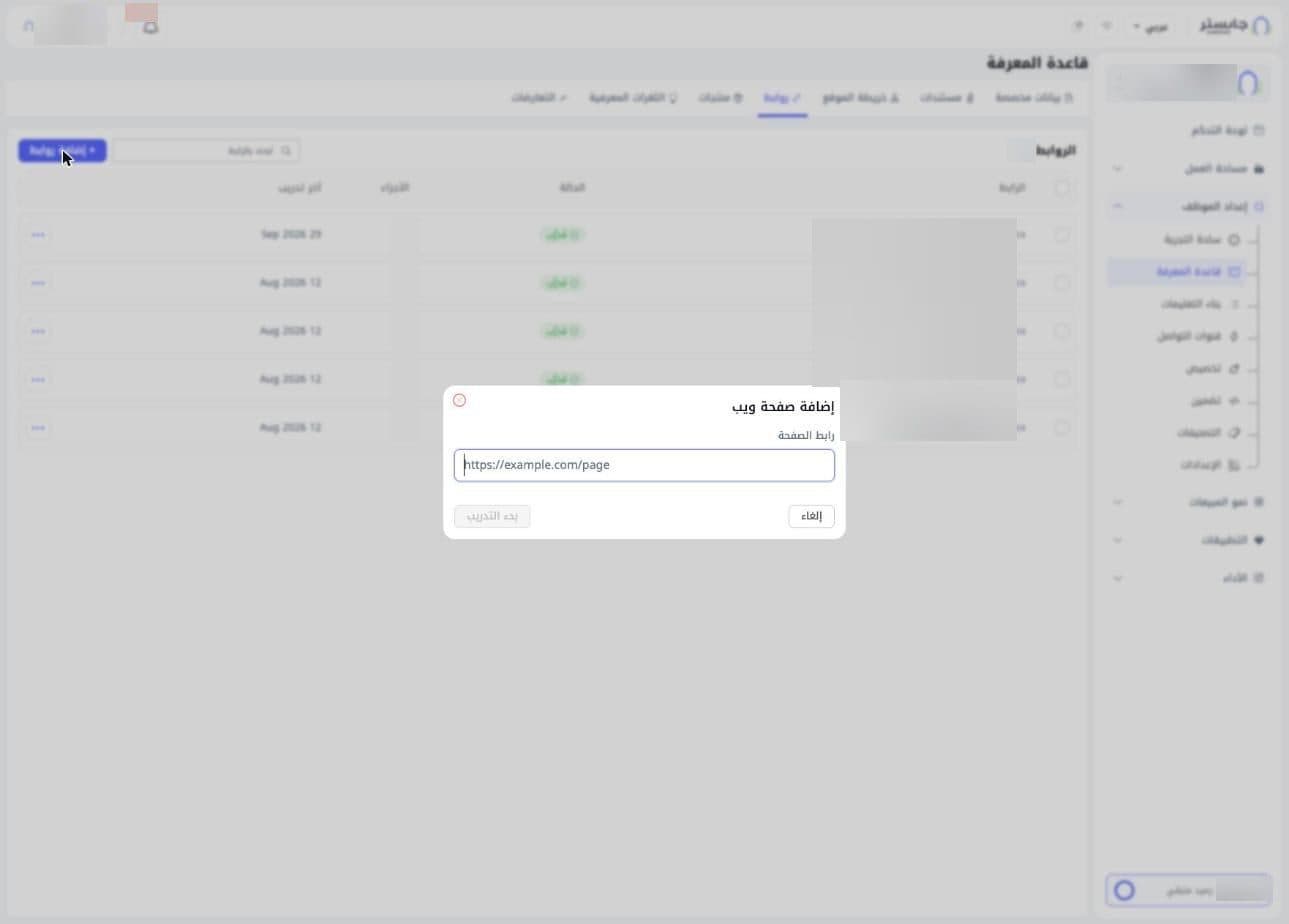
Add individual web pages. The table, headed Links (الروابط), shows the number of links and, for each one, URL (الرابط), Status (الحالة), Chunks (الأجزاء) and Last trained (آخر تدريب). Search with Search by URL (ابحث بالرابط).
To add a link: click + Add links (إضافة روابط). In the Add web page (إضافة صفحة ويب) dialog, paste the Page URL (رابط الصفحة) and click Start training (بدء التدريب). The button appears disabled while the field is empty.
Each link adds one page: only that page is read, and links on it are not followed. Each link counts as one web page toward your plan's limit. To add many pages at once, add your sitemap instead.
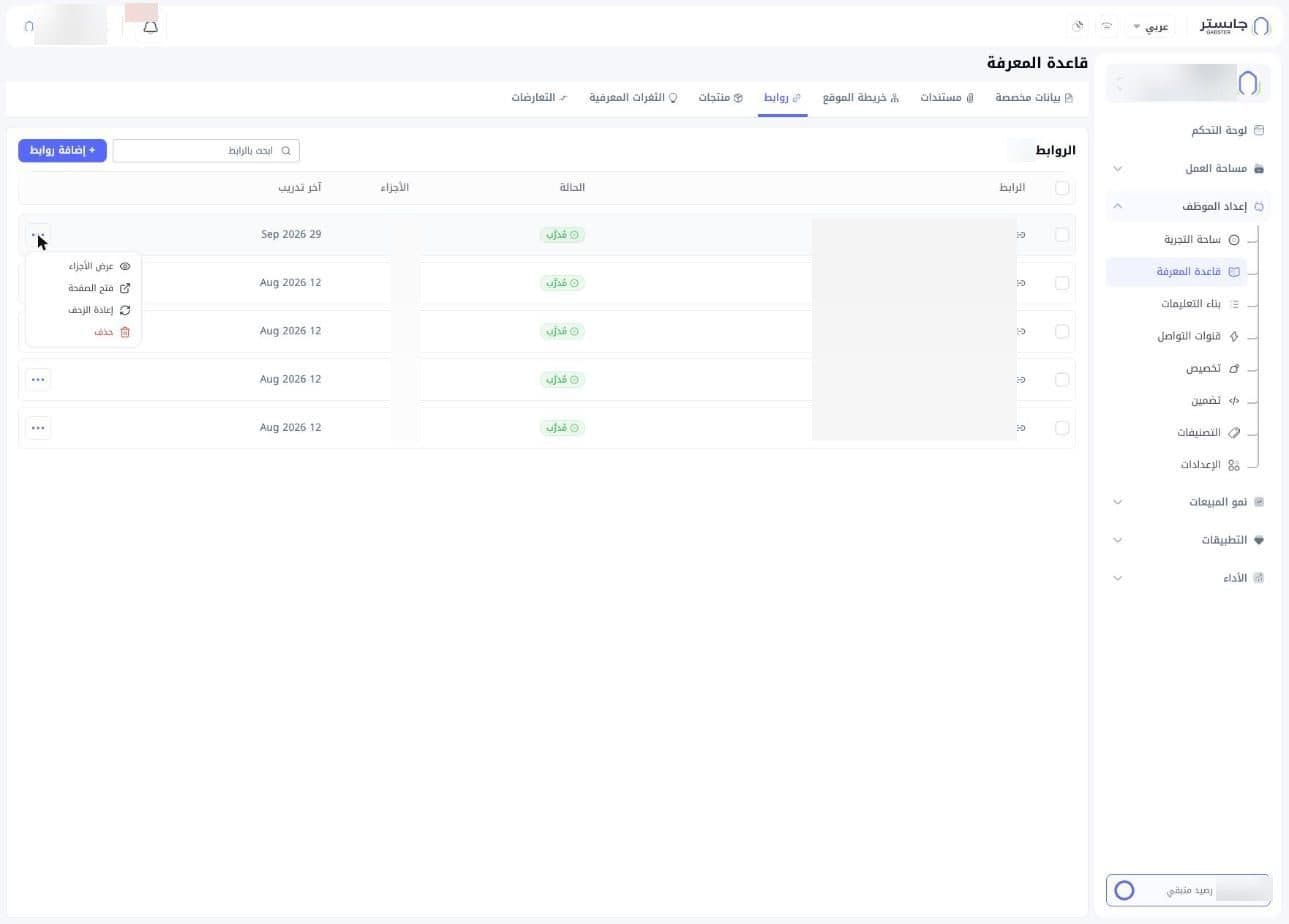
Row ⋯ menu: View chunks (عرض الأجزاء), Open page (فتح الصفحة), Re-crawl (إعادة الزحف) and Delete (حذف).
Pages are not re-checked automatically. When a page changes on your site, delete its row and add the page again so your AI Agent learns the new version.
Products
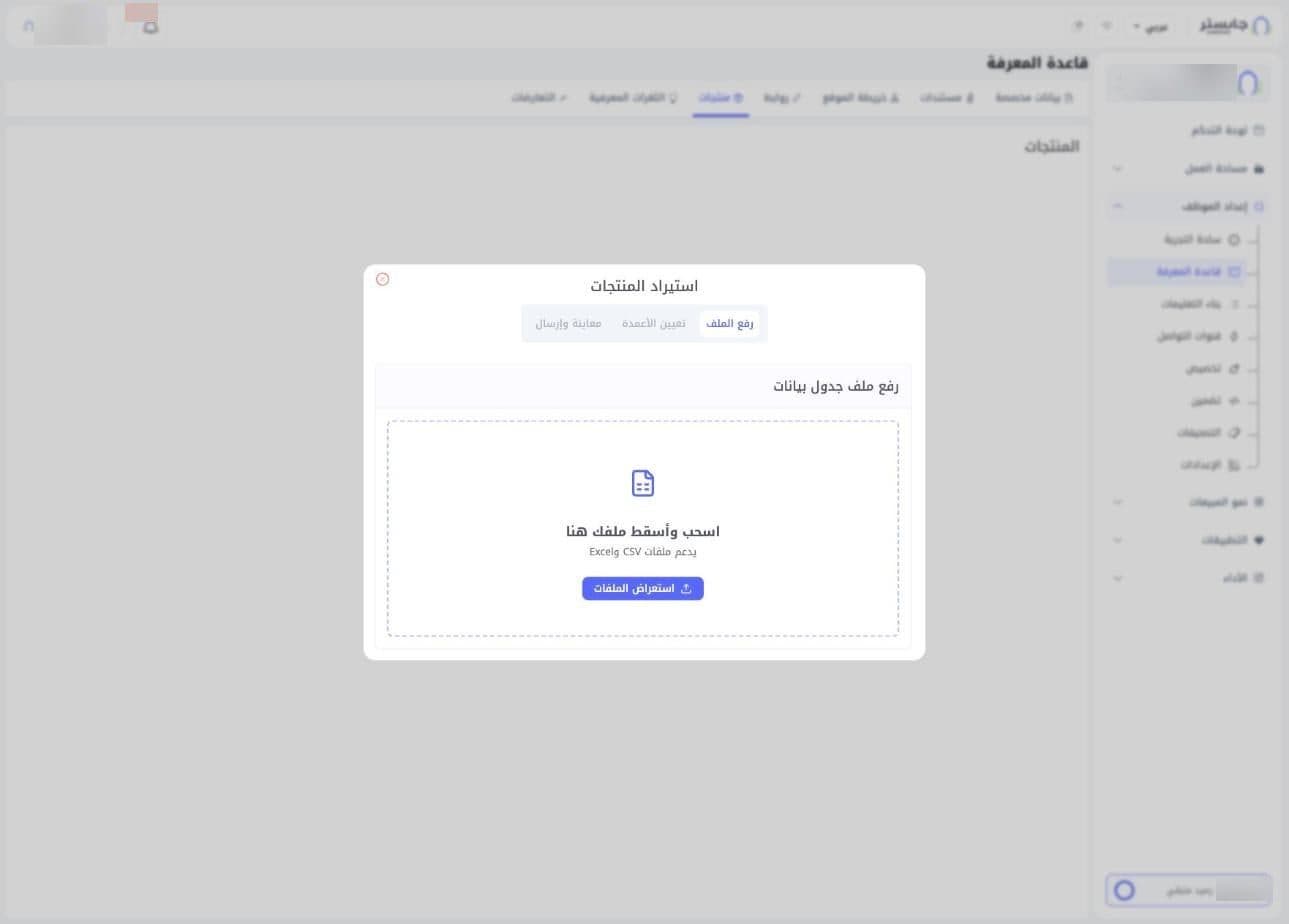
Upload your product catalogue so your AI Agent can answer with structured product information. While the tab is empty, it shows an Upload products (رفع المنتجات) button.
The button opens the Import products (استيراد المنتجات) window with three steps: Upload file (رفع الملف), Map columns (تعيين الأعمدة) and Preview & submit (معاينة وإرسال). In the first step, drag and drop your file onto the drop area or click Browse files (استعراض الملفات). The window accepts Excel and CSV files.
Knowledge Gaps
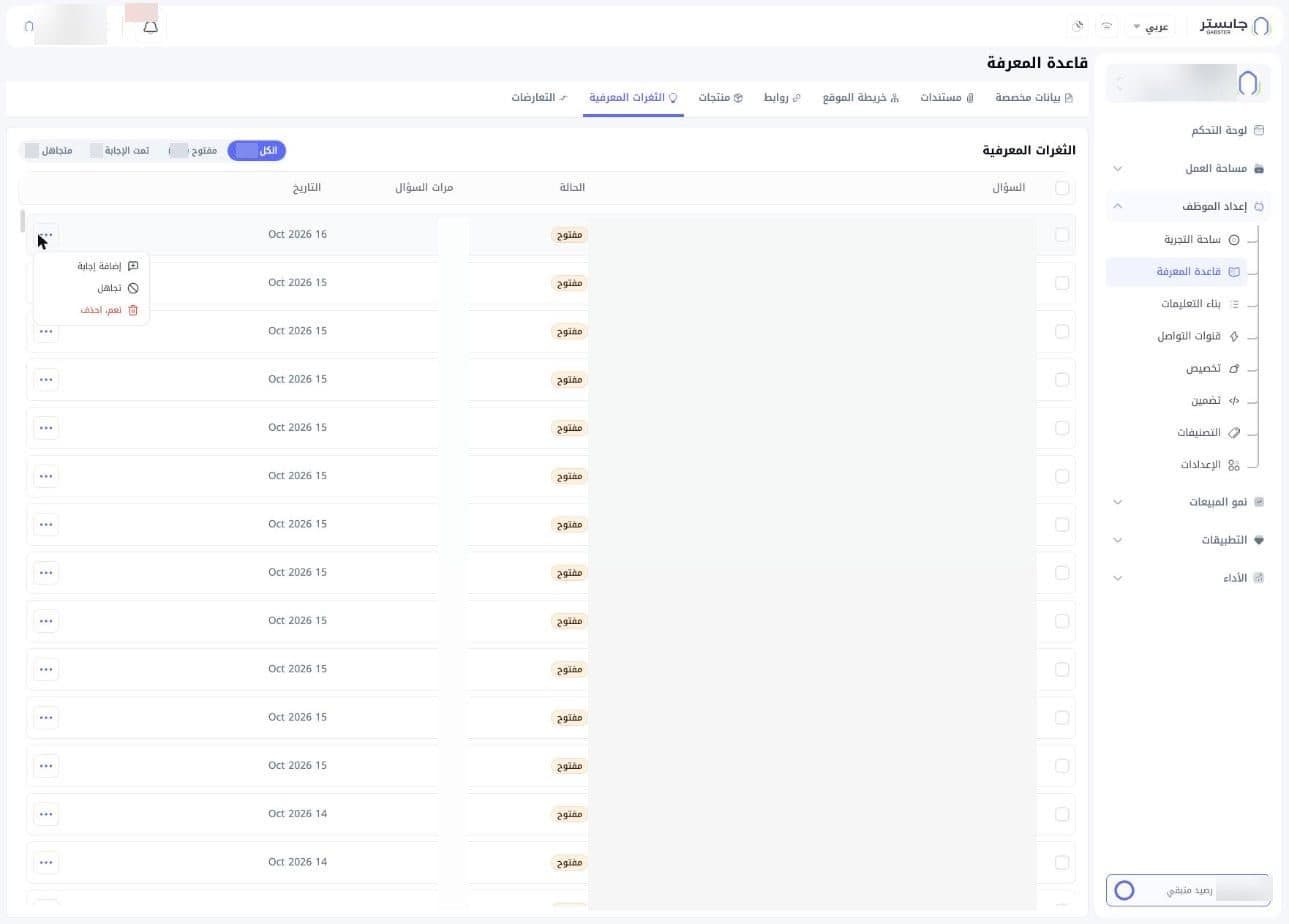
This tab lists questions customers asked that your AI Agent could not answer from its knowledge, so you can fill the gaps. Each question shows Question (السؤال), Status (الحالة), Times asked (مرات السؤال) and Date (التاريخ).
Filter the list with the chips at the top; each chip shows how many questions it holds:
| Chip | Shows |
|---|---|
| All (الكل) | Every gap |
| Open (مفتوح) | Questions not answered yet |
| Answered (تمت الإجابة) | Questions that have been answered |
| Ignored (متجاهل) | Ignored questions |
Row ⋯ menu:
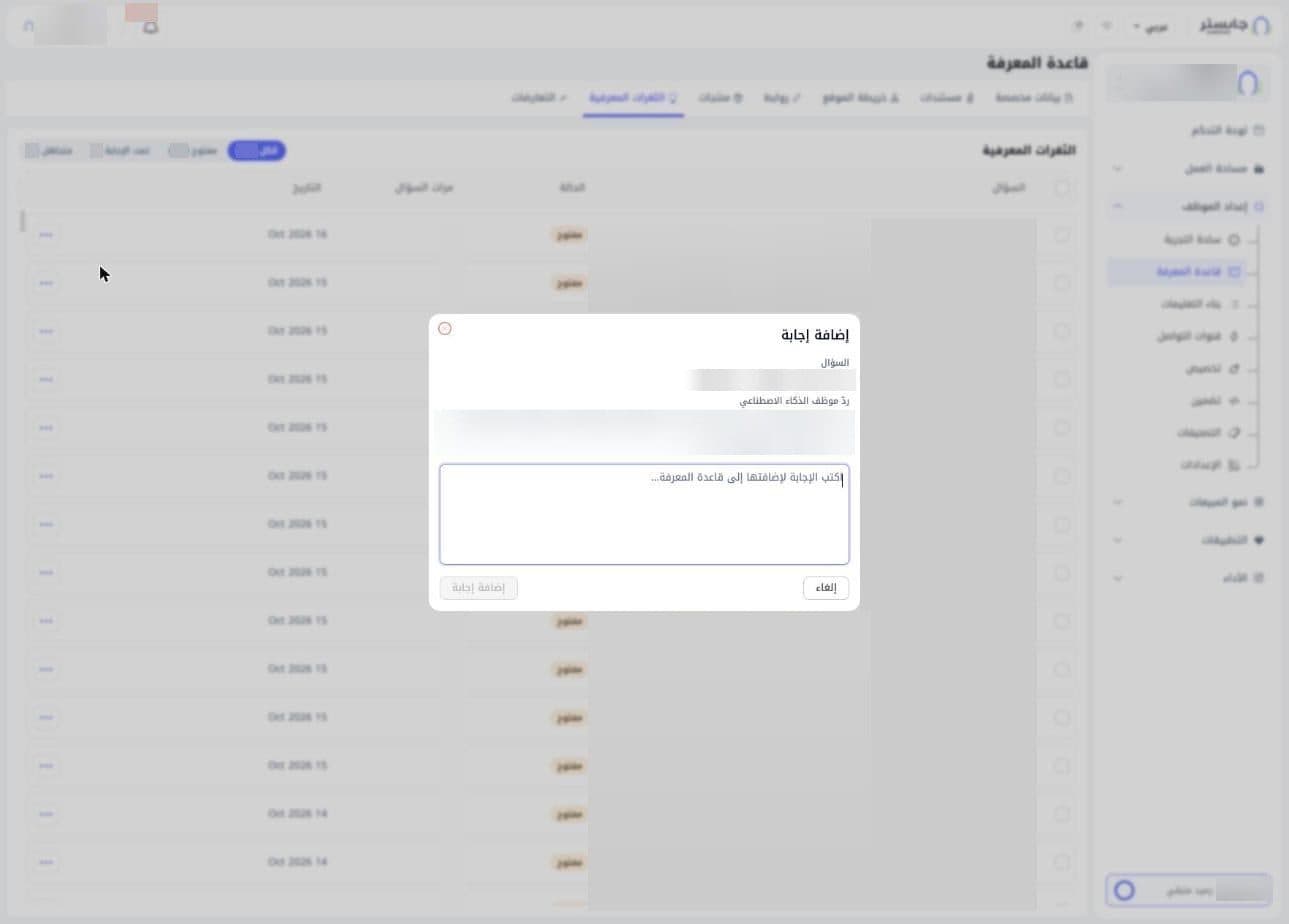
- Add answer (إضافة إجابة): opens a dialog showing the Question (السؤال) and the AI Agent reply (ردّ موظف الذكاء الاصطناعي) it gave, plus a box where you write the correct answer to add to the Knowledge Base. Then click Add answer; the button appears disabled while the box is empty.
- Ignore (تجاهل): ignore the question.
- Yes, delete (نعم، احذف, in red): delete the question.
An answer you add goes straight into your AI Agent's knowledge as a verified entry titled with the customer's question (it is not listed under Custom Data), and the question moves to Answered (تمت الإجابة). An ignored question moves to Ignored (متجاهل) and can still be answered later. Yes, delete deletes the question at once, together with any answer you added for it.
Review Knowledge Gaps regularly and start with the questions asked most often (the Times asked column). Every answer you add improves your AI Agent's replies to the next customers.
Conflicts
This tab lists "places in your files that give different answers to the same question", so you can fix them before your AI Agent gives contradictory information. Each conflict shows Conflict (التعارض), Values (القيم), Files (الملفات), Status (الحالة) and Detected on (تاريخ الاكتشاف).
Filter the list with the Open (مفتوحة), Resolved (تم حلها) and Not conflicts (ليست تعارضات) chips. When there are none, the tab shows "No conflicts. Your files are consistent." (لا توجد تعارضات. ملفاتك متوافقة.).