
Tutorials
Set up a calendar and take bookings
Create a calendar, build its booking form, set each member's working hours, then read the calendar and open a booking's details.
In this tutorial you create a calendar — a bookable meeting type shared by one or more staff members. Then you build the booking form customers fill in, set each member's weekly hours, duration and buffers, and finally read the calendar and open a booking's details.
Schedule settings belong to one member in one calendar. If a member is on several calendars, set their schedule in each calendar.
Before you start
- The staff members who will take bookings — you choose them when you create the calendar.
A. Create a calendar
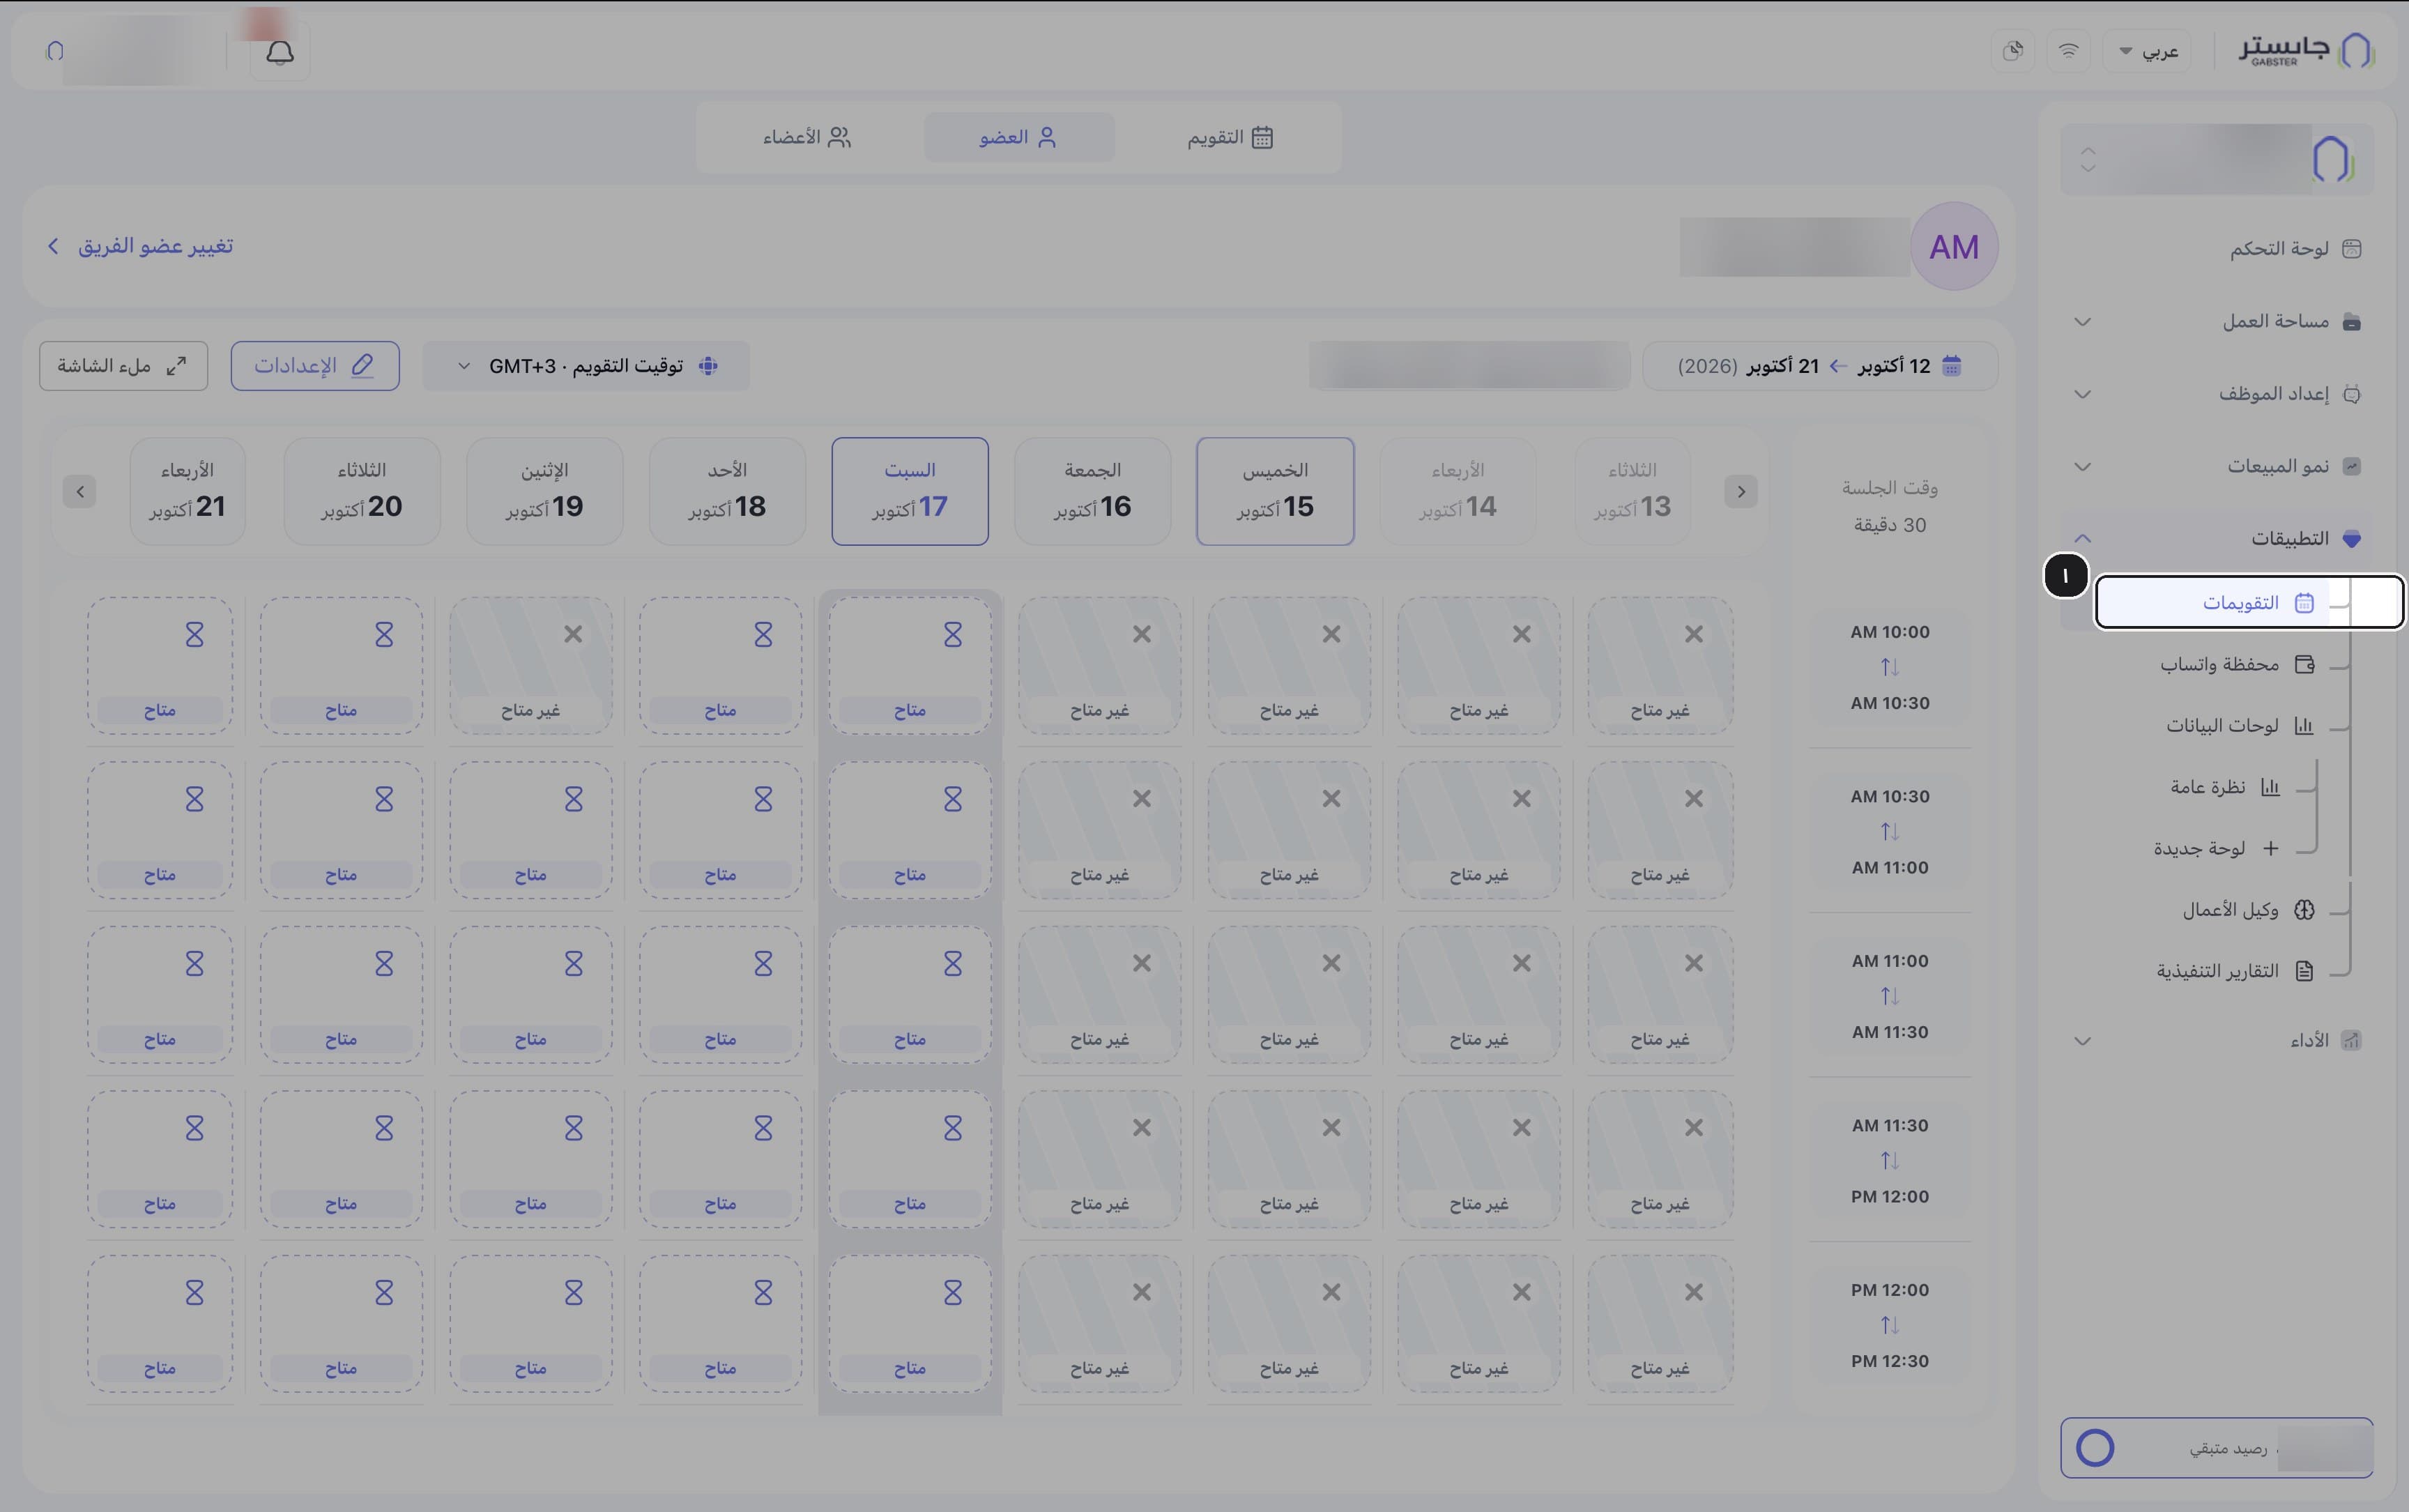
In the sidebar, open Apps (التطبيقات) and choose Calendars (التقويمات).
The page opens with three tabs: Calendar (التقويم), Member (العضو) and Members (الأعضاء).
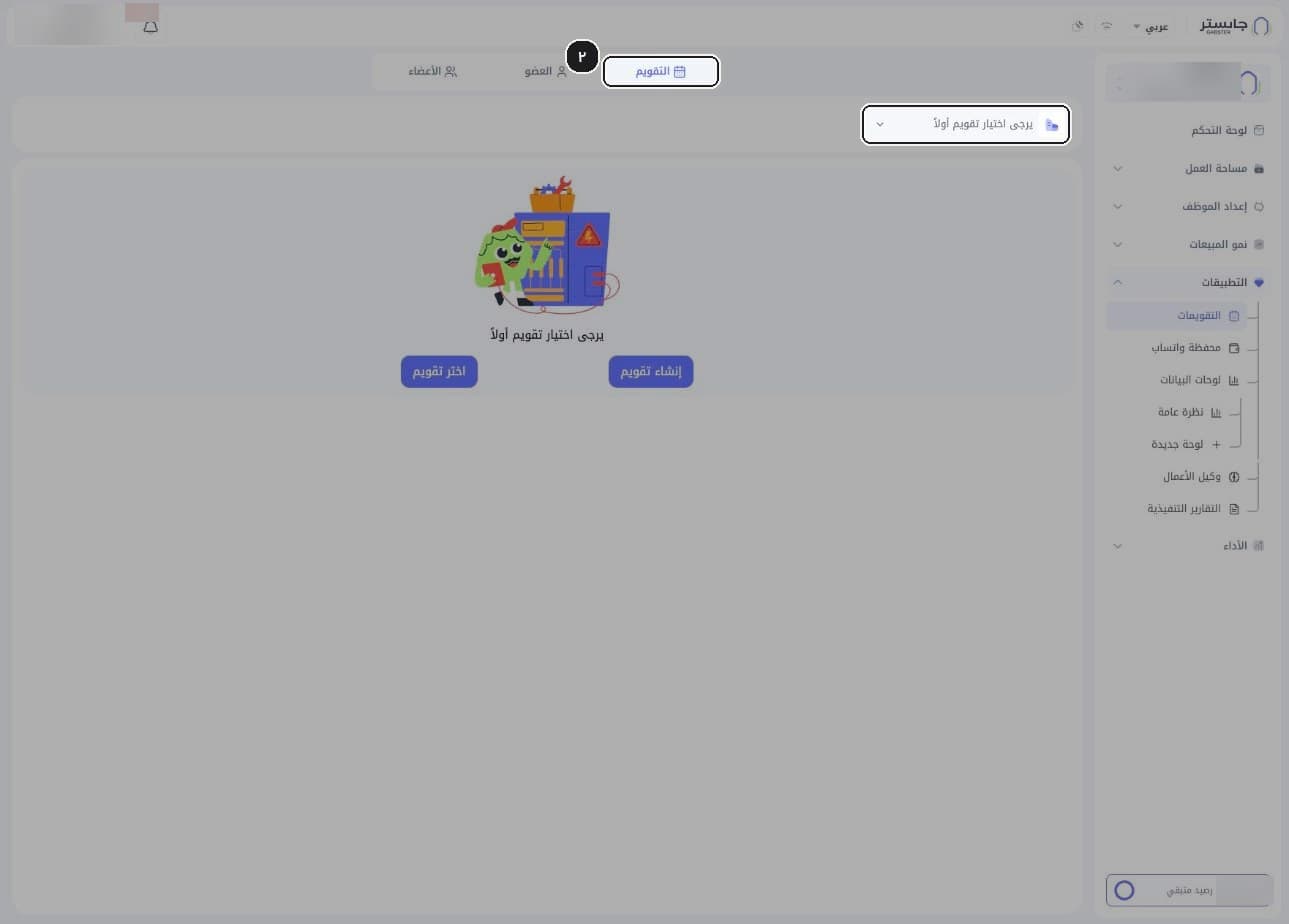
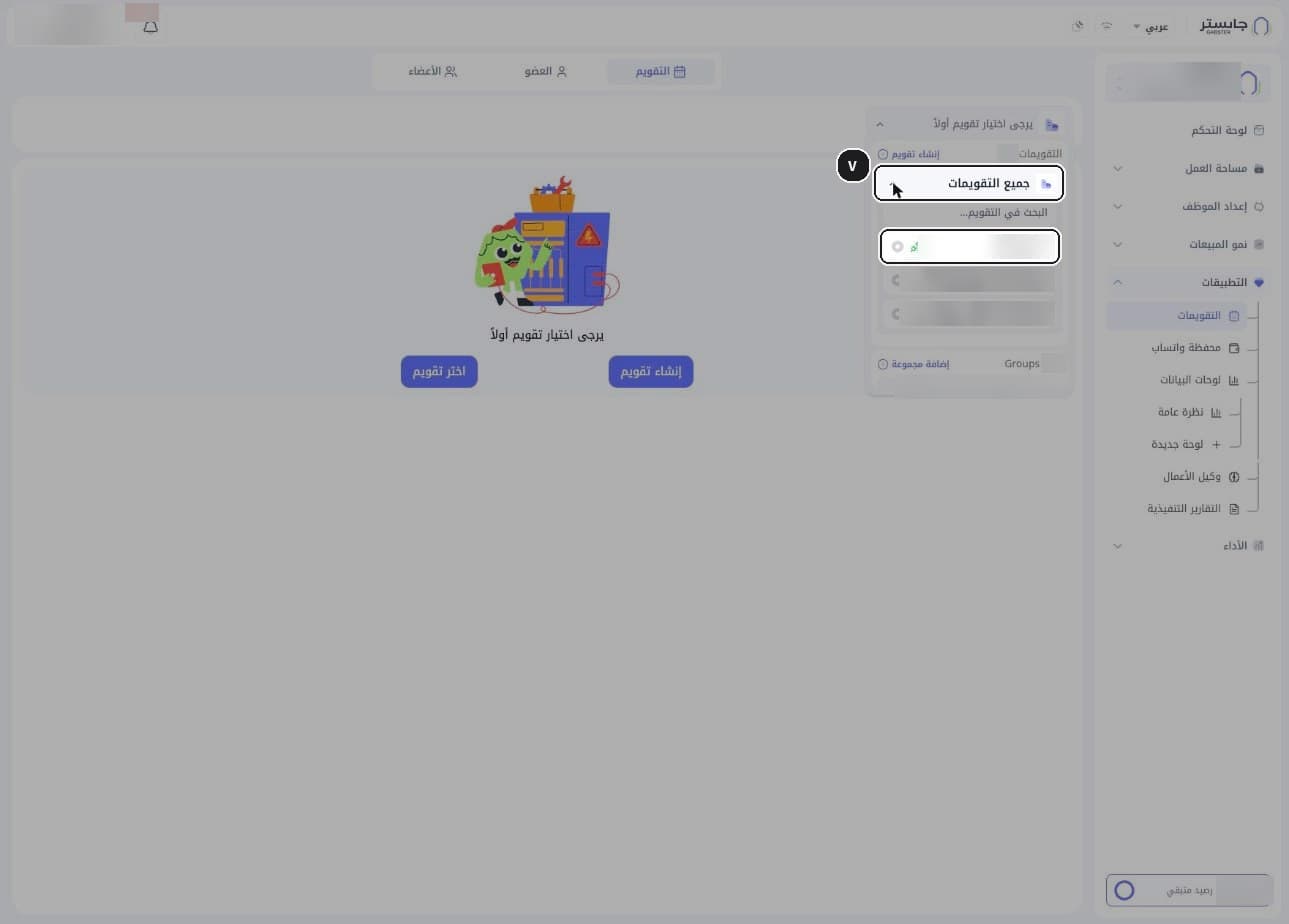
On the Calendar tab, open the calendar selector.
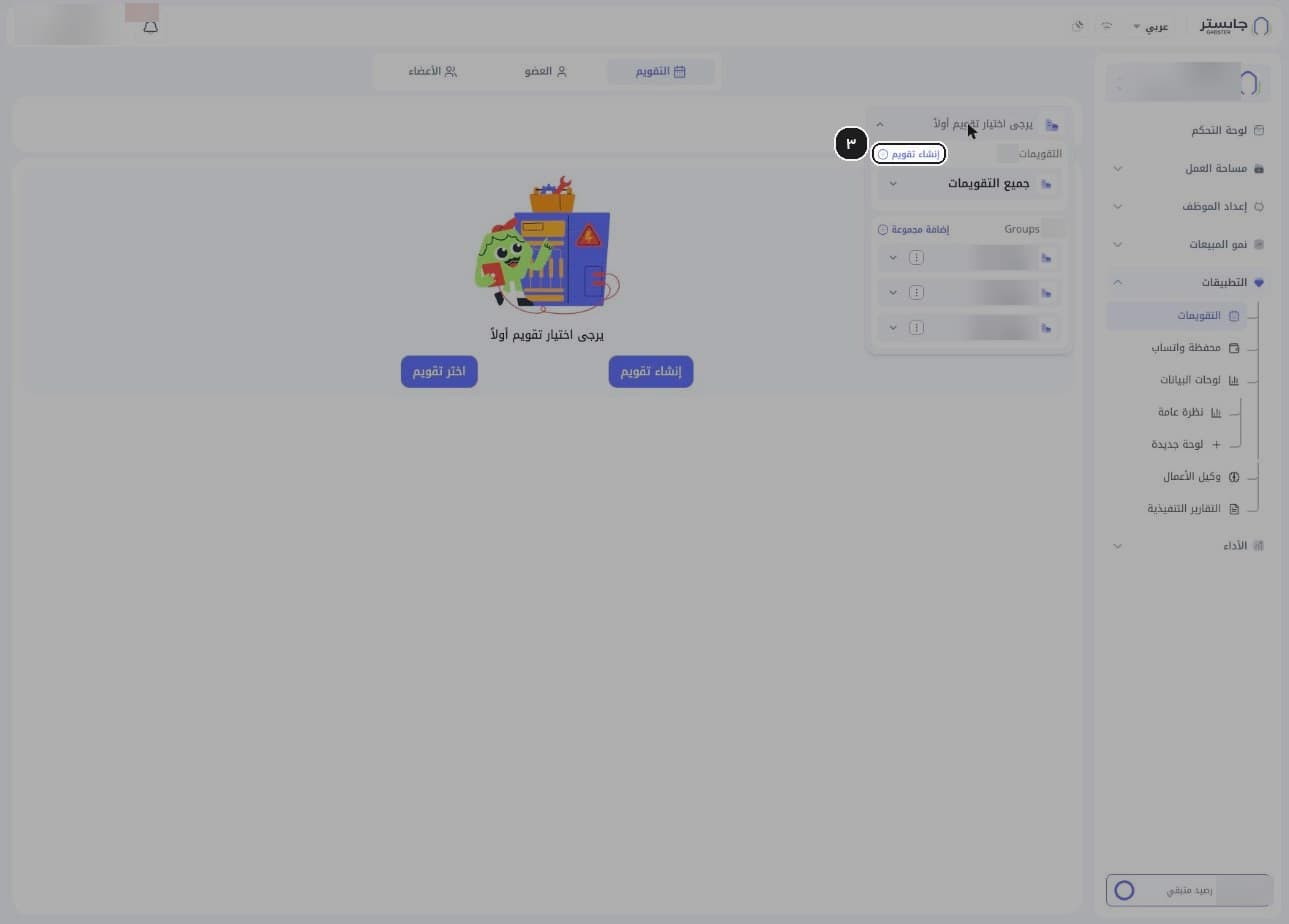
If no calendar is chosen yet, you see Please select a calendar first (يرجى اختيار تقويم أولاً). The selector panel lists your calendars, All calendars (جميع التقويمات) and groups.
Click Create calendar (إنشاء تقويم).
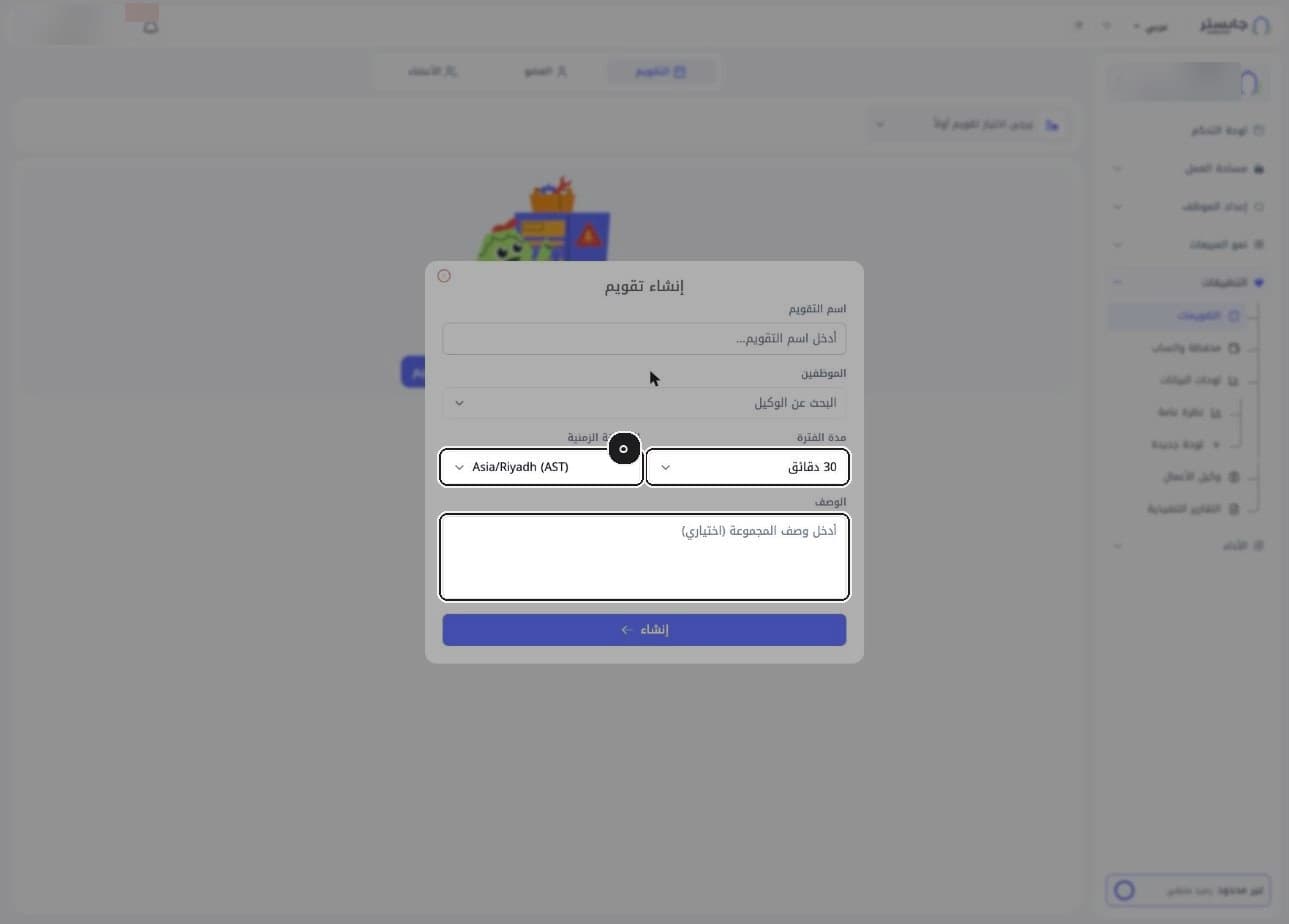
The Create calendar window opens.
Enter the Calendar name (اسم التقويم), then choose under Staff (الموظفين) the staff members who take bookings.
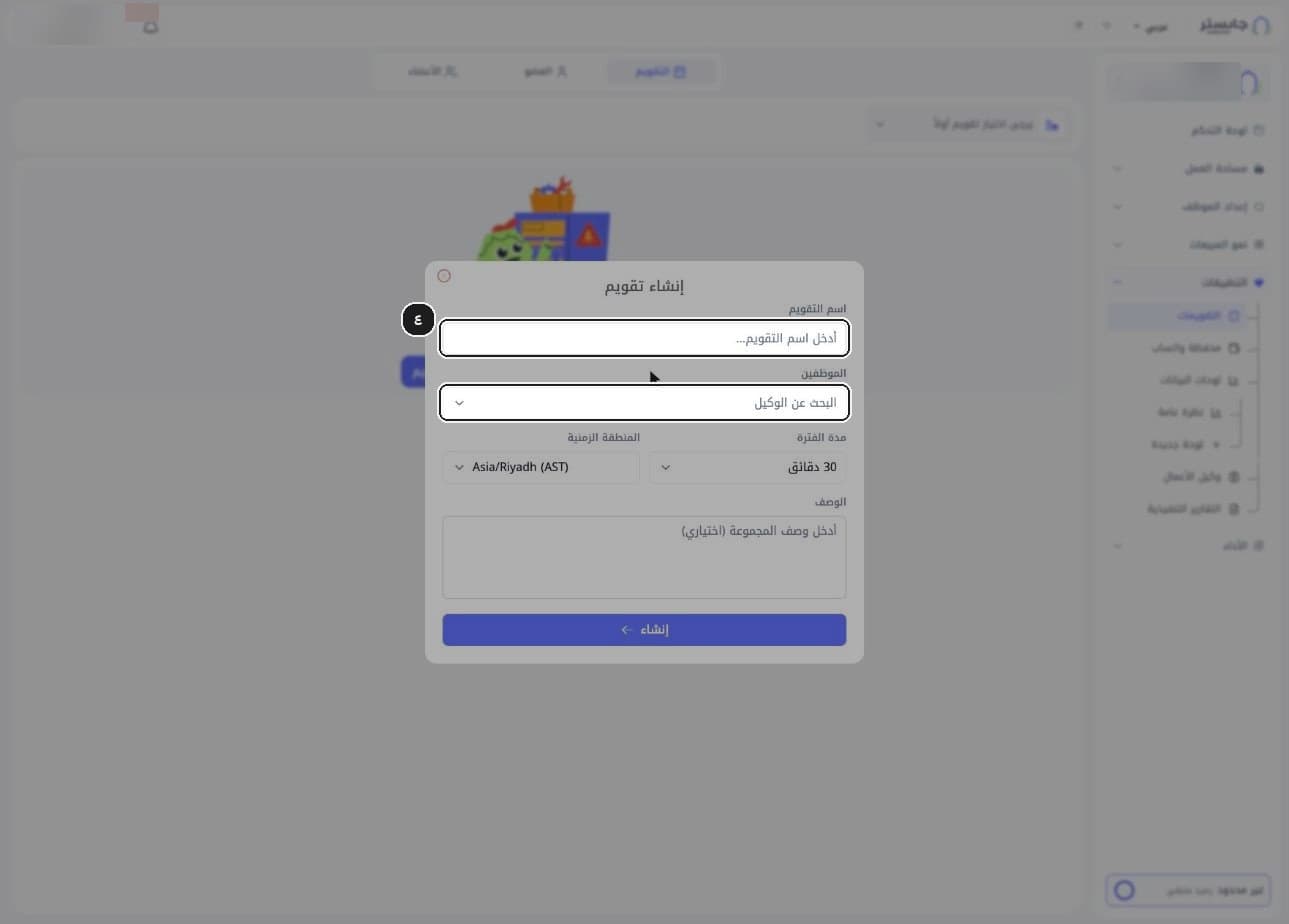
Set the Slot length (مدة الفترة) and Timezone (المنطقة الزمنية), and optionally add a Description (الوصف). The defaults are 30 minutes and Asia/Riyadh (AST).
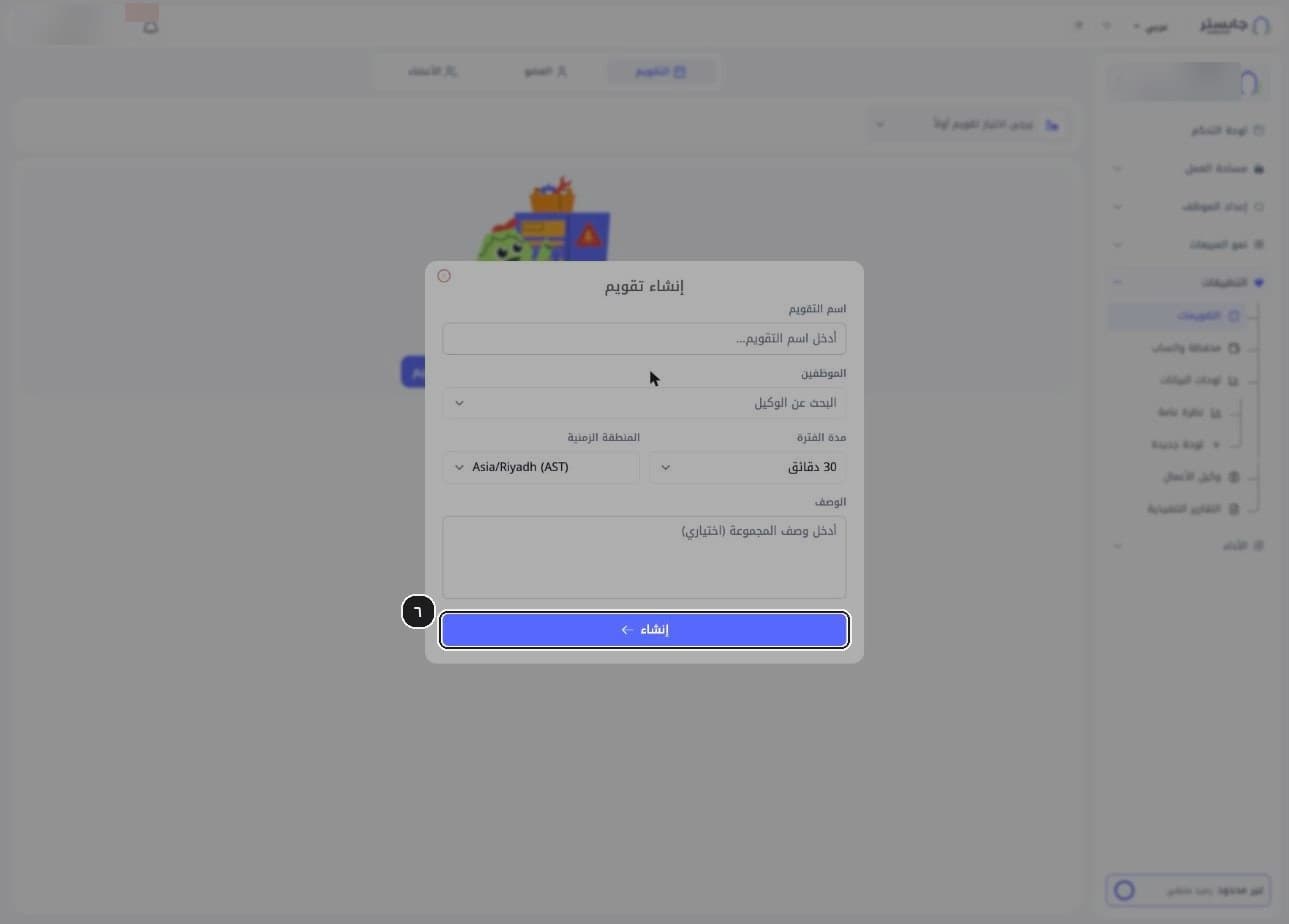
Click Create (إنشاء).
In the calendar selector, open All calendars and choose a calendar.
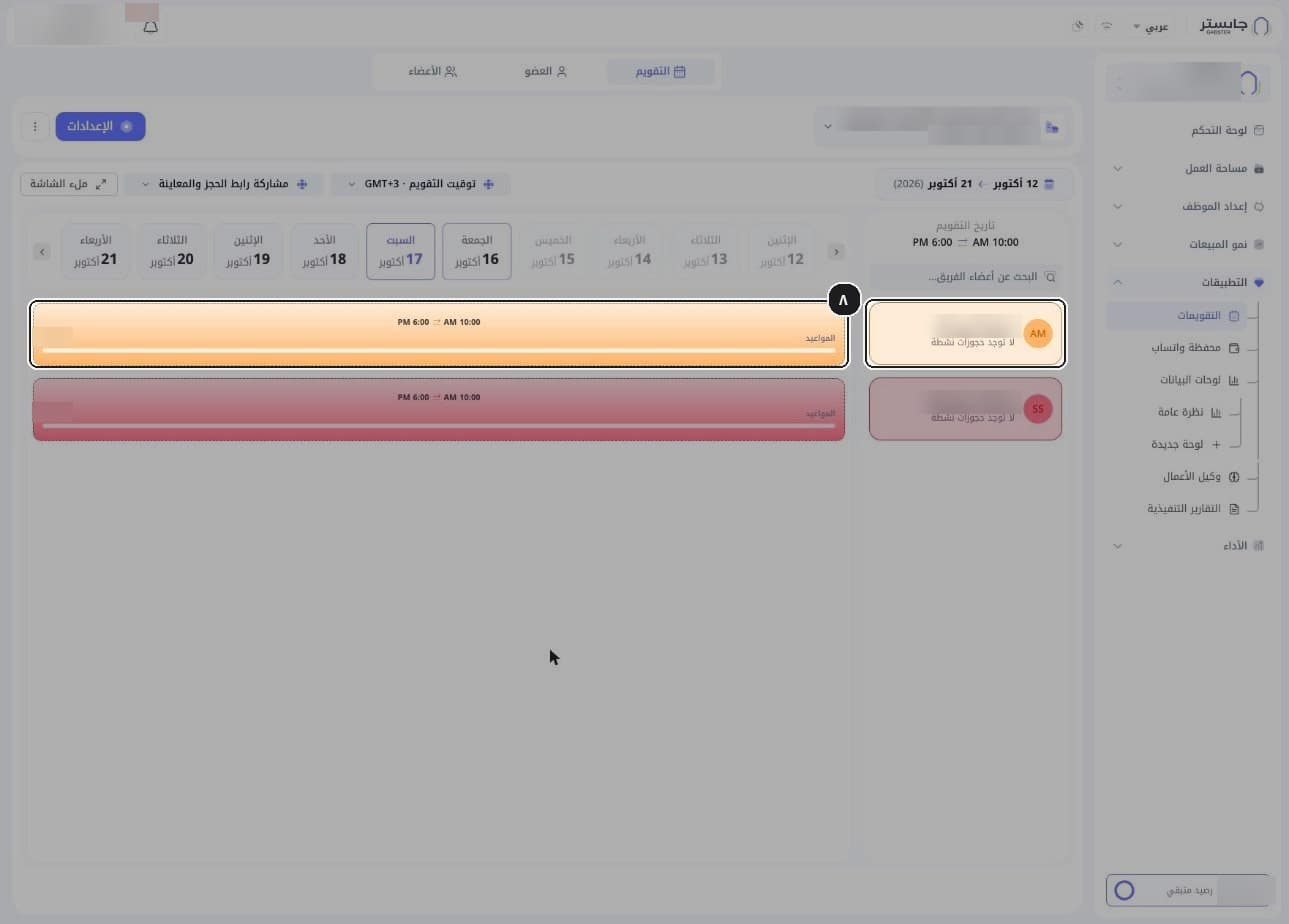
The calendar loads: under its name you see today's bookings and the number of members, with a Settings (الإعدادات) button, an options button (⋮), and one card and timeline per member.
Read each member's timeline for the selected day: working hours and the Appointments (المواعيد) counter.
B. Booking form
Open the calendar's options menu (⋮).
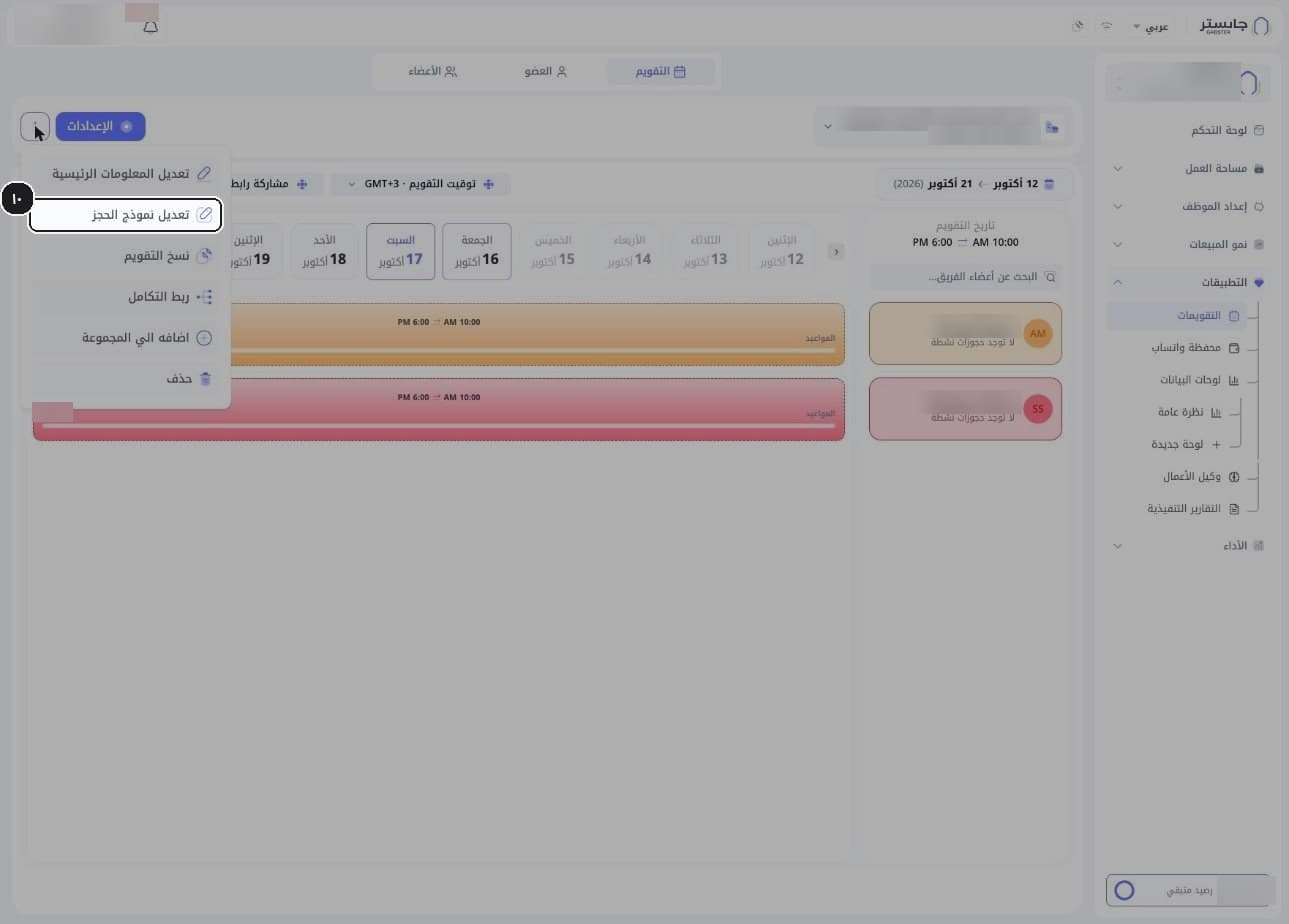
It has six items: Edit main info (تعديل المعلومات الرئيسية), Edit booking form (تعديل نموذج الحجز), Duplicate calendar (نسخ التقويم), Connect integration (ربط التكامل), Add to group (اضافه الي المجموعة) and Delete (حذف).
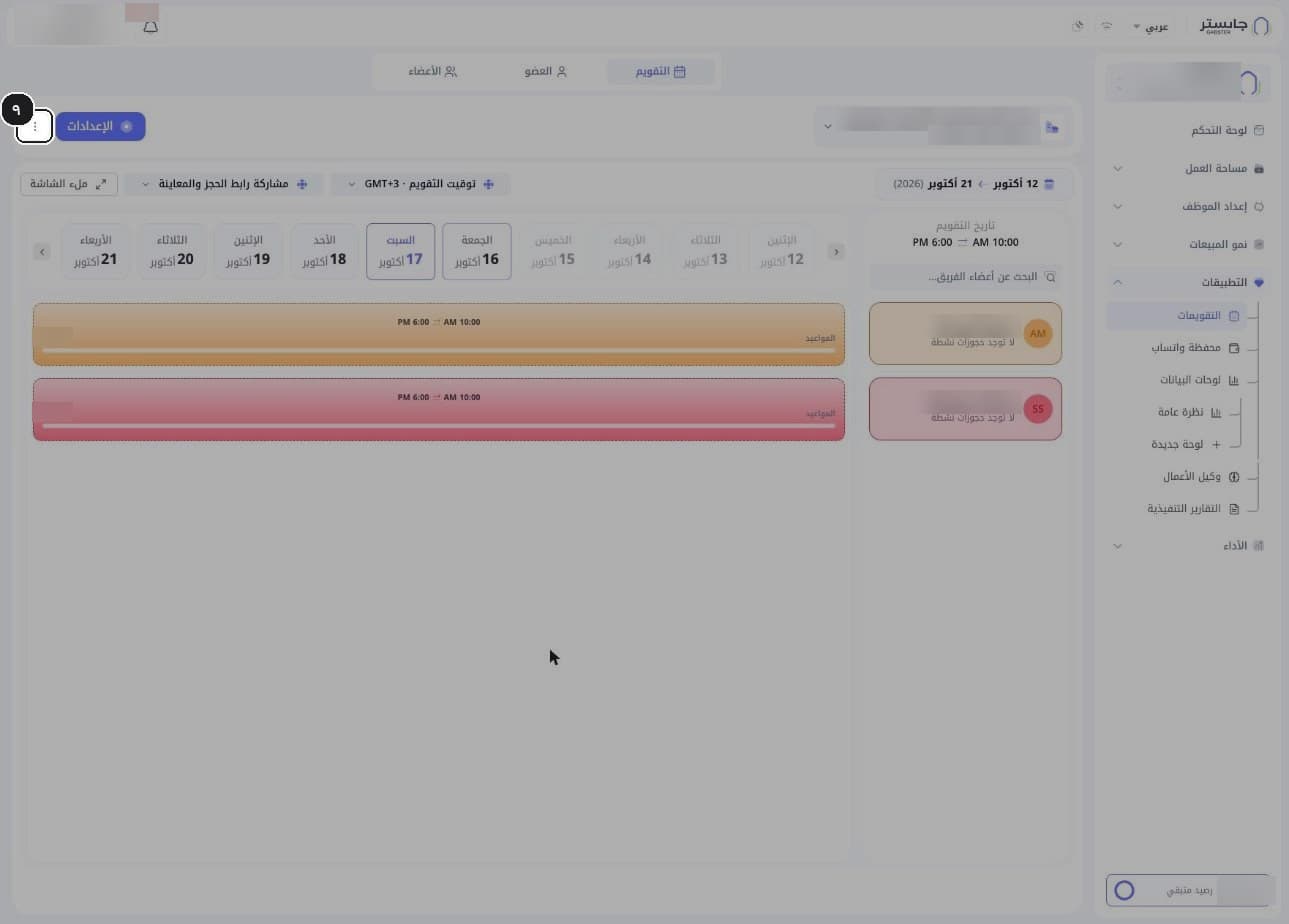
Choose Edit booking form.
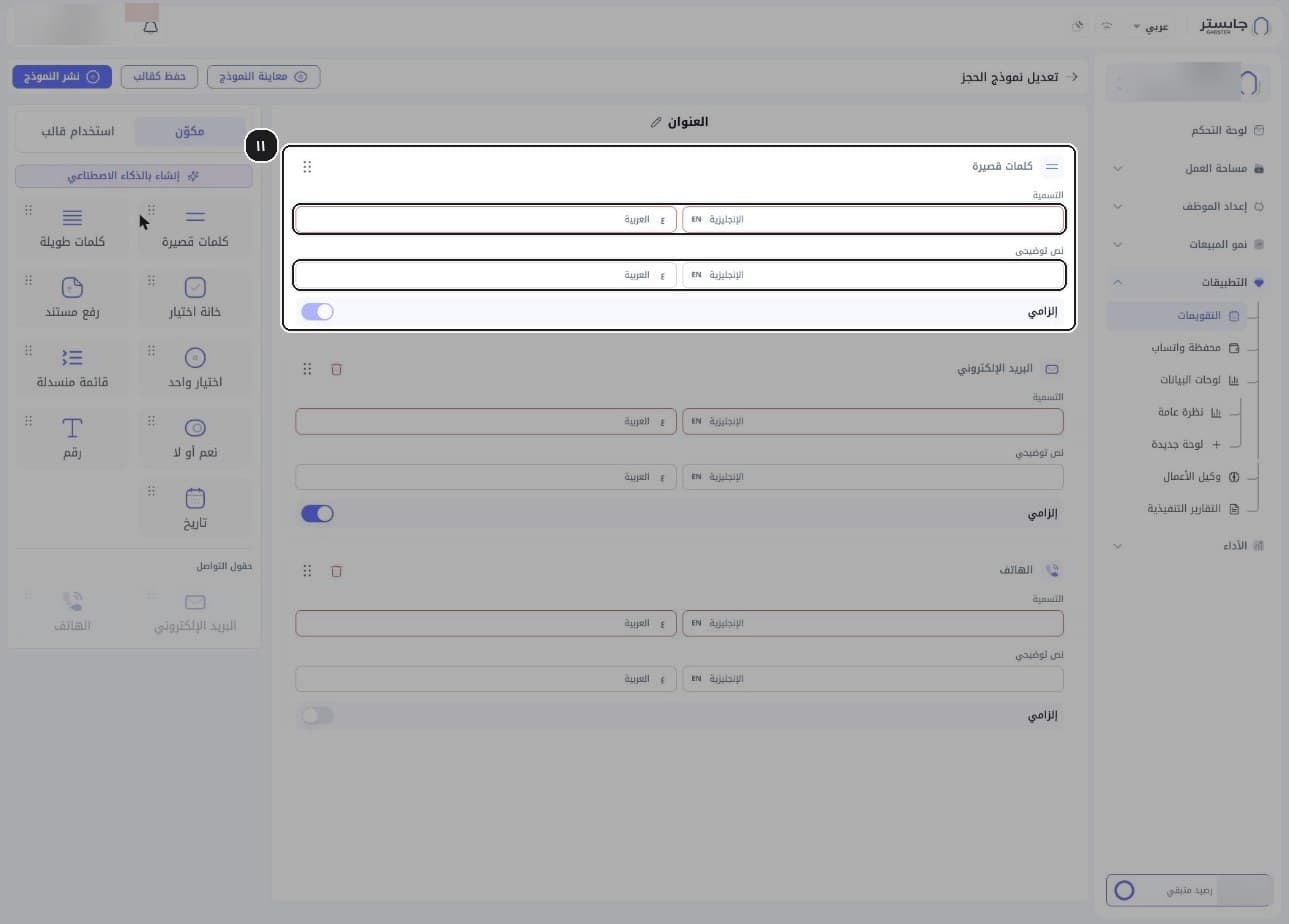
The Edit booking form page opens.
Review the default fields: Short text (كلمات قصيرة), Email (البريد الإلكتروني) and Phone (الهاتف). For each field, enter the Label (التسمية) and Helper text (نص توضيحي) in English and Arabic.
Label boxes show a red border while they are empty.
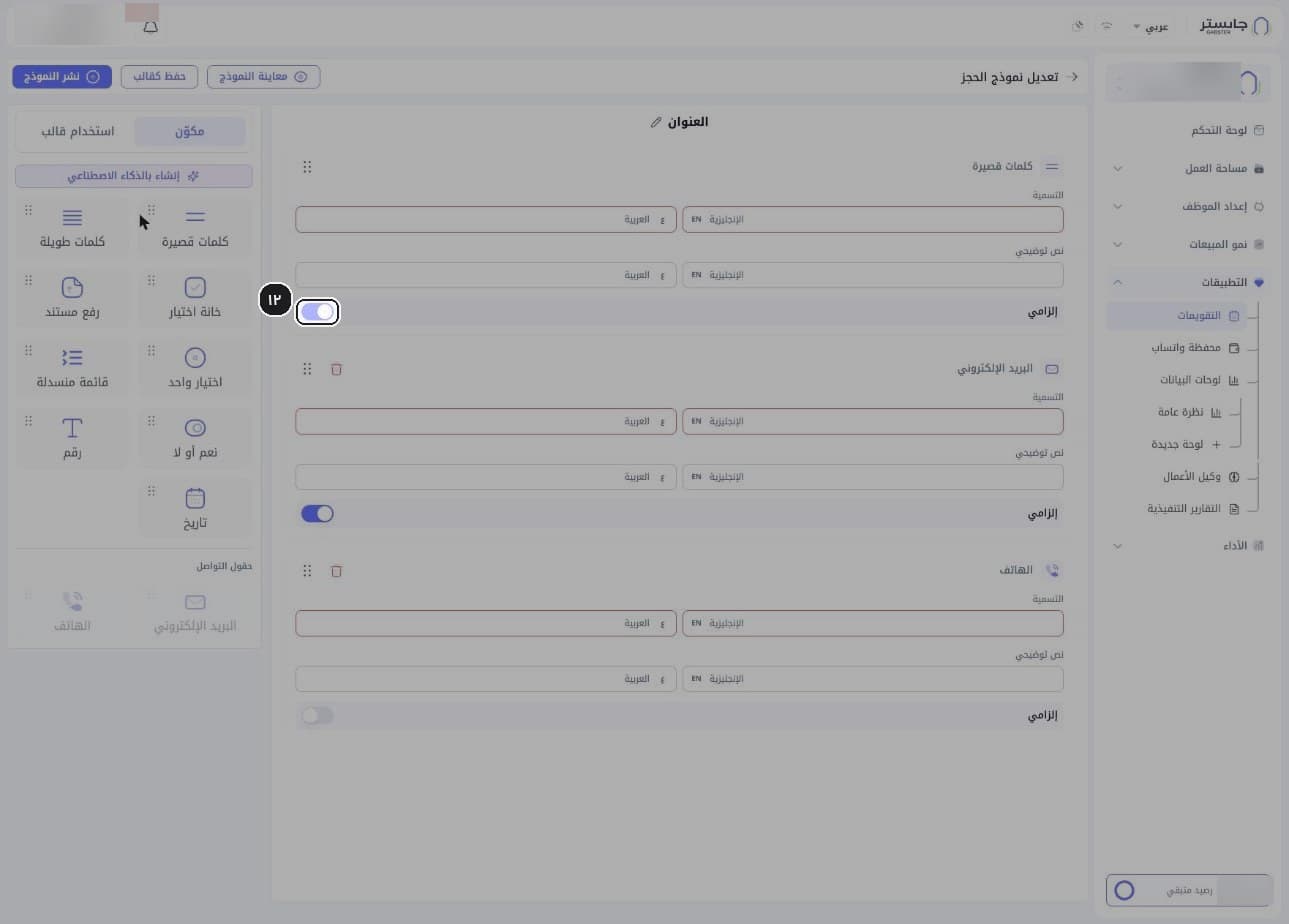
Set which fields are required with each field's Required (إلزامي) toggle. By default, Email is required and Phone is not.
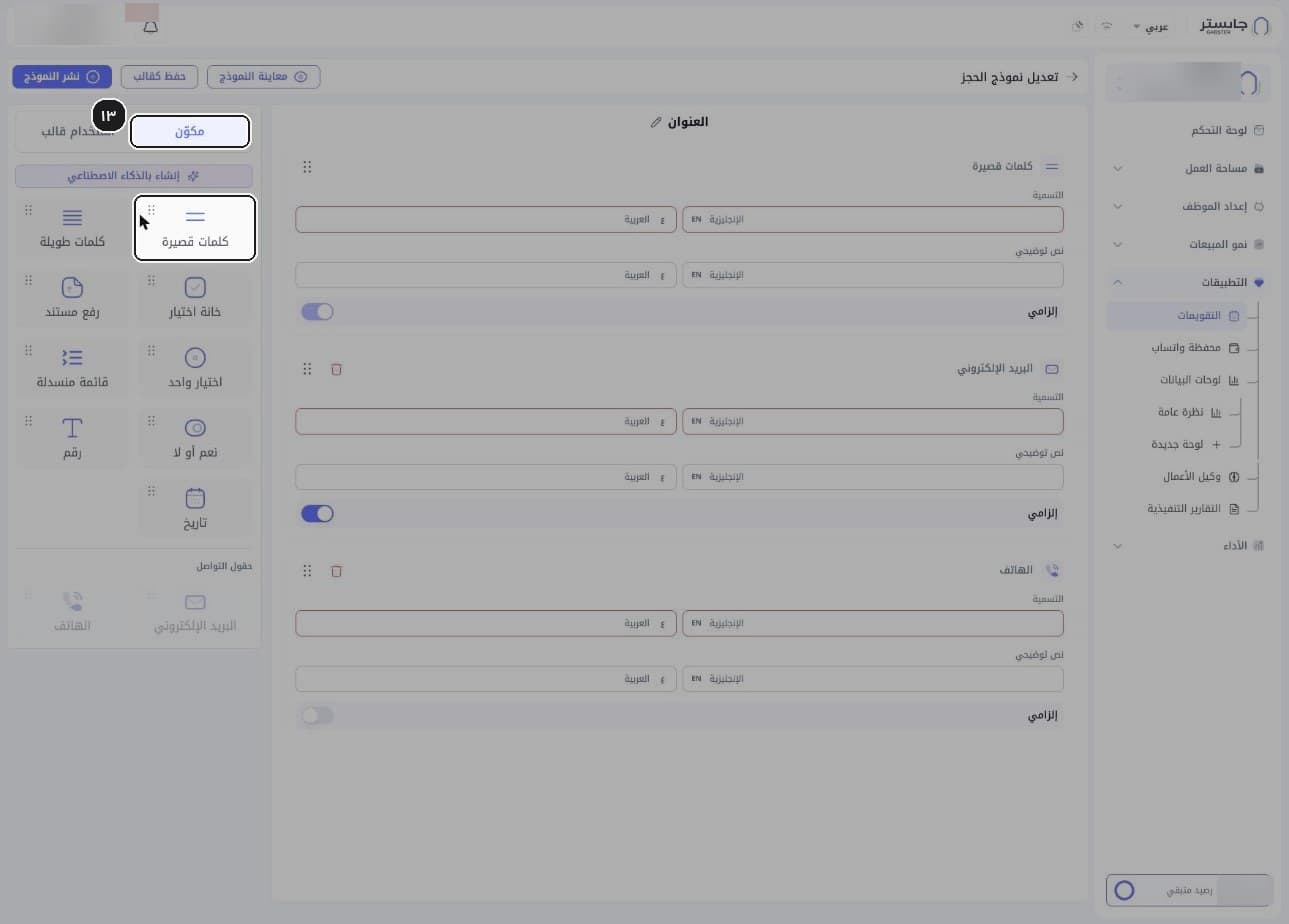
To add more fields, open the Components (مكوّن) tab and drag a component onto the form. Available components: Short text, Long text (كلمات طويلة), Checkbox (خانة اختيار), Upload document (رفع مستند), Single choice (اختيار واحد), Dropdown (قائمة منسدلة), Yes or no (نعم أو لا), Number (رقم) and Date (تاريخ).
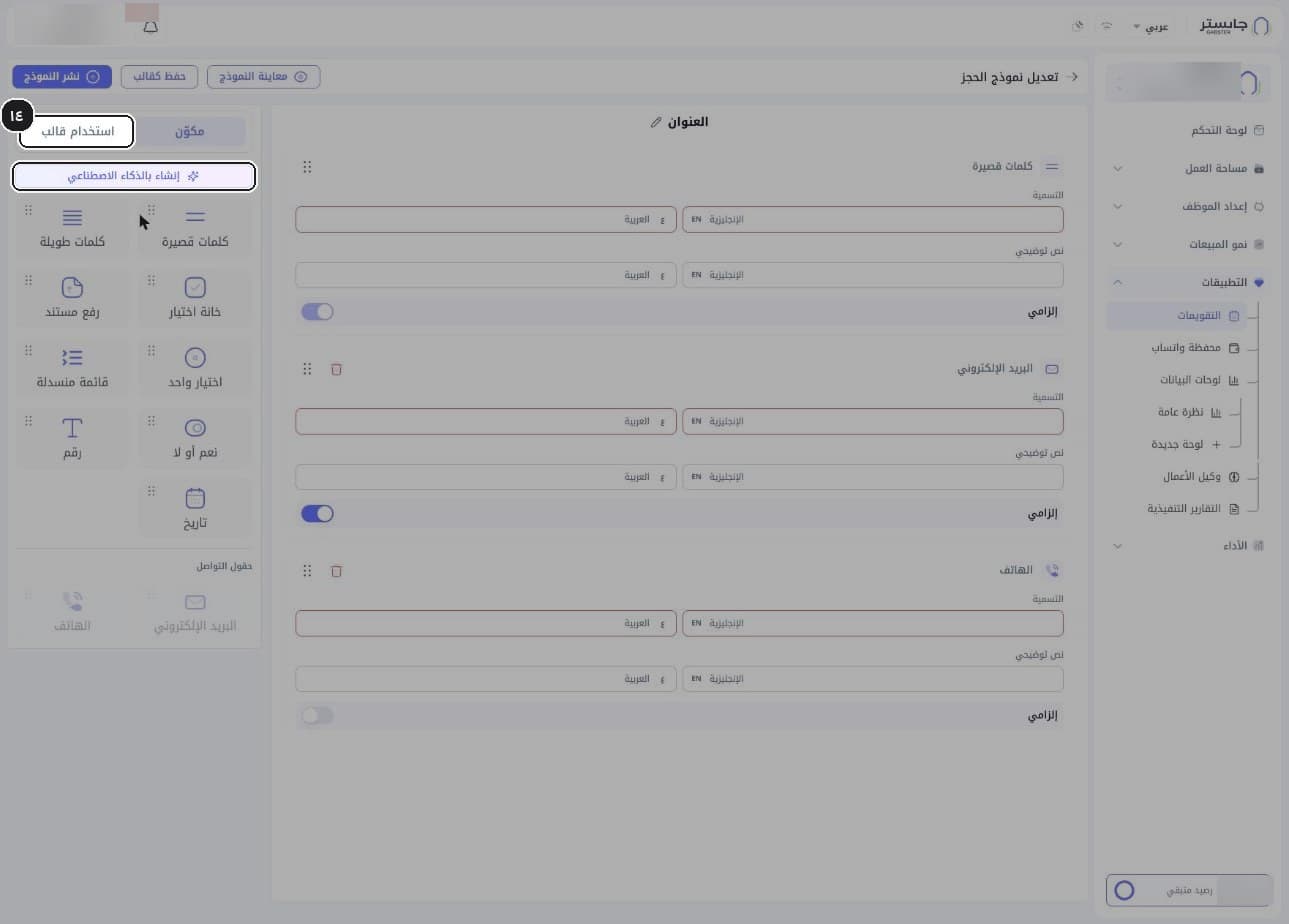
(Optional) Start from a saved template on the Use template (استخدام قالب) tab, or build the form with Generate with AI (إنشاء بالذكاء الاصطناعي). The templates tab shows No templates yet (لا توجد قوالب بعد) until you save one.
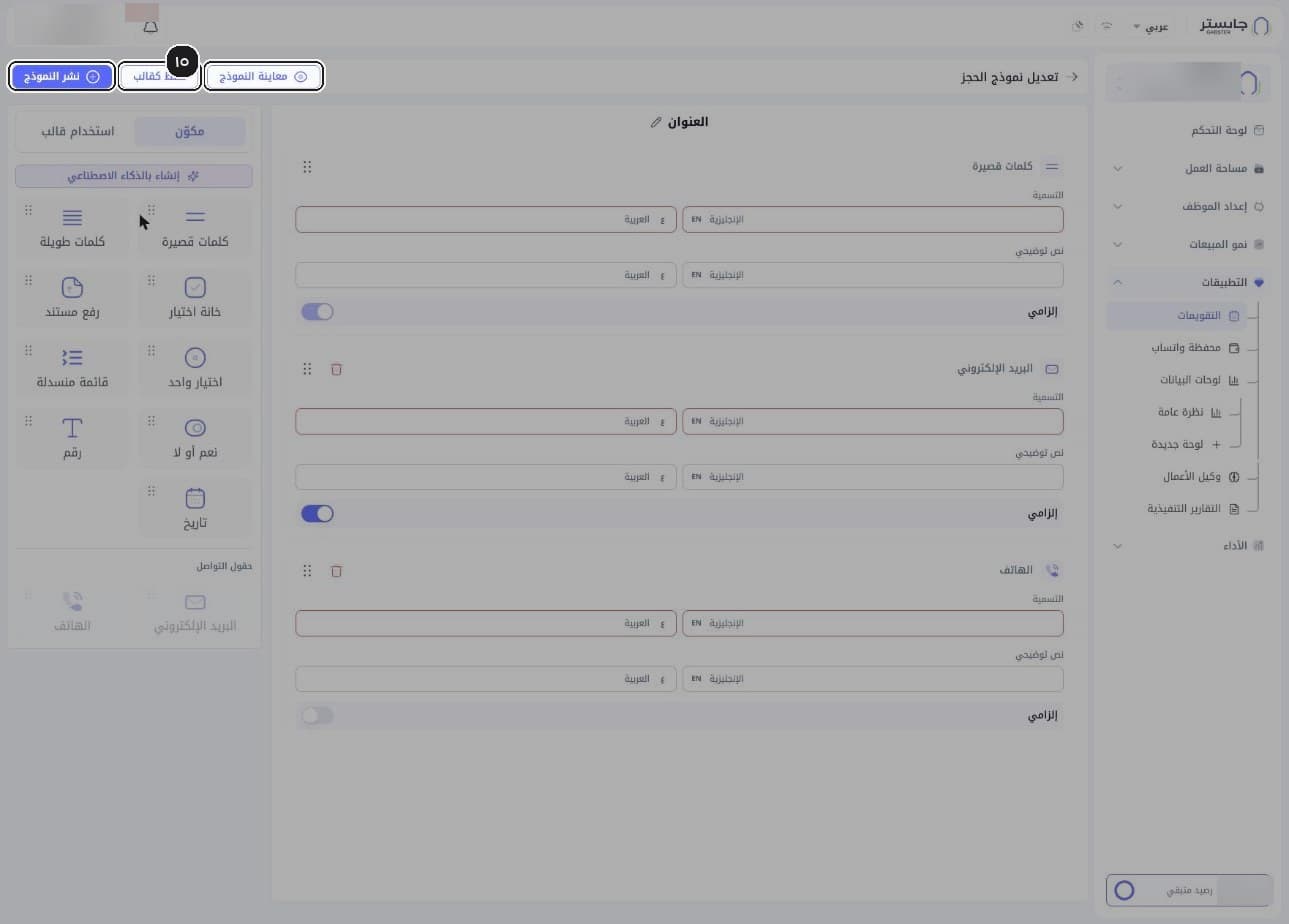
Use Preview form (معاينة النموذج) to see it, Save as template (حفظ كقالب) to reuse it, then Publish form (نشر النموذج).
C. Member availability
Open the Members tab.
Each member has a row with a badge showing how many calendars they are on, such as One calendar (تقويم واحد) or Two calendars (تقويمان).
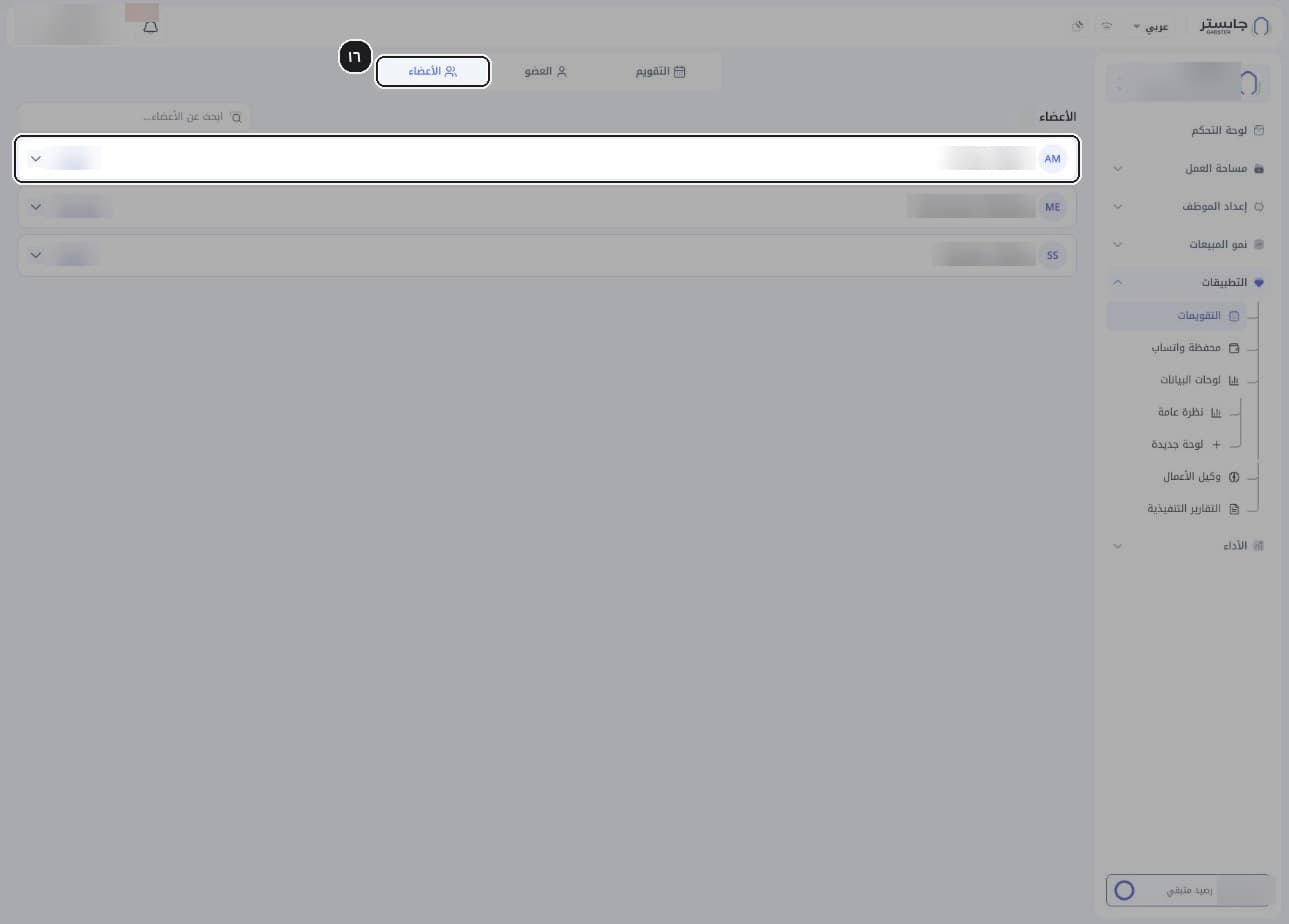
Expand a member's row with the arrow to see their calendars.
Each calendar appears as a card with its timezone; some may show a Not set up (غير مُعد) badge.
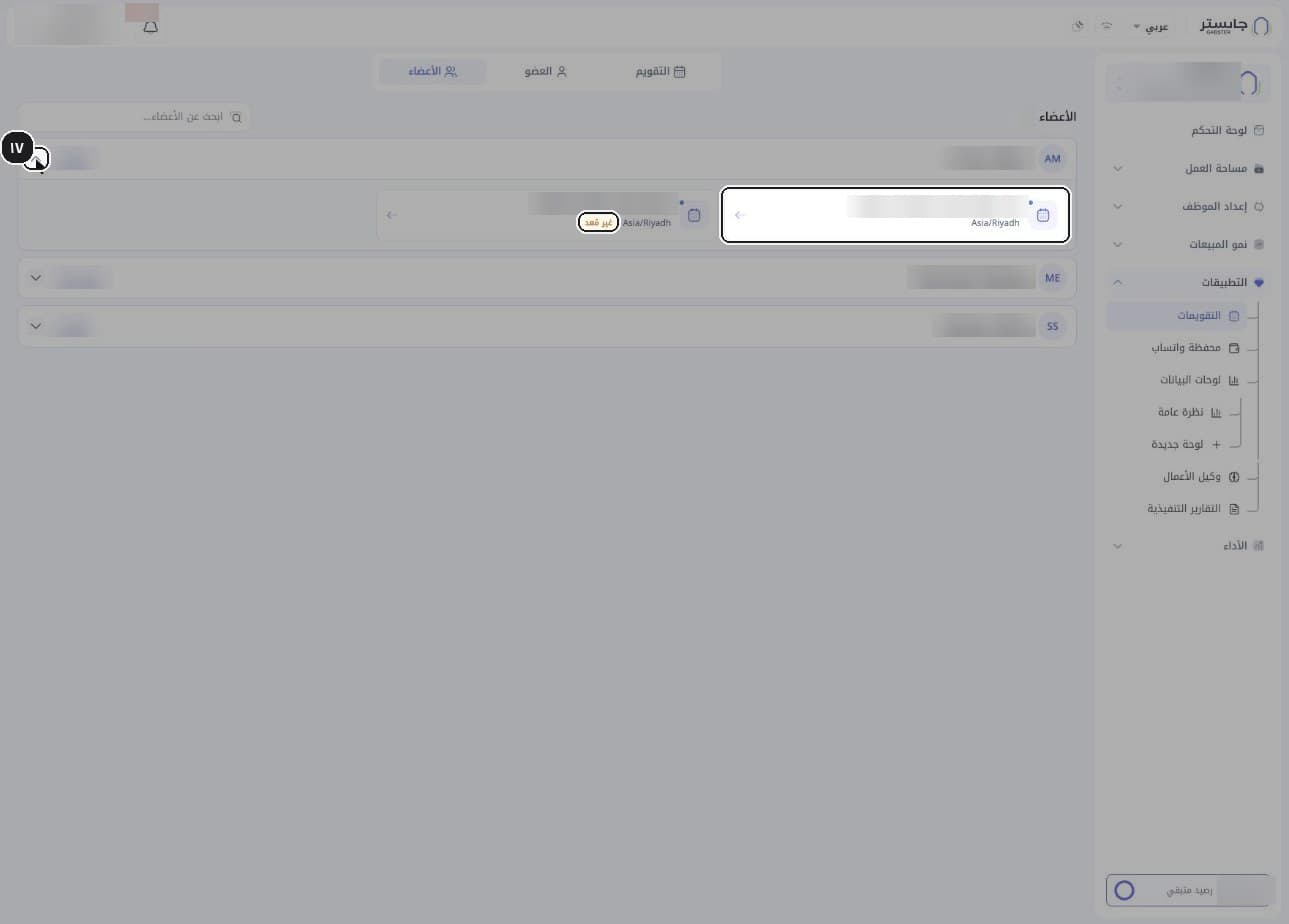
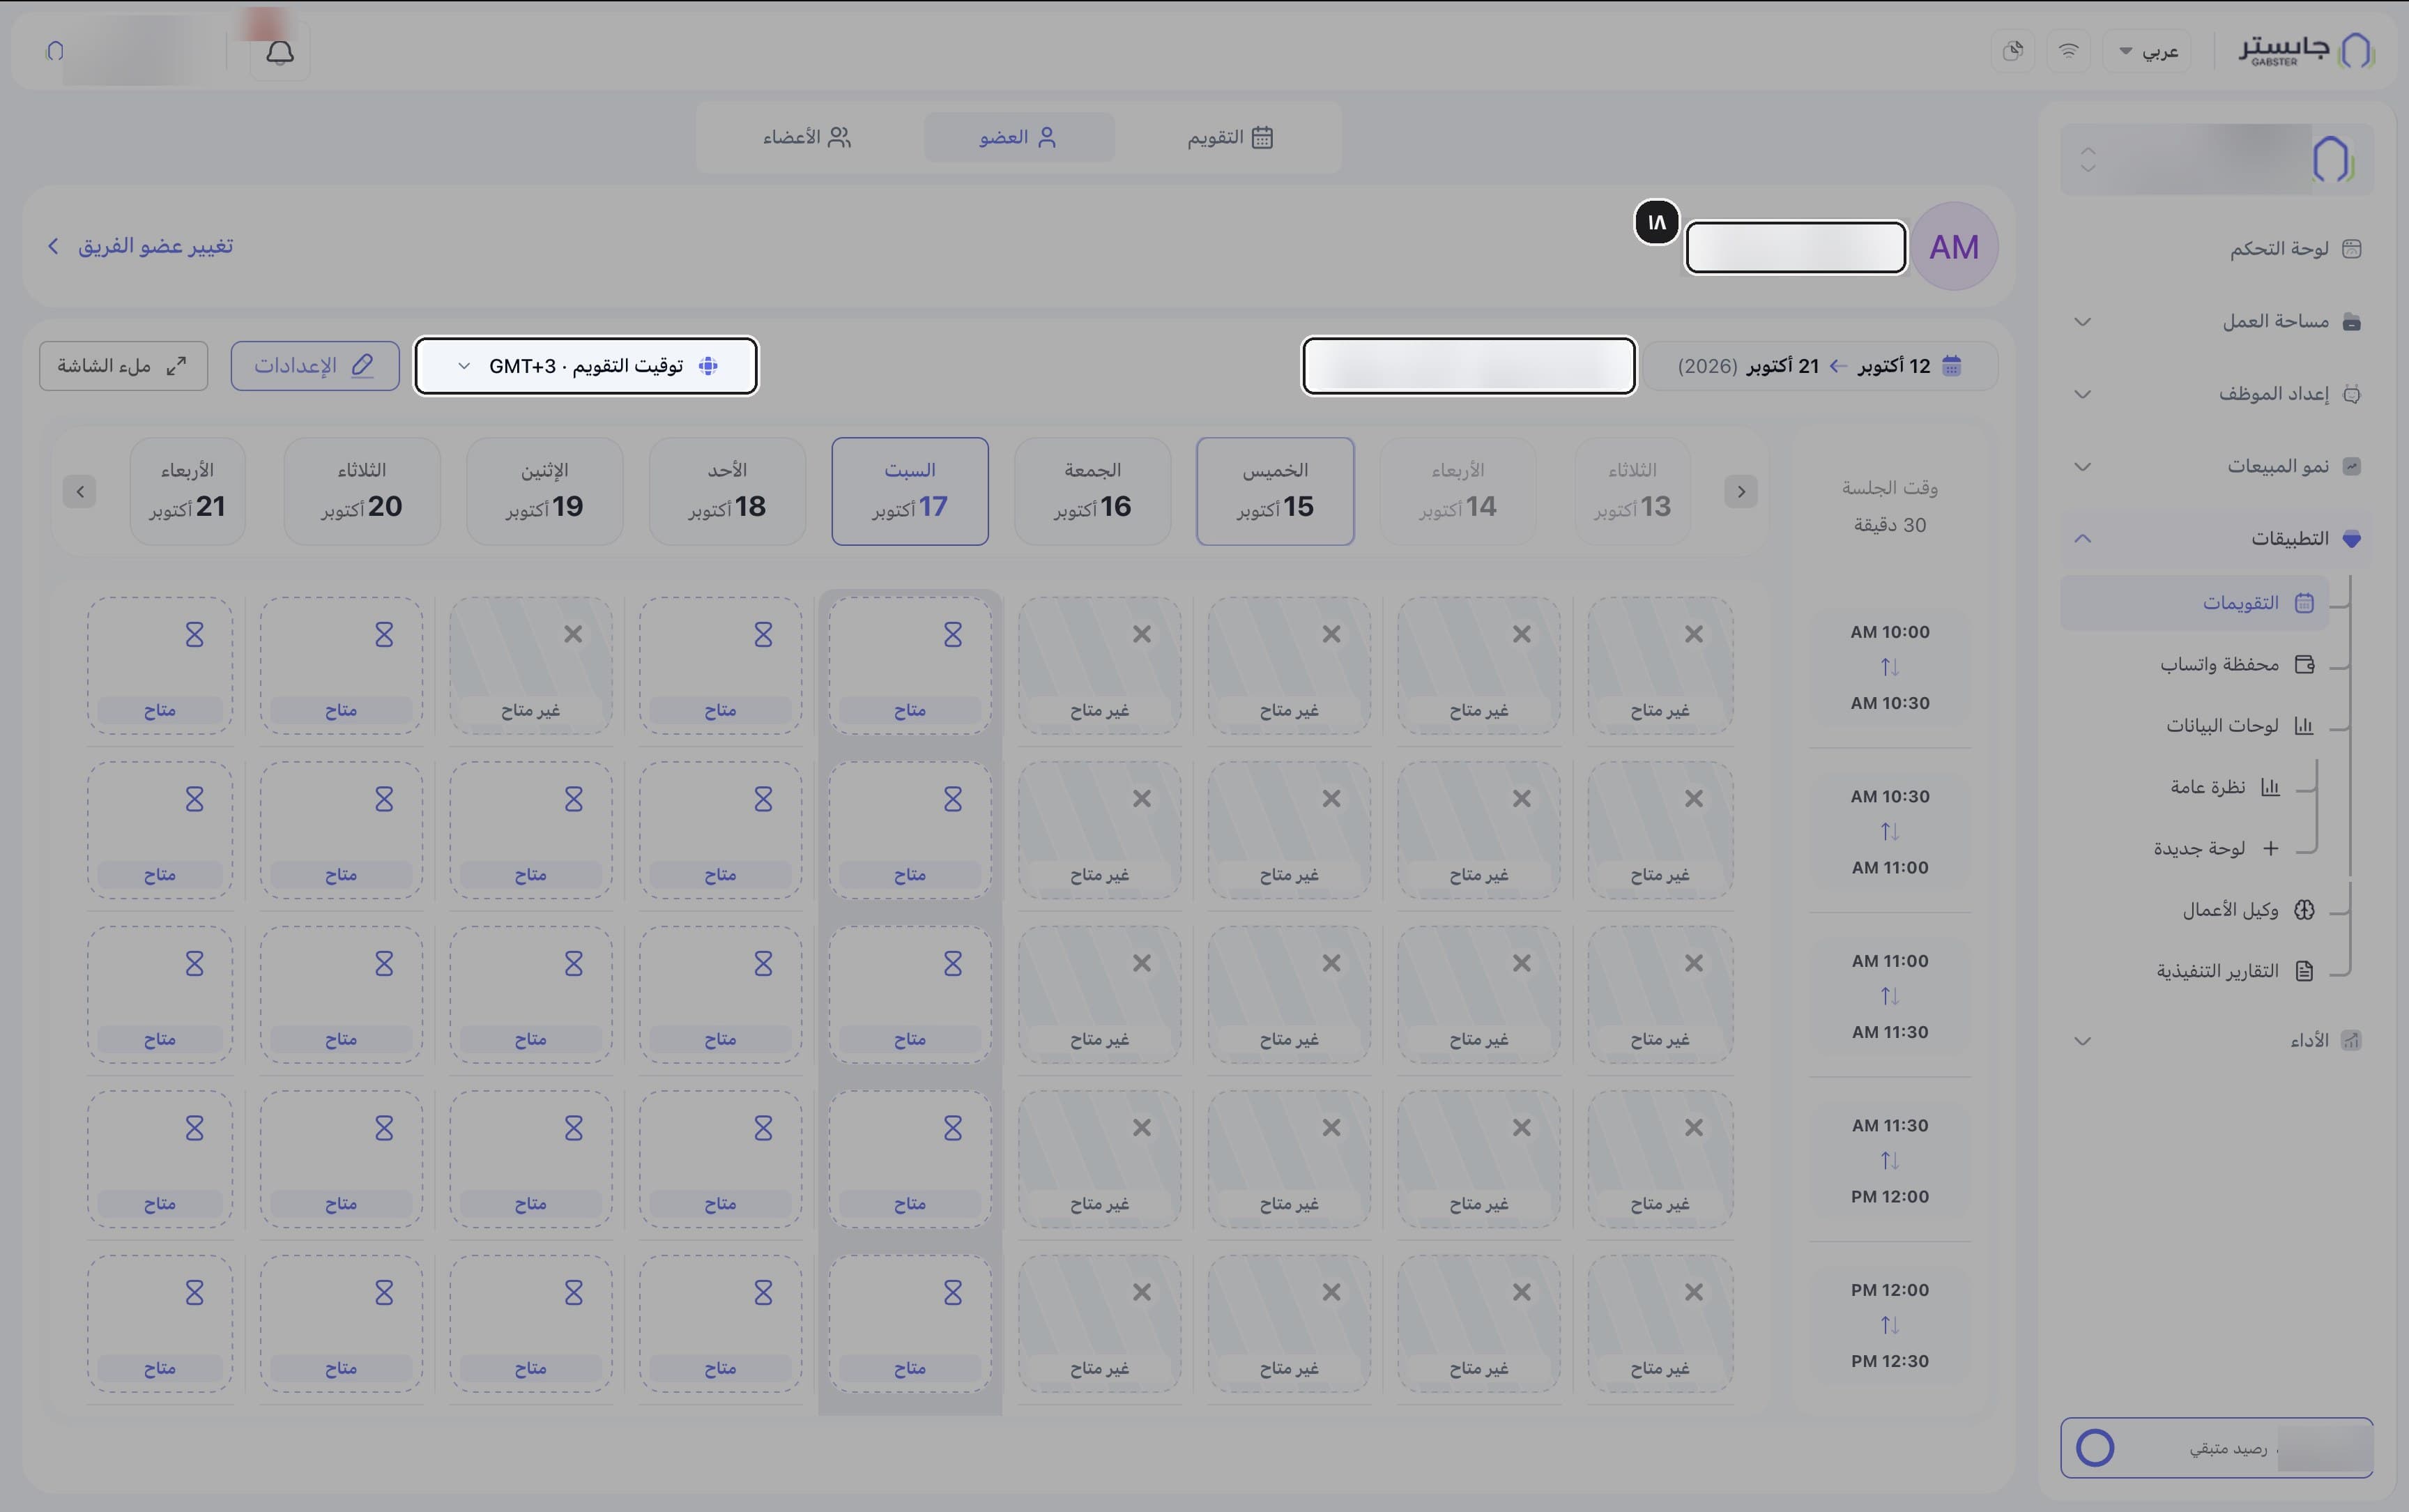
Open the member's calendar on the Member tab.
The page shows the member's name, the meeting type with its length, and the Calendar timezone (توقيت التقويم).
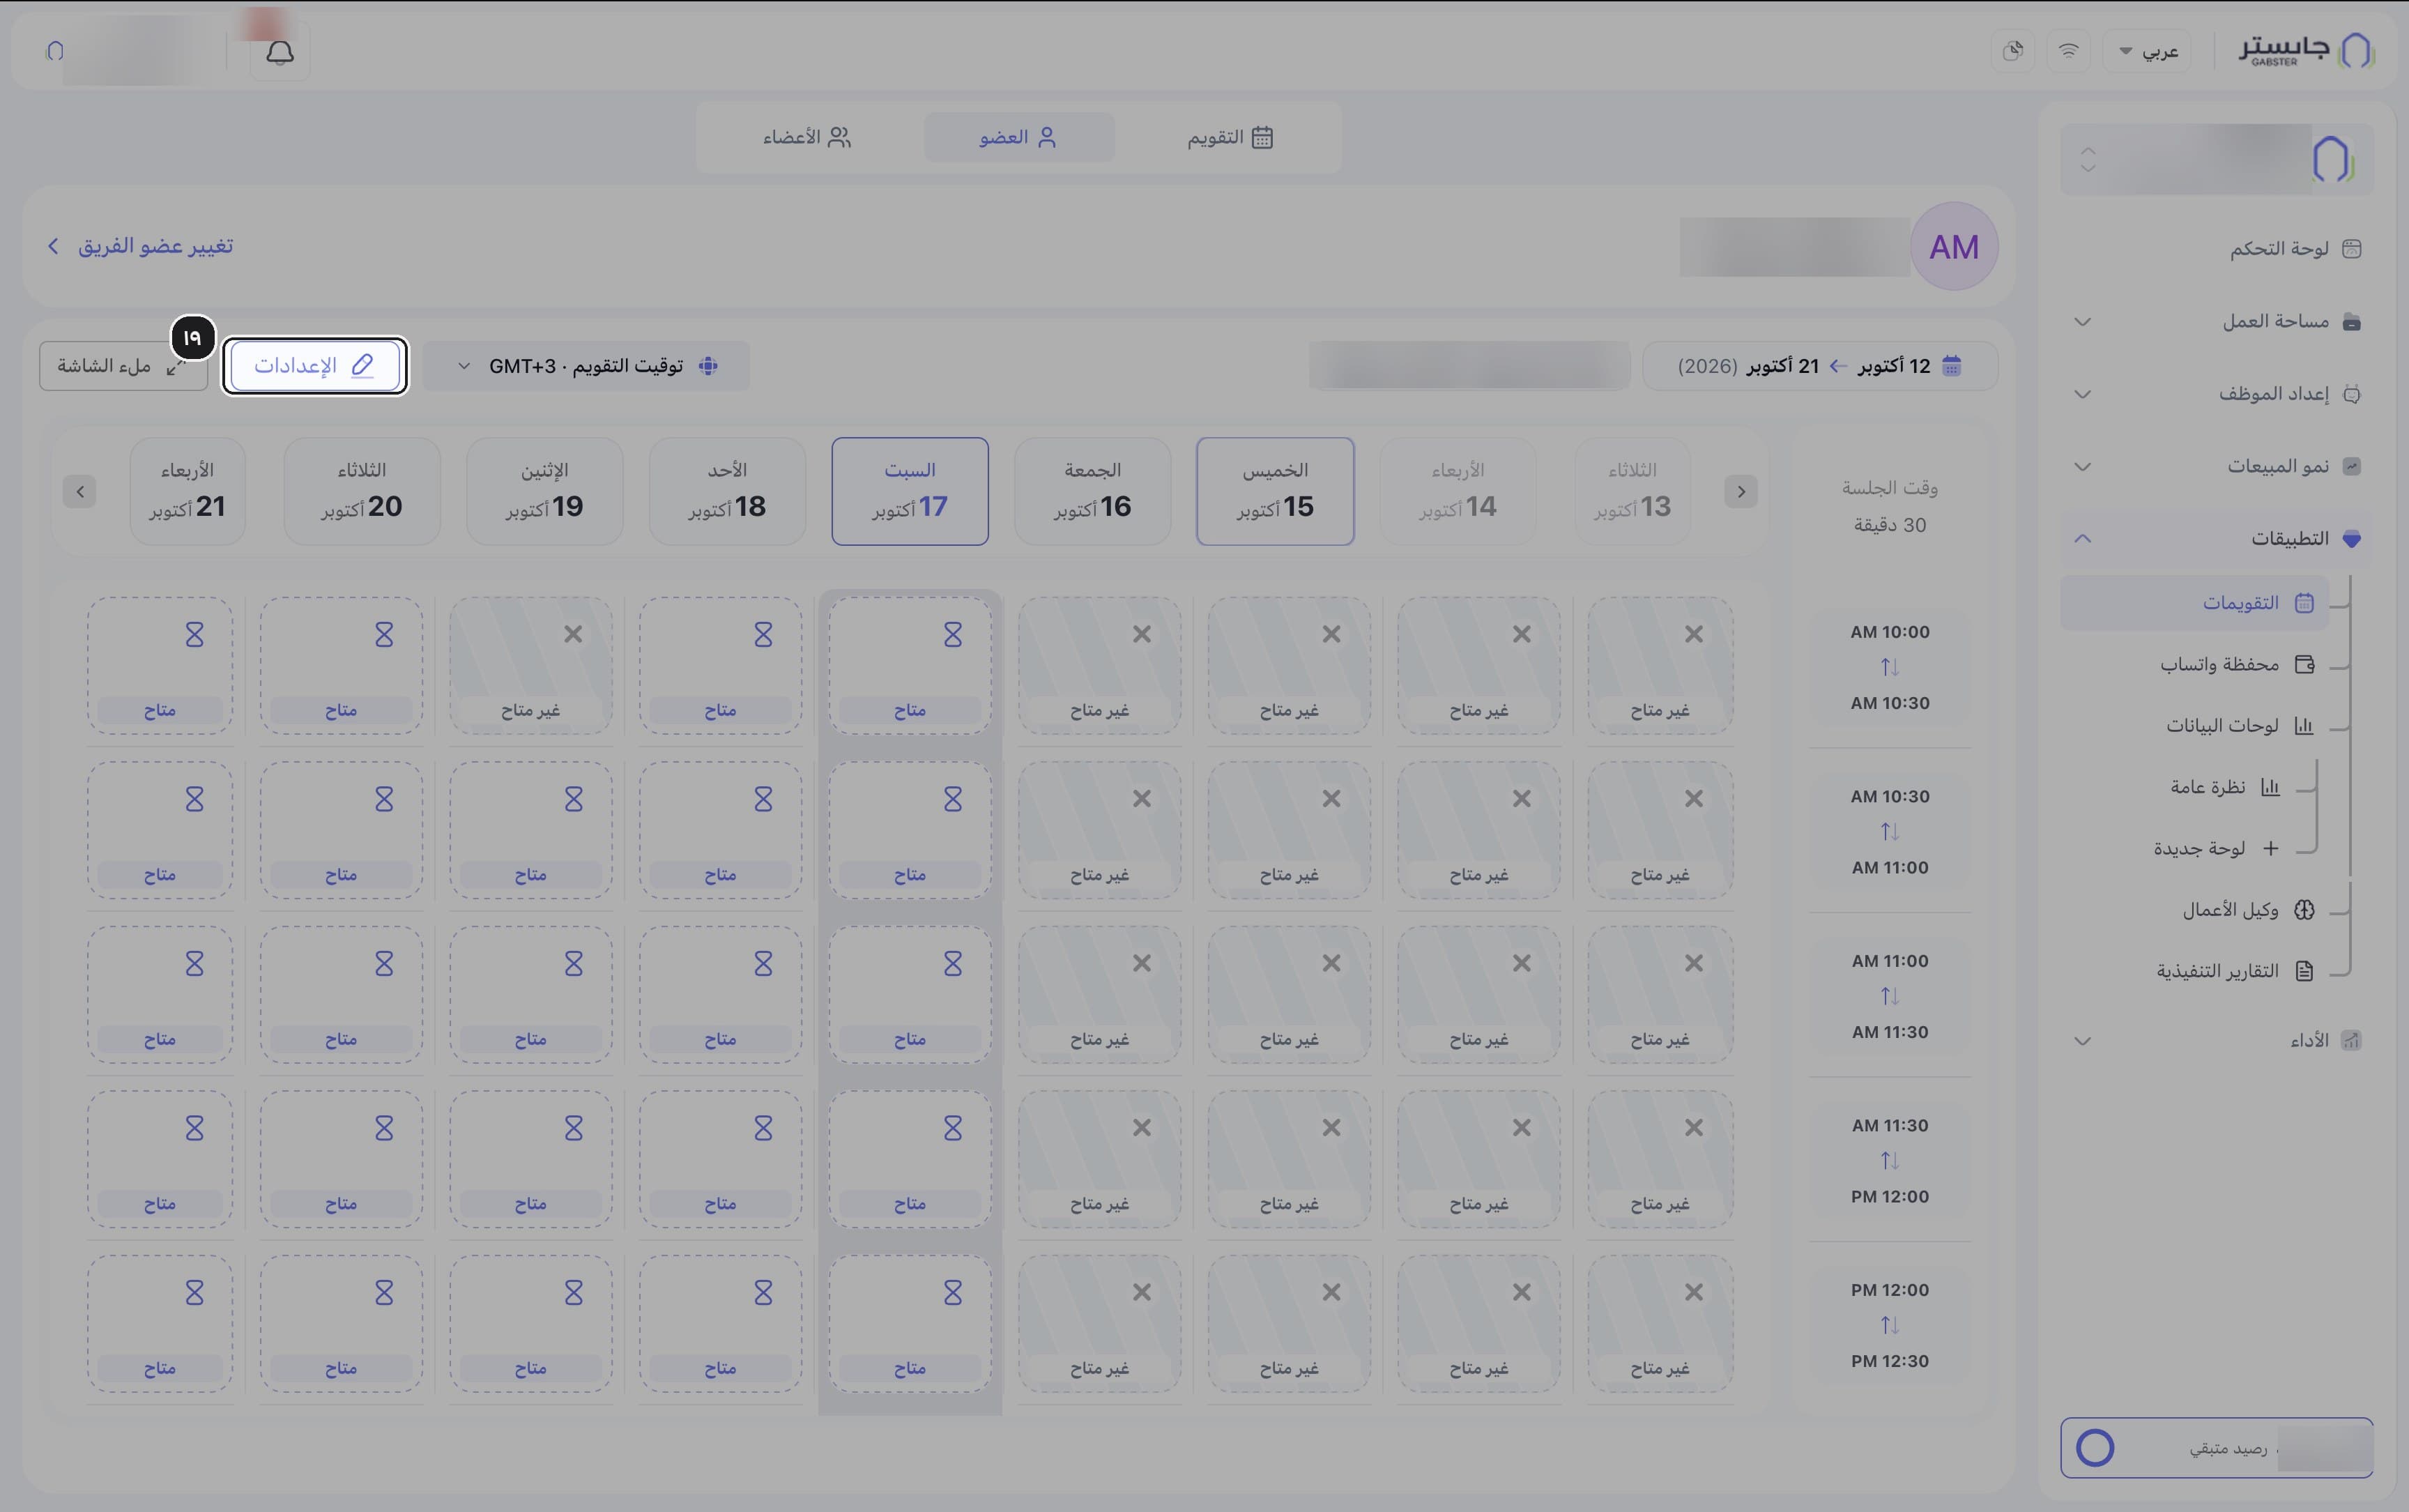
Click Settings (الإعدادات).
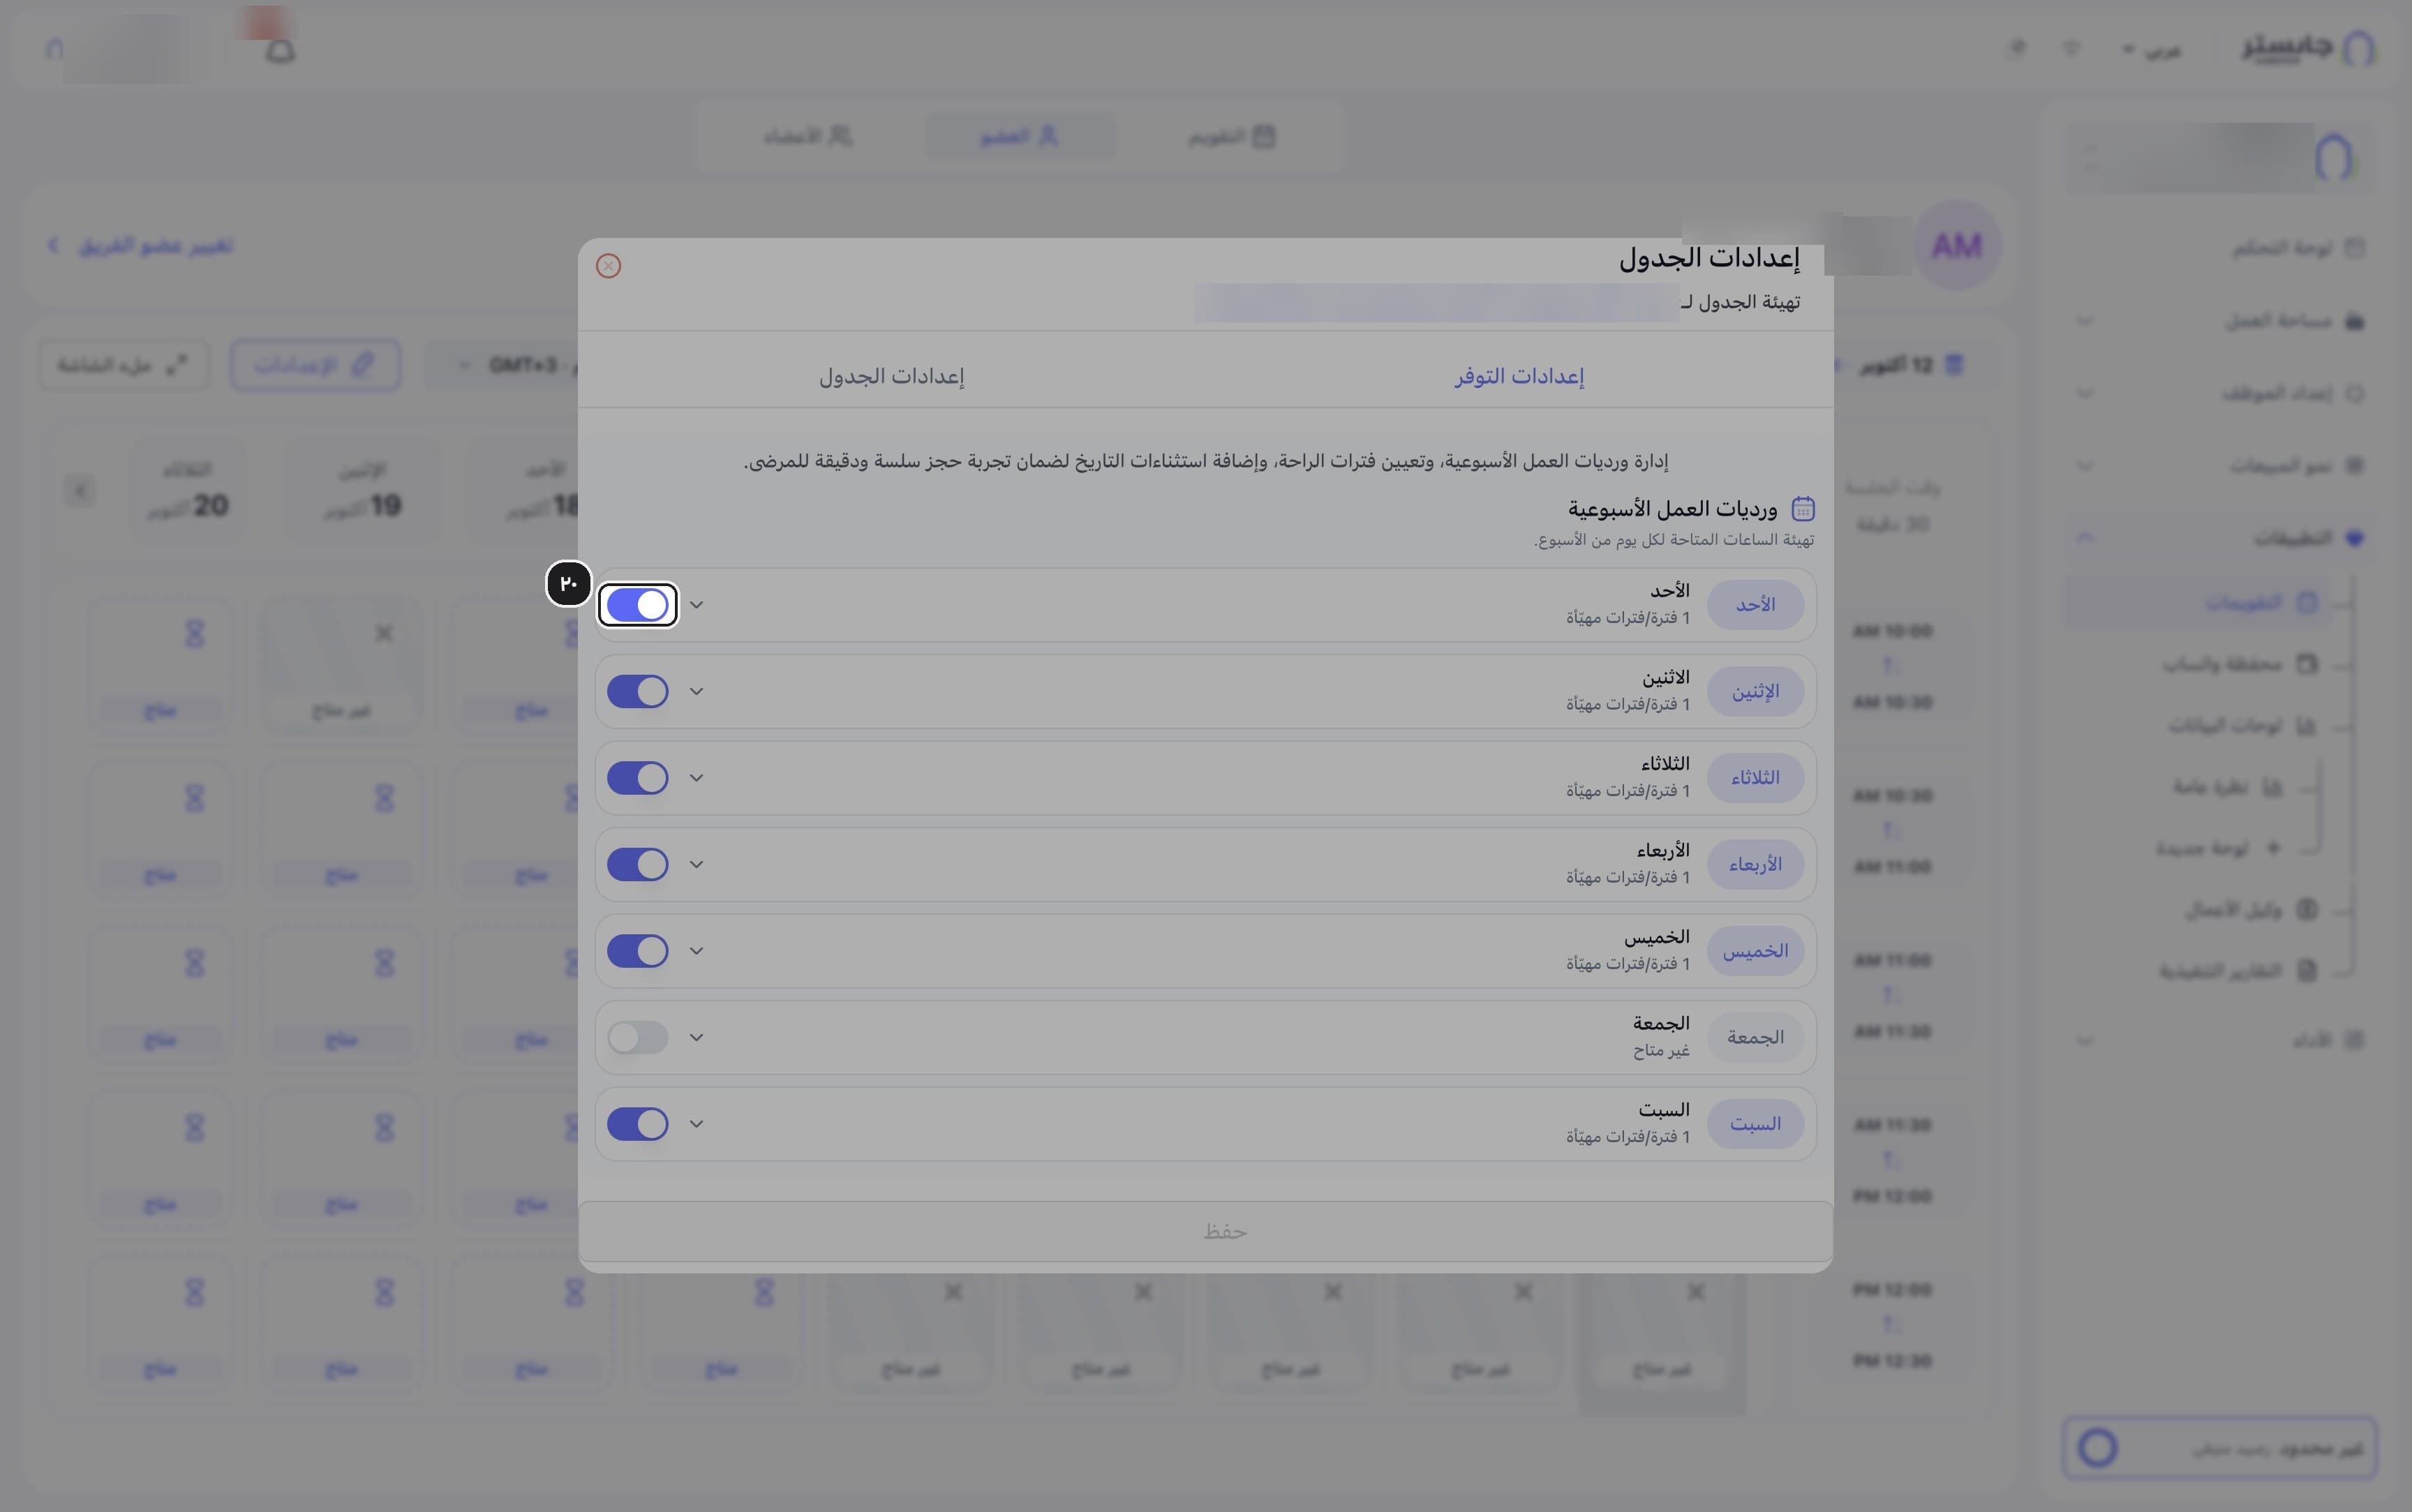
The Schedule settings (إعدادات الجدول) window opens for this member and meeting type.
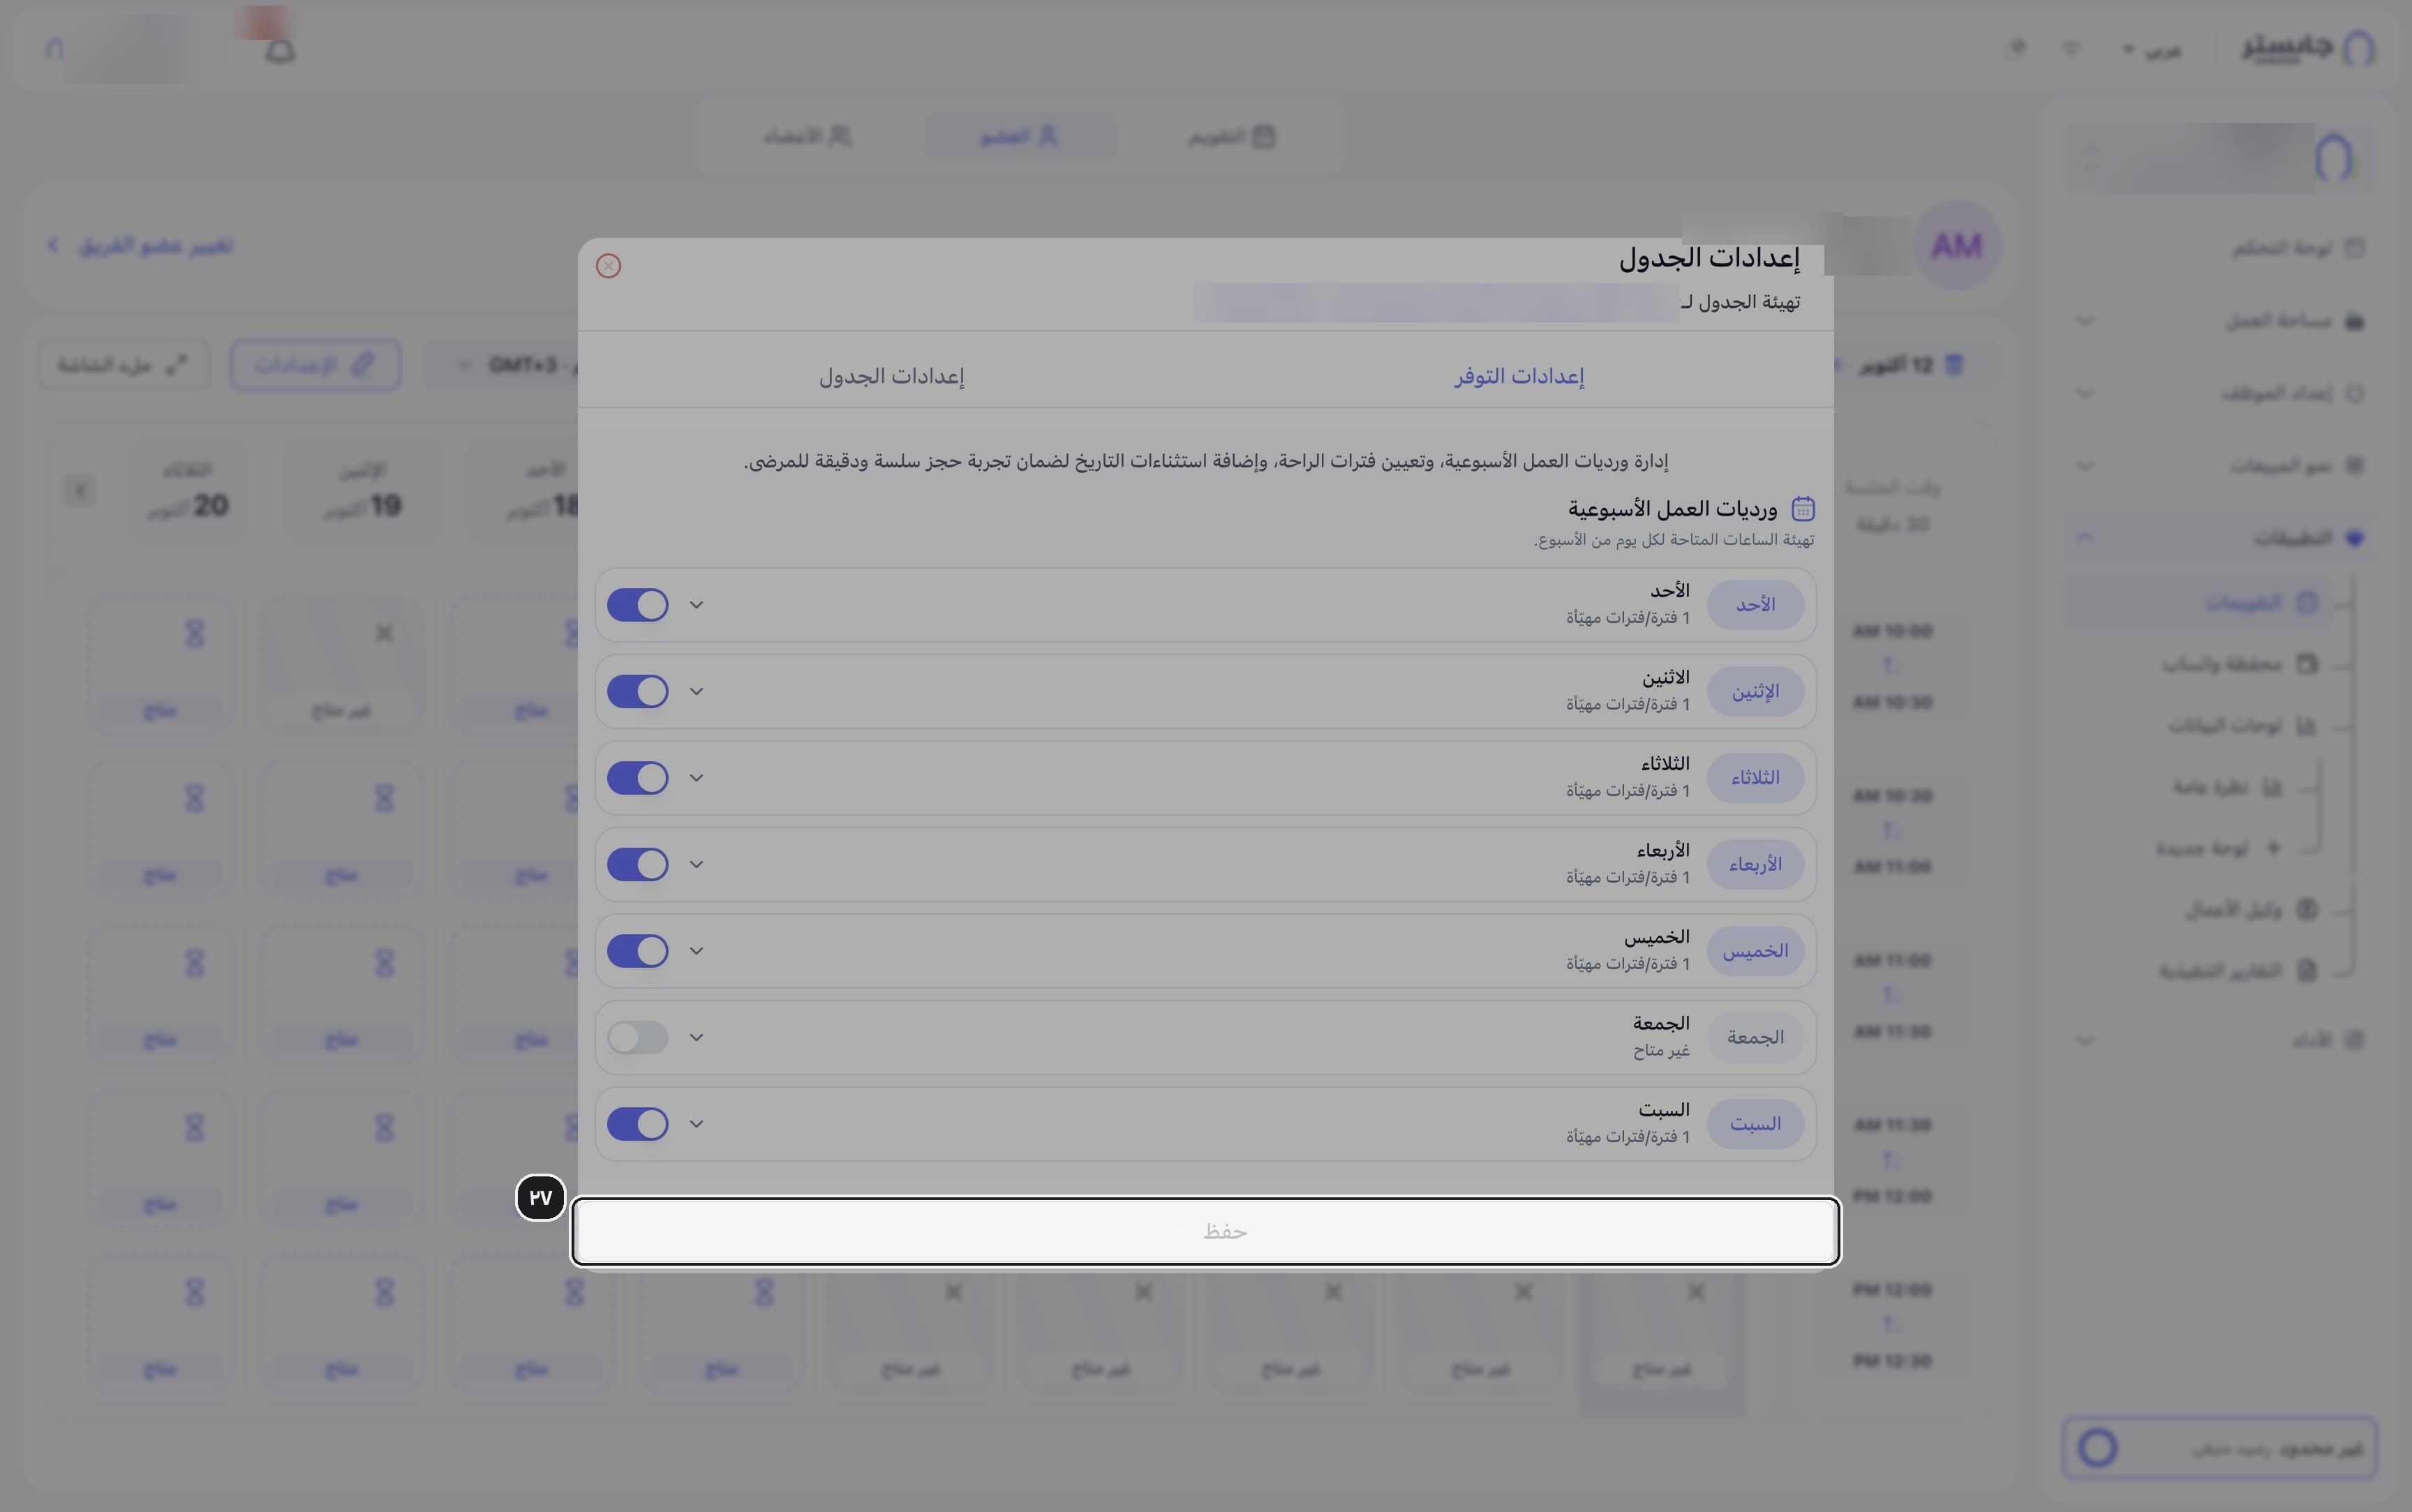
On the Availability settings (إعدادات التوفر) tab, turn each weekday on or off with its toggle. Days that are off show Unavailable (غير متاح).
Expand a day with its arrow and set the period's start and end time, for example 10:00 AM to 08:00 PM.
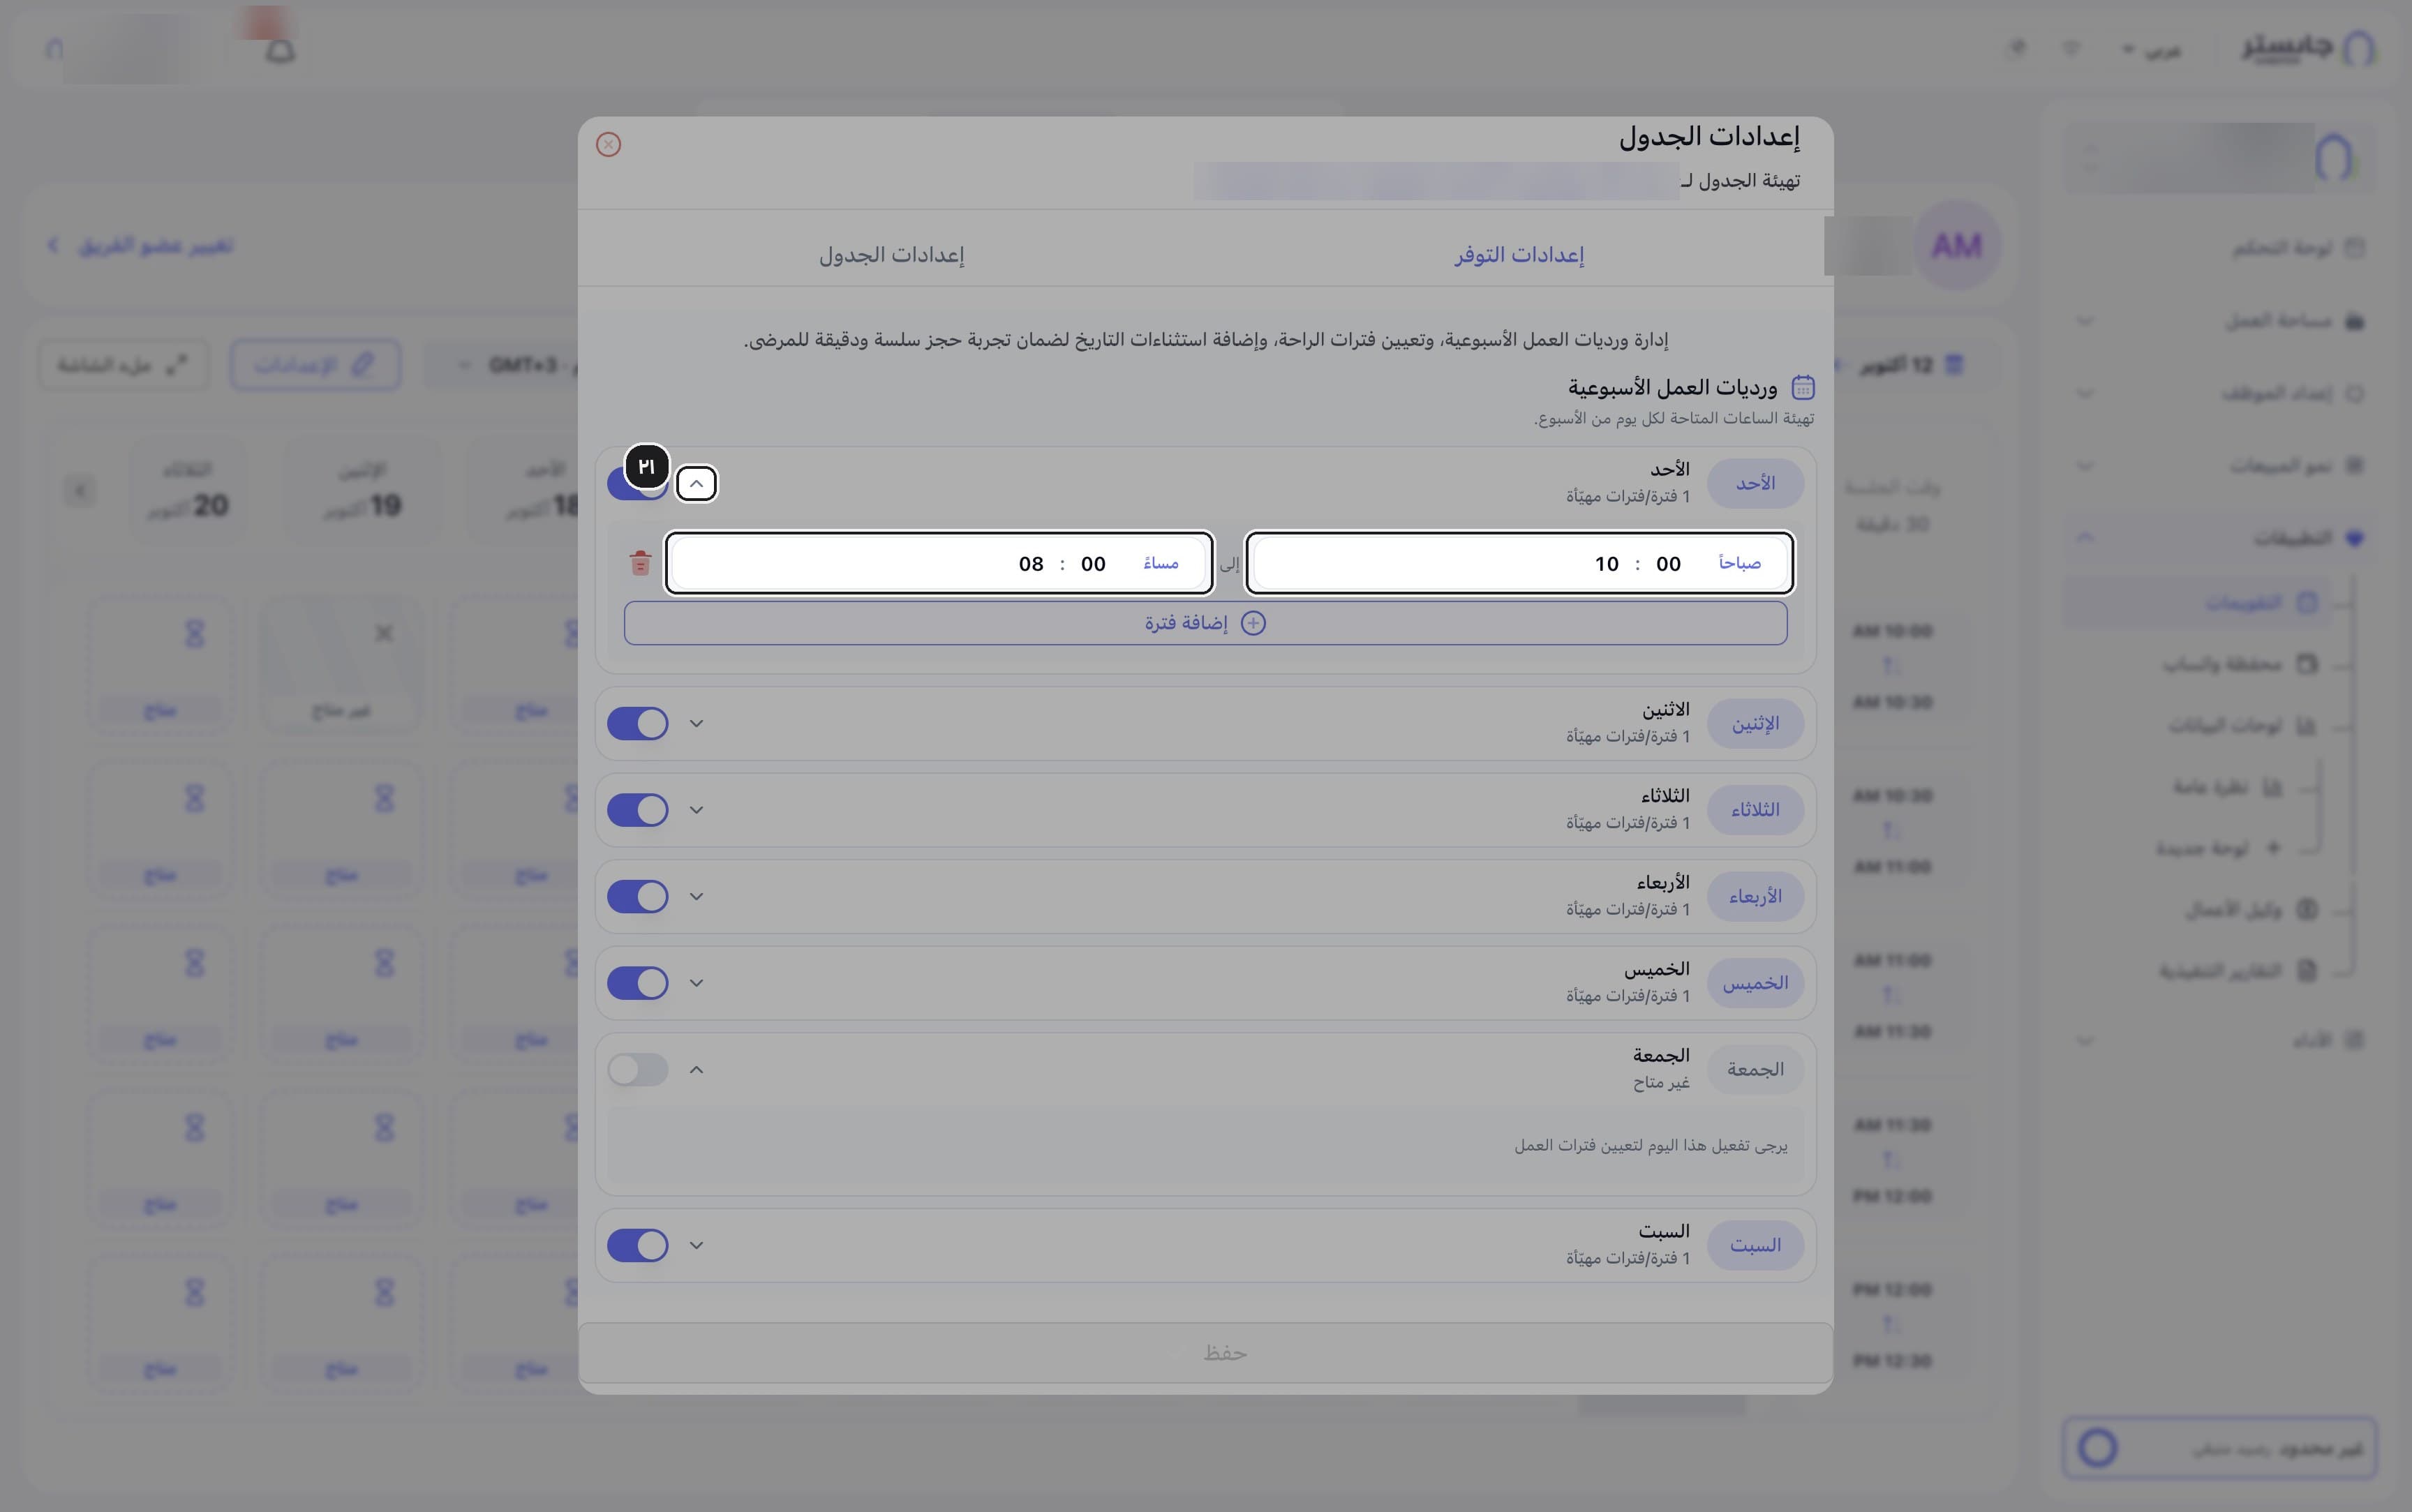
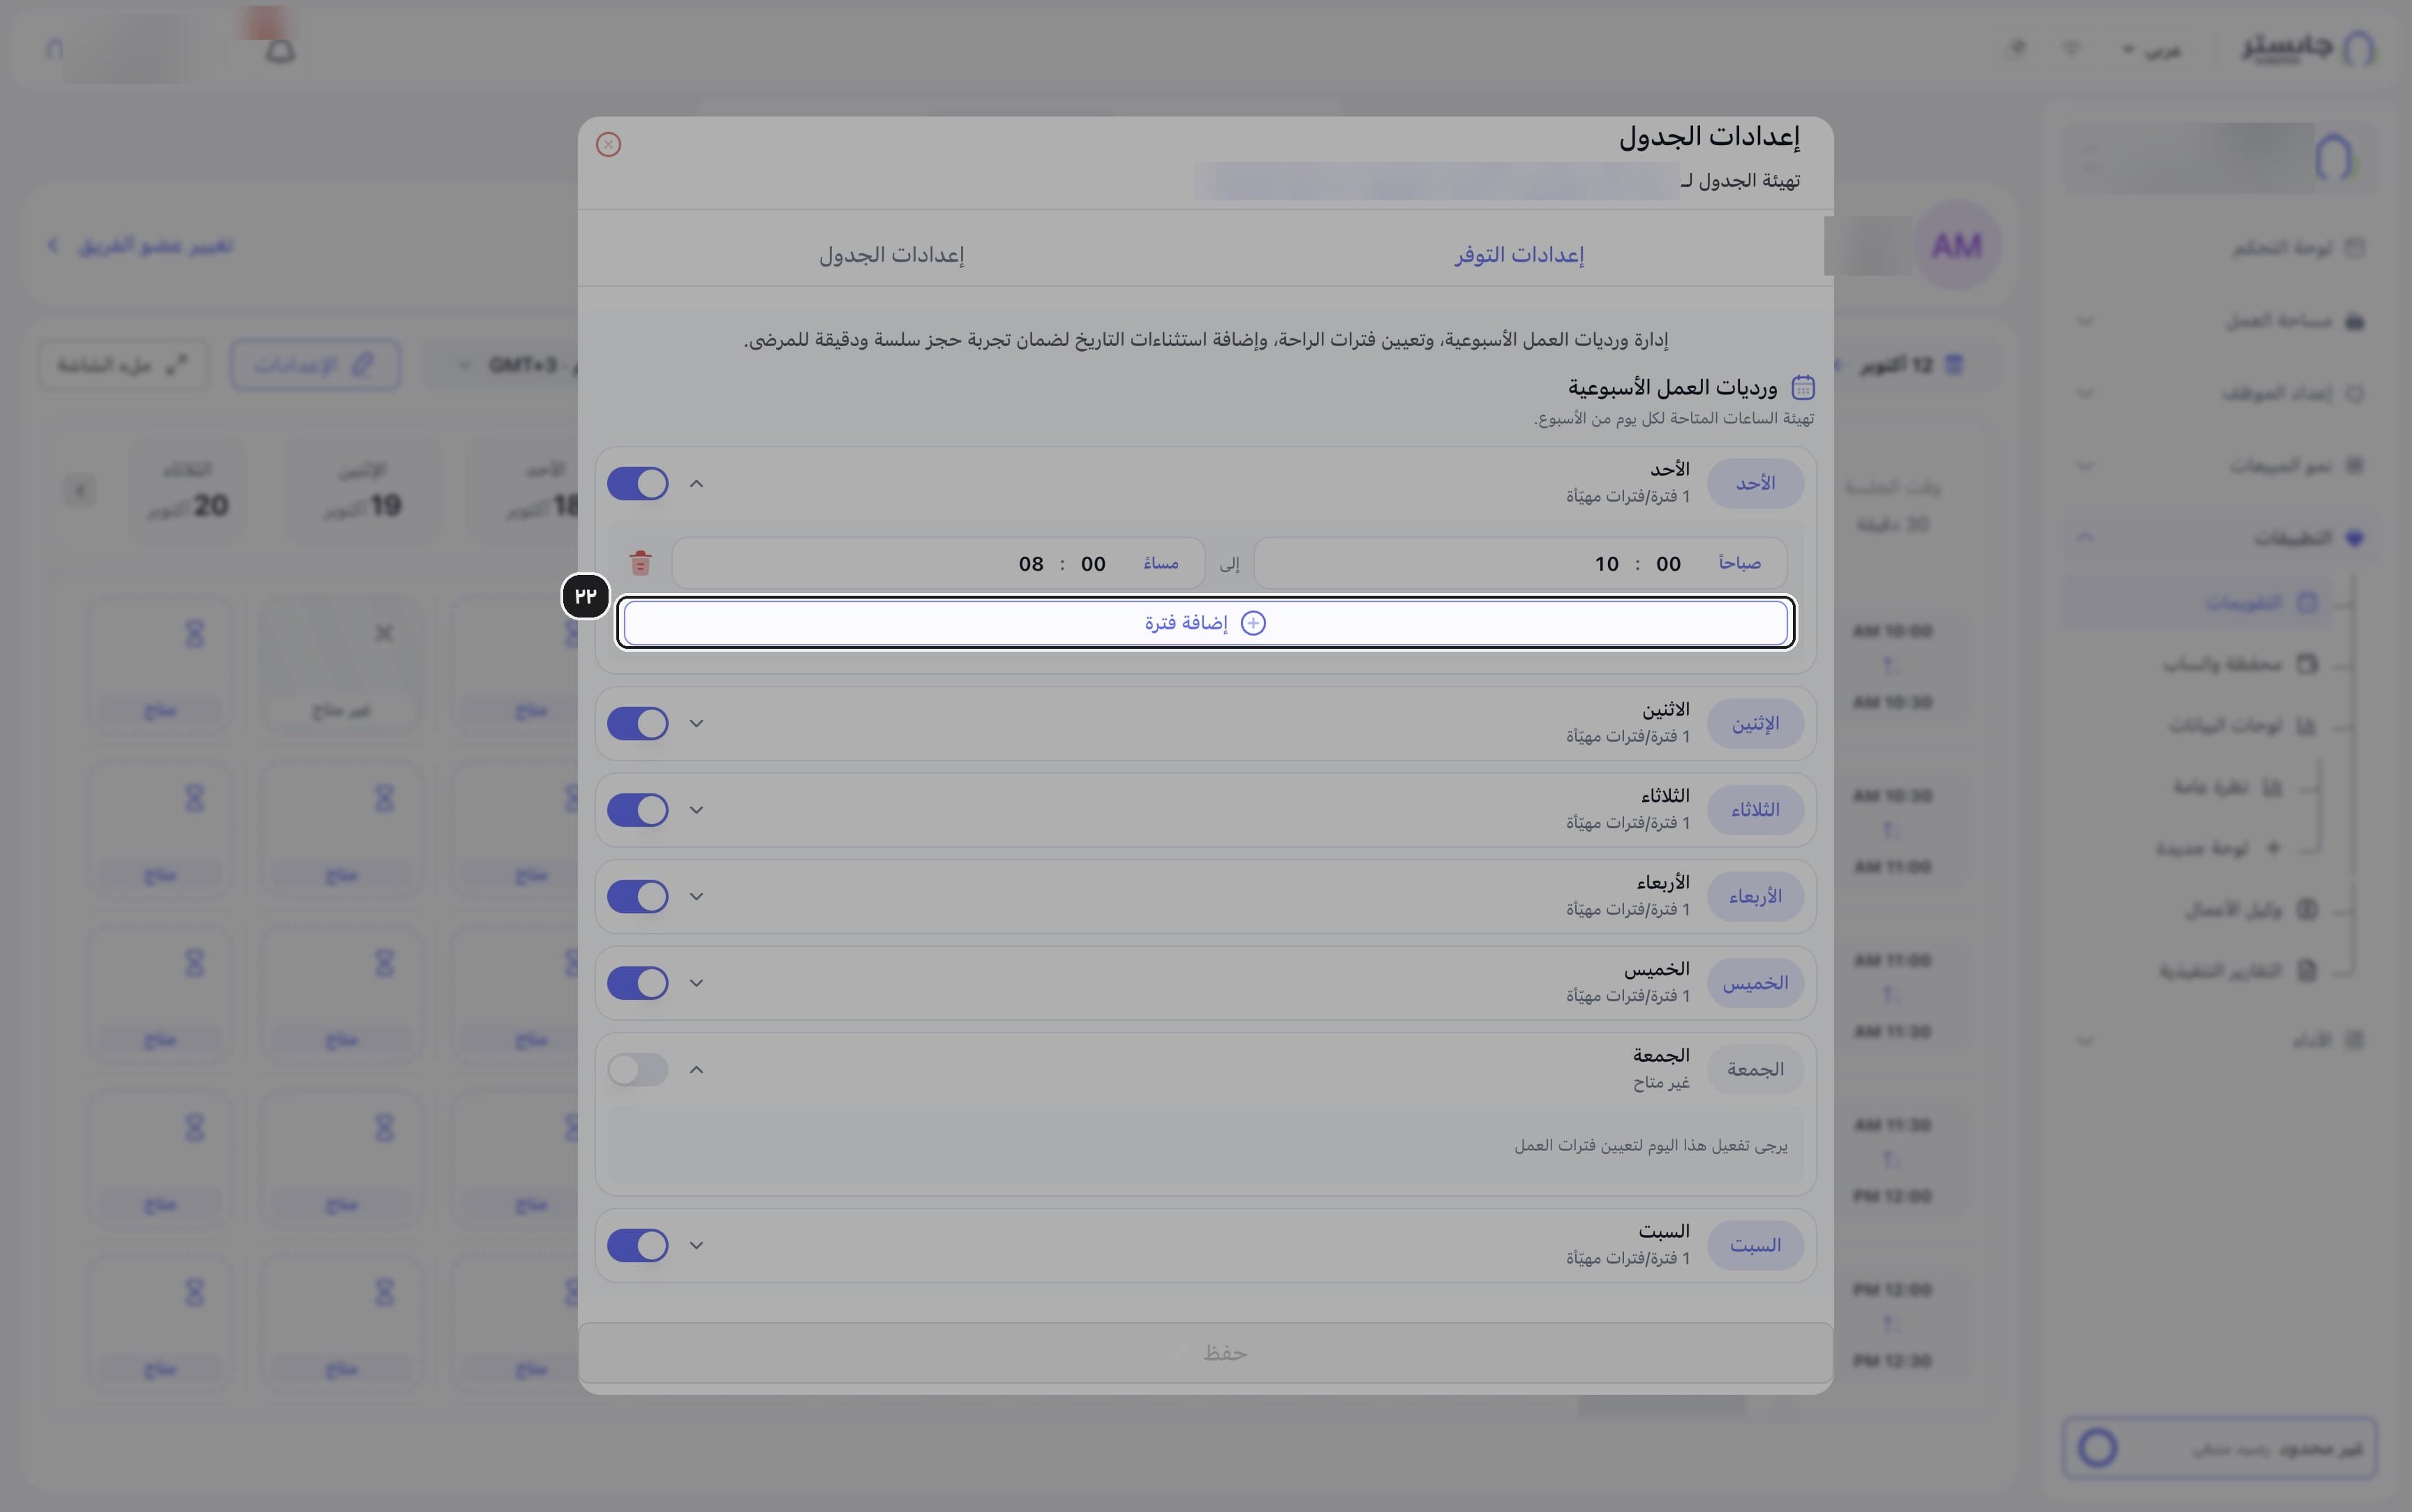
(Optional) Click Add period (إضافة فترة) to add a second period to the same day — for example, to leave a break between them.
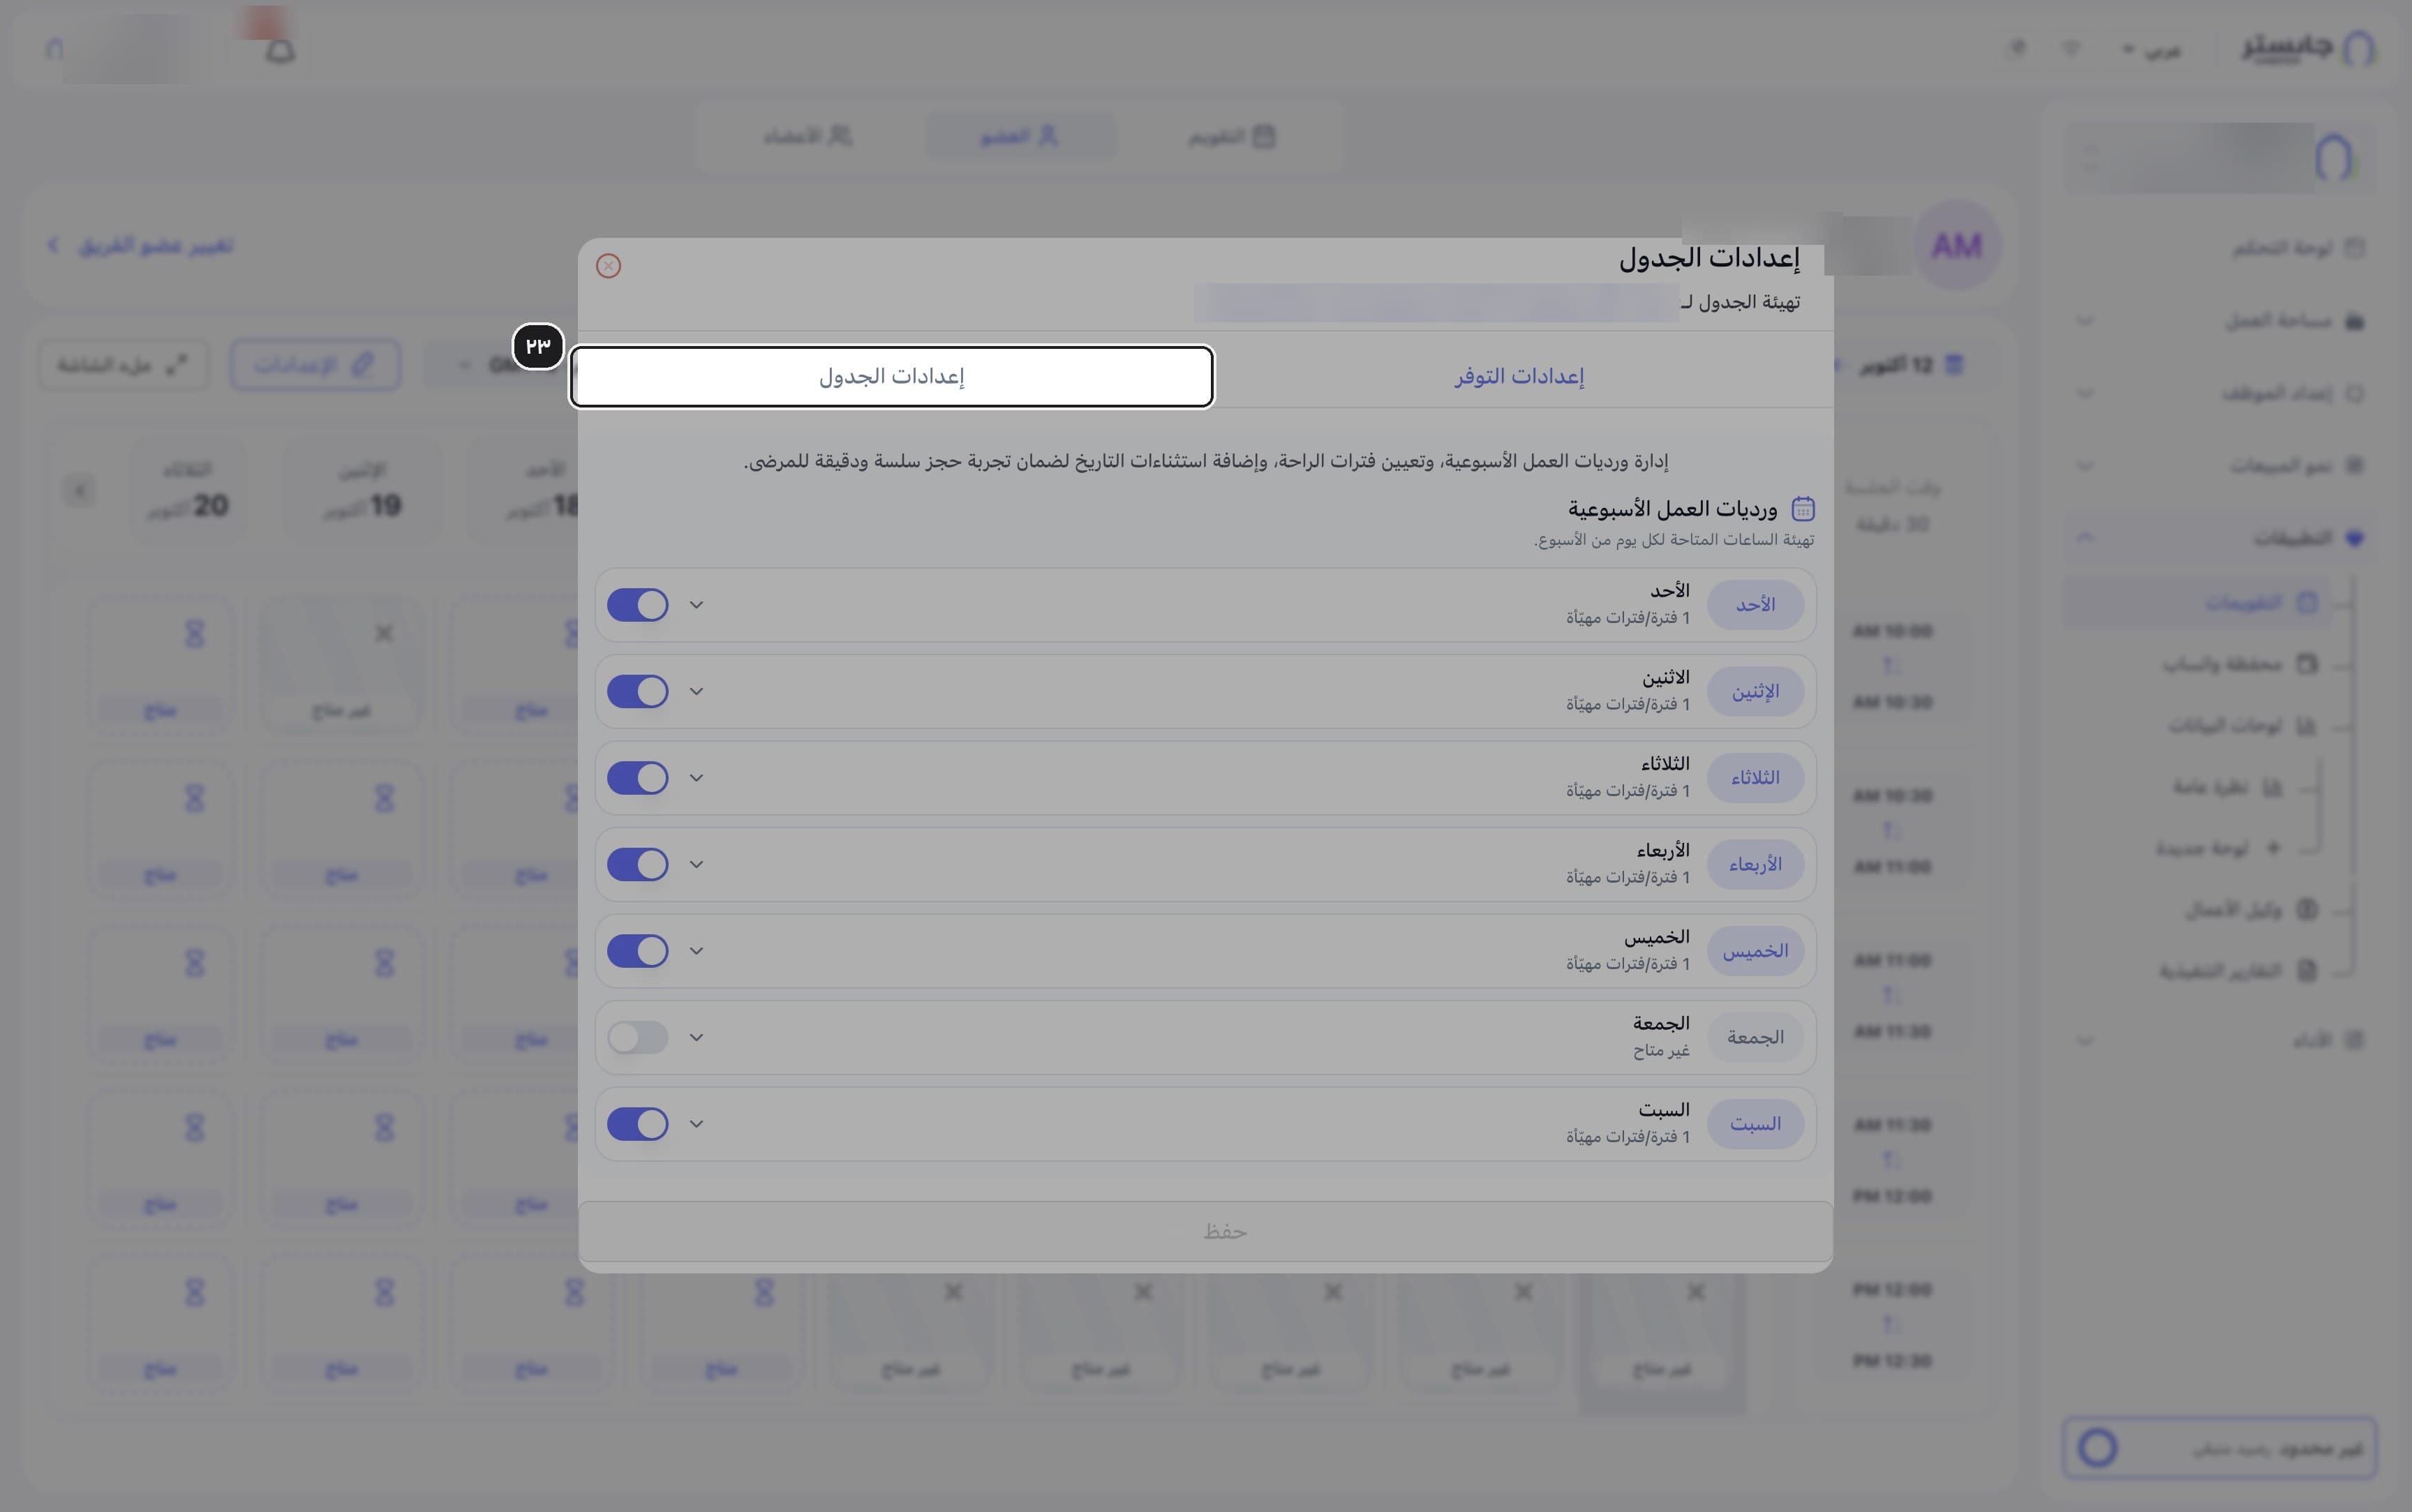
Switch to the Schedule settings tab.
The exceptions, Pattern settings (إعدادات النمط) and Availability manager (مدير التوفر — appointment duration and buffers) sections appear.
To add a day off or different hours on a specific date, click Add exception (إضافة استثناء).
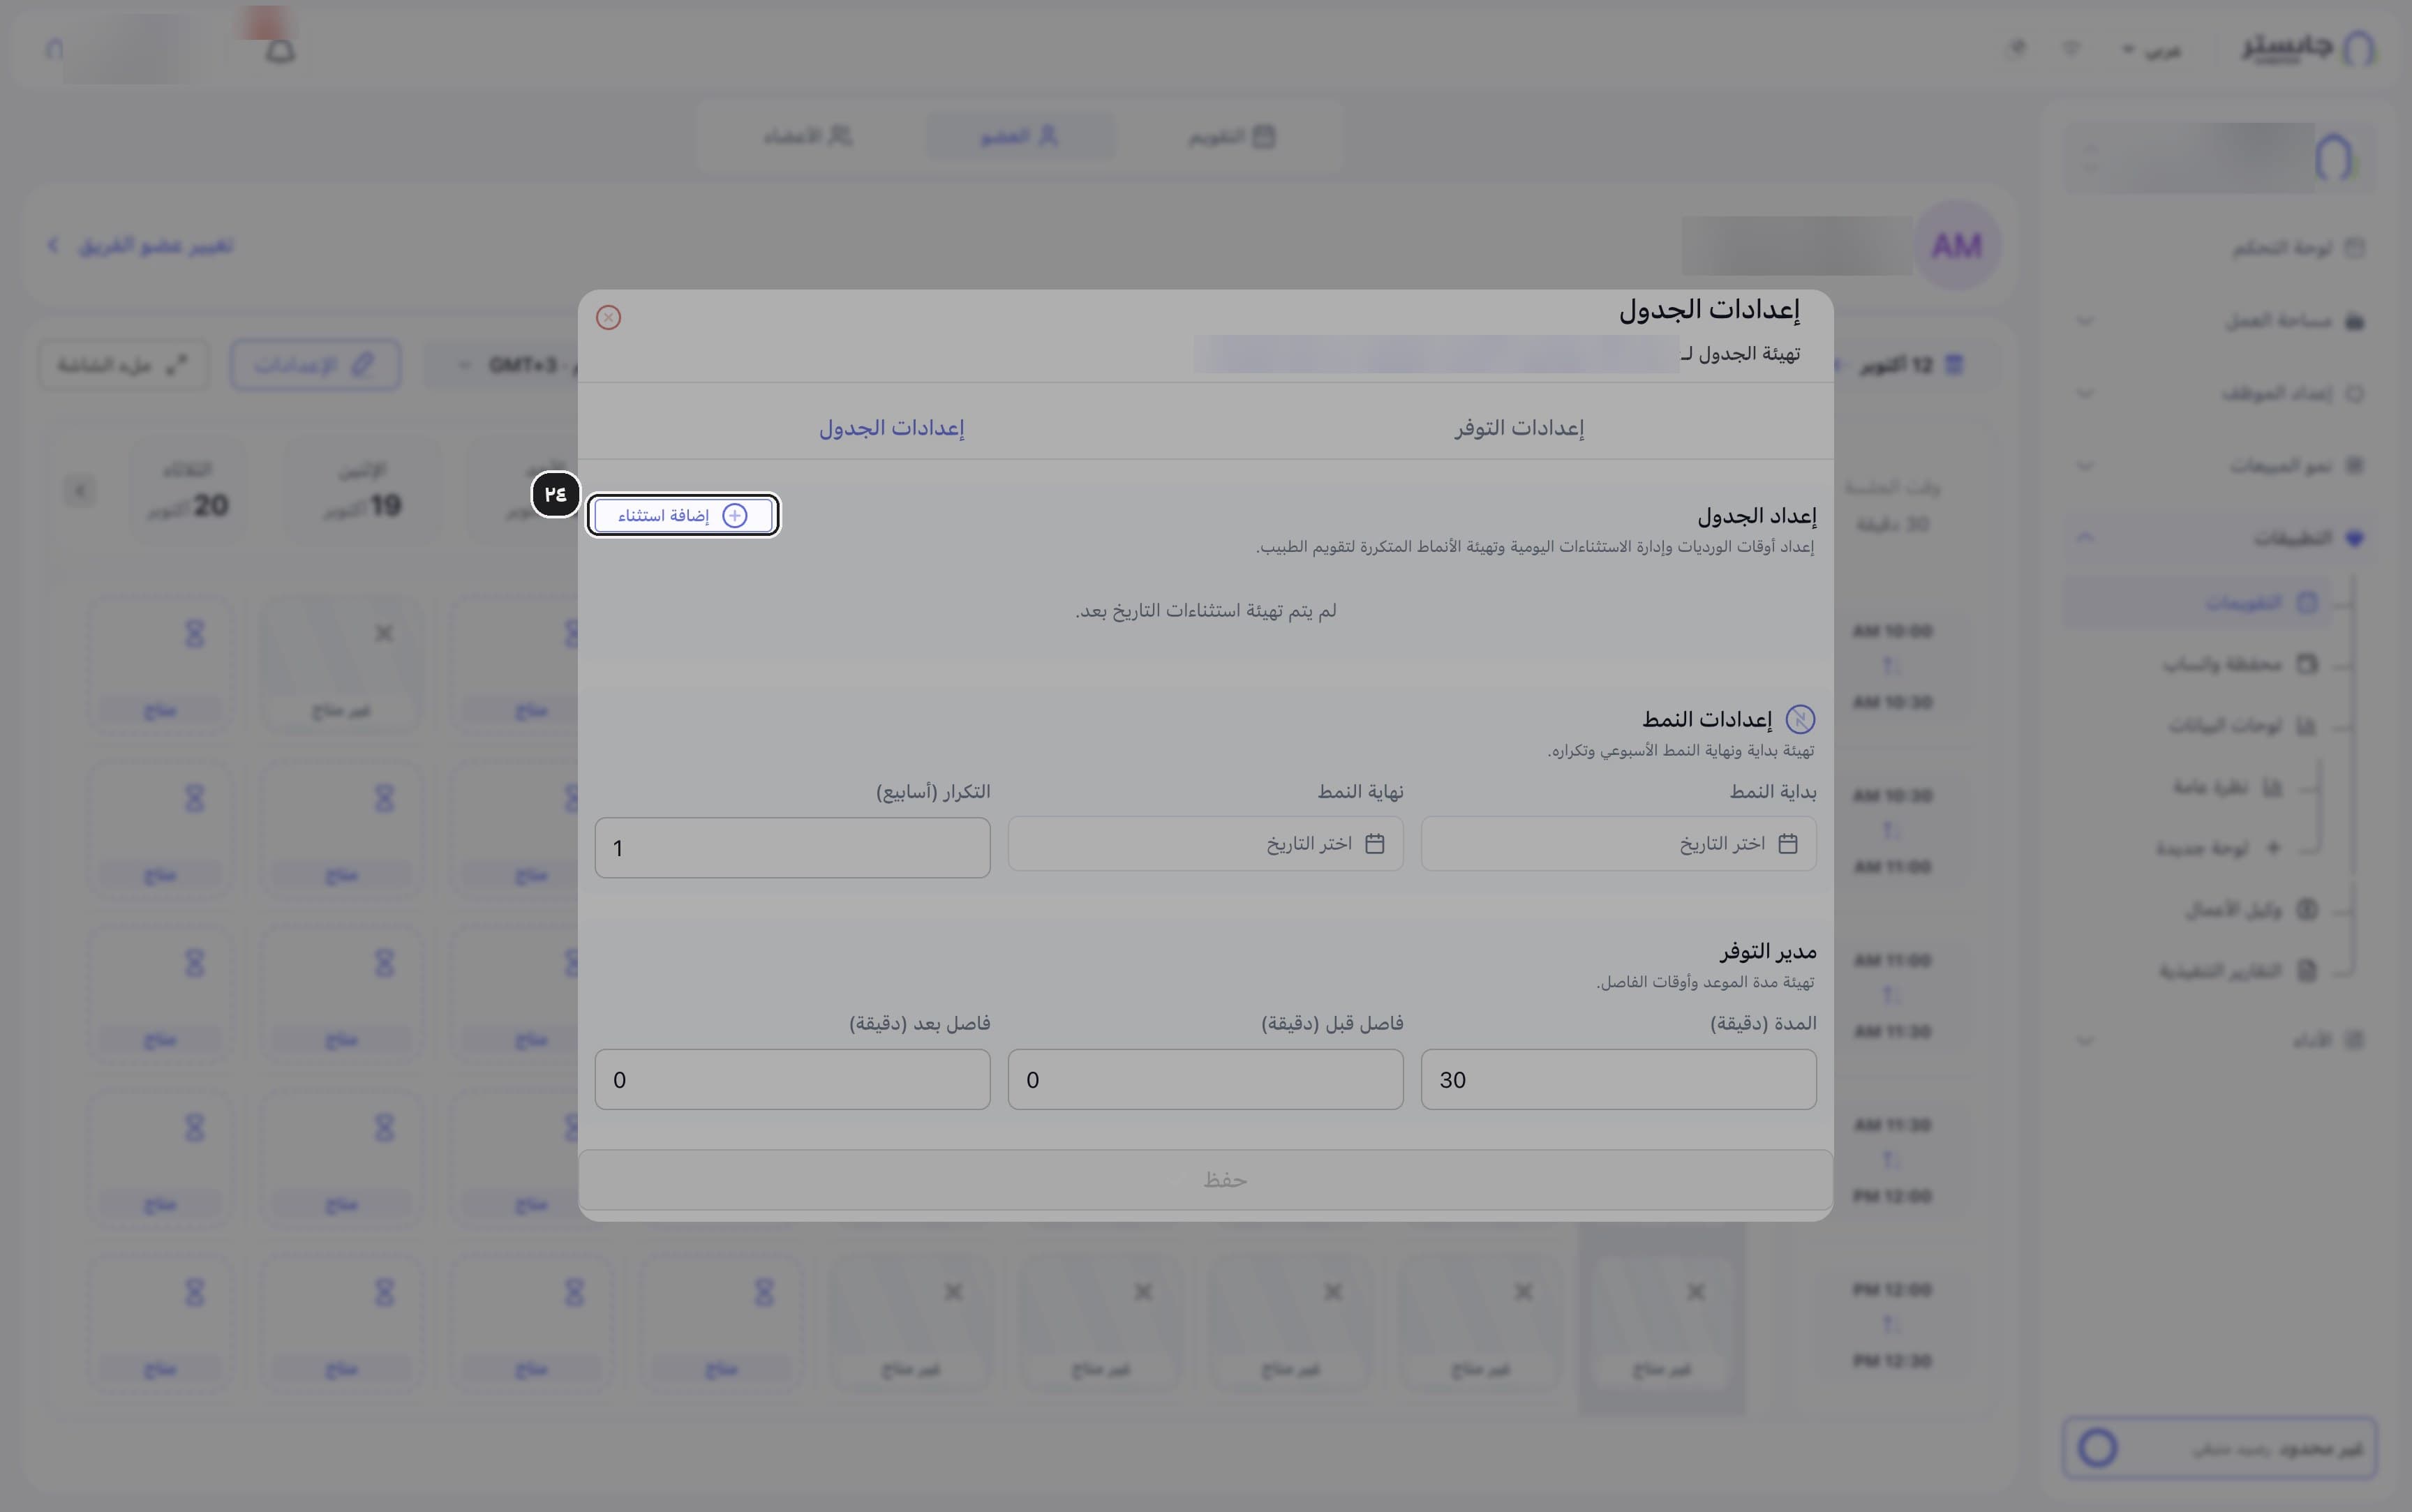
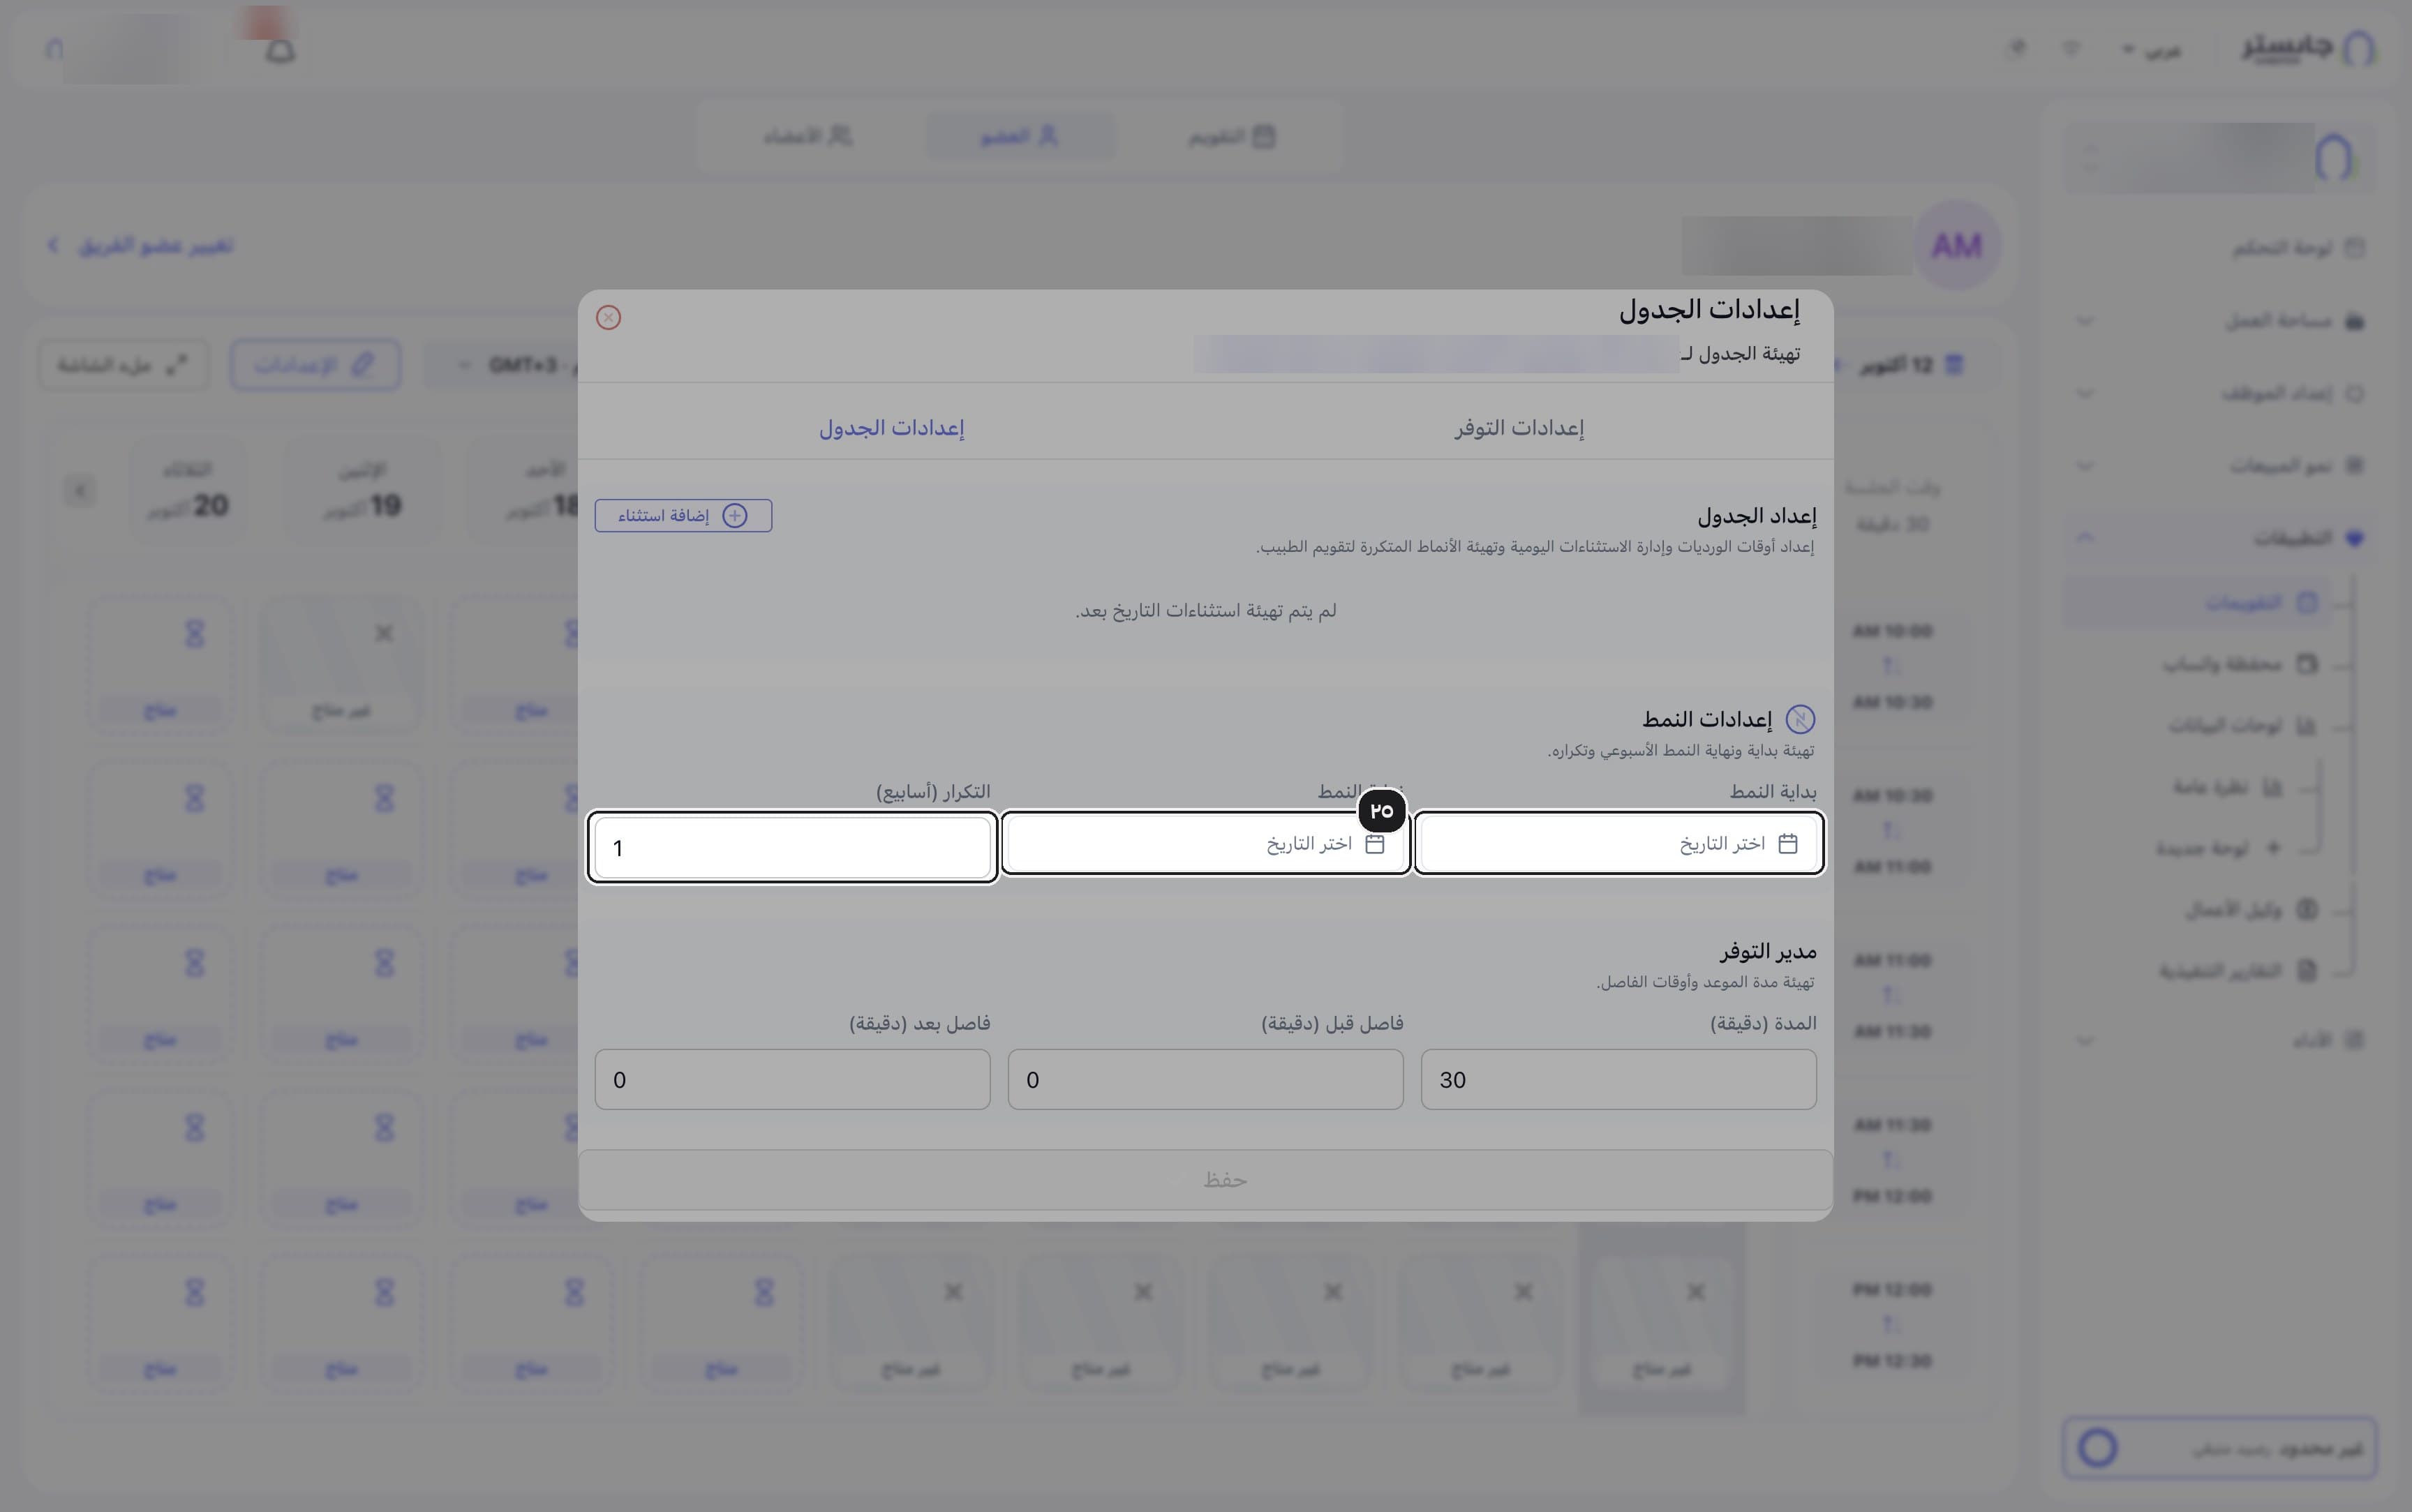
Set the Pattern start (بداية النمط), Pattern end (نهاية النمط) and Repeat (weeks) (التكرار (أسابيع)). Repeat defaults to 1.
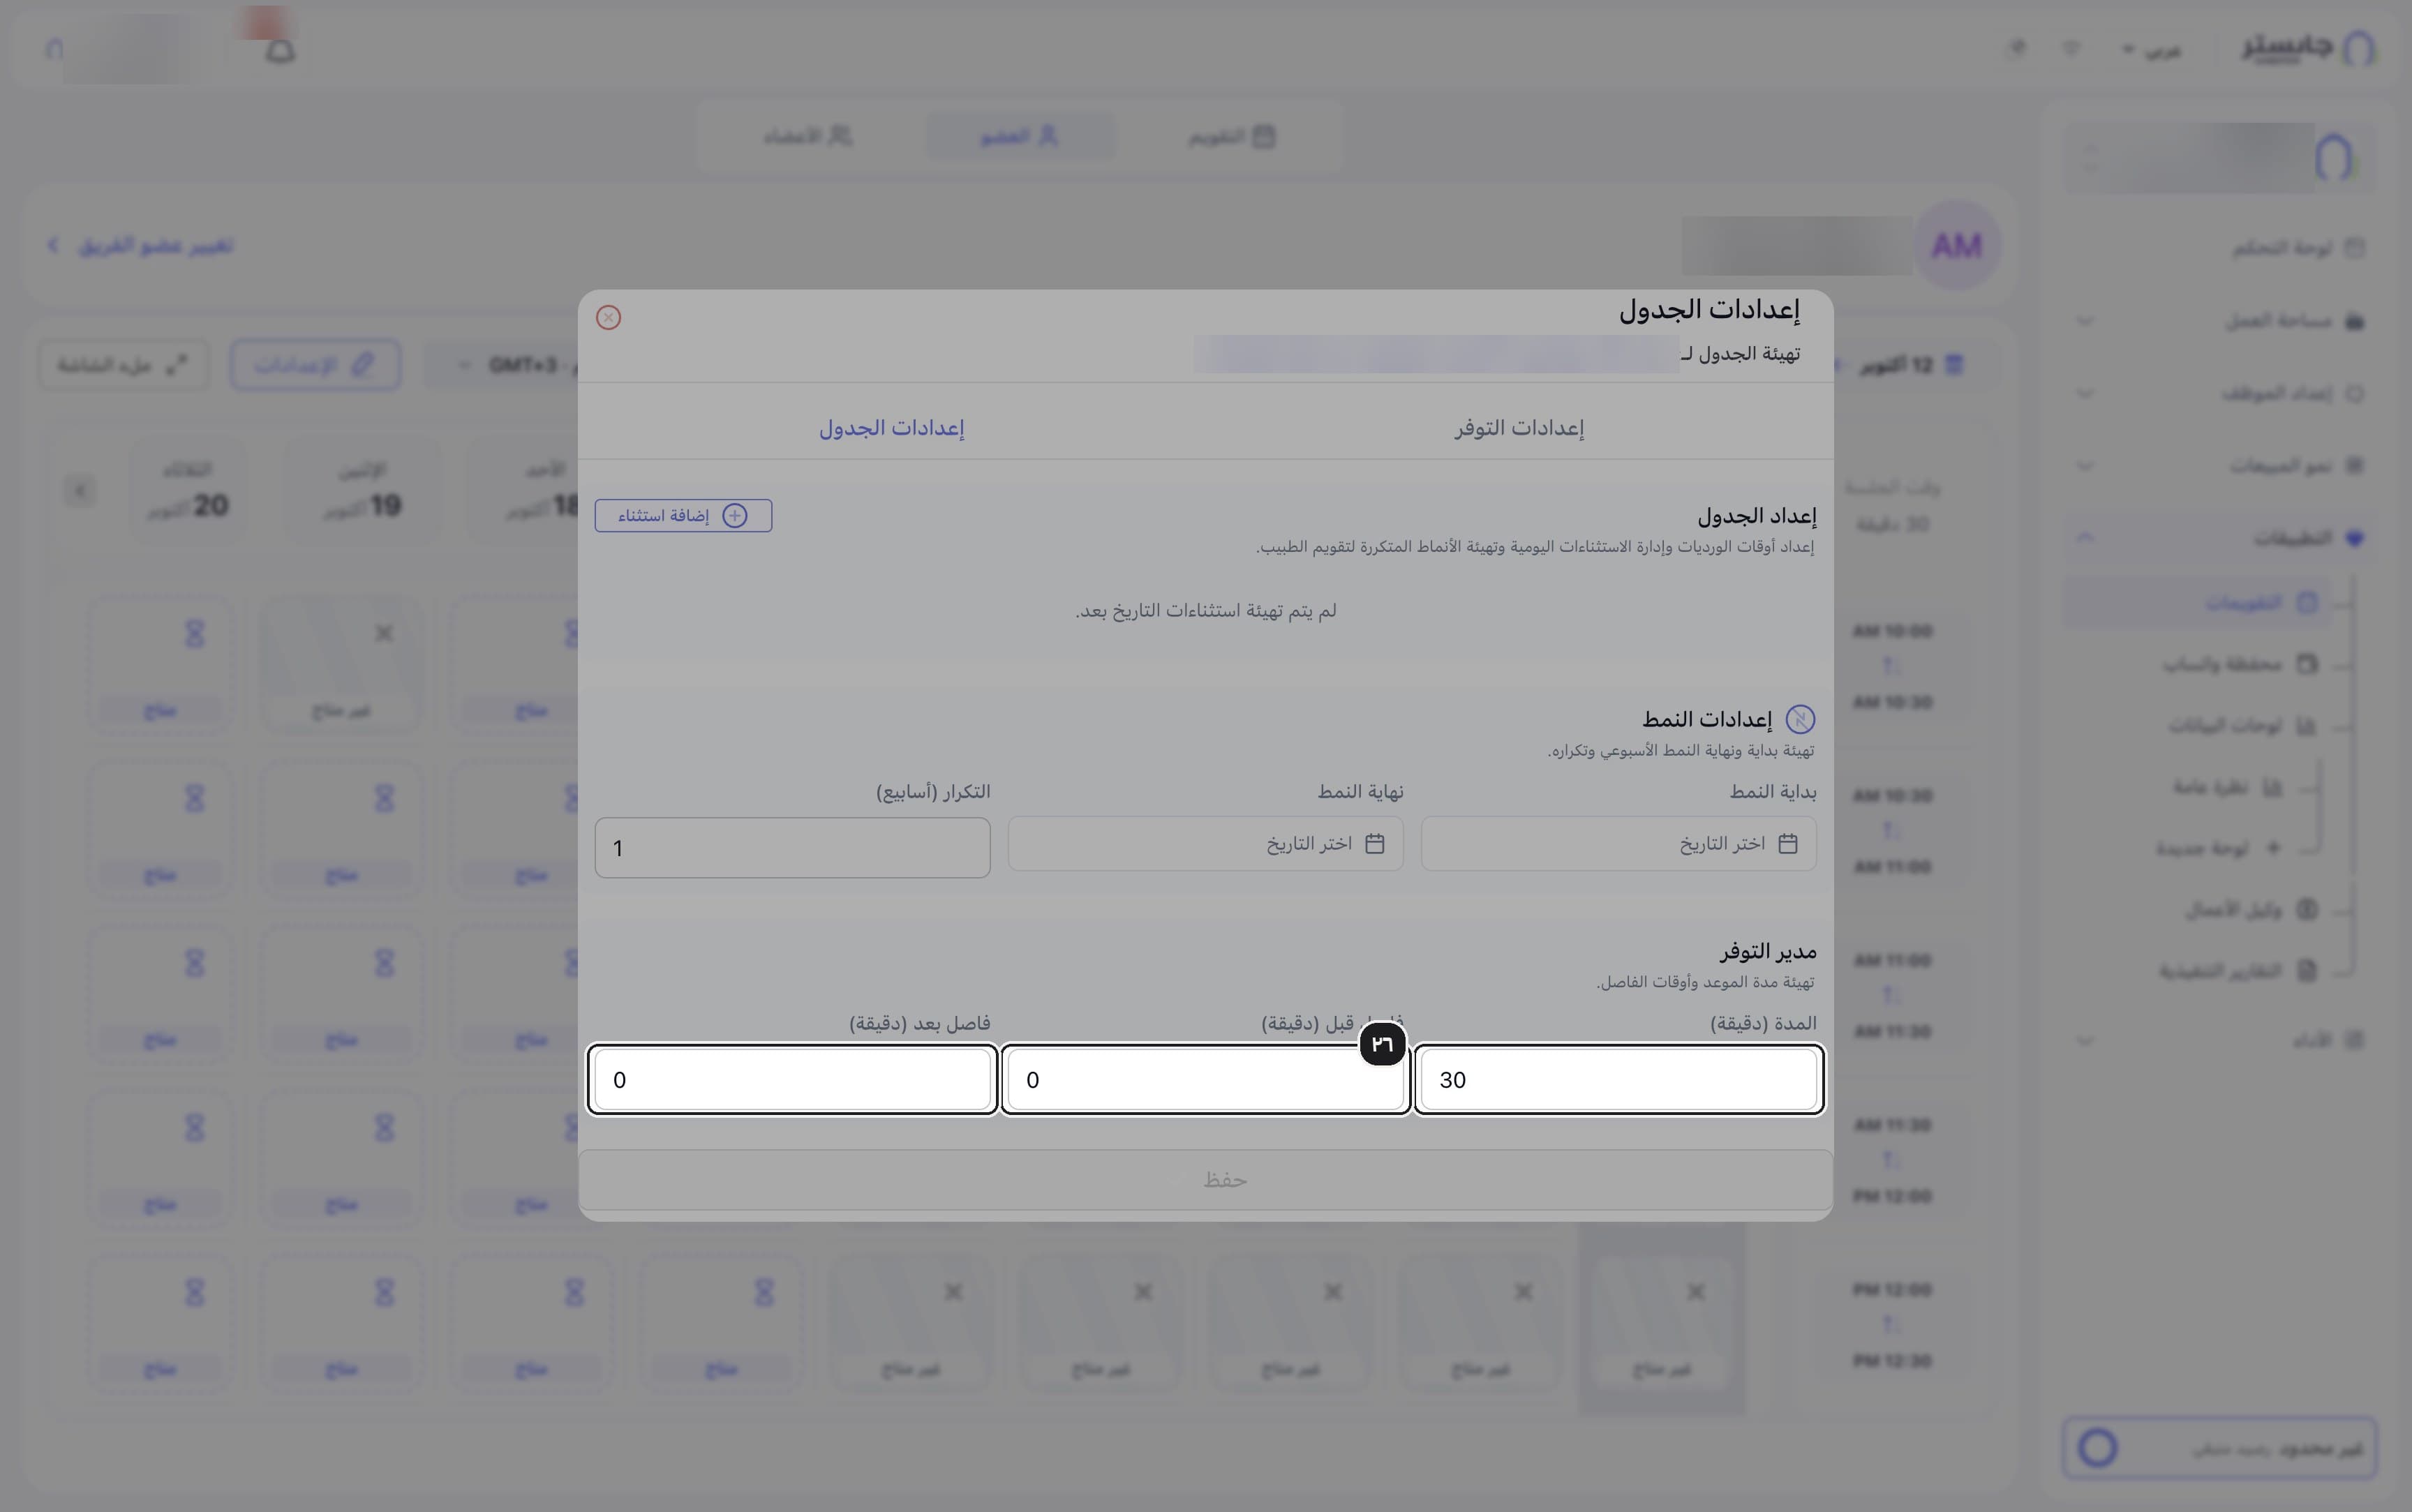
Set the Duration (minutes) (المدة (دقيقة)), Buffer before (minutes) (فاصل قبل (دقيقة)) and Buffer after (minutes) (فاصل بعد (دقيقة)). The defaults are 30, 0 and 0.
Click Save (حفظ).
D. Read the calendar and bookings
On the Member tab, read the calendar grid. Each day column is split into slots of the session length:
- Available (متاح): a slot that can be booked.
- Unavailable (غير متاح): a slot that can't be booked, such as on a day that is off or a past day.
- A blue slot with the booking title and a Confirmed (مؤكد) badge: a booked slot.
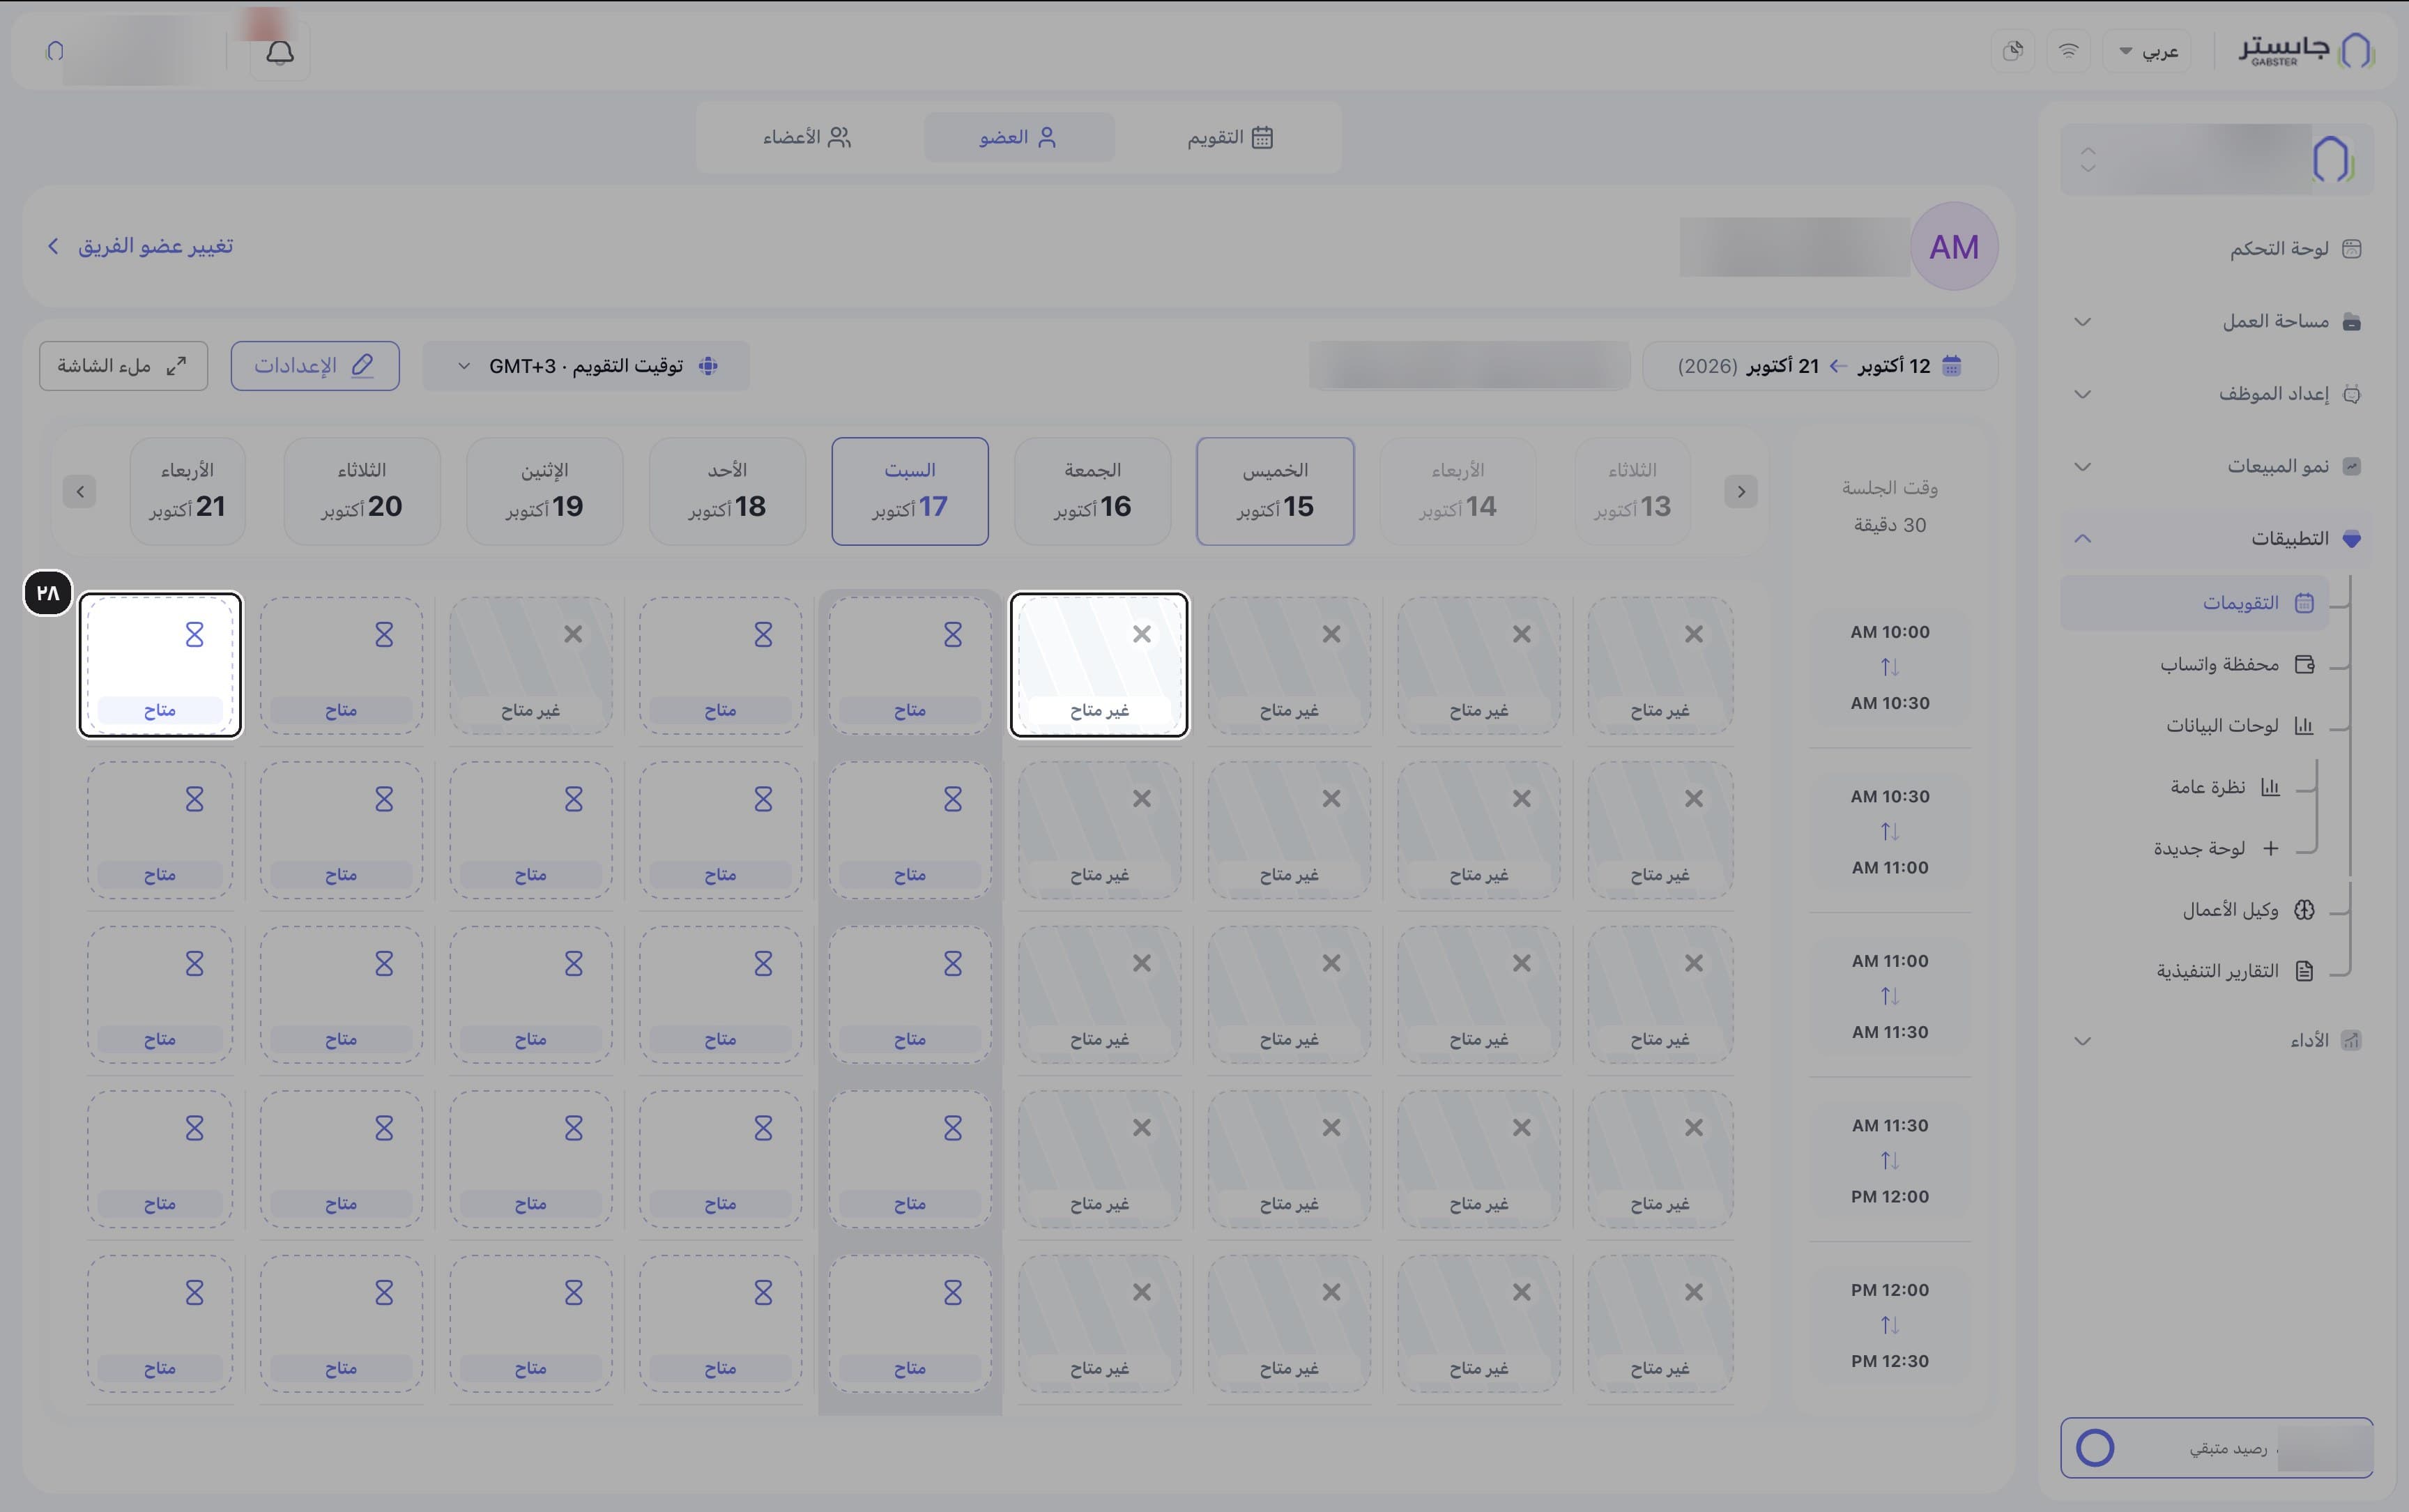
Move between days with the arrows at either end of the day strip.
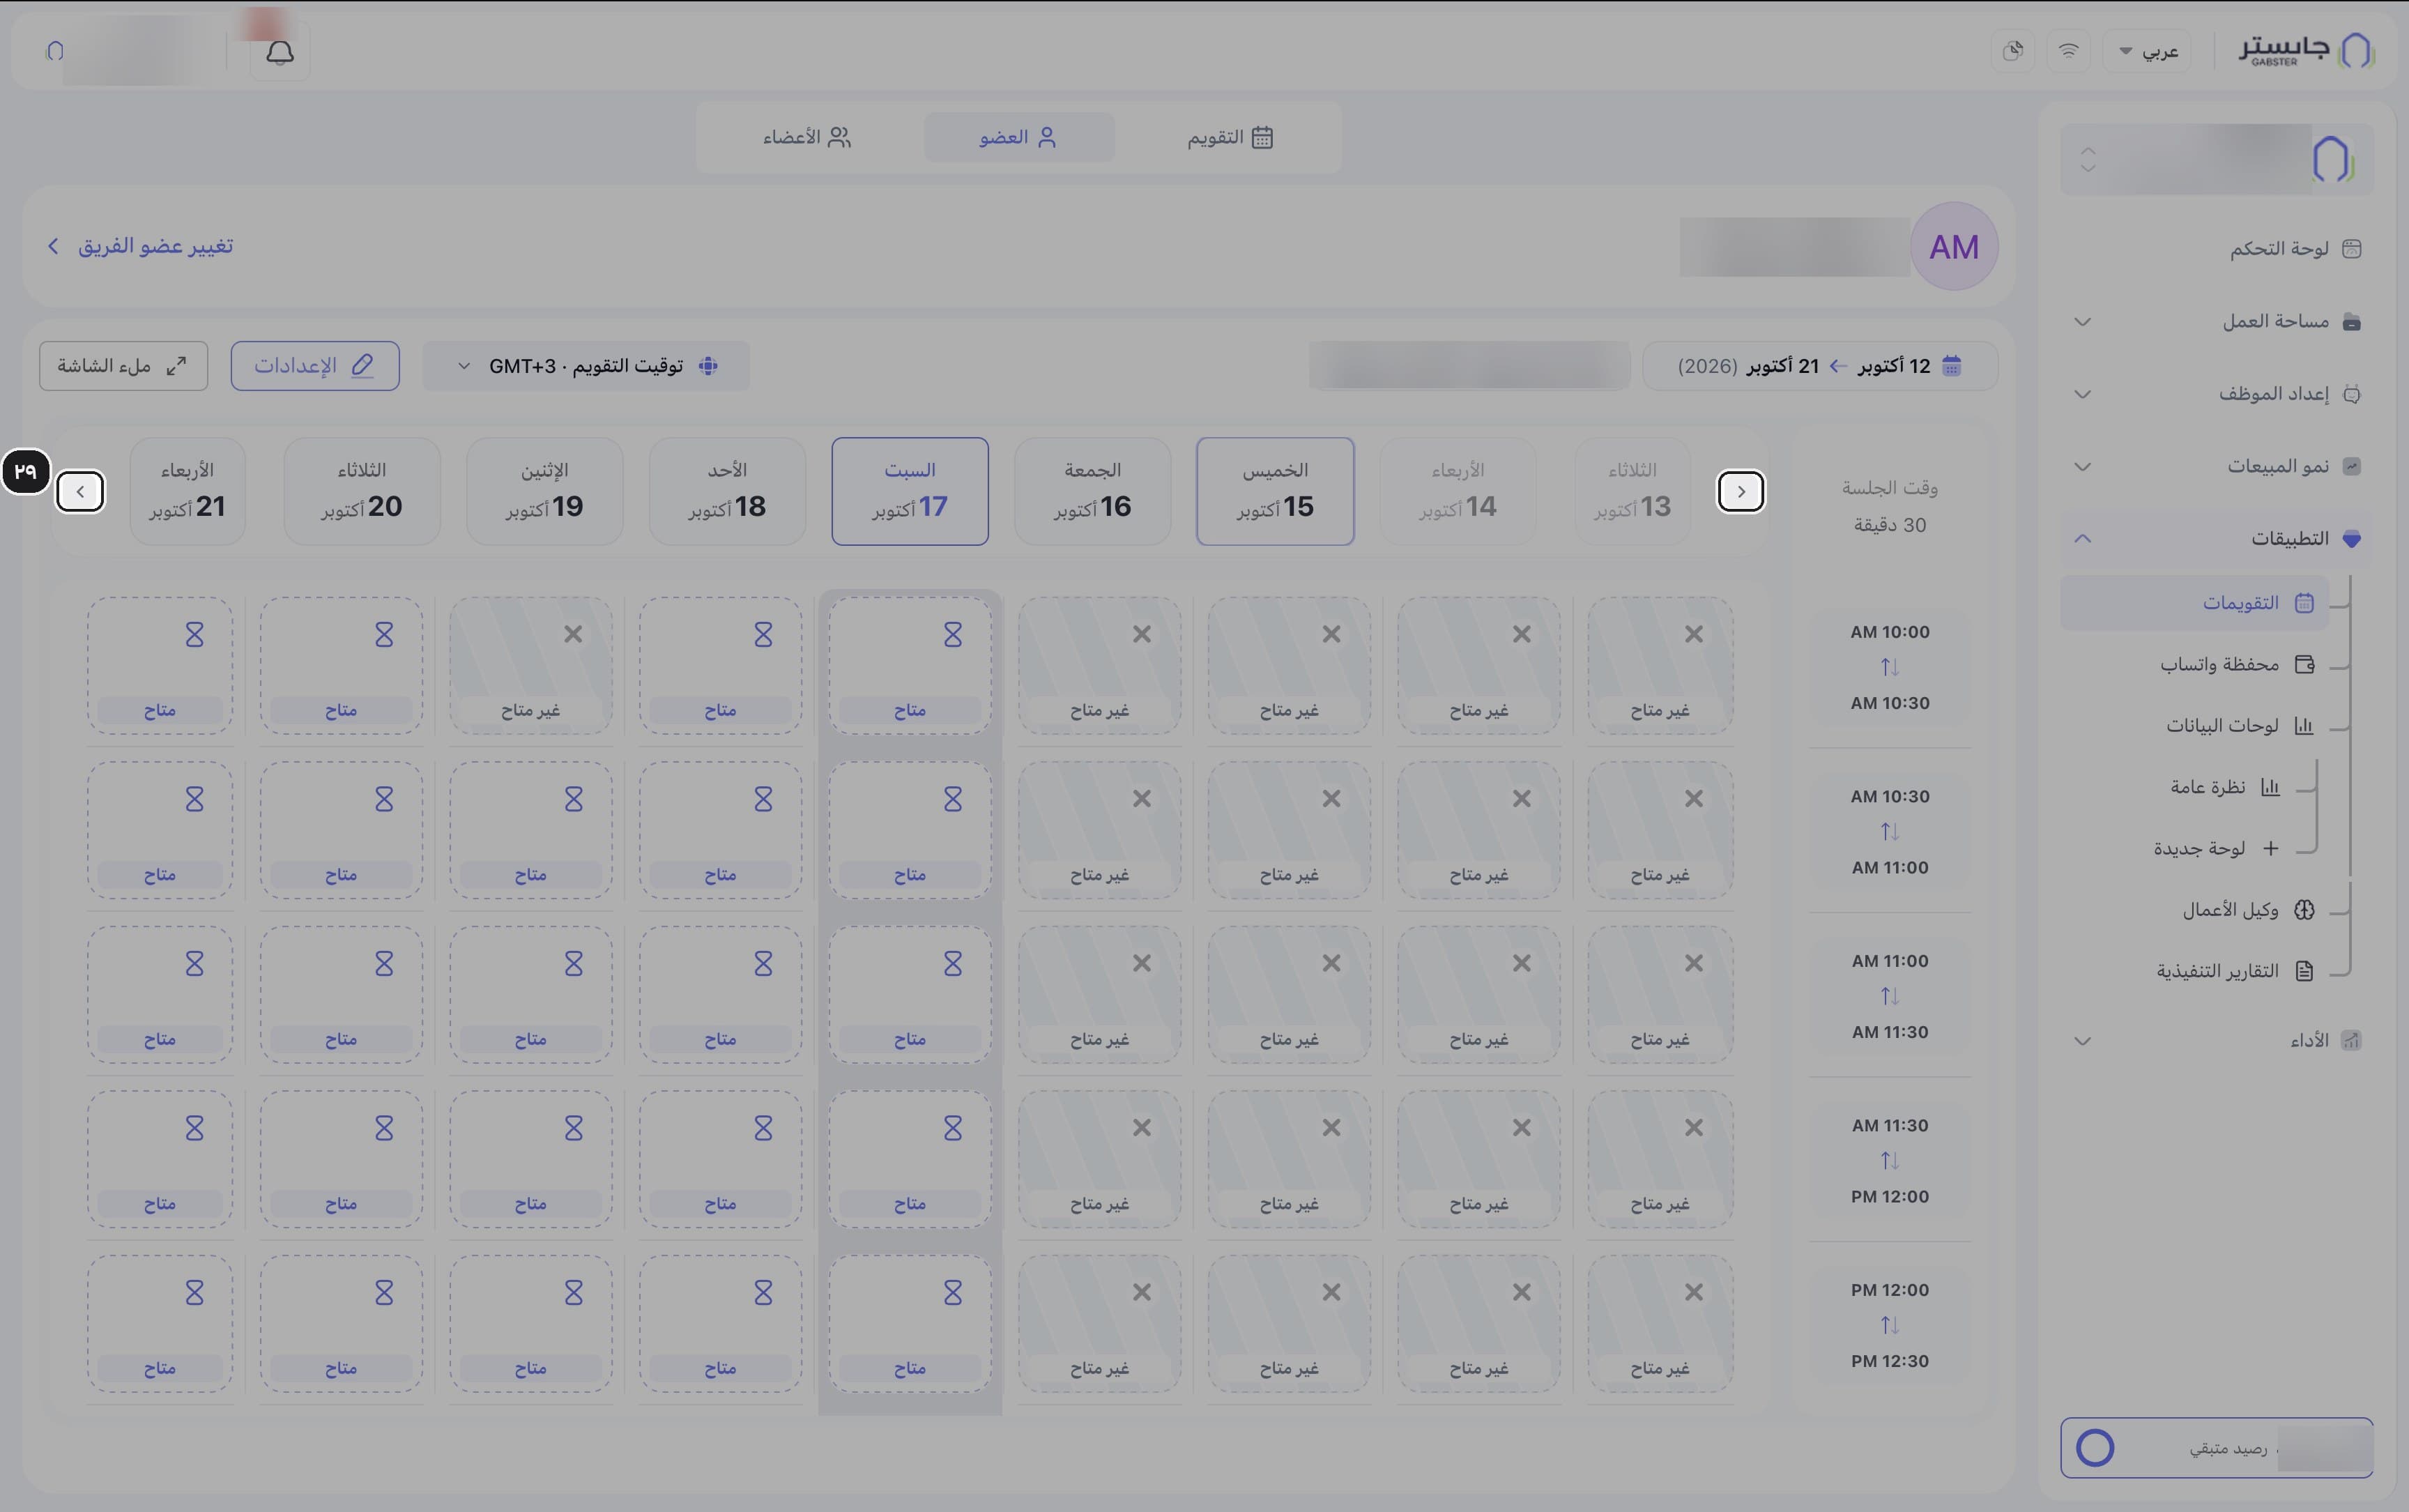
Click a booked slot.
The booking details card opens.
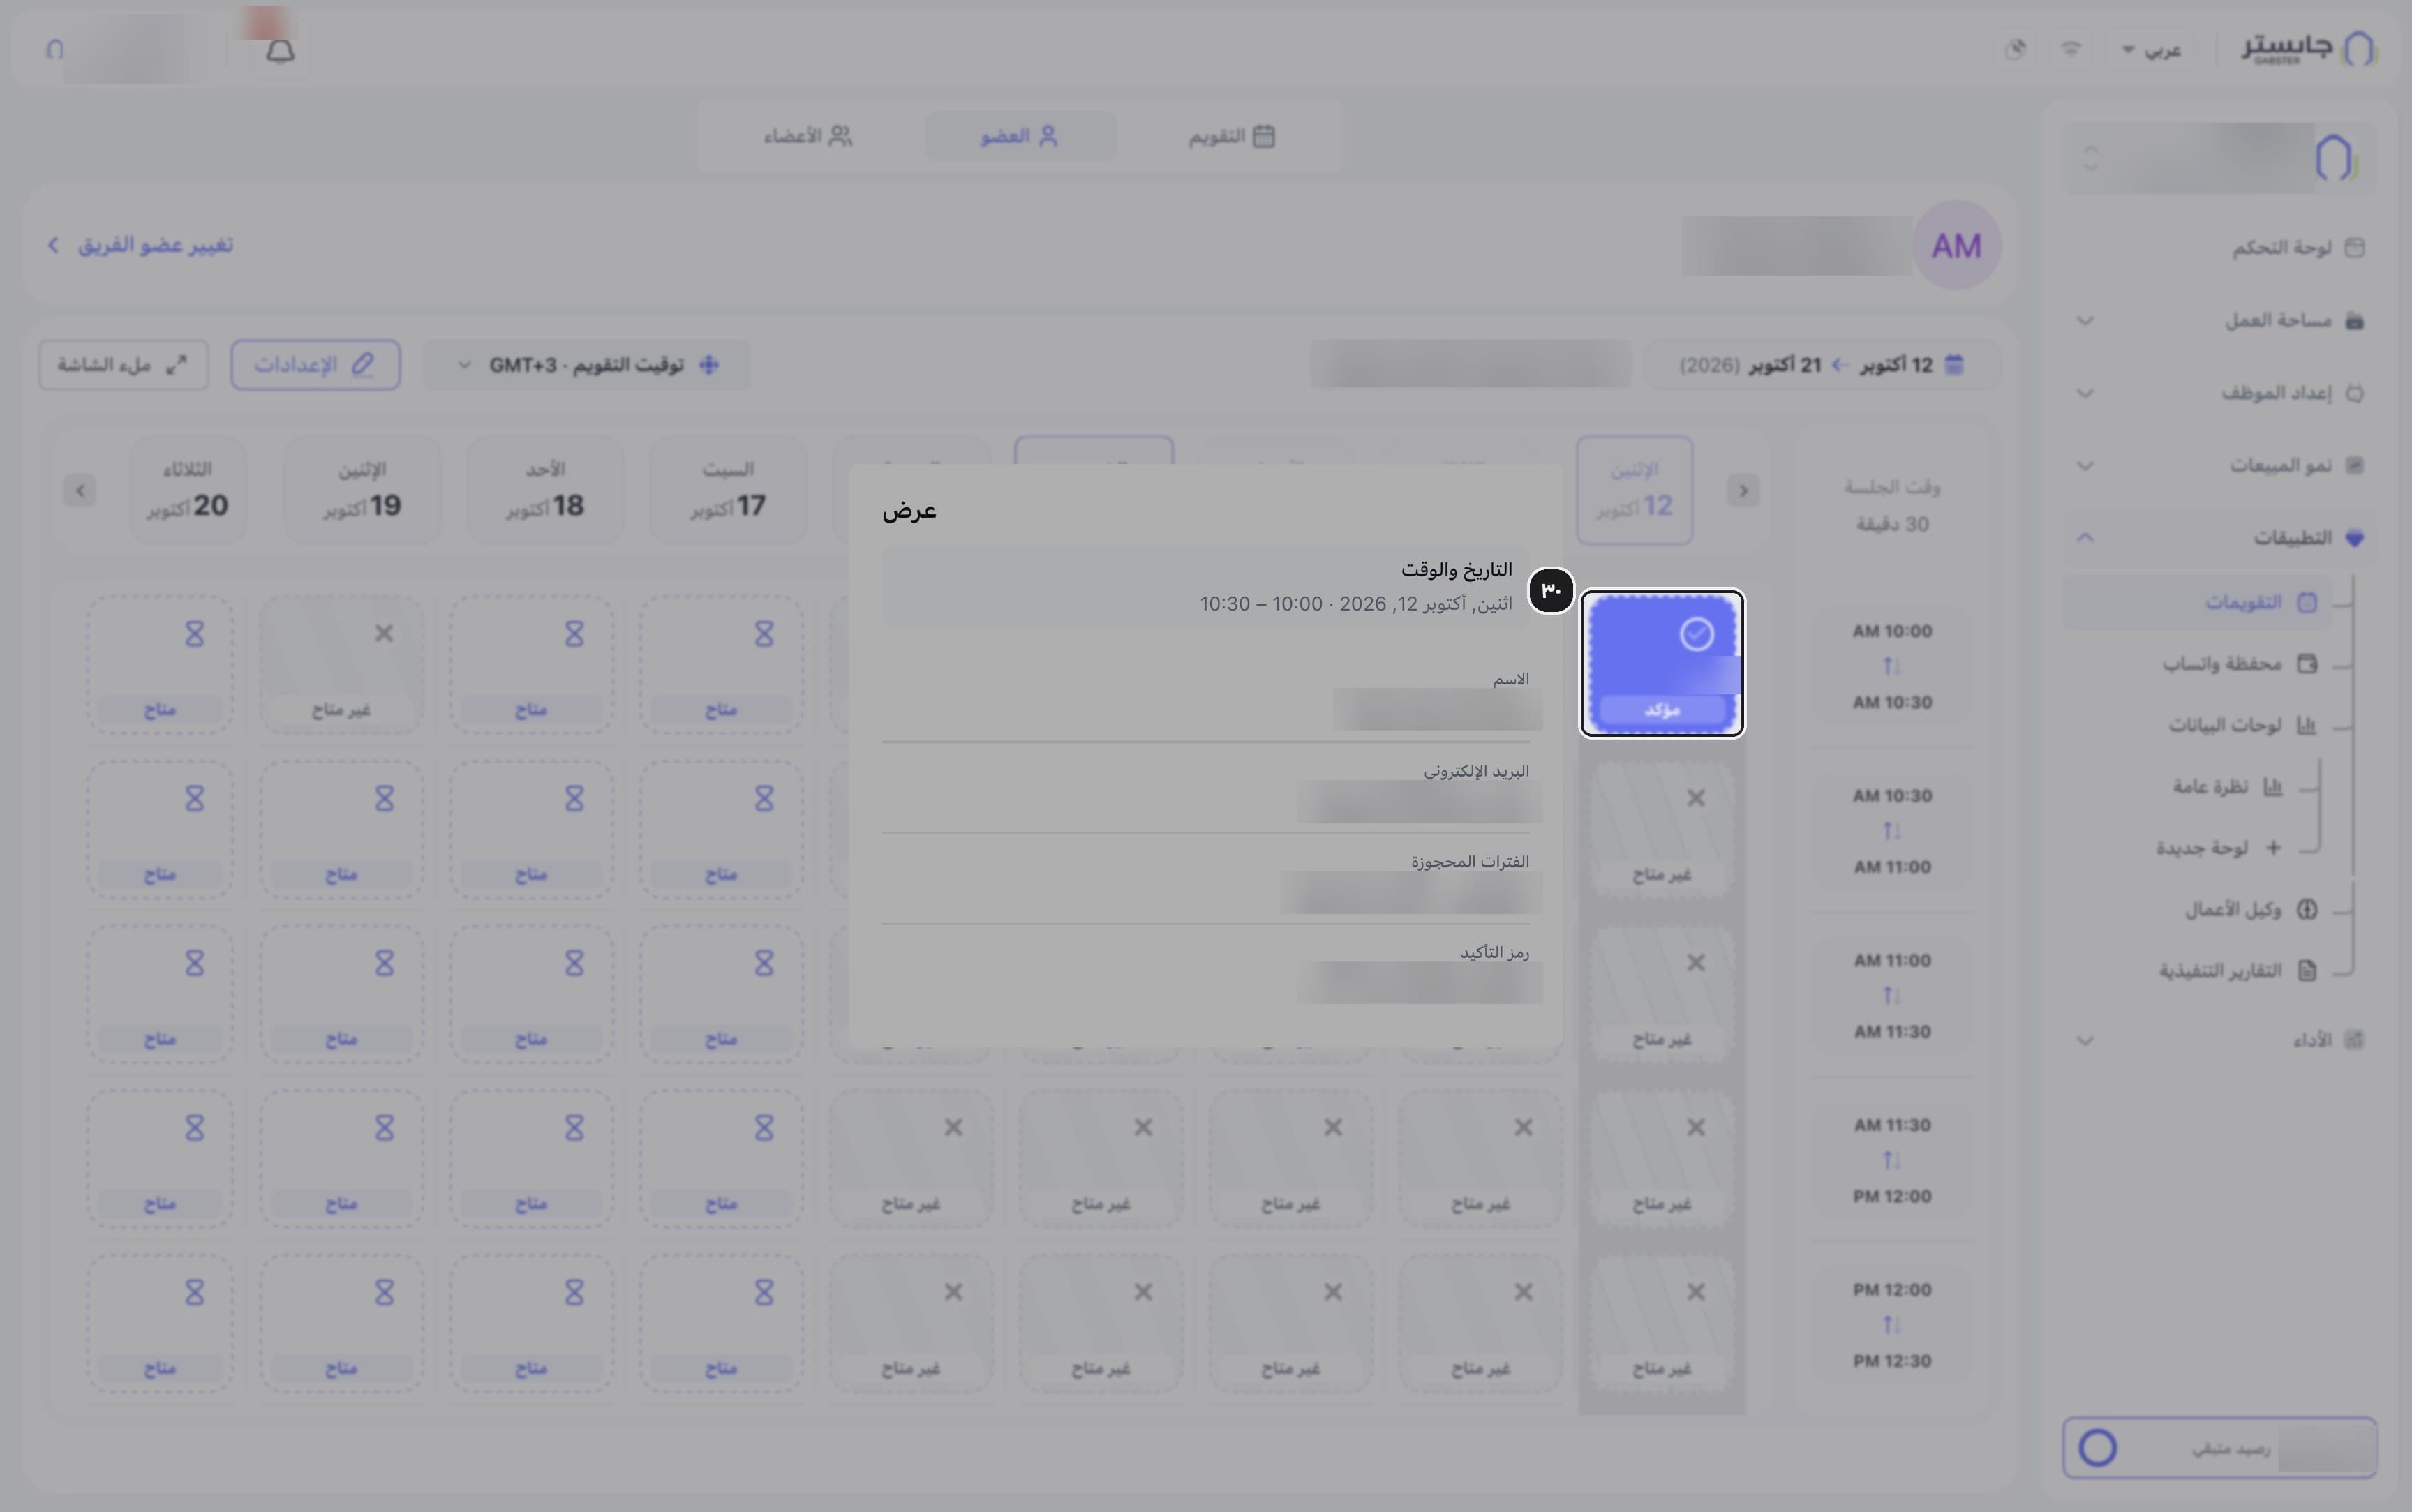
Read the booking: Date & time (التاريخ والوقت), the customer's Name (الاسم) and email, Booked slots (الفترات المحجوزة) and the Confirmation code (رمز التأكيد). The card is read-only.
Customers can cancel from the link in their booking confirmation and reminder emails.
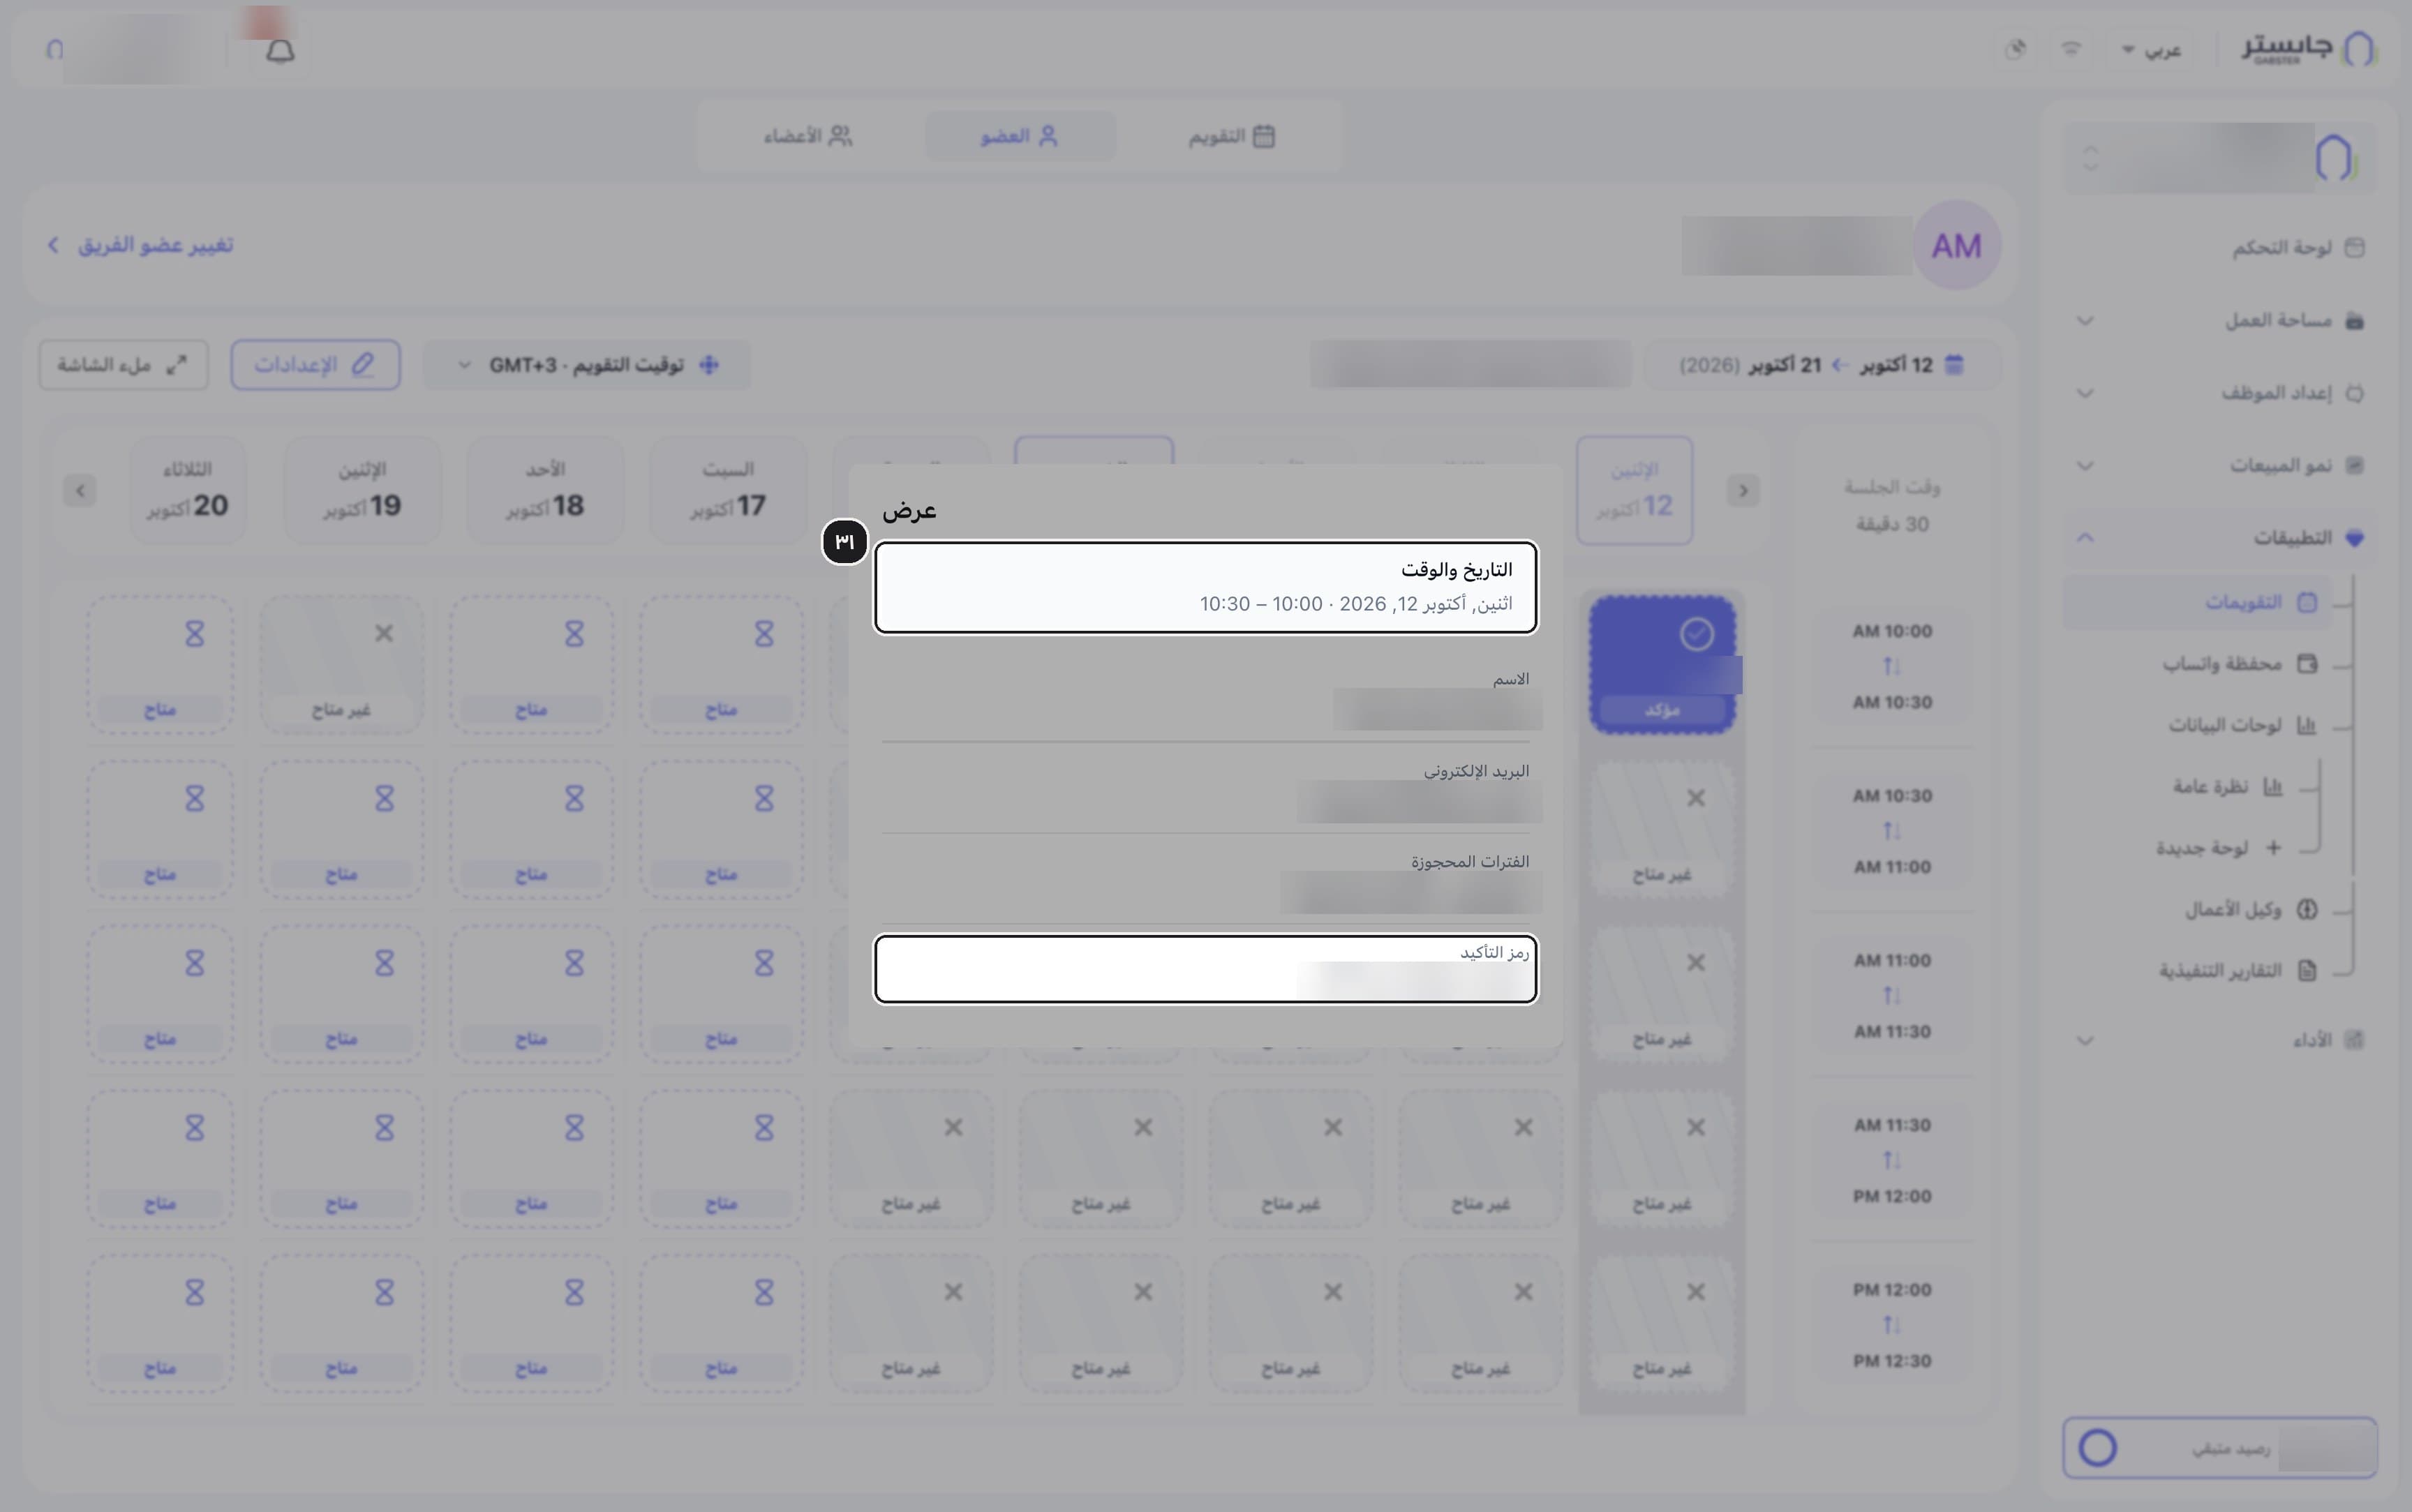
How customers book: on the calendar's public booking page, which you share with its link. They get a confirmation email with a link to cancel.
Related
Send a WhatsApp campaign and track it
Create a WhatsApp template, prepare and send a campaign from it, then follow each recipient's delivery status in the Campaign Log.
Set up voice and calls
Let your AI Agent answer phone calls — from connecting the SIP line and choosing a voice to the IVR Menu and Call Staff.